On this page
When you spread frosting directly onto a soft cake, loose crumbs can become trapped in the visible finish. A crumb coat solves much of that problem with a thin initial layer of frosting that captures crumbs and sets before the final coat. It is a foundational cake-decorating skill, not a professional secret. The method also reveals gaps and uneven areas that are easier to correct before the whole cake is covered in expensive frosting.
What a crumb coat actually is
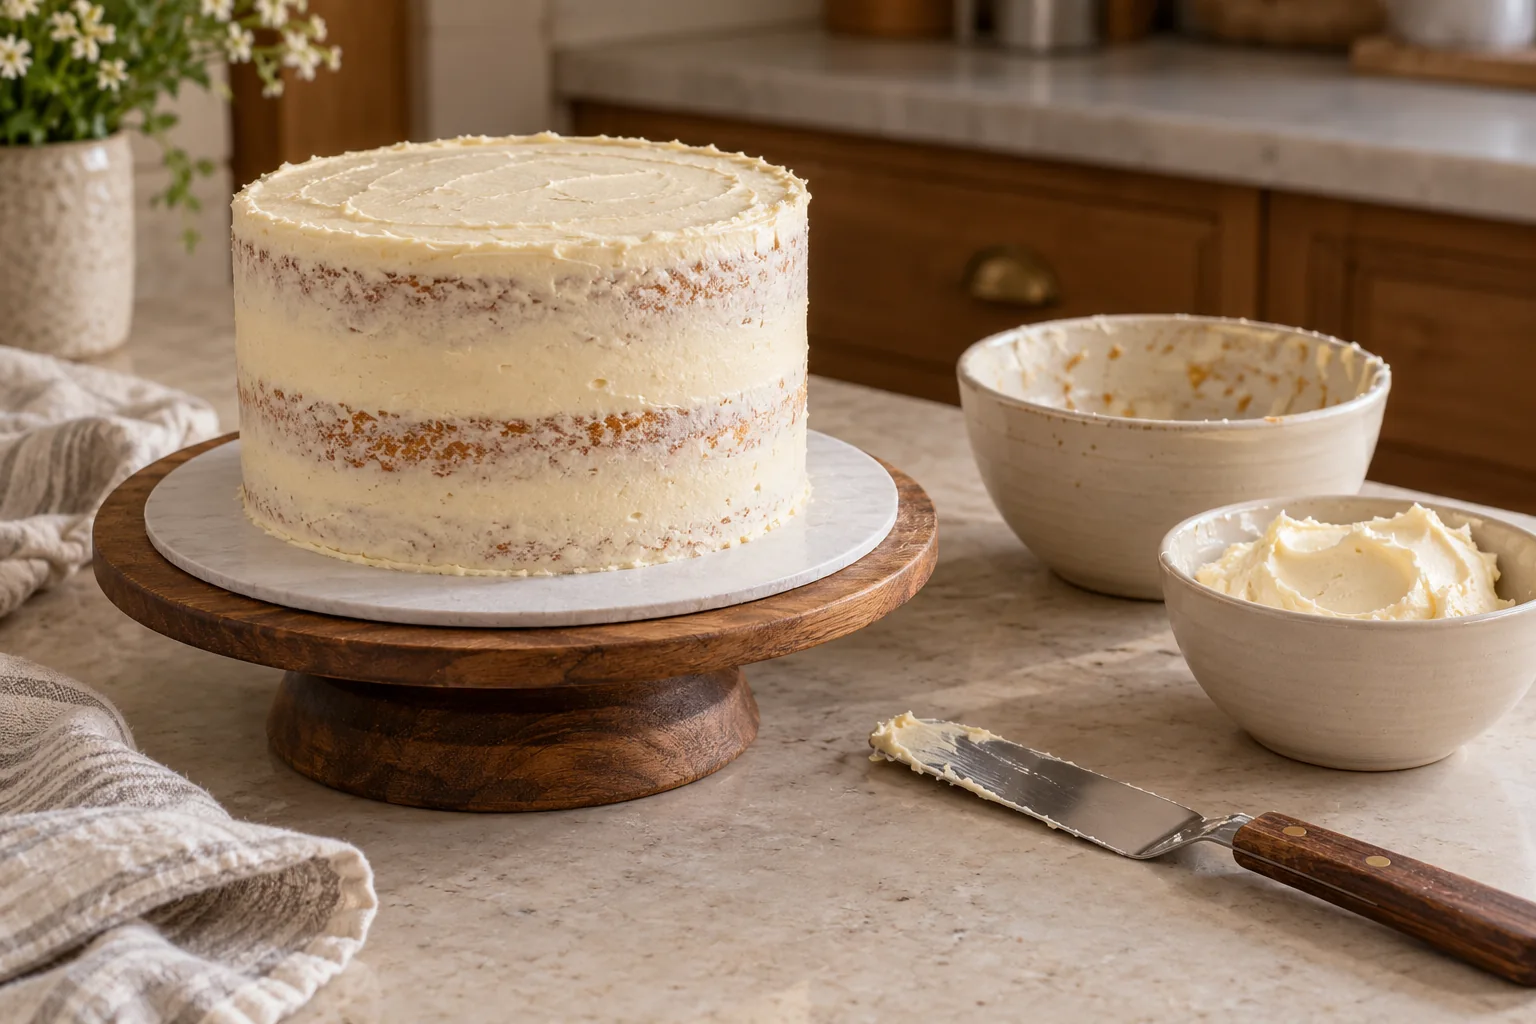
A crumb coat is a very thin layer of frosting applied to the stacked cake before the main exterior frosting. It doesn't need to look beautiful and cake may show through. Its purpose is to anchor loose crumbs and provide a more uniform surface for subsequent spreading. King Arthur Baking demonstrates this approach in its cake-assembly and crumb-coating guides, emphasizing fully cooled layers and appropriate chilling.
Why a single thick coat can fail
If you immediately apply a heavy final layer to an unfrosted tender sponge, the spatula may catch loose crumbs and drag them into the finish. Repeated scraping makes the problem worse. A thick coat can also move an unstable cake or squeeze soft filling outward. Working in two stages separates the messy anchoring step from the clean decorative one.
Start with fully cooled cakes
Warm cake can melt buttercream, soften ganache and tear under a spatula. Cool each layer as instructed before trimming and stacking. Some bakers chill layers for easier handling, particularly very tender cakes, but follow appropriate wrapping and condensation guidance. A freezer-cold cake with moisture on its surface may also challenge frosting adhesion, so temperature needs to be controlled. For a layered example, see our Classic Vanilla Layer Cake recipe.
Level the layers first
Use a clean sharp serrated knife or suitable leveling tool to remove only significant domes where the recipe and design call for flat layers. A tilted stack isn't fixed by a crumb coat. Brush loose cut crumbs away gently before placing the next layer. If baking layers in a large sheet and cutting rounds, anticipate additional exposed crumb surfaces. Our Chocolate Layer Cake recipe shows a three-layer cake to stack and coat.

Prepare a rigid base
Assemble the cake on a sturdy board or serving plate that fits its size. The surface should be stable enough to rotate without flexing. If decorating directly on a presentation platter, parchment strips placed under the edges can protect it from frosting; remove them carefully after finishing. Avoid lifting a tall cake by the sides once frosting has been applied.
Use the right frosting consistency
The crumb coat should spread thinly without tearing the sponge. Very stiff cold frosting can pull crumbs away, while very warm loose frosting may slide down the sides. Prepare a recipe whose temperature and texture suit the cake. If the frosting is split or overly grainy, repair it through its own tested method before using it as an anchor. The Brown Butter Layer Cake recipe uses a buttercream crumb coat before the final frosting.
Separate clean and crumb-contaminated frosting
Place a modest amount of frosting into a small working bowl for the crumb coat. Once a spatula has collected cake crumbs, avoid dipping it into the reserved clean finishing batch. This keeps the later coat smooth and reduces waste. You don't need a huge amount of frosting for the initial layer; it should only catch crumbs and fill minor imperfections.

Fill the cake before coating
Spread an even layer of the chosen filling between sponges, using a buttercream dam for soft curd or compote when the recipe calls for it. Align edges and confirm the cake stands straight. A filling that is running outward may need to set or be adjusted before decorating. A crumb coat won't stop a cake from leaning under excessive filling weight. The Spiced Apple Layer Cake recipe coats its filled layers before the finish.

Begin at the sides
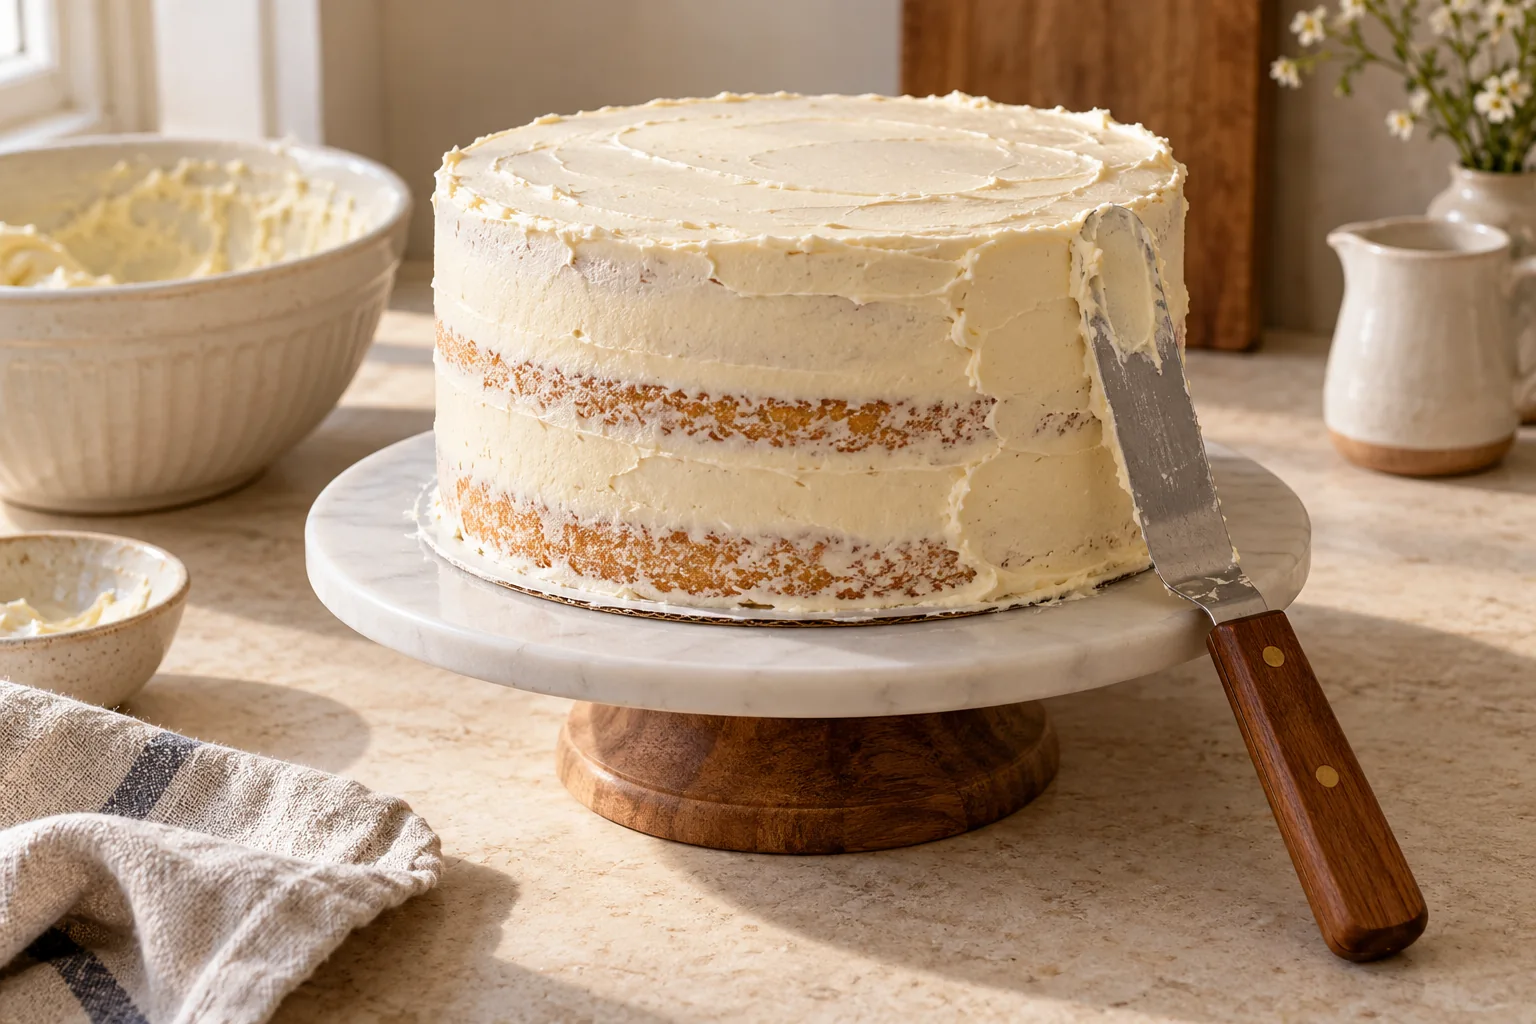
Use an offset spatula, bowl scraper or clean straight-edged tool to spread a thin coat over the exposed sides. The frosting should fill small gaps and trap crumbs but still be thin enough for the cake to show faintly. Avoid pressing so hard that the tool gouges the sponge. Turn the cake carefully and wipe off large crumbs as you work.
Cover the top lightly
Spread a small amount of frosting over the top with gentle strokes, bringing any remaining crumbs into the initial coating. Use minimal pressure near a cut sponge surface. Don't chase every tiny streak; the final coat will cover visual imperfections. The objective is a stable thin film, not a perfectly glossy top in the first pass.
What thickness is appropriate?
King Arthur's crumb-coating guidance describes a thin layer, roughly one-eighth inch or less in its demonstration. Exact thickness varies with cake texture and filling gaps. A transparent-looking coat is acceptable. If you're applying enough frosting that the final layer would be unnecessary, it probably isn't a crumb coat anymore.
How to smooth the first coat
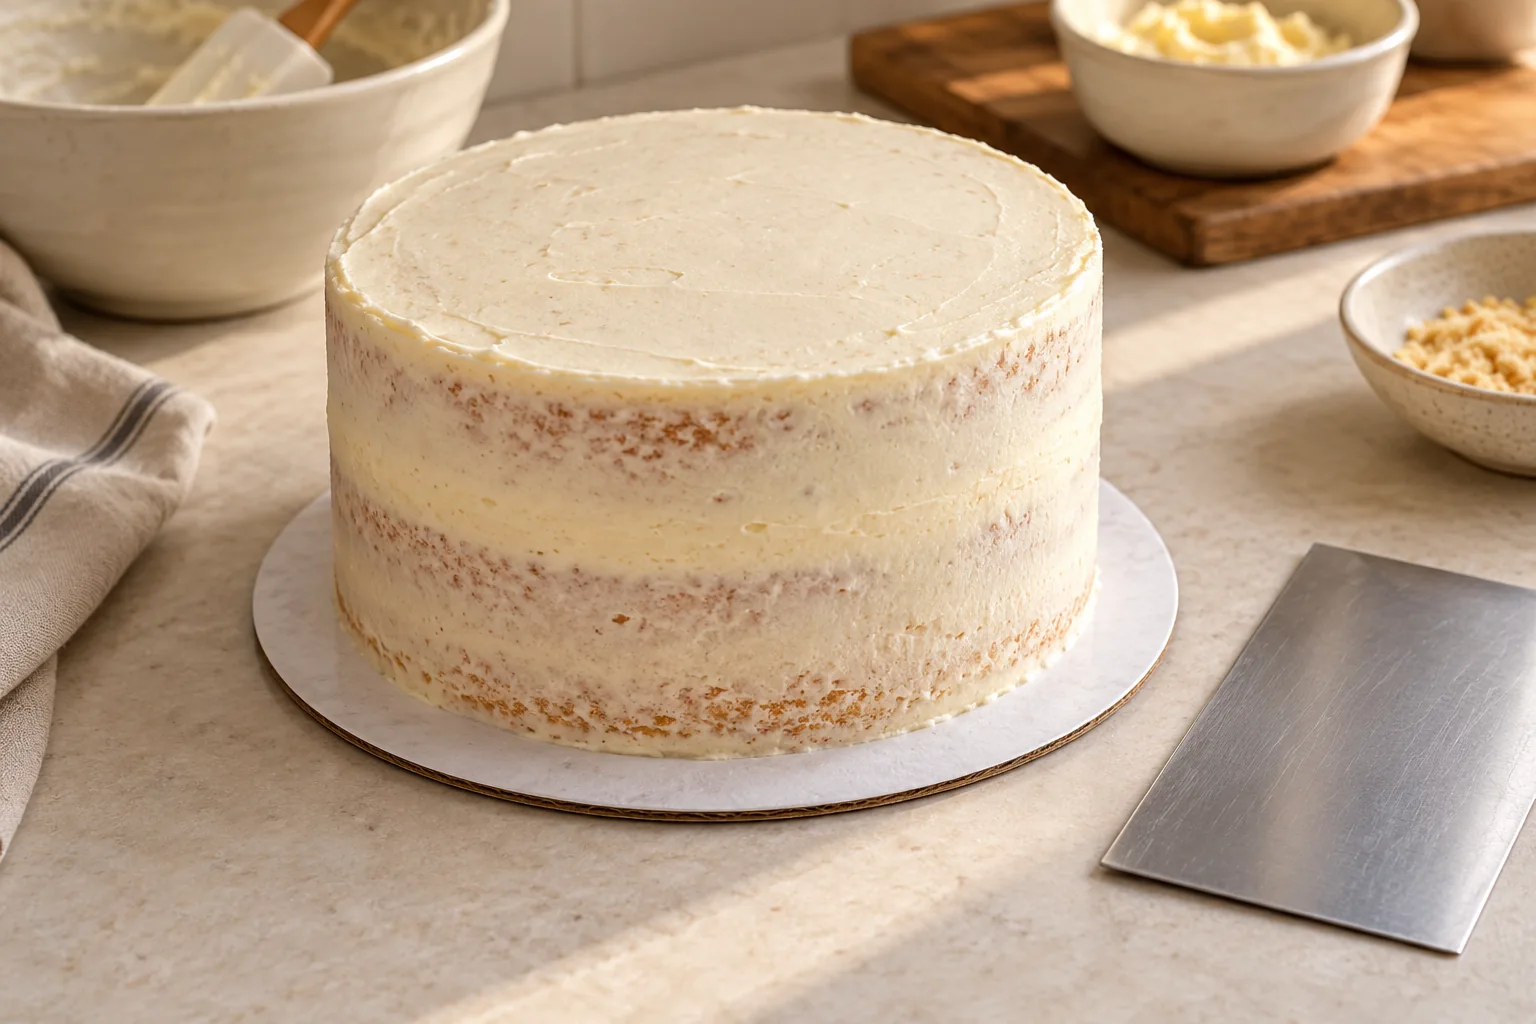
A straight scraper can remove excess frosting from the sides while leaving a thin even film. Wipe the tool after each pass so crumbs aren't dragged around. Minor bumps or exposed cake are fine. Focus on preventing large ridges and closing gaps where crumbs would otherwise escape into the final layer.
Chill until the crumb coat sets
Refrigerate according to the frosting recipe until the coating feels firm enough that it doesn't readily come away on a gentle touch. The time varies by frosting, cake size and refrigerator temperature. A buttercream may firm differently from whipped cream, and a ganache-based coat behaves differently again. Follow appropriate food-safety storage rules during this stage. Our Gingerbread Maple Layer Cake recipe sets the first coating before the final layer.
Why refrigeration can help alignment
A short chill after stacking but before coating may let a buttercream dam or filling stabilize. This reduces bulging while the exterior is being smoothed. Don't force a leaning cake to stand straight by adding a hard shell of frosting. Correct layer alignment and filling thickness first, then proceed.
What if the coat is too soft?
If it smears under a finger or pulls away with the spatula, it may need longer controlled chilling or a different frosting consistency. Avoid repeatedly applying more loose frosting to a sliding surface. If the cake has perishable filling, keep it properly refrigerated rather than letting it stand for a long time in a warm kitchen while troubleshooting.
What if the coat cracks?
A very cold or excessively stiff coating can crack when a cake flexes or the board bends. Check base strength and frosting temperature. A small cosmetic crack can often be smoothed with compatible frosting, but a large shifting gap may indicate structural movement beneath. Diagnose the support before hiding the problem with piping.
Apply the clean finish
Once the first coat sets, add enough reserved fresh frosting to cover the cake without revealing crumbs. Smooth the top and sides with steady strokes. A scraper can remove excess and create even surfaces; wipe it between passes. The clean final coat is much easier when the crumb coat has already captured loose pieces. See the Malted Chocolate Layer Cake recipe for a thin crumb coat followed by its final frosting.

How to sharpen the top edge
If a ridge forms above the top after smoothing sides, gently draw it inward with a clean offset spatula. Work around the perimeter in small sections. The ideal finish depends on style; a softly rounded homemade top can be elegant too. Avoid pressing down so hard that the frosting layer becomes thin enough to expose the crumb coat.
When you can skip it
A simple snack cake served in its baking pan may need only a casual swirl of frosting. A firm low-crumb cake with intentionally rustic frosting may not require a separate crumb coat. But a tall layered celebration cake or a tender cut sponge usually benefits. Choose based on your desired finish rather than treating the step as mandatory for every baked dessert.
What frosting works?
Many buttercream recipes and some suitable ganaches can form crumb coats. Very loose whipped cream may not hold the same way without a formula intended for layering. Cream cheese frosting has its own temperature and storage limits. Choose the method and chilling time for the actual coating; don't assume all frostings set after twenty minutes.
A simple practice routine
Use a small two-layer cooled cake, level and stack, then set aside clean frosting for the final pass. Apply a thin messy crumb coat, chill and smooth the visible coat. Observe how much easier the clean frosting spreads. A small practice cake can teach the entire technique without the pressure of a birthday or wedding centerpiece.
Frequently asked questions
Does crumb coat frosting need to match the final color? Usually a compatible frosting is best, though designs vary. Must it be thick? No. Should the sponge show through? It can. Does chilling make every filling stable? No. Can I crumb coat the day before? Follow recipe and refrigeration guidance. Is it needed for a sheet cake? Not always.
The lesson of the crumb coat
Use a little frosting to trap crumbs, let that layer set and then apply the clean finish. This simple two-stage approach can turn a frustrating decorating process into an enjoyable one without requiring expensive equipment.
A small cake can still benefit
Even a single-layer cake may crumble when spread with stiff frosting, especially if its top was trimmed. A very thin preparatory coat can protect a tender surface while you work. Chill only as appropriate for the cake and frosting, then apply a final swirl or smooth finish.
Images are AI editorial illustrations of the baking technique.
IN PICTURES
From the baking notebook
FROM THE RECIPE BOX