On this page
A beautifully crimped pie crust makes even the simplest apple pie look ready for a celebration. But a decorative edge has a practical job as well: it helps secure top and bottom crusts and creates a deliberate rim that can protect filling. The secret to tidy crimping is usually not a complicated hand movement; it is leaving the right amount of dough, keeping it cool and repeating one small shape all the way around the pan.
Start with enough overhang
Roll the pastry large enough to fit the pan without stretching, leaving an overhang as specified by the recipe. A common approach uses roughly an inch of extra dough around the edge, but deep dishes and double-crust pies can require different amounts. If the dough barely reaches the rim, decorative fluting may tear or disappear in the oven.
Why the bottom crust shouldn't be stretched
Pulled pastry tends to shrink back when baked. Ease it into the corner where the base meets the side and allow it to settle naturally. The final crimp should be built from extra dough, not from pastry stretched upward from the bottom of the pan.
Trim carefully
Use kitchen shears or an appropriate cutter to remove uneven excess while preserving the edge required by the recipe. If there is a double top crust, leave enough to join the two layers before folding. A ragged thick edge can cook differently from the rest of the pastry.
Fold the overhang under
For a single-crust pie, many recipes fold the overhang beneath itself to form a firm rim. For a double crust, the upper and lower overhangs are commonly folded together. The exact direction depends on the recipe. Aim for even thickness around the pan.
The classic finger flute
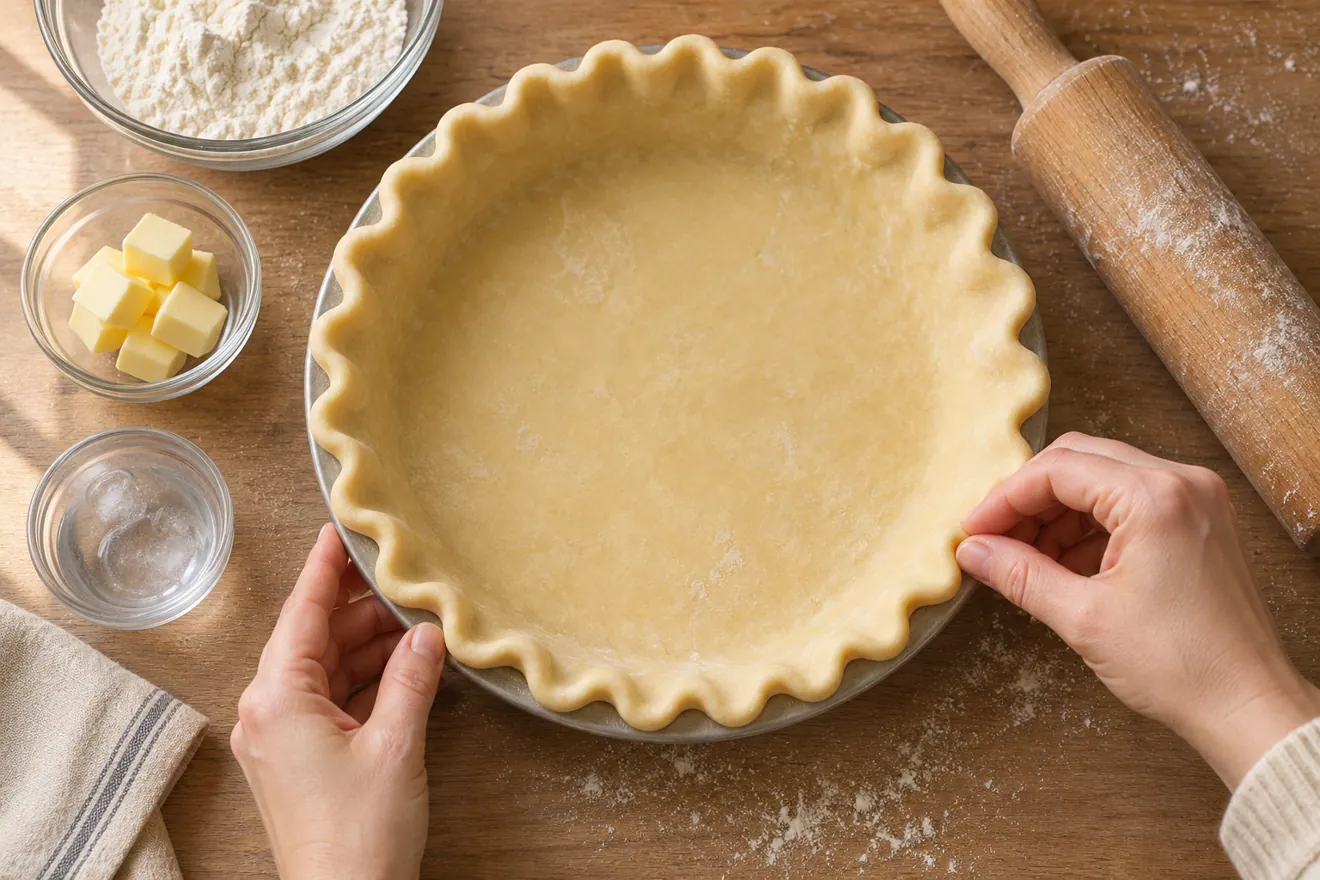
Place an index finger against the inside of the rim and use the thumb and forefinger of your other hand to press dough around it, forming a small V or U-shaped wave. Move a short, consistent distance and repeat. A few gentle practice crimps help you settle on a uniform spacing.
Mark one small starting point and use the same fingertip span between each indentation. Turn the dish as you work to hold your hands at a comfortable angle.
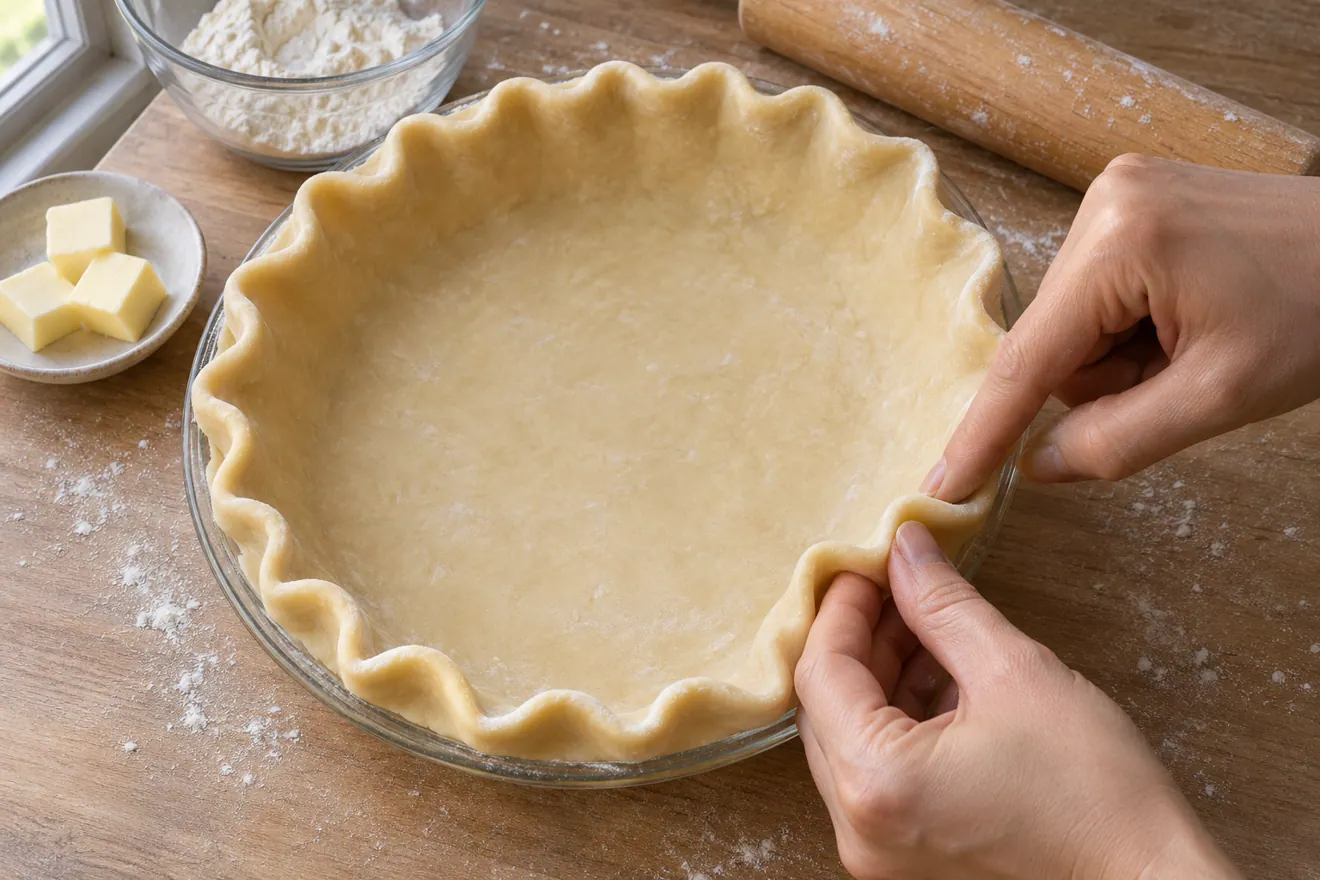
Why gentle pressure looks better
Squeezing too hard can make the edge thin and fragile. Press just enough to define a shape while preserving the dough's thickness. For a double-crust pie, ensure the layers are joined before decorating so the beautiful edge doesn't separate as fruit juices bubble.
How to make a fork crimp
Press the tines of a lightly floured fork around the folded rim, creating a simple repeating imprint. This is an approachable method for beginners and hand pies. Don't press all the way through the pastry, which can cut the seal instead of decorating it.
The edges on Apple Hand Pies show how a fork seals a small pastry. Leave some space between the filling and the edge so the fork presses dough against dough.

Try a rope-style edge
A rope crimp uses diagonal finger impressions or successive pinches to give the appearance of twisted cord. Keep each movement similar in depth and angle. It is best attempted on a rim with enough thickness and firmness to hold the pattern.
The scalloped edge
Make broader, round indentations spaced evenly around the plate for a soft, classic effect. This design suits rustic fruit pies and custard pies alike. A tiny crimp may disappear when a very buttery dough rises, so keep the pattern visible but not overly thin.
Simple spoon and tool marks
Some bakers use the back of a clean spoon to create repeated scallops; others use a pastry wheel or specialty crimper. Food-safe tools must have smooth clean edges. Avoid damaging nonstick or fragile pie plates with sharp metal implements.
Chill after crimping
Many recipes recommend chilling the shaped pie before baking. This allows fat to firm and gives dough a chance to relax after handling. A very warm crust can slump and blur the crimp during baking. Follow the recipe's schedule rather than assuming freezing solid is always better.
How to avoid an edge that collapses
Start with a strong folded rim, avoid stretching and give the dough enough chilling time. Too-thin pastry or overhandled warm dough may slump. If the whole shell shrinks, inspect dough hydration and resting as well as the crimping motion.
Joining two crusts properly
For a double-crust pie, the crimp acts as part of the seal that retains filling. Brush or moisten edges only if the recipe calls for it, then fold the layers together. A pretty but unsealed top can pull away and leak even with a perfect-looking flute.
In Cherry Pie, the lattice ends are folded into the lower crust before the edge is crimped. The method keeps the strips attached to the rim.

Decorative cutouts
Leaves, stars or braided strips can be attached using recipe-approved methods. Keep any decoration proportionate to the baking time: thick stacked pastry can remain pale or underbaked while adjacent thin crust becomes dark. Don't cover every steam vent with decoration.
An egg wash for shine
Some pies use egg wash or a milk wash to brown and gloss the rim. Apply thinly without flooding the creases, and follow the recipe's timing. Thick puddles may glue delicate pastry layers together or leave patchy colour.
Bake the pastry before tasting it.
Protecting the edge from excess browning
Crimped edges are exposed and may brown faster than the centre. Use a loose foil shield or pie protector at the stage the recipe suggests. Do not cover the full top too tightly, since steam must escape from a fruit pie.
What if the crimp tears?
Small tears can sometimes be repaired with a bit of spare dough using the recipe's method. If the dough is very brittle, let it soften slightly before pinching; if greasy, chill it. Repeatedly gathering and rerolling scraps can toughen the pastry.
Photographing a beautiful pie edge
A consistent rim looks especially attractive from a slight angle. For a rustic style, a neat fork mark or gentle flute may be better than elaborate leaves. The main visual impact comes from even spacing, a golden baked crust and a filling that hasn't leaked across the pattern.
Frequently asked questions
How much dough should hang over? Follow the recipe, often around an inch. Should you crimp before chilling? Many formulas do. Can you flute puff pastry? Not in exactly the same way; its laminated layers require different handling. Why did my crimp vanish? Warm fat, thin edges or shrinkage can contribute.
Make one shape and repeat it
A classic edge is a rhythm: fold, pinch, move and repeat. Give yourself enough pastry to work with, keep it cool and aim for consistency rather than perfection. A gently imperfect handmade flute often looks better than an overworked, overly delicate rim.
Some images are AI-generated illustrations of the dishes and techniques described.
IN PICTURES
From the baking notebook
FROM THE RECIPE BOX