Vegan Gluten-Free Croissants Recipe
Learn how to make the best homemade vegan gluten-free croissants with perfectly flaky layers. This foolproof recipe uses a special blend of gluten-free flours and vegan butter folding technique for authentic results. Master these French-inspired pastries without gluten or animal products!
Difficulty:
Advanced
Prep Time:
1 hour (plus 8 hours resting)
Cook Time:
25 mins
Serves:
8 croissants
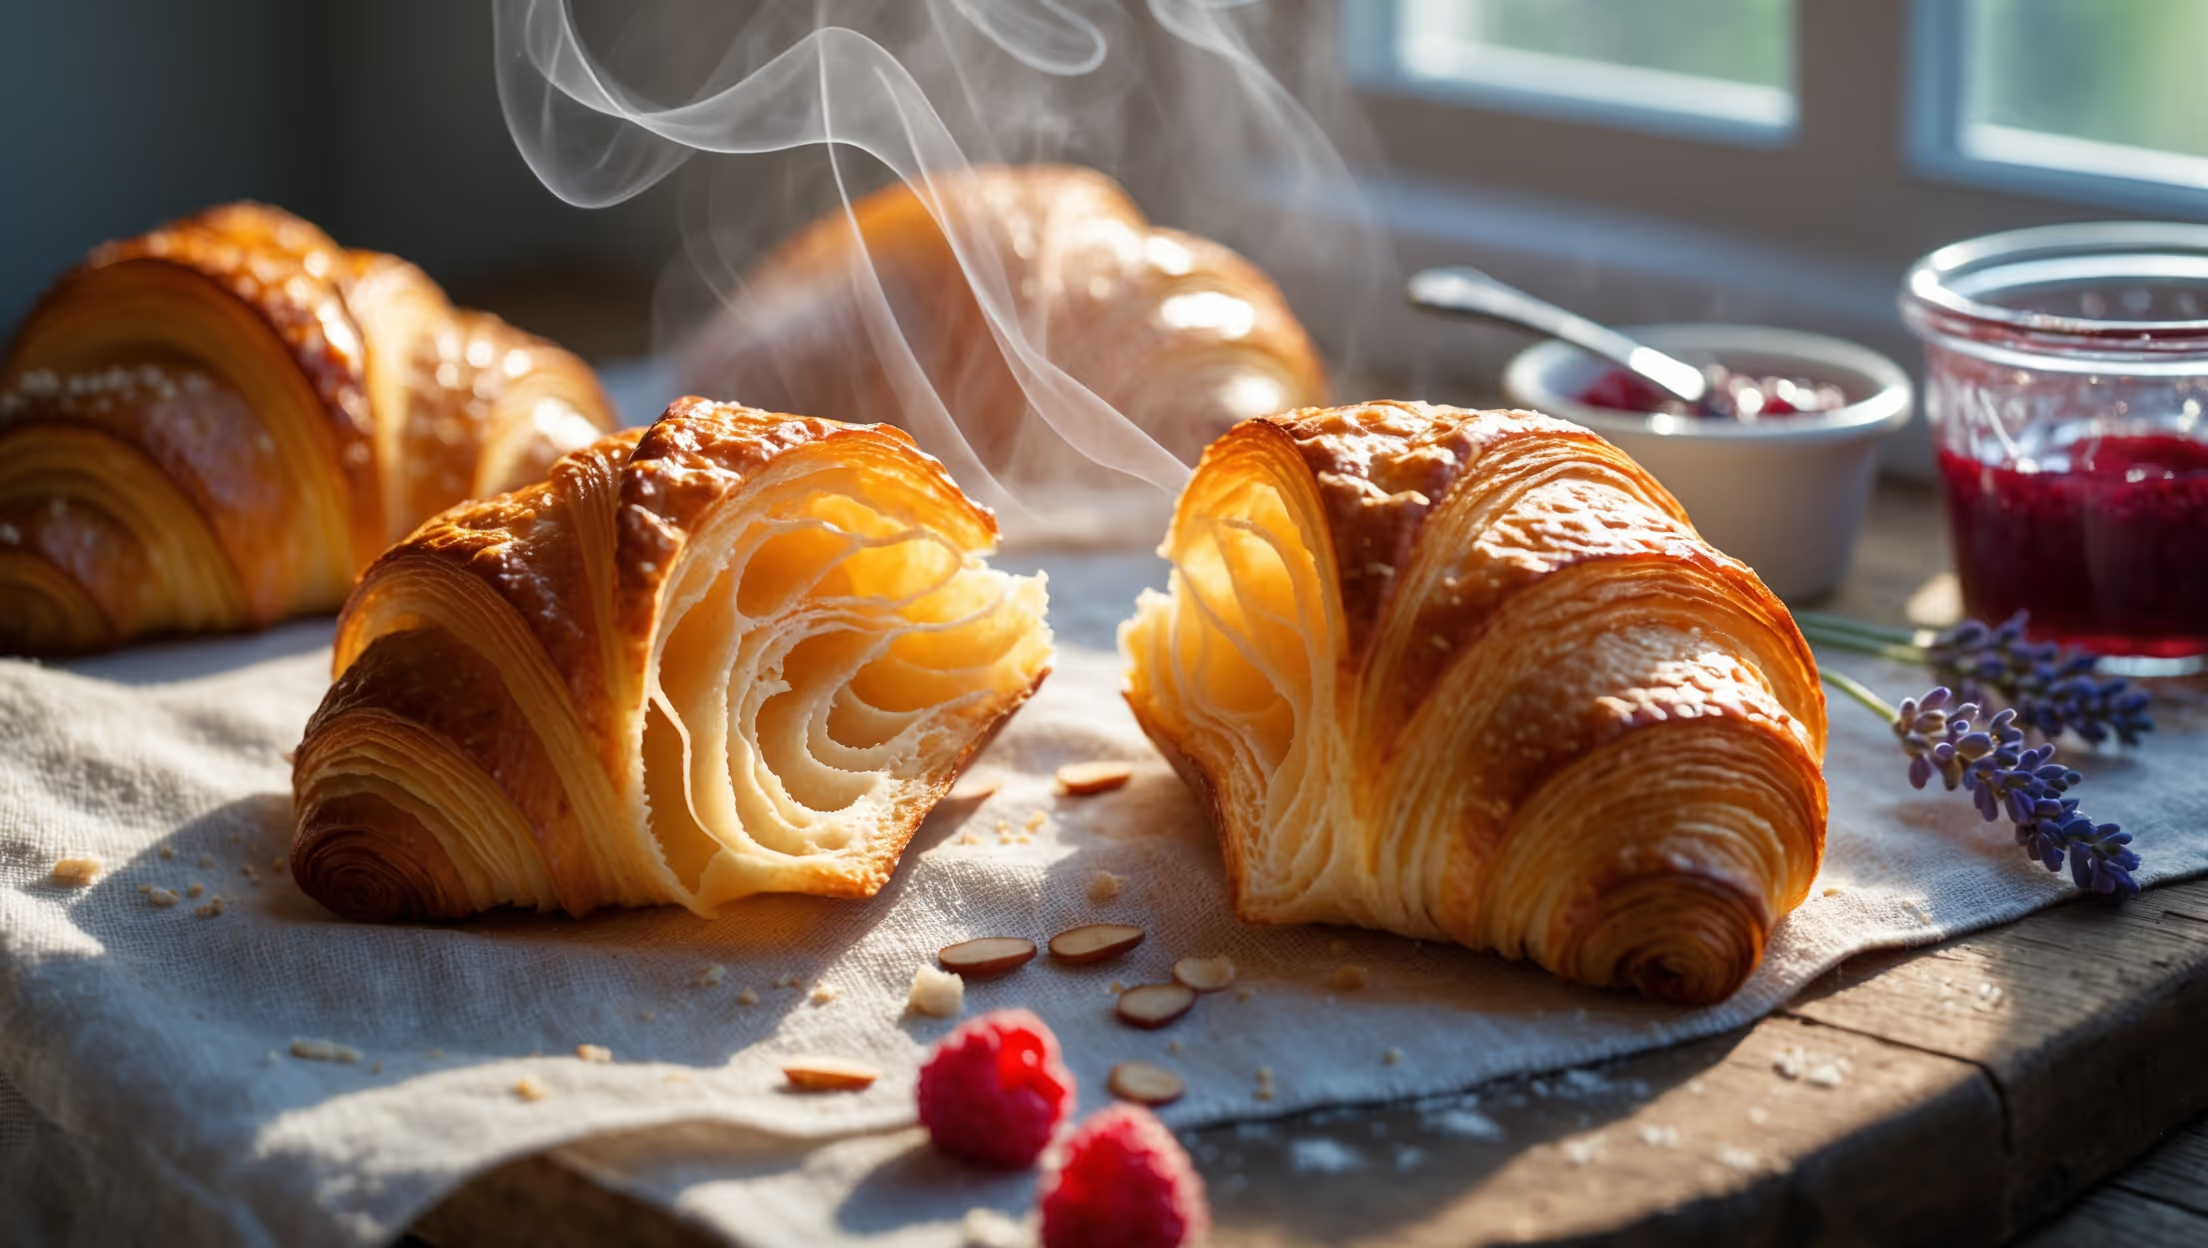
A close-up shot captures a broken vegan gluten-free croissant, revealing its delicate layers that spiral inward in honeycomb-like patterns. Golden-brown exterior glistens in soft morning light streaming through a kitchen window, while wispy steam escapes from the freshly-baked interior. The croissants are arranged on a rustic linen cloth atop a weathered wooden board, with scattered almond flour and a small pot of raspberry jam positioned strategically in the corner. A sprig of fresh lavender adds a touch of Provençal authenticity, while the characteristic curved shape of the croissants creates compelling shadows across the scene.

Ingredients

<ul class="ingredients-main-list"><li class="ingredients-single-item">200g gluten-free flour blend (with xanthan gum)</li><li class="ingredients-single-item">100g almond flour</li><li class="ingredients-single-item">50g tapioca starch</li><li class="ingredients-single-item">30g cornstarch</li><li class="ingredients-single-item">25g psyllium husk powder</li><li class="ingredients-single-item">4g salt</li><li class="ingredients-single-item">30g granulated sugar</li><li class="ingredients-single-item">7g instant dry yeast</li><li class="ingredients-single-item">250ml warm plant milk (soy or oat works best)</li><li class="ingredients-single-item">200g cold vegan butter block (not spread)</li><li class="ingredients-single-item">30ml maple syrup</li><li class="ingredients-single-item">15ml apple cider vinegar</li><li class="ingredients-single-item">45ml aquafaba (liquid from canned chickpeas)</li><li class="ingredients-single-item">15ml neutral oil (for brushing)</li></ul>

Equipment

<ul class="equipment-main-list"><li class="equipment-single-item">Rolling pin</li><li class="equipment-single-item">Baking sheets</li><li class="equipment-single-item">Pastry brush</li><li class="equipment-single-item">Bench scraper</li><li class="equipment-single-item">Ruler or measuring tape</li><li class="equipment-single-item">Plastic wrap</li><li class="equipment-single-item">Heavy baking tray (for steam)</li></ul>

Directions

<ol class="no-list-style"><li class="MethodStepper"><h4 class="step-title">Step 1</h4>In a large bowl, whisk together the gluten-free flour blend, almond flour, tapioca starch, cornstarch, psyllium husk powder, salt, sugar, and yeast. These diverse flours work together to mimic the structure that gluten would normally provide - the psyllium husk is particularly crucial as it creates elasticity in your dough.</li><li class="MethodStepper"><h4 class="step-title">Step 2</h4>Warm your plant milk to about 40°C (104°F) - it should feel warm but not hot to touch. Combine the warm milk with apple cider vinegar and let sit for 2 minutes to create a plant-based "buttermilk." The acidity helps activate the yeast and creates a tender result.</li><li class="MethodStepper"><h4 class="step-title">Step 3</h4>Pour the milk mixture, maple syrup, and aquafaba into the dry ingredients. Mix until just combined, then switch to gentle kneading with your hands until a soft, slightly sticky dough forms. The dough won't be as elastic as traditional croissant dough, but should hold together well. Form into a rectangle about 2cm thick, wrap tightly in plastic wrap, and refrigerate for 2 hours.</li><li class="MethodStepper"><h4 class="step-title">Step 4</h4>Meanwhile, prepare your vegan butter block. Place the cold butter between two pieces of parchment paper and beat with a rolling pin until malleable but still cold. Shape into a 15cm x 15cm square, keeping the edges straight and even. Return to the refrigerator to firm up.</li><li class="MethodStepper"><h4 class="step-title">Step 5</h4>After 2 hours, roll your chilled dough on a lightly floured surface into a 30cm x 15cm rectangle. Place the butter square diagonally in the center, then fold the corners of dough over the butter like an envelope, ensuring there are no gaps where butter could escape. Seal the edges well by pinching them together.</li><li class="MethodStepper"><h4 class="step-title">Step 6</h4>For the first turn, roll the dough into a 45cm x 15cm rectangle, keeping the edges straight. Brush off excess flour, then fold the dough in thirds like a letter. Wrap in plastic and refrigerate for 1 hour. This layering process creates the distinctive flaky texture of croissants.</li><li class="MethodStepper"><h4 class="step-title">Step 7</h4>Repeat the rolling and folding process two more times, chilling the dough for 1 hour between each turn. Handle the dough gently but confidently, keeping everything cold to prevent the butter from melting into the dough. If at any point the butter starts to soften too much, return the dough to the refrigerator immediately.</li><li class="MethodStepper"><h4 class="step-title">Step 8</h4>After the final turn, chill the dough overnight or for at least 4 hours. This extended rest allows the flours to fully hydrate and the flavors to develop.</li><li class="MethodStepper"><h4 class="step-title">Step 9</h4>When ready to shape, roll the dough on a lightly floured surface to a 40cm x 25cm rectangle, about 5mm thick. With the long edge facing you, trim the edges to create clean lines. Cut the dough into triangles with 10cm bases and 20cm heights.</li><li class="MethodStepper"><h4 class="step-title">Step 10</h4>Make a small 1cm cut in the center of each triangle's base, then gently stretch each triangle to about 25cm long. Roll up from the base to the tip, slightly stretching as you roll. The small cut at the base helps create the classic croissant shape when you curve the ends toward each other to form a crescent.</li><li class="MethodStepper"><h4 class="step-title">Step 11</h4>Place shaped croissants on baking sheets lined with parchment paper, leaving 5cm between each. Brush lightly with oil, then cover loosely with plastic wrap and let rise in a warm place for 1.5-2 hours until noticeably puffed. Gluten-free dough won't double in size like traditional dough, but should increase by about 50%.</li><li class="MethodStepper"><h4 class="step-title">Step 12</h4>Preheat your oven to 200°C (390°F) with a heavy tray placed on the bottom rack. Just before baking, brush croissants again with oil for a golden finish, and pour 240ml of hot water into the heated tray to create steam. This helps create a crisp exterior.</li><li class="MethodStepper"><h4 class="step-title">Step 13</h4>Bake for 20-25 minutes until deeply golden brown. The internal temperature should reach about 93°C (200°F). A proper bake ensures the layers are fully cooked through - underbaking will result in a gummy interior.</li><li class="MethodStepper"><h4 class="step-title">Step 14</h4>Transfer to a cooling rack and allow to cool for at least 20 minutes before serving. These croissants are best enjoyed fresh on the same day but can be refreshed in a hot oven for 3-4 minutes if needed. Store any leftovers in an airtight container for up to 2 days, or freeze for up to 1 month.</li></ol>

FAQs

Find answers to your most pressing questions about this delicious recipe right here.

What ingredients are used in Vegan Gluten-Free Croissants Recipe?

This recipe uses a special flour blend (gluten-free flour, almond flour, tapioca starch, cornstarch), psyllium husk powder, plant milk, vegan butter, maple syrup, apple cider vinegar, aquafaba, and oil. These ingredients work together to create flaky layers without gluten or animal products.

How to cook Vegan Gluten-Free Croissants Recipe at home?

Learn how to cook Vegan Gluten-Free Croissants by creating a special dough with mixed gluten-free flours and psyllium husk for elasticity, then laminating cold vegan butter through multiple folding steps. After overnight resting, shape into triangles, proof until puffy, and bake in a steam-filled oven at 200°C for 20-25 minutes until golden brown and flaky.

Why is psyllium husk essential for gluten-free pastries?

Psyllium husk powder is crucial because it mimics gluten's elasticity and binding properties. It absorbs liquid to create a gel-like structure that gives gluten-free dough the necessary stretch and cohesion to laminate properly, resulting in distinct flaky layers rather than a crumbly texture.

Can I freeze unbaked croissant dough?

Yes, you can freeze the shaped unbaked croissants for up to one month. Place them on a baking sheet until solid, then transfer to airtight containers. When ready to bake, allow them to thaw and proof overnight in the refrigerator, then 1-2 hours at room temperature before baking.

What causes the flaky layers in dairy-free croissants?

The flaky layers come from the lamination process—folding solid vegan butter between dough layers creates distinct fat and dough sheets. When baked, the butter melts, creating steam that pushes the dough upward. Each fold triples the number of layers, resulting in the characteristic honeycomb texture.

Want to try something else in ...

Gluten-Free Vegan Bakes

Try following recommended recipes

{ "@context": "http://schema.org/", "@type": "Recipe", "name": "Vegan Gluten-Free Croissants Recipe", "author": { "@type": "Person", "name": "Gurbir Aujla", "brand": "What's Baking?", "jobTitle": "Baker" }, "datePublished": "2024-05-14", "description": "Learn how to make the best homemade vegan gluten-free croissants with perfectly flaky layers. This foolproof recipe uses a special blend of gluten-free flours and vegan butter folding technique for authentic results. Master these French-inspired pastries without gluten or animal products!", "prepTime": "PT1H", "cookTime": "PT25M", "totalTime": "PT9H25M", "keywords": "vegan croissants, gluten-free pastry, dairy-free breakfast, laminated dough, French vegan baking", "recipeYield": "8", "recipeCategory": "Breakfast", "recipeCuisine": "French", "nutrition": { "@type": "NutritionInformation", "calories": "285 calories", "carbohydrateContent": "32 g", "proteinContent": "3 g", "fatContent": "18 g", "saturatedFatContent": "5 g", "cholesterolContent": "0 mg", "sodiumContent": "220 mg", "sugarContent": "2 g", "servingSize": "1 serving" }, "recipeIngredient": [ "200g gluten-free flour blend (with xanthan gum)", "100g almond flour", "50g tapioca starch", "30g cornstarch", "25g psyllium husk powder", "4g salt", "30g granulated sugar", "7g instant dry yeast", "250ml warm plant milk (soy or oat works best)", "200g cold vegan butter block (not spread)", "30ml maple syrup", "15ml apple cider vinegar", "45ml aquafaba (liquid from canned chickpeas)", "15ml neutral oil (for brushing)" ], "recipeInstructions": [ { "@type": "HowToStep", "name": "Mix dry ingredients", "text": "In a large bowl, whisk together the gluten-free flour blend, almond flour, tapioca starch, cornstarch, psyllium husk powder, salt, sugar, and yeast. These diverse flours work together to mimic the structure that gluten would normally provide - the psyllium husk is particularly crucial as it creates elasticity in your dough." }, { "@type": "HowToStep", "name": "Prepare plant milk mixture", "text": "Warm your plant milk to about 40°C (104°F) - it should feel warm but not hot to touch. Combine the warm milk with apple cider vinegar and let sit for 2 minutes to create a plant-based 'buttermilk.' The acidity helps activate the yeast and creates a tender result." }, { "@type": "HowToStep", "name": "Form dough", "text": "Pour the milk mixture, maple syrup, and aquafaba into the dry ingredients. Mix until just combined, then switch to gentle kneading with your hands until a soft, slightly sticky dough forms. The dough won't be as elastic as traditional croissant dough, but should hold together well. Form into a rectangle about 2cm thick, wrap tightly in plastic wrap, and refrigerate for 2 hours." }, { "@type": "HowToStep", "name": "Prepare butter block", "text": "Meanwhile, prepare your vegan butter block. Place the cold butter between two pieces of parchment paper and beat with a rolling pin until malleable but still cold. Shape into a 15cm x 15cm square, keeping the edges straight and even. Return to the refrigerator to firm up." }, { "@type": "HowToStep", "name": "Encase butter", "text": "After 2 hours, roll your chilled dough on a lightly floured surface into a 30cm x 15cm rectangle. Place the butter square diagonally in the center, then fold the corners of dough over the butter like an envelope, ensuring there are no gaps where butter could escape. Seal the edges well by pinching them together." }, { "@type": "HowToStep", "name": "First turn", "text": "For the first turn, roll the dough into a 45cm x 15cm rectangle, keeping the edges straight. Brush off excess flour, then fold the dough in thirds like a letter. Wrap in plastic and refrigerate for 1 hour. This layering process creates the distinctive flaky texture of croissants." }, { "@type": "HowToStep", "name": "Complete lamination", "text": "Repeat the rolling and folding process two more times, chilling the dough for 1 hour between each turn. Handle the dough gently but confidently, keeping everything cold to prevent the butter from melting into the dough. If at any point the butter starts to soften too much, return the dough to the refrigerator immediately." }, { "@type": "HowToStep", "name": "Overnight rest", "text": "After the final turn, chill the dough overnight or for at least 4 hours. This extended rest allows the flours to fully hydrate and the flavors to develop." }, { "@type": "HowToStep", "name": "Shape croissants", "text": "When ready to shape, roll the dough on a lightly floured surface to a 40cm x 25cm rectangle, about 5mm thick. With the long edge facing you, trim the edges to create clean lines. Cut the dough into triangles with 10cm bases and 20cm heights. Make a small 1cm cut in the center of each triangle's base, then gently stretch each triangle to about 25cm long. Roll up from the base to the tip, slightly stretching as you roll. The small cut at the base helps create the classic croissant shape when you curve the ends toward each other to form a crescent." }, { "@type": "HowToStep", "name": "Final proofing", "text": "Place shaped croissants on baking sheets lined with parchment paper, leaving 5cm between each. Brush lightly with oil, then cover loosely with plastic wrap and let rise in a warm place for 1.5-2 hours until noticeably puffed. Gluten-free dough won't double in size like traditional dough, but should increase by about 50%." }, { "@type": "HowToStep", "name": "Prepare for baking", "text": "Preheat your oven to 200°C (390°F) with a heavy tray placed on the bottom rack. Just before baking, brush croissants again with oil for a golden finish, and pour 240ml of hot water into the heated tray to create steam. This helps create a crisp exterior." }, { "@type": "HowToStep", "name": "Bake", "text": "Bake for 20-25 minutes until deeply golden brown. The internal temperature should reach about 93°C (200°F). A proper bake ensures the layers are fully cooked through - underbaking will result in a gummy interior." }, { "@type": "HowToStep", "name": "Cool and serve", "text": "Transfer to a cooling rack and allow to cool for at least 20 minutes before serving. These croissants are best enjoyed fresh on the same day but can be refreshed in a hot oven for 3-4 minutes if needed. Store any leftovers in an airtight container for up to 2 days, or freeze for up to 1 month." } ], "aggregateRating": { "@type": "AggregateRating", "ratingValue": "5", "ratingCount": "178" }, "review": [ { "@type": "Review", "author": "Elisa Moretti", "datePublished": "2024-05-01", "reviewBody": "I've been searching for a gluten-free croissant recipe that actually works for years! These were crispy on the outside and tender inside - exactly like the description promised. The lamination technique does take patience but delivers amazing results.", "name": "Finally Found The Perfect Recipe", "reviewRating": { "@type": "Rating", "ratingValue": "5" } }, { "@type": "Review", "author": "Akira Tanaka", "datePublished": "2024-05-03", "reviewBody": "These croissants were absolutely worth the effort! I was skeptical about vegan and gluten-free croissants having that authentic pull-apart texture, but the psyllium husk really does make all the difference. My celiac wife was in tears after tasting these.", "name": "Worth Every Folding Step", "reviewRating": { "@type": "Rating", "ratingValue": "5" } }, { "@type": "Review", "author": "Sanjay Patel", "datePublished": "2024-05-09", "reviewBody": "As someone with multiple food allergies, finding pastries I can eat is nearly impossible. These croissants are a game-changer! The detailed instructions made the complex process manageable, and the results were better than any store-bought gluten-free versions I've tried.", "name": "Better Than Bakery Versions", "reviewRating": { "@type": "Rating", "ratingValue": "5" } }, { "@type": "Review", "author": "Sofia Lundberg", "datePublished": "2024-05-12", "reviewBody": "My vegan family couldn't believe these were homemade! The flaky layers and buttery taste (without any actual butter) are incredible. I appreciated the detailed troubleshooting tips throughout the recipe. These have become our weekend special breakfast treat.", "name": "Family Weekend Favorite", "reviewRating": { "@type": "Rating", "ratingValue": "5" } }, { "@type": "Review", "author": "Miguel Fernandez", "datePublished": "2024-05-10", "reviewBody": "I never thought gluten-free dough could achieve such flakiness! The technique with the vegan butter is genius. I've made these three times now and they get better each time as I perfect the folding technique. Perfect with my morning coffee - no compromises on taste or texture.", "name": "No Compromises Necessary", "reviewRating": { "@type": "Rating", "ratingValue": "5" } } ], "url": "https://www.whatsbaking.co/recipes/vegan-gluten-free-croissants-recipe" }
{ "@context": "https://schema.org", "@type": "FAQPage", "mainEntity": [ { "@type": "Question", "name": "What ingredients are used in Vegan Gluten-Free Croissants Recipe?", "acceptedAnswer": { "@type": "Answer", "text": "This recipe uses a special flour blend (gluten-free flour, almond flour, tapioca starch, cornstarch), psyllium husk powder, plant milk, vegan butter, maple syrup, apple cider vinegar, aquafaba, and oil. These ingredients work together to create flaky layers without gluten or animal products." } }, { "@type": "Question", "name": "How to cook Vegan Gluten-Free Croissants Recipe at home?", "acceptedAnswer": { "@type": "Answer", "text": "Learn how to cook Vegan Gluten-Free Croissants by creating a special dough with mixed gluten-free flours and psyllium husk for elasticity, then laminating cold vegan butter through multiple folding steps. After overnight resting, shape into triangles, proof until puffy, and bake in a steam-filled oven at 200°C for 20-25 minutes until golden brown and flaky." } }, { "@type": "Question", "name": "Why is psyllium husk essential for gluten-free pastries?", "acceptedAnswer": { "@type": "Answer", "text": "Psyllium husk powder is crucial because it mimics gluten's elasticity and binding properties. It absorbs liquid to create a gel-like structure that gives gluten-free dough the necessary stretch and cohesion to laminate properly, resulting in distinct flaky layers rather than a crumbly texture." } }, { "@type": "Question", "name": "Can I freeze unbaked croissant dough?", "acceptedAnswer": { "@type": "Answer", "text": "Yes, you can freeze the shaped unbaked croissants for up to one month. Place them on a baking sheet until solid, then transfer to airtight containers. When ready to bake, allow them to thaw and proof overnight in the refrigerator, then 1-2 hours at room temperature before baking." } }, { "@type": "Question", "name": "What causes the flaky layers in dairy-free croissants?", "acceptedAnswer": { "@type": "Answer", "text": "The flaky layers come from the lamination process—folding solid vegan butter between dough layers creates distinct fat and dough sheets. When baked, the butter melts, creating steam that pushes the dough upward. Each fold triples the number of layers, resulting in the characteristic honeycomb texture." } } ] }