Vegan Gluten-Free Chocolate Tart Recipe
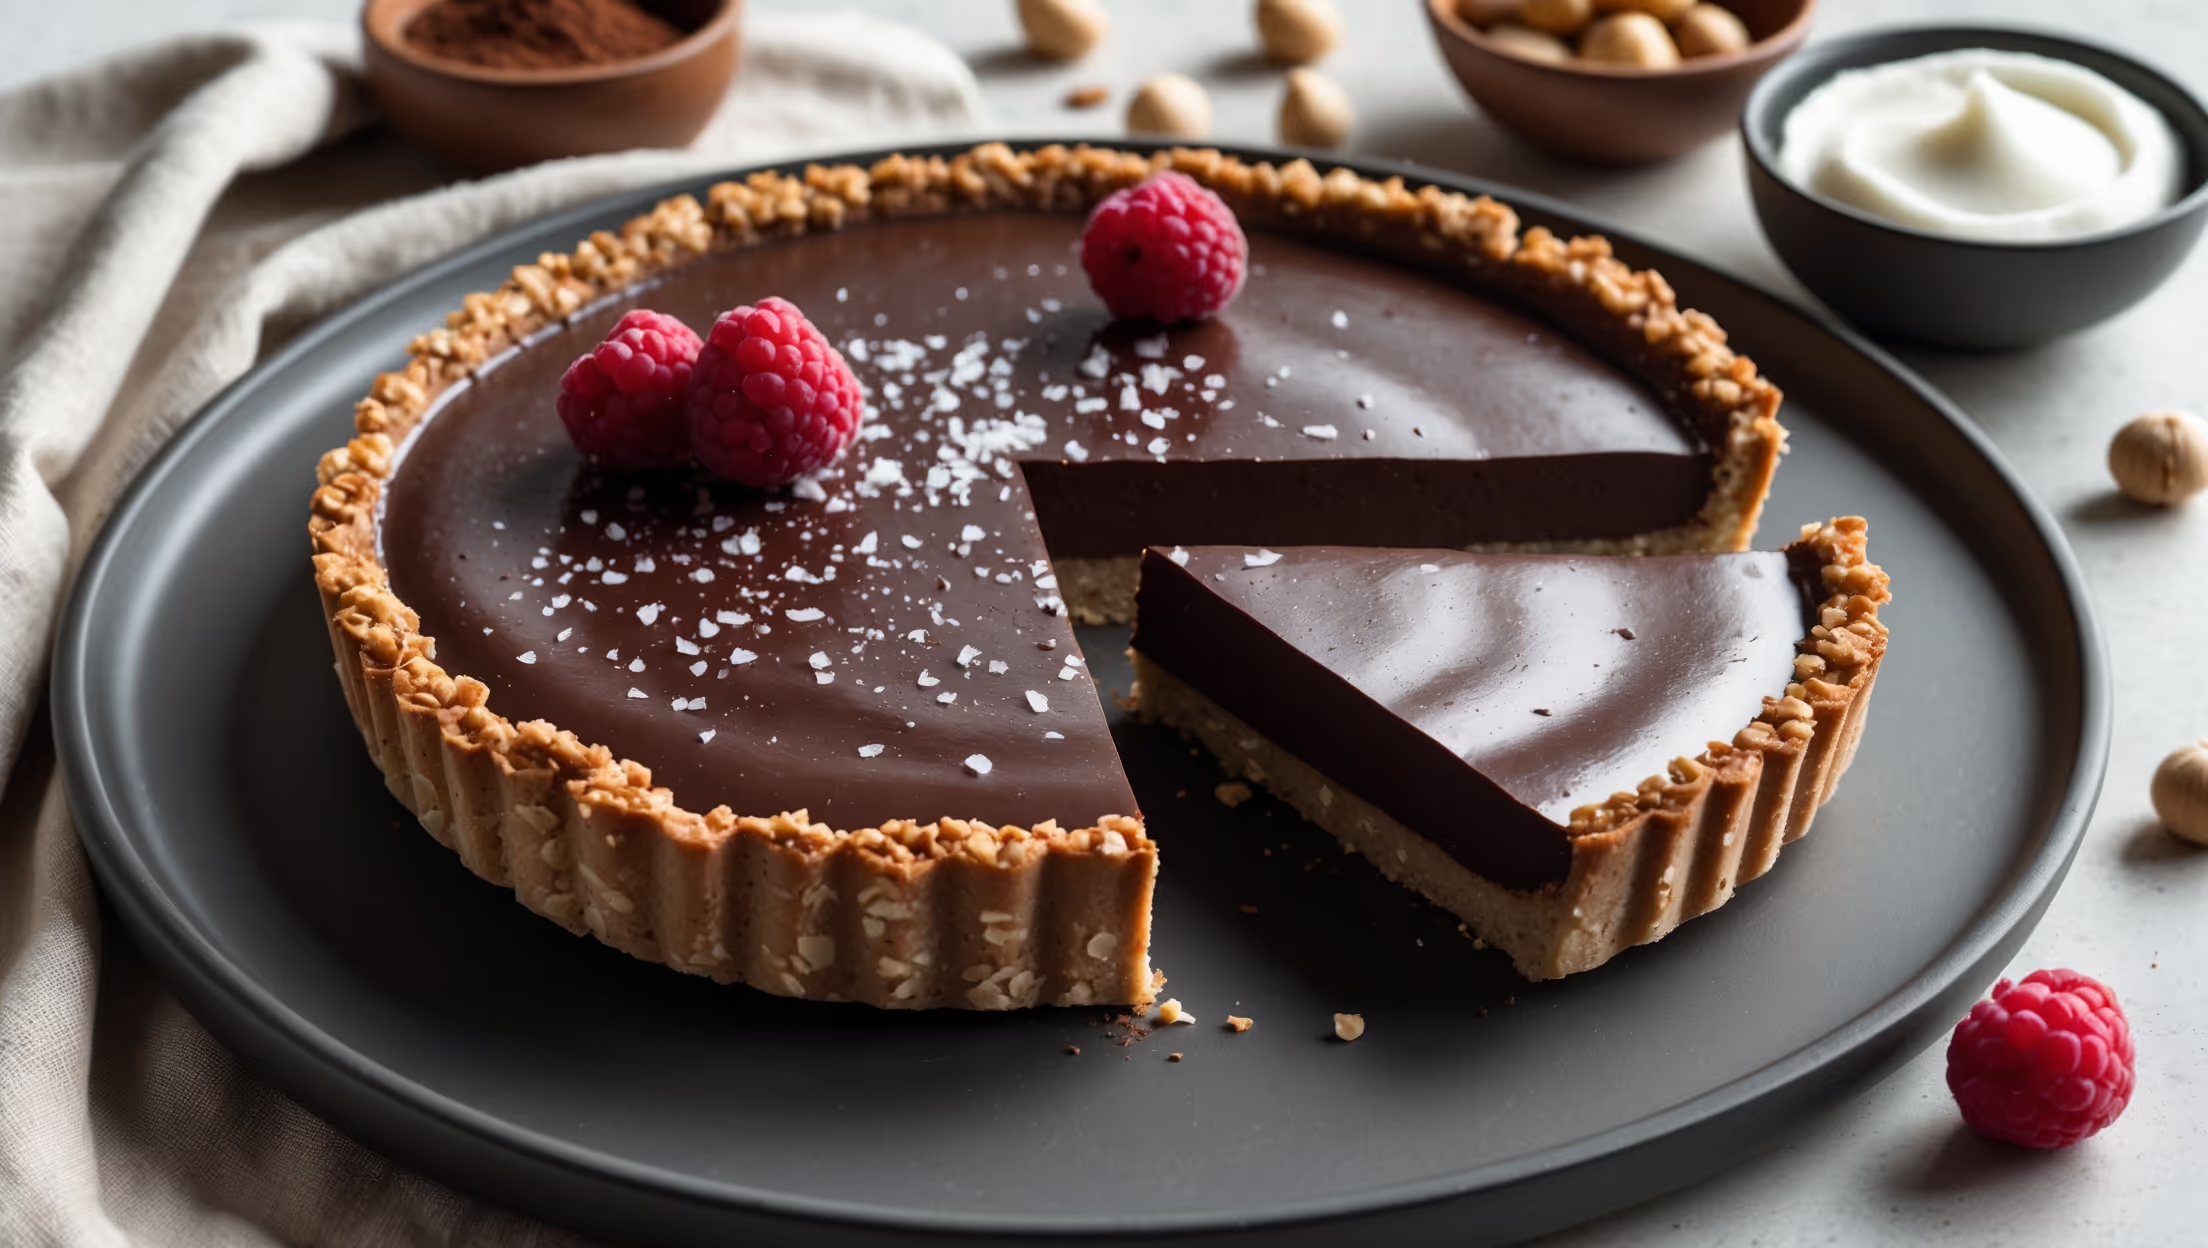
Learn how to make the best homemade vegan gluten-free chocolate tart with this easy baking recipe. A rich, silky-smooth chocolate ganache filling nestled in a nutty oat crust that's naturally sweetened. Perfect for special occasions or whenever chocolate cravings strike!
Difficulty:
Intermediate
Prep Time:
30 mins
Cook Time:
15 mins
Serves:
1 tart (8 slices)
An overhead shot of a perfectly sliced vegan gluten-free chocolate tart on a matte black ceramic plate, revealing its glossy dark chocolate ganache filling and nutty, crumbly crust. Soft natural daylight streams across the scene, highlighting the tart's smooth, mirror-like surface adorned with a scattering of flaky sea salt crystals and fresh raspberries. In the background, a small bowl of cocoa powder, a jar of coconut cream, and scattered hazelnuts create context on a textured linen cloth. A cross-section shot shows the distinct layers – the firm but tender almond-oat base and the luscious, velvety chocolate filling that holds its shape while appearing irresistibly creamy.

Ingredients

<ul class="ingredients-main-list"><li class="ingredients-single-item">For the crust:</li><li class="ingredients-single-item">150g gluten-free rolled oats</li><li class="ingredients-single-item">100g almond flour (or hazelnut flour)</li><li class="ingredients-single-item">60g coconut oil, melted</li><li class="ingredients-single-item">60ml maple syrup</li><li class="ingredients-single-item">1/4 tsp sea salt</li><li class="ingredients-single-item">For the filling:</li><li class="ingredients-single-item">300g dark chocolate (70% cacao, dairy-free)</li><li class="ingredients-single-item">400ml full-fat coconut milk</li><li class="ingredients-single-item">60ml maple syrup</li><li class="ingredients-single-item">2 tsp vanilla extract</li><li class="ingredients-single-item">1/4 tsp sea salt</li><li class="ingredients-single-item">For garnish:</li><li class="ingredients-single-item">Fresh berries (optional)</li><li class="ingredients-single-item">2 tbsp chopped hazelnuts (optional)</li><li class="ingredients-single-item">Flaky sea salt for sprinkling</li></ul>

Nutrition Facts (per serving)

🍽️ Serving Size: 1 slice
🔥 Calories: 375 calories
🥑 Fat: 28 g
🧈 Saturated Fat: 18 g
🍞 Carbohydrates: 32 g
🍭 Sugar: 16 g
🍗 Protein: 6 g
🫀 Cholesterol: 0 mg
🧂 Sodium: 95 mg

Equipment

<ul class="equipment-main-list"><li class="equipment-single-item">23cm (9-inch) tart pan with removable bottom</li><li class="equipment-single-item">Food processor</li><li class="equipment-single-item">Heatproof silicone spatula</li><li class="equipment-single-item">Baking paper</li></ul>

Directions

<ol class="no-list-style"><li class="MethodStepper"><h4 class="step-title">Step 1</h4>Preheat your oven to 180°C (350°F). Lightly grease your tart pan with a little coconut oil to ensure easy removal later.</li><li class="MethodStepper"><h4 class="step-title">Step 2</h4>For the crust, place the gluten-free oats in your food processor and pulse until they form a coarse flour. This creates a more cohesive base than using whole oats. Add the almond flour and salt, pulsing to combine.</li><li class="MethodStepper"><h4 class="step-title">Step 3</h4>In a small bowl, whisk together the melted coconut oil and maple syrup until combined. With the food processor running, slowly pour this liquid mixture through the feed tube. Process until the mixture resembles wet sand and holds together when pressed between your fingers. If it seems too dry, add 1-2 teaspoons of water.</li><li class="MethodStepper"><h4 class="step-title">Step 4</h4>Transfer the crust mixture to your prepared tart pan. Using your fingertips or the bottom of a flat measuring cup, firmly press the mixture evenly across the bottom and up the sides of the pan. The firmer you press, the better your crust will hold together after baking.</li><li class="MethodStepper"><h4 class="step-title">Step 5</h4>Prick the bottom of the crust all over with a fork (this prevents it from puffing up during baking). Bake for 12-15 minutes until lightly golden and fragrant. The crust might still feel slightly soft but will firm up as it cools. Place on a wire rack to cool completely while you prepare the filling.</li><li class="MethodStepper"><h4 class="step-title">Step 6</h4>For the chocolate filling, chop the dark chocolate into small pieces and place in a large heat-resistant bowl. Smaller pieces will melt more evenly and prevent overheating, which can cause the chocolate to seize.</li><li class="MethodStepper"><h4 class="step-title">Step 7</h4>In a small saucepan, bring the coconut milk to a gentle simmer over medium heat – watch carefully as it can boil over quickly. Remove from heat as soon as you see small bubbles forming around the edges. The fat in the coconut milk acts similarly to heavy cream, creating a smooth ganache without dairy.</li><li class="MethodStepper"><h4 class="step-title">Step 8</h4>Pour the hot coconut milk over the chopped chocolate. Let it sit undisturbed for 2-3 minutes to allow the chocolate to soften. Then gently stir with a silicone spatula until completely smooth and glossy. Avoid vigorous stirring which can incorporate air bubbles into your ganache.</li><li class="MethodStepper"><h4 class="step-title">Step 9</h4>Add the maple syrup, vanilla extract, and salt to the chocolate mixture, stirring gently until fully incorporated. The salt enhances the chocolate flavor while the vanilla adds depth.</li><li class="MethodStepper"><h4 class="step-title">Step 10</h4>Pour the silky chocolate filling into your cooled tart crust. Gently tap the pan on the counter a few times to release any air bubbles and smooth the surface. For a professional finish, use an offset spatula to create an even top.</li><li class="MethodStepper"><h4 class="step-title">Step 11</h4>Refrigerate the tart uncovered for at least 4 hours, preferably overnight. This extended chilling time allows the filling to set properly while the flavors develop and intensify.</li><li class="MethodStepper"><h4 class="step-title">Step 12</h4>Before serving, let the tart sit at room temperature for 15-20 minutes to take the chill off – this enhances the chocolate flavor and creates the perfect creamy texture. Garnish with fresh berries, chopped hazelnuts, and a light sprinkle of flaky sea salt, which creates a beautiful contrast to the sweet chocolate.</li><li class="MethodStepper"><h4 class="step-title">Step 13</h4>To slice cleanly, use a sharp knife dipped in hot water and wiped dry between each cut. The tart will keep, covered, in the refrigerator for up to 5 days, though the crust may soften slightly over time. Enjoy this indulgent treat that proves vegan and gluten-free desserts can be every bit as luxurious as traditional ones!</li></ol>

FAQs

Find answers to your most pressing questions about this delicious recipe right here.

What ingredients are used in Vegan Gluten-Free Chocolate Tart?

This tart requires gluten-free oats, almond flour, coconut oil, maple syrup, dark chocolate (70% dairy-free), full-fat coconut milk, vanilla extract, and sea salt. Optional garnishes include fresh berries, chopped hazelnuts, and flaky sea salt.

How to cook Vegan Gluten-Free Chocolate Tart at home?

Learn how to cook Vegan Gluten-Free Chocolate Tart by first making a nutty gluten-free crust from processed oats and almond flour, baking it until golden, then creating a silky chocolate ganache using dairy-free chocolate and coconut milk. Pour the ganache into the cooled crust, refrigerate for at least 4 hours, then garnish with berries and sea salt before serving.

Can I make this chocolate tart without a food processor?

Yes, you can make this tart without a food processor by using pre-ground oat flour and mixing the crust ingredients by hand. Ensure the ingredients are well combined and press firmly into the tart pan. The texture may be slightly different but will still work beautifully.

Why is my chocolate ganache filling not setting properly?

Ganache setting issues usually stem from incorrect chocolate-to-coconut milk ratios or insufficient chilling time. Ensure you're using full-fat coconut milk, proper chocolate percentages (70% works best), and refrigerate for at least 4 hours, preferably overnight.

How far in advance can I make this dairy-free chocolate dessert?

This tart can be prepared up to 3 days in advance when stored properly in the refrigerator. The flavours actually develop and improve after 24 hours. If making ahead, add fresh garnishes just before serving for the best presentation and texture.

Want to try something else in ...

Gluten-Free Vegan Bakes

Try following recommended recipes

No items found.

{ "@context": "http://schema.org/", "@type": "Recipe", "name": "Vegan Gluten-Free Chocolate Tart Recipe", "image": ["https://cdn.prod.website-files.com/67f19ab882e7325b0d63c86a/683ba0f8e08f00bedaac660f_Leonardo_Phoenix_10_An_overhead_shot_of_a_perfectly_sliced_veg_0.jpeg"], "author": { "@type": "Person", "name": "Gurbir Aujla", "brand": "What's Baking?", "jobTitle": "Baker" }, "datePublished": "2023-06-12", "description": "Learn how to make the best homemade vegan gluten-free chocolate tart with this easy baking recipe. A rich, silky-smooth chocolate ganache filling nestled in a nutty oat crust that's naturally sweetened. Perfect for special occasions or whenever chocolate cravings strike!", "prepTime": "PT30M", "cookTime": "PT15M", "totalTime": "PT4H45M", "keywords": "vegan chocolate tart, gluten-free dessert, dairy-free ganache, plant-based dessert, allergy-friendly tart", "recipeYield": "8", "recipeCategory": "Dessert", "recipeCuisine": "Vegan", "nutrition": { "@type": "NutritionInformation", "calories": "375 calories", "carbohydrateContent": "32 g", "proteinContent": "6 g", "fatContent": "28 g", "saturatedFatContent": "18 g", "cholesterolContent": "0 mg", "sodiumContent": "95 mg", "sugarContent": "16 g", "servingSize": "1 slice" }, "recipeIngredient": [ "150g gluten-free rolled oats", "100g almond flour (or hazelnut flour)", "60g coconut oil, melted", "60ml maple syrup", "1/4 tsp sea salt", "300g dark chocolate (70% cacao, dairy-free)", "400ml full-fat coconut milk", "60ml maple syrup", "2 tsp vanilla extract", "1/4 tsp sea salt", "Fresh berries (optional)", "2 tbsp chopped hazelnuts (optional)", "Flaky sea salt for sprinkling" ], "recipeInstructions": [ { "@type": "HowToStep", "name": "Prepare pan", "text": "Preheat your oven to 180°C (350°F). Lightly grease your tart pan with a little coconut oil to ensure easy removal later." }, { "@type": "HowToStep", "name": "Process oats", "text": "For the crust, place the gluten-free oats in your food processor and pulse until they form a coarse flour. This creates a more cohesive base than using whole oats. Add the almond flour and salt, pulsing to combine." }, { "@type": "HowToStep", "name": "Make crust mixture", "text": "In a small bowl, whisk together the melted coconut oil and maple syrup until combined. With the food processor running, slowly pour this liquid mixture through the feed tube. Process until the mixture resembles wet sand and holds together when pressed between your fingers. If it seems too dry, add 1-2 teaspoons of water." }, { "@type": "HowToStep", "name": "Form crust", "text": "Transfer the crust mixture to your prepared tart pan. Using your fingertips or the bottom of a flat measuring cup, firmly press the mixture evenly across the bottom and up the sides of the pan. The firmer you press, the better your crust will hold together after baking." }, { "@type": "HowToStep", "name": "Bake crust", "text": "Prick the bottom of the crust all over with a fork (this prevents it from puffing up during baking). Bake for 12-15 minutes until lightly golden and fragrant. The crust might still feel slightly soft but will firm up as it cools. Place on a wire rack to cool completely while you prepare the filling." }, { "@type": "HowToStep", "name": "Prepare chocolate", "text": "For the chocolate filling, chop the dark chocolate into small pieces and place in a large heat-resistant bowl. Smaller pieces will melt more evenly and prevent overheating, which can cause the chocolate to seize." }, { "@type": "HowToStep", "name": "Heat coconut milk", "text": "In a small saucepan, bring the coconut milk to a gentle simmer over medium heat – watch carefully as it can boil over quickly. Remove from heat as soon as you see small bubbles forming around the edges. The fat in the coconut milk acts similarly to heavy cream, creating a smooth ganache without dairy." }, { "@type": "HowToStep", "name": "Make ganache", "text": "Pour the hot coconut milk over the chopped chocolate. Let it sit undisturbed for 2-3 minutes to allow the chocolate to soften. Then gently stir with a silicone spatula until completely smooth and glossy. Avoid vigorous stirring which can incorporate air bubbles into your ganache." }, { "@type": "HowToStep", "name": "Flavor ganache", "text": "Add the maple syrup, vanilla extract, and salt to the chocolate mixture, stirring gently until fully incorporated. The salt enhances the chocolate flavor while the vanilla adds depth." }, { "@type": "HowToStep", "name": "Fill tart", "text": "Pour the silky chocolate filling into your cooled tart crust. Gently tap the pan on the counter a few times to release any air bubbles and smooth the surface. For a professional finish, use an offset spatula to create an even top." }, { "@type": "HowToStep", "name": "Chill", "text": "Refrigerate the tart uncovered for at least 4 hours, preferably overnight. This extended chilling time allows the filling to set properly while the flavors develop and intensify." }, { "@type": "HowToStep", "name": "Serve", "text": "Before serving, let the tart sit at room temperature for 15-20 minutes to take the chill off – this enhances the chocolate flavor and creates the perfect creamy texture. Garnish with fresh berries, chopped hazelnuts, and a light sprinkle of flaky sea salt, which creates a beautiful contrast to the sweet chocolate." }, { "@type": "HowToStep", "name": "Slice and store", "text": "To slice cleanly, use a sharp knife dipped in hot water and wiped dry between each cut. The tart will keep, covered, in the refrigerator for up to 5 days, though the crust may soften slightly over time. Enjoy this indulgent treat that proves vegan and gluten-free desserts can be every bit as luxurious as traditional ones!" } ], "aggregateRating": { "@type": "AggregateRating", "ratingValue": "5", "ratingCount": "138" }, "review": [ { "@type": "Review", "author": "Natasha Patel", "datePublished": "2023-06-25", "reviewBody": "Divine richness without dairy! I served this at a dinner party and no one could believe it was vegan. The ganache is so silky and the crust has the perfect texture. Will definitely make again!", "name": "Decadent Vegan Delight", "reviewRating": { "@type": "Rating", "ratingValue": "5" } }, { "@type": "Review", "author": "Mikel Azurmendi", "datePublished": "2023-07-03", "reviewBody": "Guests couldn't believe it's vegan! As someone who recently went dairy-free, I've been missing chocolate desserts. This tart is better than any dairy-based one I've had before. The coconut milk creates such a luxurious mouthfeel.", "name": "Better Than Traditional", "reviewRating": { "@type": "Rating", "ratingValue": "5" } }, { "@type": "Review", "author": "Aisha Johnson", "datePublished": "2023-07-12", "reviewBody": "Foolproof recipe, impressive results! I'm not the most confident baker but the clear instructions made this easy to follow. The tart looks professional and tastes incredible. I added raspberries on top which paired perfectly with the rich chocolate.", "name": "Perfect First Attempt", "reviewRating": { "@type": "Rating", "ratingValue": "5" } }, { "@type": "Review", "author": "Sven Lindgren", "datePublished": "2023-07-30", "reviewBody": "This silky texture is worth every minute of preparation! The contrast between the crunchy crust and the smooth ganache is perfect. I used hazelnuts in the crust which added wonderful depth of flavor. My new go-to dessert recipe!", "name": "Textural Perfection", "reviewRating": { "@type": "Rating", "ratingValue": "5" } }, { "@type": "Review", "author": "Elena Marković", "datePublished": "2023-08-10", "reviewBody": "I'm making this weekly now! As someone with multiple food allergies, finding delicious desserts can be challenging. This tart is absolute perfection - the flavors develop even more after a day in the fridge. I love that it uses maple syrup instead of refined sugar too.", "name": "Allergy-Friendly Masterpiece", "reviewRating": { "@type": "Rating", "ratingValue": "5" } } ]}

{ "@context": "https://schema.org", "@type": "FAQPage", "mainEntity": [ { "@type": "Question", "name": "What ingredients are used in Vegan Gluten-Free Chocolate Tart?", "acceptedAnswer": { "@type": "Answer", "text": "This tart requires gluten-free oats, almond flour, coconut oil, maple syrup, dark chocolate (70% dairy-free), full-fat coconut milk, vanilla extract, and sea salt. Optional garnishes include fresh berries, chopped hazelnuts, and flaky sea salt." } }, { "@type": "Question", "name": "How to cook Vegan Gluten-Free Chocolate Tart at home?", "acceptedAnswer": { "@type": "Answer", "text": "Learn how to cook Vegan Gluten-Free Chocolate Tart by first making a nutty gluten-free crust from processed oats and almond flour, baking it until golden, then creating a silky chocolate ganache using dairy-free chocolate and coconut milk. Pour the ganache into the cooled crust, refrigerate for at least 4 hours, then garnish with berries and sea salt before serving." } }, { "@type": "Question", "name": "Can I make this chocolate tart without a food processor?", "acceptedAnswer": { "@type": "Answer", "text": "Yes, you can make this tart without a food processor by using pre-ground oat flour and mixing the crust ingredients by hand. Ensure the ingredients are well combined and press firmly into the tart pan. The texture may be slightly different but will still work beautifully." } }, { "@type": "Question", "name": "Why is my chocolate ganache filling not setting properly?", "acceptedAnswer": { "@type": "Answer", "text": "Ganache setting issues usually stem from incorrect chocolate-to-coconut milk ratios or insufficient chilling time. Ensure you're using full-fat coconut milk, proper chocolate percentages (70% works best), and refrigerate for at least 4 hours, preferably overnight." } }, { "@type": "Question", "name": "How far in advance can I make this dairy-free chocolate dessert?", "acceptedAnswer": { "@type": "Answer", "text": "This tart can be prepared up to 3 days in advance when stored properly in the refrigerator. The flavours actually develop and improve after 24 hours. If making ahead, add fresh garnishes just before serving for the best presentation and texture." } } ]}