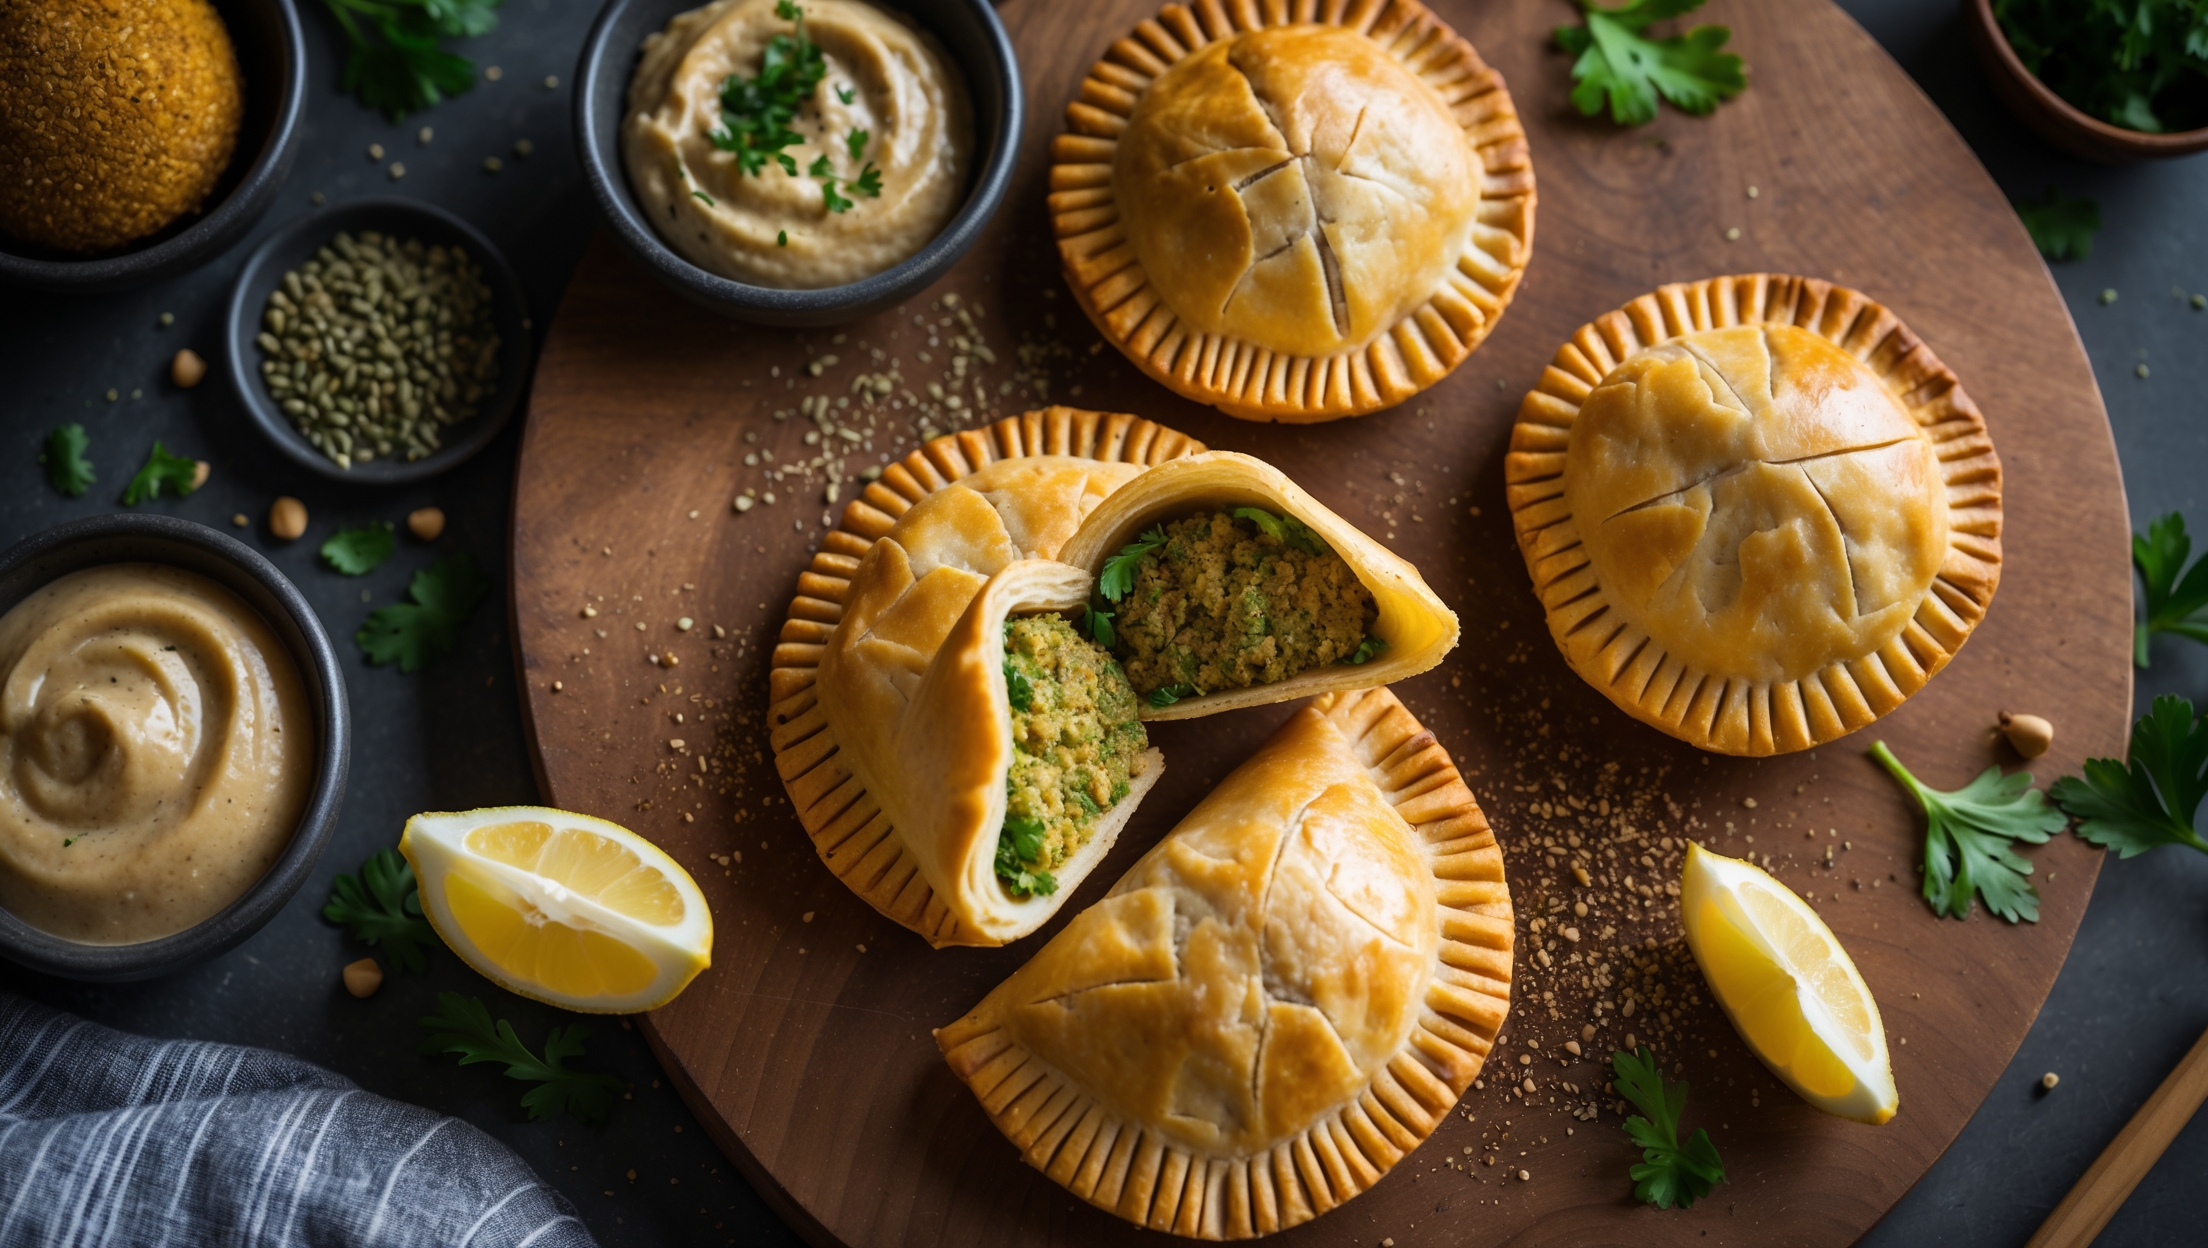
Directions
<ol class="no-list-style"><li class="MethodStepper"><h4 class="step-title">Step 1</h4>Start by making the pastry. In a large bowl, combine the flour, salt, and ground cumin. Add the cold cubed butter and rub it into the flour mixture using your fingertips until it resembles coarse breadcrumbs. The cold butter will create steam pockets during baking, resulting in flaky layers, so make sure your butter is properly chilled.</li><li class="MethodStepper"><h4 class="step-title">Step 2</h4>Gradually add the ice-cold water, a tablespoon at a time, mixing with a fork until the dough just comes together. You may not need all the water - stop when the dough holds together when pressed. The less you handle the dough, the more tender your pastry will be. Form the dough into a disc, wrap in plastic wrap, and refrigerate for at least 30 minutes.</li><li class="MethodStepper"><h4 class="step-title">Step 3</h4>While the dough chills, prepare your falafel filling. In a food processor, combine the chickpeas, onion, garlic, parsley, cilantro, and mint. Pulse until the mixture is coarsely ground but not pureed - you want some texture for authentic falafel. The fresh herbs are crucial here, providing that signature green color and fresh flavor that distinguishes great falafel.</li><li class="MethodStepper"><h4 class="step-title">Step 4</h4>Transfer the mixture to a bowl and add the olive oil, cumin, coriander, baking powder, cayenne, salt, and pepper. The baking powder helps create a lighter texture in the filling. Stir in the flour, which will bind the mixture together. Let the filling rest for 15 minutes to allow the flavors to meld and the flour to absorb moisture.</li><li class="MethodStepper"><h4 class="step-title">Step 5</h4>Preheat your oven to 200°C (390°F) and line two baking sheets with parchment paper. Remove the dough from the refrigerator and let it sit for 5 minutes to slightly soften for easier rolling.</li><li class="MethodStepper"><h4 class="step-title">Step 6</h4>On a lightly floured surface, roll the dough to about 3mm thickness. Using a 12cm round cutter or glass, cut out circles from the dough. Re-roll scraps as needed, but try to limit this to maintain tenderness. You should aim for approximately 12 circles.</li><li class="MethodStepper"><h4 class="step-title">Step 7</h4>Place about 1-2 tablespoons of falafel filling slightly off-center on each dough circle, leaving a 1cm border around the edges. Be careful not to overfill, as this can cause the pies to burst during baking. Press the filling gently to compact it.</li><li class="MethodStepper"><h4 class="step-title">Step 8</h4>Brush the edges of each circle with a little water, then fold the dough over to create a half-moon shape. Press the edges firmly to seal, then crimp with a fork or use your fingers to create a decorative edge. The tight seal is important to prevent filling from leaking during baking.</li><li class="MethodStepper"><h4 class="step-title">Step 9</h4>Transfer the hand pies to the prepared baking sheets, spacing them about 2.5cm apart. Using a knife, cut a small slit or two in the top of each pie to allow steam to escape. Brush the tops generously with beaten egg (this creates that beautiful golden color) and sprinkle with sesame seeds.</li><li class="MethodStepper"><h4 class="step-title">Step 10</h4>Bake in the preheated oven for 22-25 minutes, until the pies are golden brown and crisp. The bottom should be well-baked too, not soggy. Rotate the baking sheets halfway through for even browning.</li><li class="MethodStepper"><h4 class="step-title">Step 11</h4>Remove from the oven and let cool on the baking sheets for 5 minutes before transferring to a wire rack. This brief resting period allows the pastry to set and the filling to stabilize. Serve warm or at room temperature, perhaps with a tahini dipping sauce or tzatziki. These hand pies will stay fresh in an airtight container for 2-3 days and can be reheated in a 180°C oven for 5-7 minutes to restore crispness.</li></ol>