Kimchi Bread Rolls Recipe
Ingredients
Equipment
Directions
FAQs
Find answers to your most pressing questions about this delicious recipe right here.
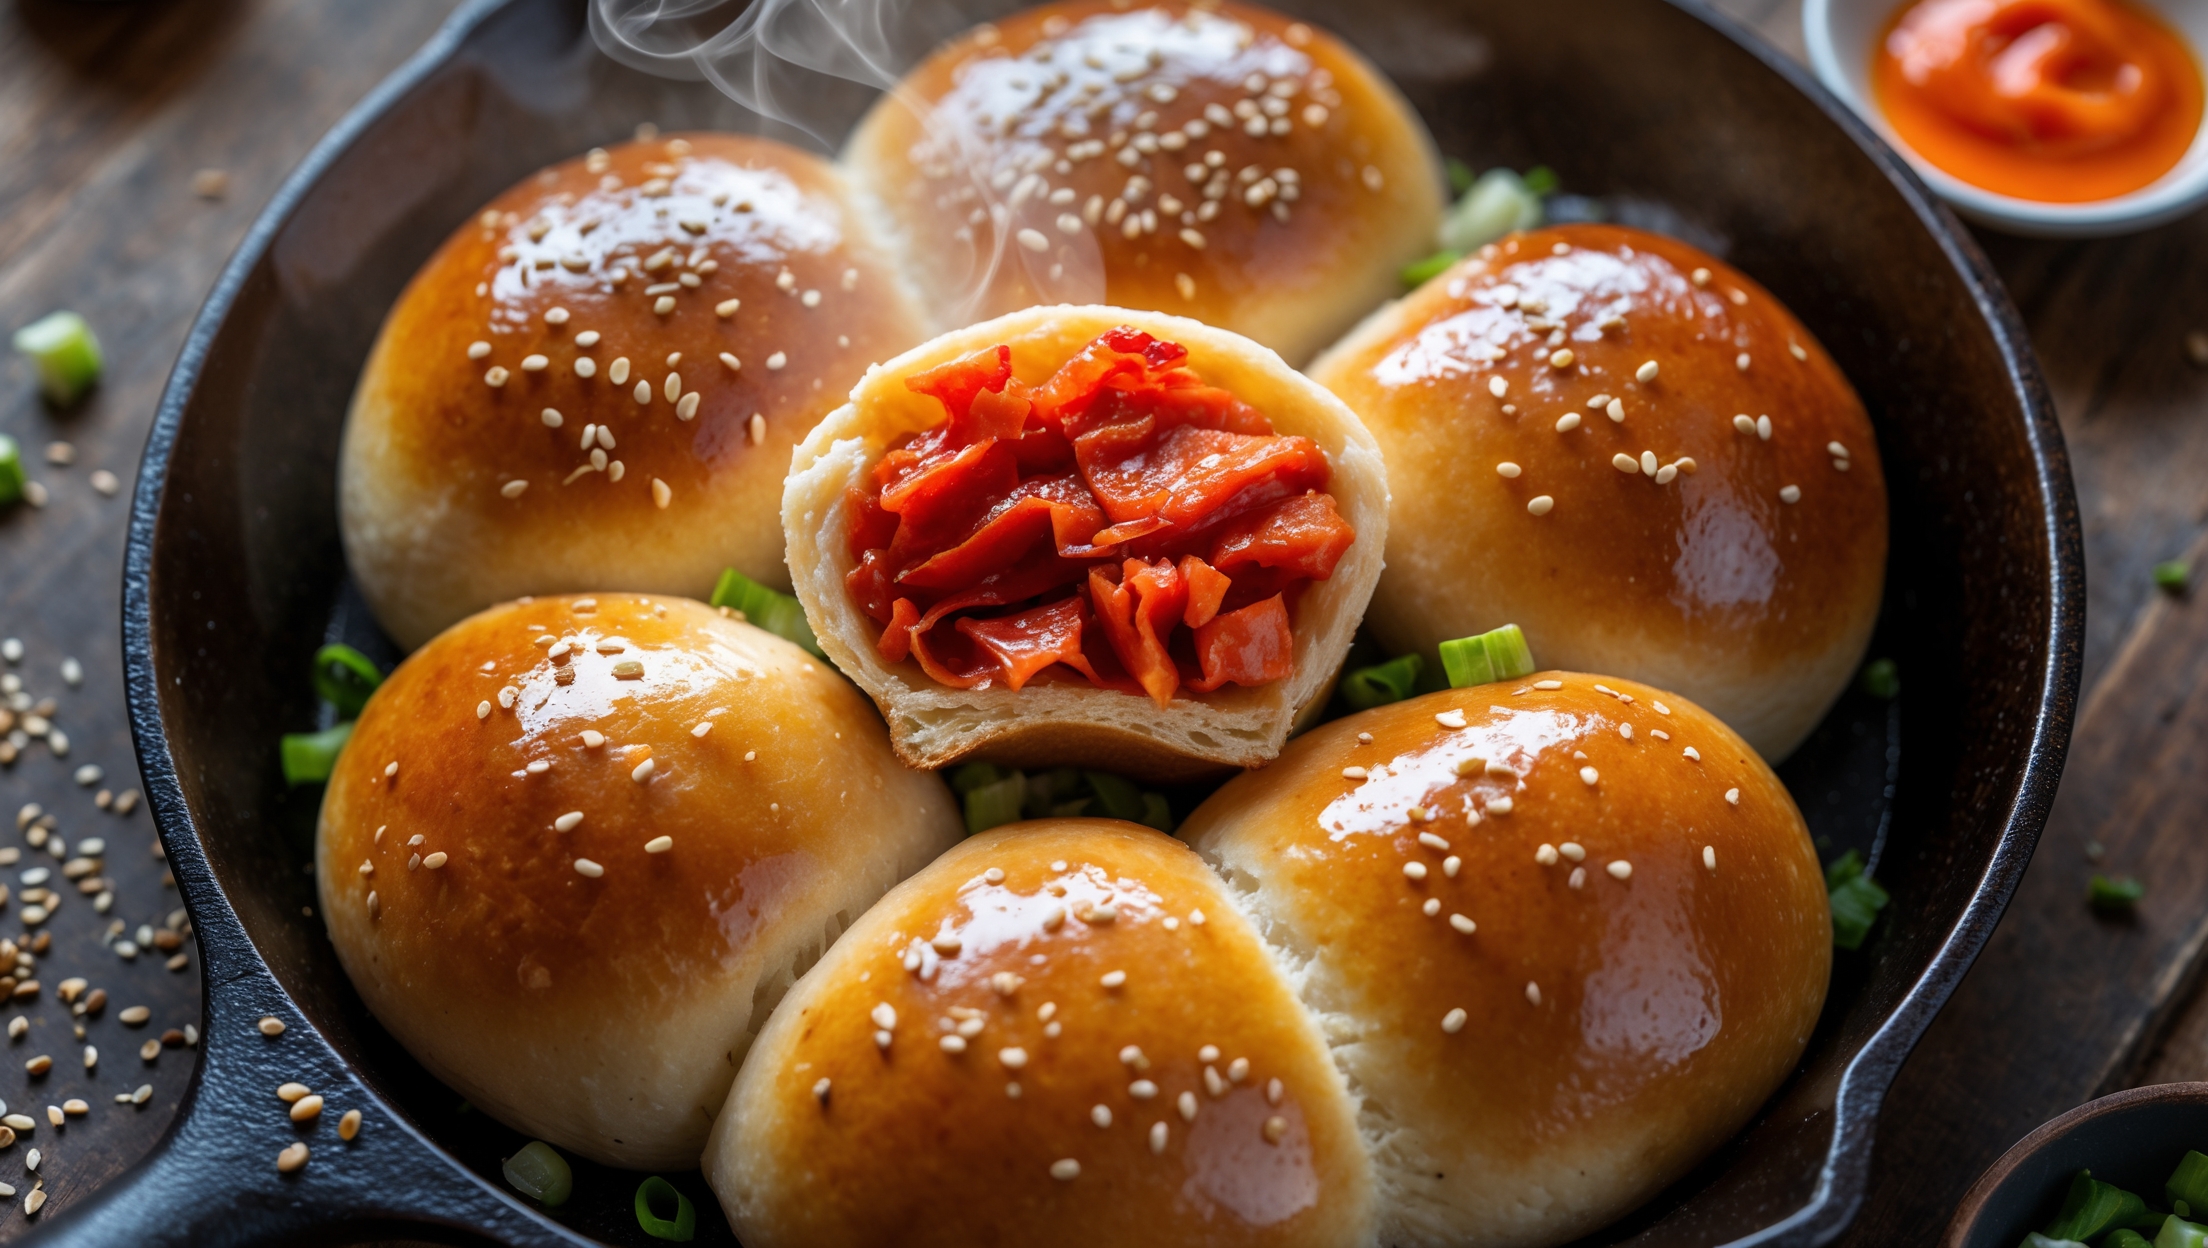
Kimchi Bread Rolls use bread flour, instant dry yeast, sugar, salt, milk, egg, butter, kimchi, kimchi juice, green onions, sesame oil, and sesame seeds. The key ingredient is the kimchi, which adds a spicy, tangy flavour throughout the soft dough.
Learn how to cook Kimchi Bread Rolls by mixing a dough with kimchi juice for flavour, adding chopped kimchi and green onions, allowing two rises for proper texture, and baking in a cast iron skillet until golden brown. The sesame oil brushed on top creates a glossy finish and enhances the Korean flavours in this fusion bread recipe.
Yes, these kimchi rolls can be prepared ahead of time. You can make the dough, shape the rolls and refrigerate overnight for a slow rise. Alternatively, fully bake them, cool completely, and freeze for up to 3 months. Reheat frozen rolls in a 150°C oven for 10-15 minutes.
For bread recipes, use well-fermented napa cabbage kimchi that's at least 2-3 weeks old for deeper flavour. Make sure to drain and chop it finely to distribute evenly throughout the dough. Avoid over-sour kimchi, which can affect yeast activity and opt for medium spice level for best results.
Properly proofed rolls will have nearly doubled in size and feel light and puffy. Press a finger gently into the dough - if the indentation springs back halfway, they're ready to bake. If it springs back completely, they need more time. If the dent remains, they're over-proofed.
International Dishes & Appetizers
Try following recommended recipes