Hazelnut Cream Pie Recipe
Ingredients
Equipment
Directions
FAQs
Find answers to your most pressing questions about this delicious recipe right here.
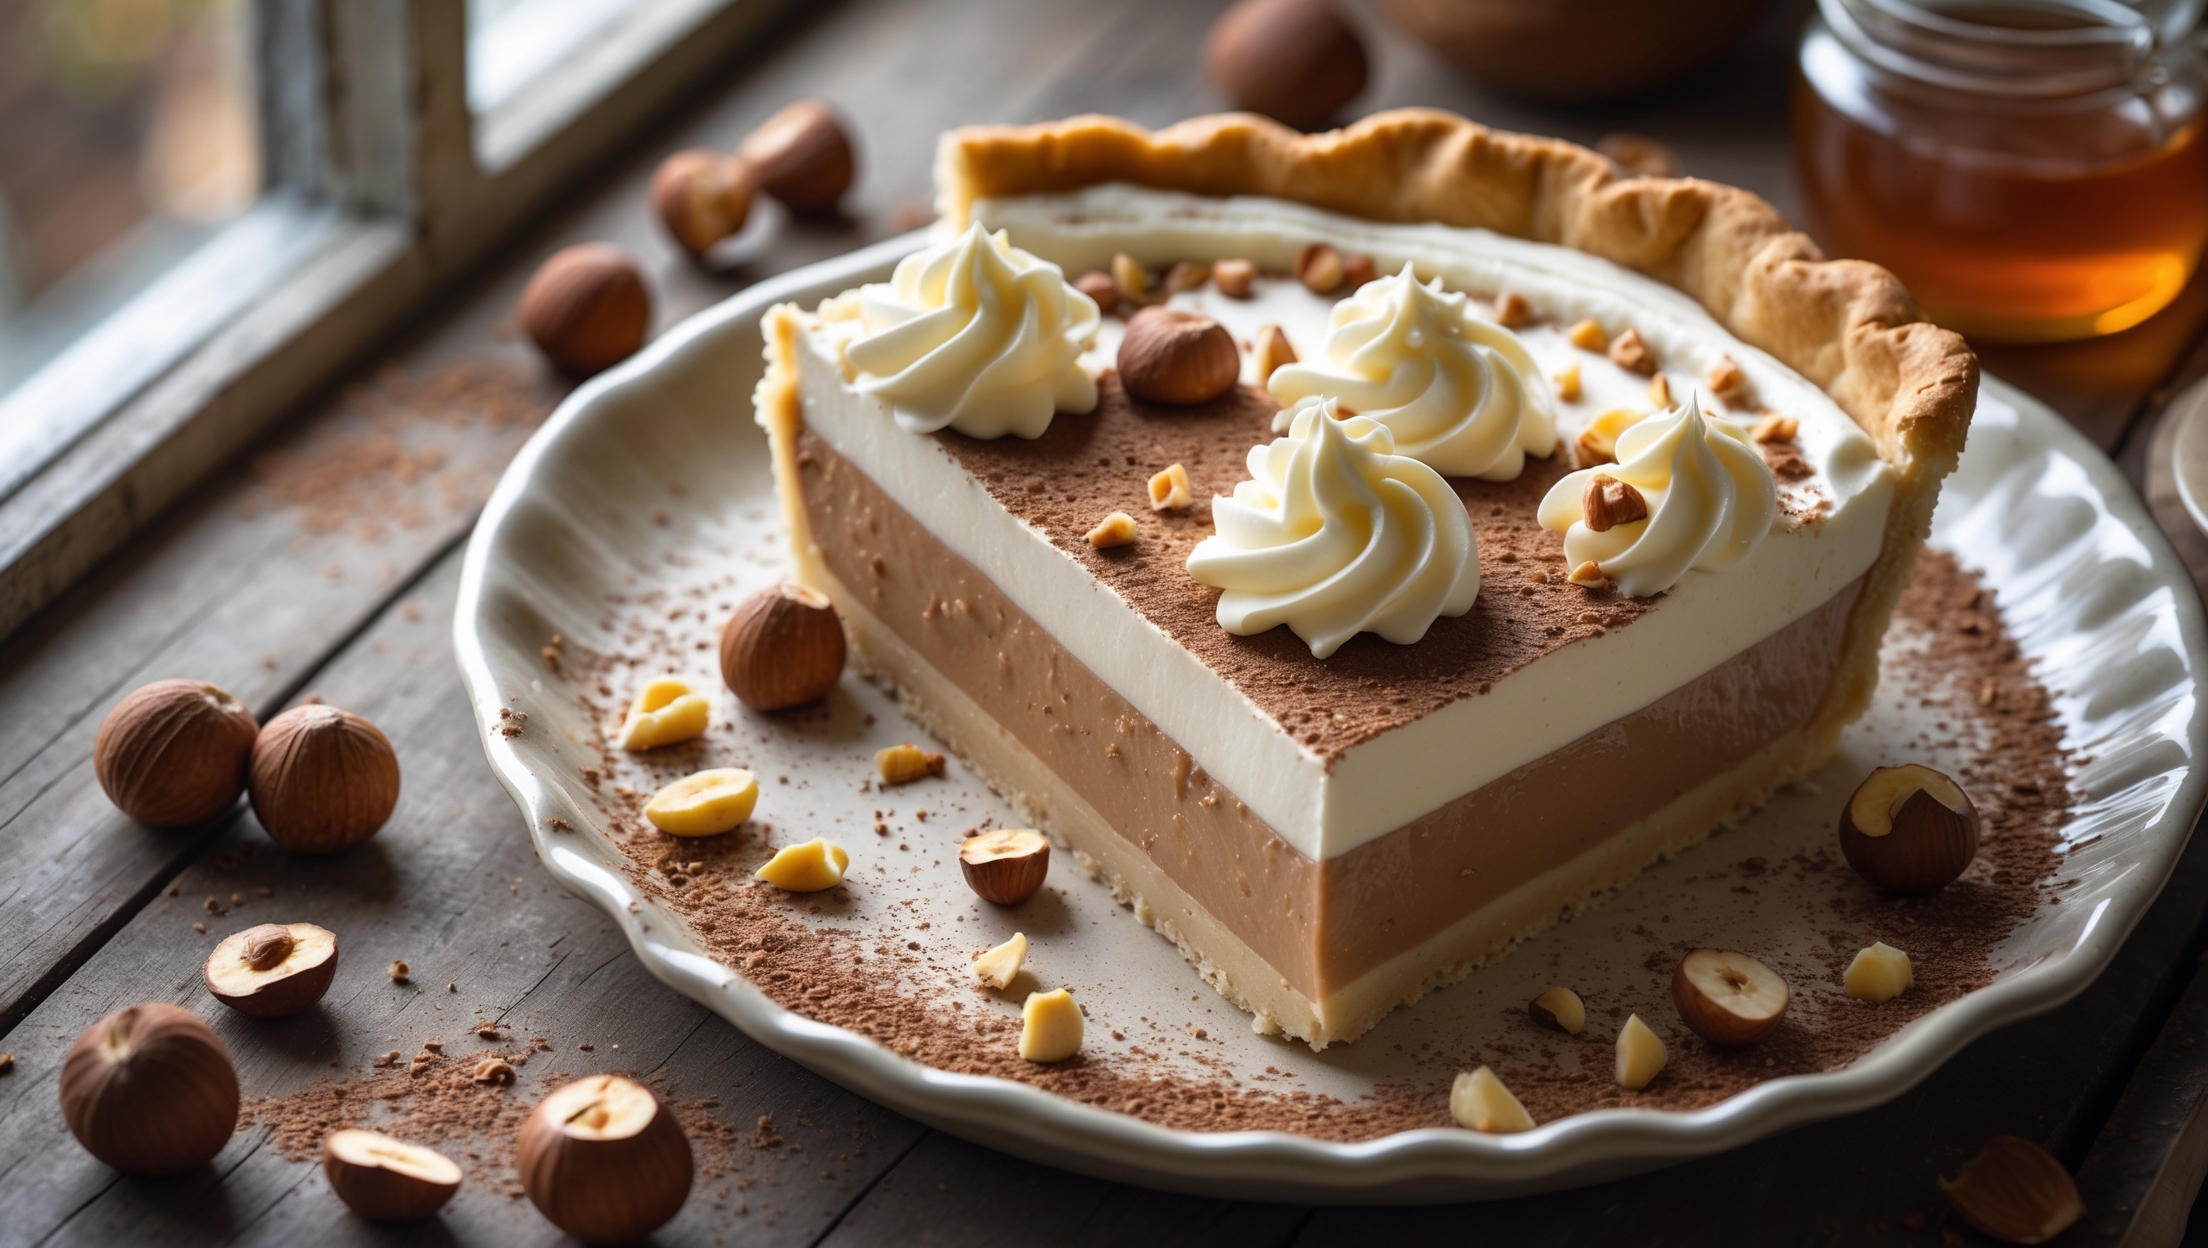
The main ingredients include blanched hazelnuts, whole milk, eggs, butter, and heavy cream. The buttery crust needs flour, butter, and egg yolk, while the silky filling combines hazelnuts with a custard base. The topping features whipped cream and toasted hazelnuts.
Learn how to cook Hazelnut Cream Pie by first blind baking a buttery shortcrust, then creating a silky hazelnut custard filling that needs to be cooked until thickened. The pie requires proper chilling (at least 4 hours) for the custard to set before being topped with freshly whipped cream and garnished with toasted hazelnuts.
Blind baking prevents the dreaded "soggy bottom" by creating a barrier between the wet filling and the pastry. For custard pies, this step is essential as it ensures the crust is partially cooked before adding the moist filling, resulting in a crisp, fully-baked base that maintains its texture.
Absolutely! This dessert actually benefits from being made 1-2 days ahead. The hazelnut flavours intensify and meld beautifully when allowed to rest overnight in the refrigerator. Simply add the whipped cream topping and garnish just before serving for the freshest presentation.
The key is proper tempering of eggs (slowly adding hot milk while constantly whisking), straining the custard through a fine-mesh sieve to remove any lumps, and processing the hazelnuts long enough (5-7 minutes) to release their oils and create a smooth paste that incorporates seamlessly.
Cream Pies
Try following recommended recipes