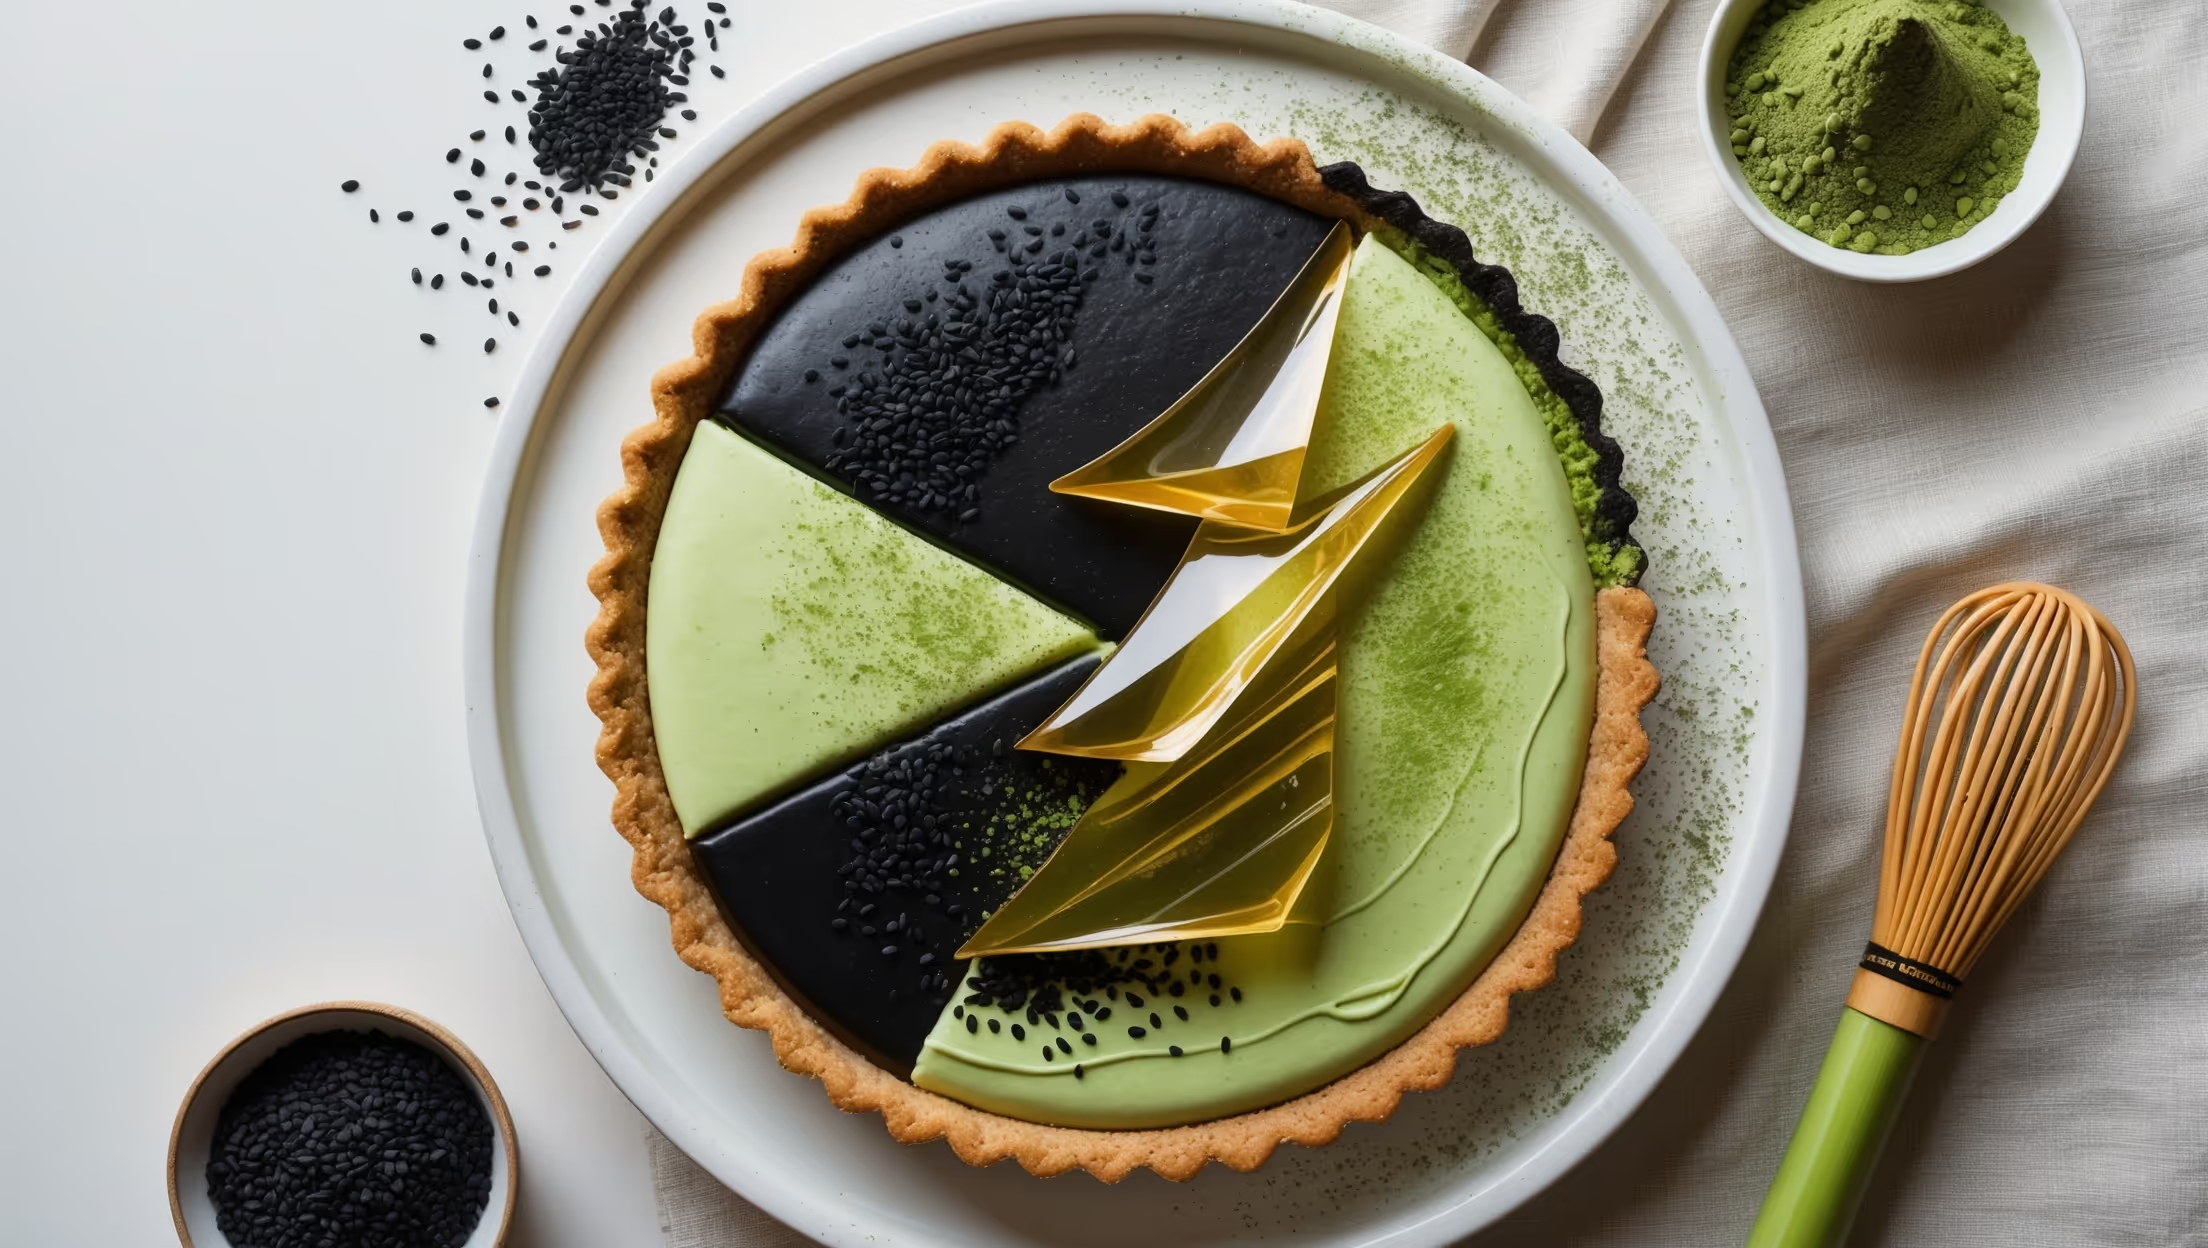
Directions
<ol class="no-list-style"><li class="MethodStepper"><h4 class="step-title">Step 1</h4>Begin by preparing the cookie crust. Preheat your oven to 180°C. In a food processor, pulse the digestive biscuits until they form fine crumbs. Mix thoroughly with melted butter, sugar, and salt until the mixture resembles wet sand. The butter acts as a binding agent that will solidify when chilled, creating a sturdy base for your layers.</li><li class="MethodStepper"><h4 class="step-title">Step 2</h4>Press the crumb mixture firmly and evenly into the bottom and slightly up the sides of your springform pan. Use the bottom of a measuring cup to compact the crust, creating a smooth, even surface. Bake for 10 minutes until lightly golden and aromatic. Allow to cool completely on a wire rack - patience here ensures your crust won't make your cream layers melt!</li><li class="MethodStepper"><h4 class="step-title">Step 3</h4>While the crust cools, prepare the gelatin base. Sprinkle the powdered gelatin over cold water in a small bowl and let it bloom for 5 minutes until completely absorbed. The gelatin will look swollen and jelly-like when properly bloomed. Microwave for 10-15 seconds until just melted (but not hot), then set aside to cool slightly.</li><li class="MethodStepper"><h4 class="step-title">Step 4</h4>In a large bowl, beat the cream cheese until smooth and fluffy, about 2 minutes. Gradually add the condensed milk while continuing to beat until well incorporated. The mixture should be silky smooth with no lumps - lumps at this stage will be impossible to remove later!</li><li class="MethodStepper"><h4 class="step-title">Step 5</h4>In a separate chilled bowl, whip 400ml of the heavy cream to soft peaks. Gently fold the whipped cream into the cream cheese mixture in three additions, maintaining as much air as possible for a light, mousse-like texture. Then carefully fold in the bloomed gelatin until just combined.</li><li class="MethodStepper"><h4 class="step-title">Step 6</h4>Divide the cream mixture equally between two bowls. Into one bowl, fold in the black sesame paste until evenly distributed and completely grey-black in color. Into the second bowl, sift and fold in the matcha powder until you achieve a vibrant green color with no specks. Taste each mixture and adjust flavors if needed.</li><li class="MethodStepper"><h4 class="step-title">Step 7</h4>Pour the black sesame cream mixture over the cooled crust and smooth with an offset spatula. Place in the refrigerator for about 30 minutes or until the layer is just set enough to support the next layer. The layer should be firm to a gentle touch but not completely solid.</li><li class="MethodStepper"><h4 class="step-title">Step 8</h4>Once set, gently pour the matcha cream layer over the black sesame layer, smoothing carefully with your offset spatula to create a clean, level surface. Return to the refrigerator and chill for at least 4 hours, preferably overnight. The extended chilling time allows the gelatin to fully set and the flavors to develop.</li><li class="MethodStepper"><h4 class="step-title">Step 9</h4>For the sugar art, line a baking sheet with a silicone mat or parchment paper. In a small, heavy-bottomed saucepan, combine 100g sugar and 30ml water. Do not stir after this point! Heat over medium-high until the mixture reaches 150°C on a candy thermometer (hard crack stage). The syrup will gradually turn amber as the water evaporates and the sugar caramelizes.</li><li class="MethodStepper"><h4 class="step-title">Step 10</h4>Immediately remove from heat when the desired temperature is reached. Working quickly, drizzle the hot sugar syrup onto your prepared surface in artistic patterns. You can create shards, spirals, or free-form shapes. Allow to cool completely until hardened and crystal clear - about 10 minutes. Be extremely careful as the sugar is dangerously hot!</li><li class="MethodStepper"><h4 class="step-title">Step 11</h4>To finish the pie, whip the remaining 100ml of heavy cream to stiff peaks. Transfer to a piping bag fitted with a star tip and pipe decorative rosettes around the edge of the set pie. Carefully remove the sides of the springform pan before decorating.</li><li class="MethodStepper"><h4 class="step-title">Step 12</h4>Just before serving, arrange your sugar art pieces on top of the pie, gently pressing the base of each piece into the cream to secure it. Sprinkle black sesame seeds around the edge and dust lightly with matcha powder for a professional finishing touch. For the most dramatic presentation, serve immediately while the sugar art is still glossy and transparent.</li></ol>