Dragon Fruit Cream Pie Recipe

A vibrant tropical delight featuring a buttery graham cracker crust, silky dragon fruit pastry cream, and clouds of whipped topping – combining exotic flavor with dreamy texture in every slice.
Difficulty:
Intermediate
Prep Time:
30 mins
Cook Time:
15 mins
Serves:
1 pie (8 slices)
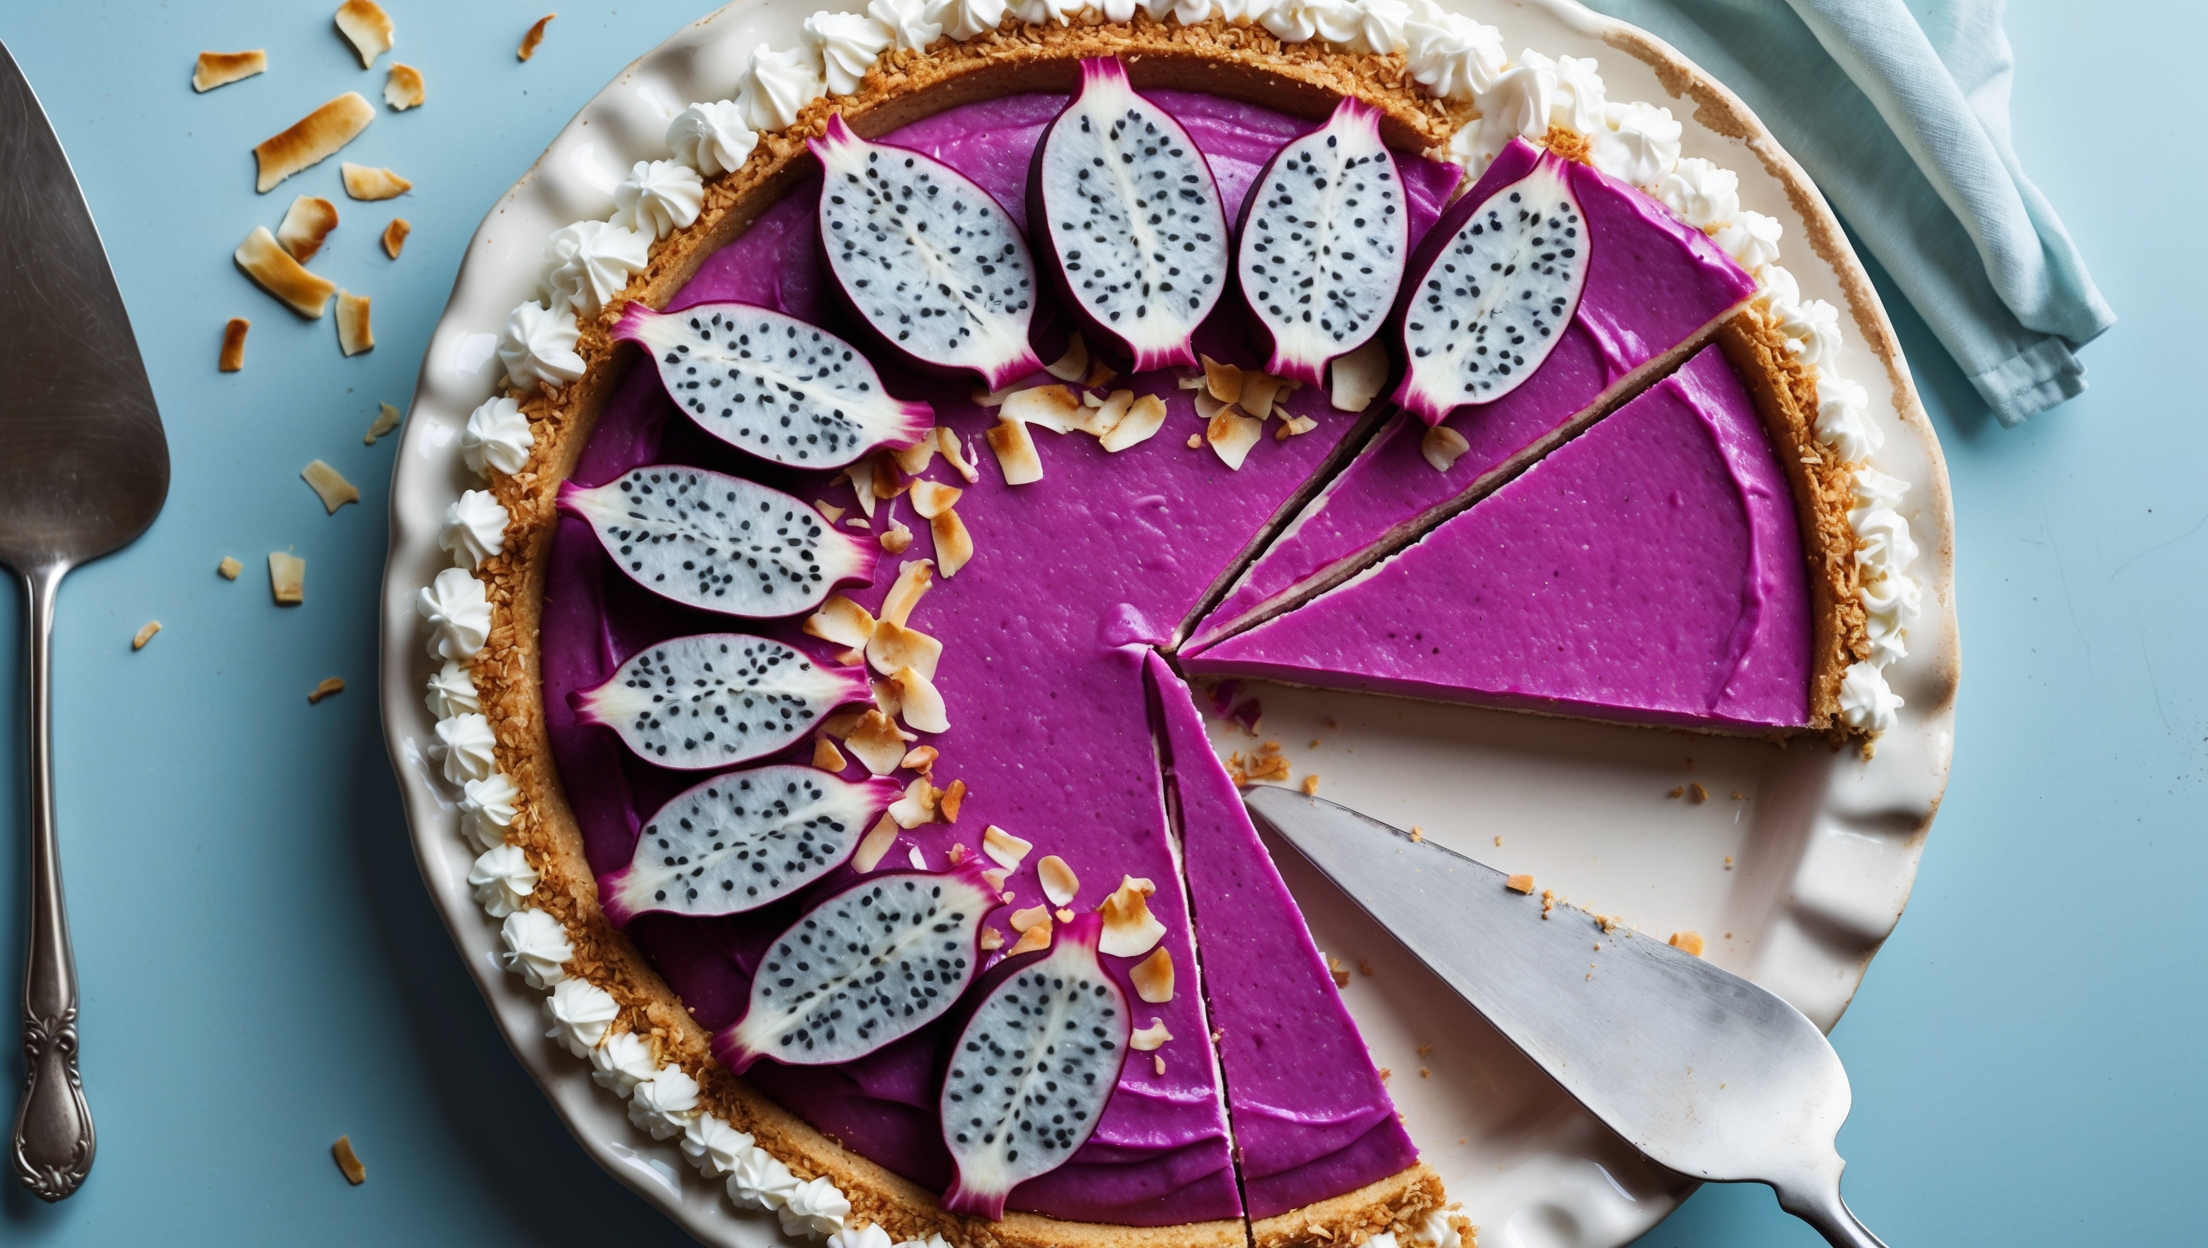
An overhead shot of a perfectly sliced dragon fruit cream pie displayed on a white ceramic cake stand against a light blue backdrop. Soft natural light accentuates the pie's vivid magenta filling, contrasting beautifully with the golden graham cracker crust and crown of fluffy white whipped cream. Dragon fruit slices arranged in a decorative pattern showcase their striking black and white speckled interior, while a scattering of toasted coconut flakes adds texture. A vintage silver cake server rests beside the pie, with a single slice separated to reveal the smooth, vibrant layers and clean-cut edges of the custard filling.

Ingredients

<ul class="ingredients-main-list"><li class="ingredients-single-item">For the Crust:</li><li class="ingredients-single-item">200g graham crackers (or digestive biscuits)</li><li class="ingredients-single-item">85g unsalted butter, melted</li><li class="ingredients-single-item">50g granulated sugar</li><li class="ingredients-single-item">1g salt</li><li class="ingredients-single-item">For the Dragon Fruit Filling:</li><li class="ingredients-single-item">400g red/magenta dragon fruit flesh (from approximately 2 large fruits)</li><li class="ingredients-single-item">150g granulated sugar</li><li class="ingredients-single-item">60g cornstarch</li><li class="ingredients-single-item">5 large egg yolks</li><li class="ingredients-single-item">480ml whole milk</li><li class="ingredients-single-item">120ml heavy cream</li><li class="ingredients-single-item">1 vanilla bean, split and scraped (or 2 tsp vanilla extract)</li><li class="ingredients-single-item">2g salt</li><li class="ingredients-single-item">For the Topping:</li><li class="ingredients-single-item">240ml heavy whipping cream, cold</li><li class="ingredients-single-item">30g powdered sugar</li><li class="ingredients-single-item">5ml vanilla extract</li><li class="ingredients-single-item">30g toasted coconut flakes (optional)</li><li class="ingredients-single-item">Additional dragon fruit slices for garnish</li></ul>

Equipment

<ul class="equipment-main-list"><li class="equipment-single-item">23cm (9-inch) pie dish</li><li class="equipment-single-item">Food processor</li><li class="equipment-single-item">Medium saucepan</li><li class="equipment-single-item">Fine mesh sieve</li><li class="equipment-single-item">Stand mixer or electric hand mixer</li><li class="equipment-single-item">Rubber spatula</li></ul>
BAKE SMARTER

Kitchen Converter

Quickly switch between common baking units without leaving the recipe.

Convert
Result—

Volume uses US cups, tablespoons, and teaspoons. Converting weight to volume depends on the ingredient.

Directions

<ol class="no-list-style"><li class="MethodStepper"><h4 class="step-title">Step 1</h4>Begin by preparing the graham cracker crust. Preheat your oven to 175°C. In a food processor, pulse the graham crackers until they form fine crumbs. Pour into a bowl and mix with the melted butter, sugar, and salt until the mixture resembles wet sand. The butter acts as the binding agent, while the sugar adds sweetness and helps the crust caramelize slightly during baking.</li><li class="MethodStepper"><h4 class="step-title">Step 2</h4>Press the crumb mixture firmly and evenly into your pie dish, extending up the sides. Use the flat bottom of a measuring cup to compact the crumbs – this creates a sturdy base that won't crumble when sliced. Bake for 10-12 minutes until lightly golden and fragrant. The brief baking sets the crust and enhances its nutty flavor. Cool completely on a wire rack.</li><li class="MethodStepper"><h4 class="step-title">Step 3</h4>For the dragon fruit filling, start by pureeing the dragon fruit flesh in a blender until completely smooth. Pass through a fine mesh sieve to remove any seeds, which would disrupt the silky texture of your custard. You should have approximately 350ml of smooth dragon fruit puree with a vibrant magenta color.</li><li class="MethodStepper"><h4 class="step-title">Step 4</h4>In a medium bowl, whisk together the egg yolks, 60g of the sugar, and cornstarch until well combined and slightly lightened in color. The cornstarch and egg yolks will work together to thicken your custard, while the high-fat content of the yolks adds richness and a velvety mouthfeel.</li><li class="MethodStepper"><h4 class="step-title">Step 5</h4>In a medium saucepan, combine the milk, heavy cream, remaining sugar, vanilla bean (or extract), and salt. Heat over medium until steaming but not boiling. The fat in the dairy creates a more luxurious custard, while the vanilla and salt enhance the fruit flavor.</li><li class="MethodStepper"><h4 class="step-title">Step 6</h4>Temper the egg yolk mixture by slowly streaming about 120ml of the hot milk mixture into the eggs while whisking constantly. This crucial step gradually raises the temperature of the eggs without scrambling them. Then pour the tempered egg mixture back into the saucepan with the remaining milk mixture.</li><li class="MethodStepper"><h4 class="step-title">Step 7</h4>Cook the custard over medium heat, whisking constantly, until it thickens and begins to bubble. Once bubbling, continue to cook for exactly 1 minute (set a timer!) to ensure the cornstarch reaches its full thickening power. The mixture should coat the back of a spoon and when you draw your finger through it, the line should hold.</li><li class="MethodStepper"><h4 class="step-title">Step 8</h4>Remove from heat and whisk in the dragon fruit puree until fully incorporated. The acidity in the fruit will brighten the flavor and help set the custard further. Pour through a sieve into a clean bowl to ensure absolute smoothness.</li><li class="MethodStepper"><h4 class="step-title">Step 9</h4>Press plastic wrap directly onto the surface of the custard to prevent a skin from forming, then cool to room temperature. Once cooled, pour the filling into your prepared crust and refrigerate for at least 4 hours, preferably overnight. The extended chilling time allows the filling to set completely and the flavors to meld beautifully.</li><li class="MethodStepper"><h4 class="step-title">Step 10</h4>Just before serving, prepare the whipped topping. In a chilled bowl, whip the cold heavy cream with powdered sugar and vanilla until stiff peaks form. The cold temperature allows the cream to incorporate more air, resulting in a lighter, more stable whipped cream. Spoon or pipe decoratively over the pie.</li><li class="MethodStepper"><h4 class="step-title">Step 11</h4>Garnish with toasted coconut flakes and fresh dragon fruit slices arranged in a pattern of your choice. The contrasting textures and colors make for a stunning presentation. For the cleanest slices, dip your knife in hot water and wipe dry between cuts. Serve chilled and enjoy your exotic creation!</li></ol>
Nutrition Facts (per serving)

🍽️ Serving Size: 1 slice
🔥 Calories: 325 calories
🥑 Fat: 18 g
🧈 Saturated Fat: 10 g
🍞 Carbohydrates: 38 g
🍭 Sugar: 24 g
🍗 Protein: 4 g
🫀 Cholesterol: 175 mg
🧂 Sodium: 175 mg

Chef’s Notes

A few helpful details for making this recipe.

Can I use white dragon fruit instead of red/magenta for this pie?

While white dragon fruit works functionally, it won't produce the stunning pink colour that makes this dessert so visually striking. The red/magenta variety contains natural pigments that create the vibrant filling. White dragon fruit will result in a more subtle, cream-coloured pie.

What's the best way to achieve a perfectly smooth dragon fruit custard?

For silky-smooth custard, strain the dragon fruit puree to remove seeds, temper the eggs properly to prevent curdling, and strain the final mixture again. Constant whisking while cooking prevents lumps, and the precise 1-minute final cooking time ensures proper thickening without graininess.

How far in advance can I prepare this tropical cream pie?

You can prepare the pie up to 2 days ahead, keeping it refrigerated with the filling in the crust. Add the whipped cream topping and fruit garnish no more than 4 hours before serving for the freshest presentation and optimal texture contrast.

Want to try something else in ...

More recipes you might like

Keep exploring with more recipes from What's Baking.
