Date Cream Pie Recipe

A luscious, silky cream pie with a velvety date filling nestled in a buttery crust, topped with clouds of whipped cream and a sprinkle of cinnamon.
Difficulty:
Intermediate
Prep Time:
45 mins
Cook Time:
40 mins
Serves:
1 pie (8 slices)
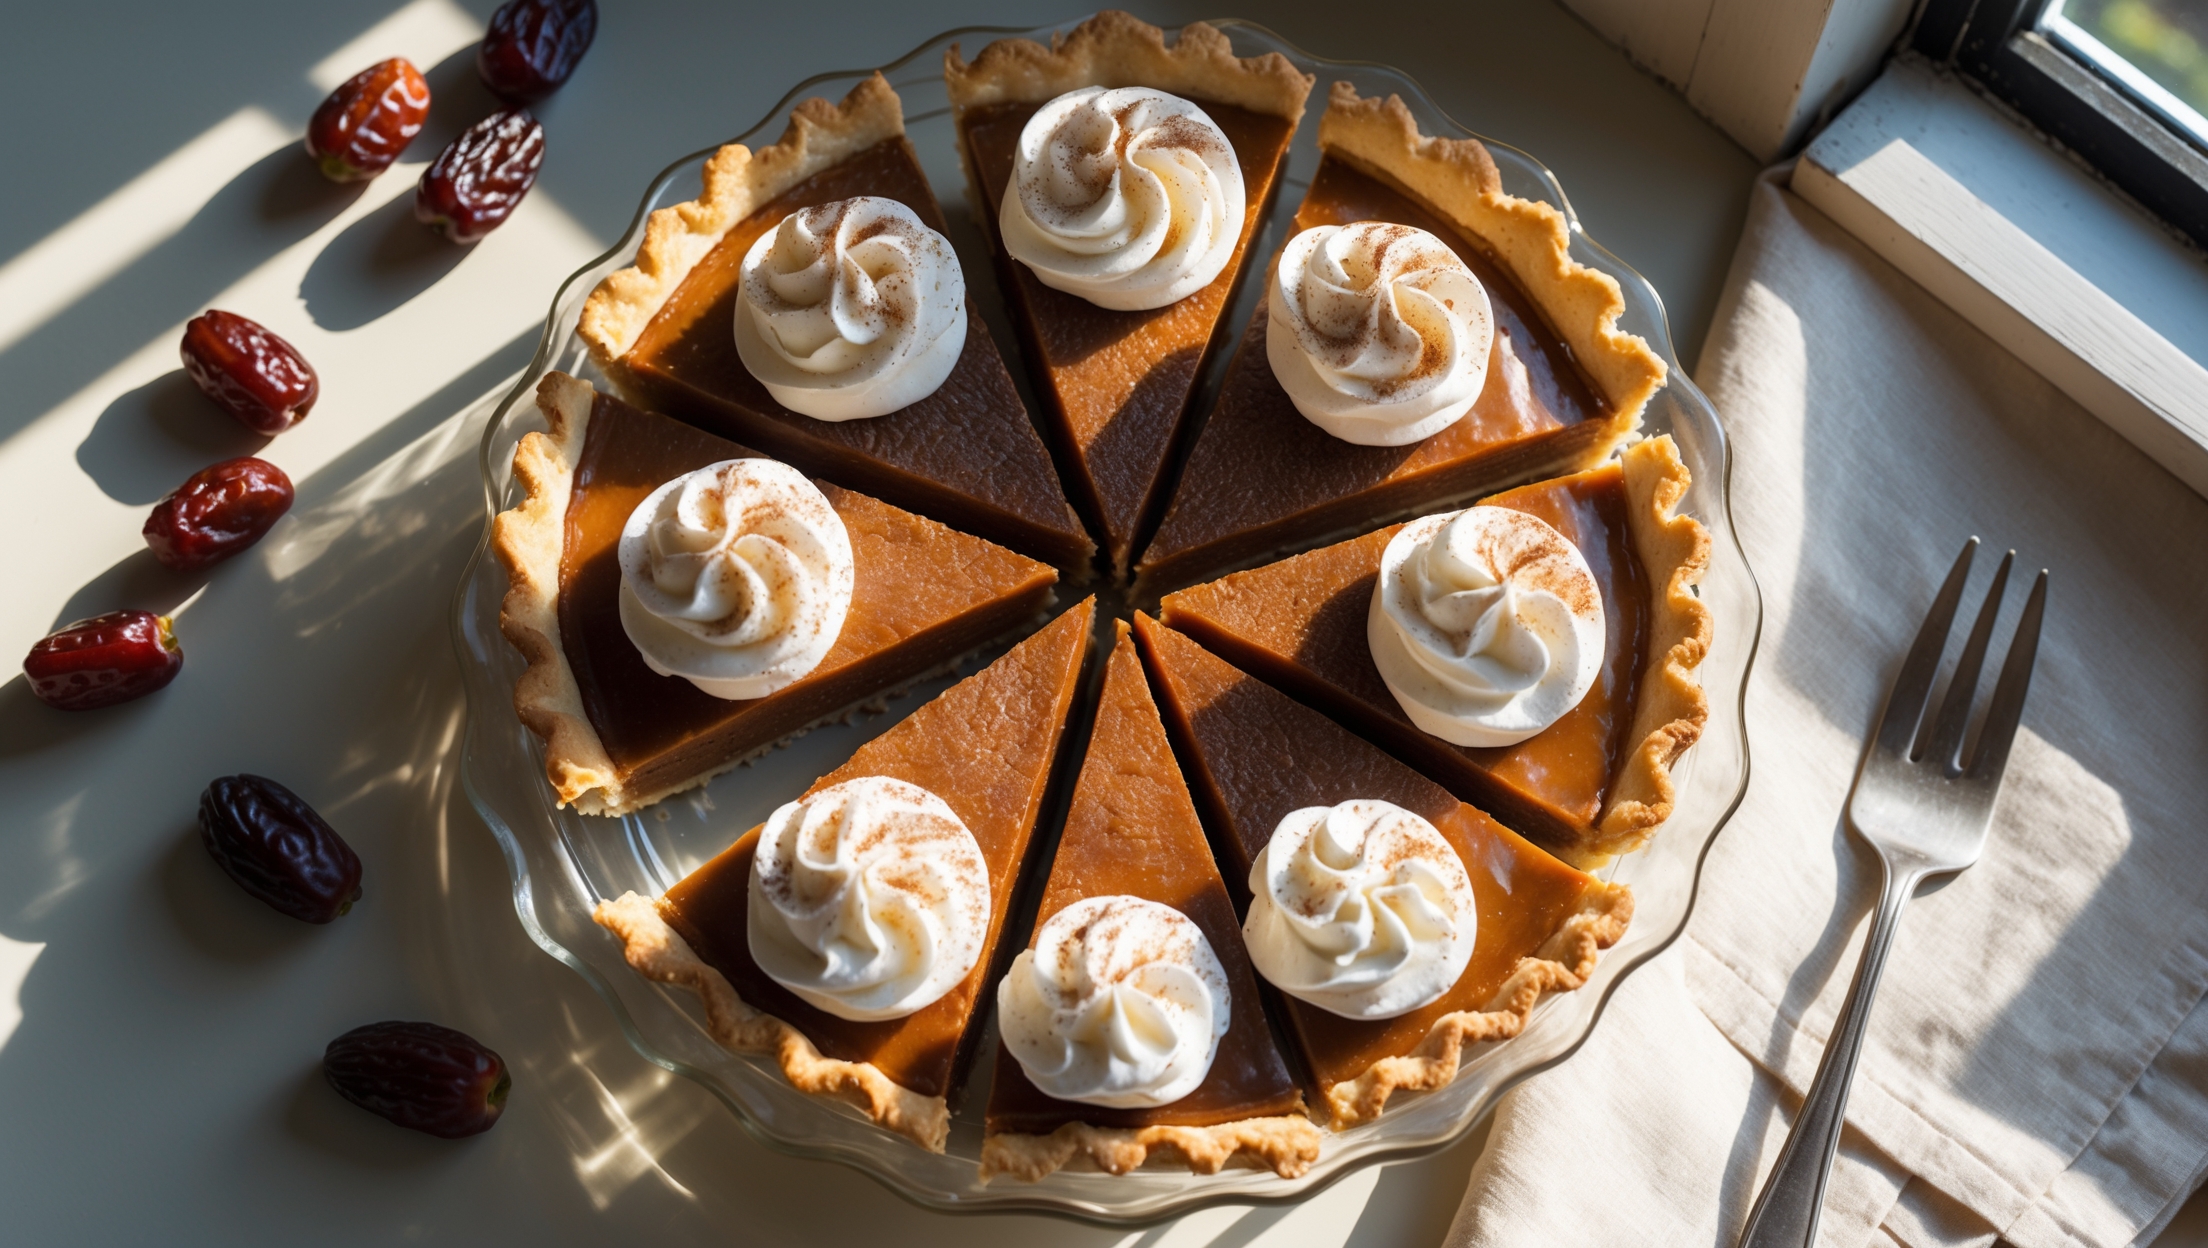
An overhead shot of a perfectly sliced date cream pie on a vintage milk glass cake stand, revealing its three distinct layers - the golden-brown flaky crust, rich amber-colored date filling, and pillowy whipped cream topping dusted with cinnamon. The natural light streaming through a nearby window highlights the glossy surface of the filling and creates gentle shadows that emphasize the pie's texture. Scattered dates and cinnamon sticks artfully arranged alongside the pie provide context and color contrast, while a silver dessert fork rests on a cream linen napkin, suggesting the imminent pleasure of the first bite.

Ingredients

<ul class="ingredients-main-list"><li class="ingredients-single-item">For the crust:</li><li class="ingredients-single-item">200g all-purpose flour</li><li class="ingredients-single-item">1/2 tsp salt</li><li class="ingredients-single-item">2 tbsp granulated sugar</li><li class="ingredients-single-item">115g cold unsalted butter, cubed</li><li class="ingredients-single-item">4-6 tbsp ice-cold water</li><li class="ingredients-single-item">For the date filling:</li><li class="ingredients-single-item">300g pitted dates, chopped</li><li class="ingredients-single-item">250ml water</li><li class="ingredients-single-item">50g brown sugar</li><li class="ingredients-single-item">1/2 tsp cinnamon</li><li class="ingredients-single-item">1/4 tsp nutmeg</li><li class="ingredients-single-item">Pinch of salt</li><li class="ingredients-single-item">1 tsp vanilla extract</li><li class="ingredients-single-item">For the cream layer:</li><li class="ingredients-single-item">250ml heavy cream</li><li class="ingredients-single-item">60g powdered sugar</li><li class="ingredients-single-item">1 tsp vanilla extract</li><li class="ingredients-single-item">For garnish:</li><li class="ingredients-single-item">1/2 tsp ground cinnamon</li><li class="ingredients-single-item">2 tbsp chopped toasted walnuts (optional)</li></ul>

Equipment

<ul class="equipment-main-list"><li class="equipment-single-item">23cm (9-inch) pie dish</li><li class="equipment-single-item">Food processor (optional for crust)</li><li class="equipment-single-item">Rolling pin</li><li class="equipment-single-item">Pie weights or dried beans</li><li class="equipment-single-item">Stand mixer or electric hand mixer</li></ul>
BAKE SMARTER

Kitchen Converter

Quickly switch between common baking units without leaving the recipe.

Convert
Result—

Volume uses US cups, tablespoons, and teaspoons. Converting weight to volume depends on the ingredient.

Directions

<ol class="no-list-style"><li class="MethodStepper"><h4 class="step-title">Step 1</h4>Begin with the pie crust. In a large bowl, whisk together the flour, salt, and sugar. Add the cold cubed butter and use a pastry cutter or your fingertips to work it into the flour until the mixture resembles coarse breadcrumbs with some pea-sized pieces of butter remaining (these butter pockets will create flaky layers in your crust).</li><li class="MethodStepper"><h4 class="step-title">Step 2</h4>Drizzle in 4 tablespoons of ice-cold water and stir with a fork until the dough begins to come together. Add more water, 1 tablespoon at a time, only if needed. The dough should hold together when squeezed but shouldn't feel wet or sticky. Working quickly to keep the butter cold, form the dough into a disc, wrap in plastic wrap, and refrigerate for at least 1 hour.</li><li class="MethodStepper"><h4 class="step-title">Step 3</h4>While the dough chills, prepare the date filling. Combine the chopped dates, water, brown sugar, cinnamon, nutmeg, and salt in a medium saucepan. Bring to a simmer over medium heat and cook, stirring occasionally, for about 10-12 minutes until the dates have softened completely and the mixture has thickened to a spreadable consistency. Remove from heat and stir in the vanilla extract. Allow to cool completely.</li><li class="MethodStepper"><h4 class="step-title">Step 4</h4>Preheat your oven to 190°C (375°F). On a lightly floured surface, roll out your chilled dough to about 3mm (⅛-inch) thickness and about 30cm (12 inches) in diameter. Carefully transfer to your pie dish, gently pressing it into the corners without stretching the dough (stretching leads to shrinkage during baking). Trim the excess, leaving a 2cm (¾-inch) overhang, then fold and crimp the edges.</li><li class="MethodStepper"><h4 class="step-title">Step 5</h4>Line the pie crust with parchment paper and fill with pie weights or dried beans. Blind bake for 15 minutes, then remove the weights and parchment and continue baking for another 10-12 minutes until the crust is golden brown. The blind baking ensures your crust will be fully cooked and crisp, not soggy. Cool completely on a wire rack.</li><li class="MethodStepper"><h4 class="step-title">Step 6</h4>Once the crust and date filling have cooled completely, spread the date filling evenly into the pie crust. The filling should be thick but spreadable - if it seems too firm, you can warm it slightly or add a tablespoon of hot water and mix to loosen.</li><li class="MethodStepper"><h4 class="step-title">Step 7</h4>For the cream layer, in a cold bowl (chilling your bowl in the freezer for 10 minutes helps the cream whip better), beat the heavy cream, powdered sugar, and vanilla extract with an electric mixer until stiff peaks form. Watch carefully - overbeating will turn your cream into butter! The cream should be billowy but hold its shape when the beater is lifted.</li><li class="MethodStepper"><h4 class="step-title">Step 8</h4>Spread or pipe the whipped cream over the date filling, creating decorative swirls if desired. Dust the top with ground cinnamon and sprinkle with chopped toasted walnuts if using. Refrigerate the pie for at least 2 hours or overnight to allow the flavors to meld and the pie to set properly.</li><li class="MethodStepper"><h4 class="step-title">Step 9</h4>When ready to serve, use a sharp knife dipped in hot water (and wiped dry) between cuts for clean slices. This pie is best enjoyed cold and will keep in the refrigerator for up to 3 days, though the crust will gradually soften over time.</li></ol>
Nutrition Facts (per serving)

🍽️ Serving Size: 1 slice
🔥 Calories: 425 calories
🥑 Fat: 24 g
🧈 Saturated Fat: 14 g
🍞 Carbohydrates: 51 g
🍭 Sugar: 38 g
🍗 Protein: 4 g
🫀 Cholesterol: 75 mg
🧂 Sodium: 210 mg

Chef’s Notes

A few helpful details for making this recipe.

Can I make this pie without blind baking the crust?

Blind baking is essential for this recipe to prevent a soggy bottom. The moisture from the date filling would seep into an unbaked crust, resulting in an undercooked, doughy texture. The pre-baking step creates a barrier that keeps your pie crust crisp and flaky.

How do I know when my date filling has reached the right consistency?

The date filling should be thick enough to hold its shape when spread but not so dry it's difficult to work with. It should resemble a spreadable paste. When a spoon dragged through leaves a trail that slowly fills back in, it's ready. If too thick, add a splash of hot water.

What's the best way to store a cream-topped pie to maintain its freshness?

Store your cream-topped pie in the refrigerator, covered loosely with cling film or in a pie keeper to prevent the cream from sticking. It will stay fresh for up to 3 days, though the crust will gradually soften. For best texture and flavour, consume within 48 hours.

Want to try something else in ...

More recipes you might like

Keep exploring with more recipes from What's Baking.
