Banana Nutella Hand Pies Recipe
Ingredients
Equipment
Directions
FAQs
Find answers to your most pressing questions about this delicious recipe right here.
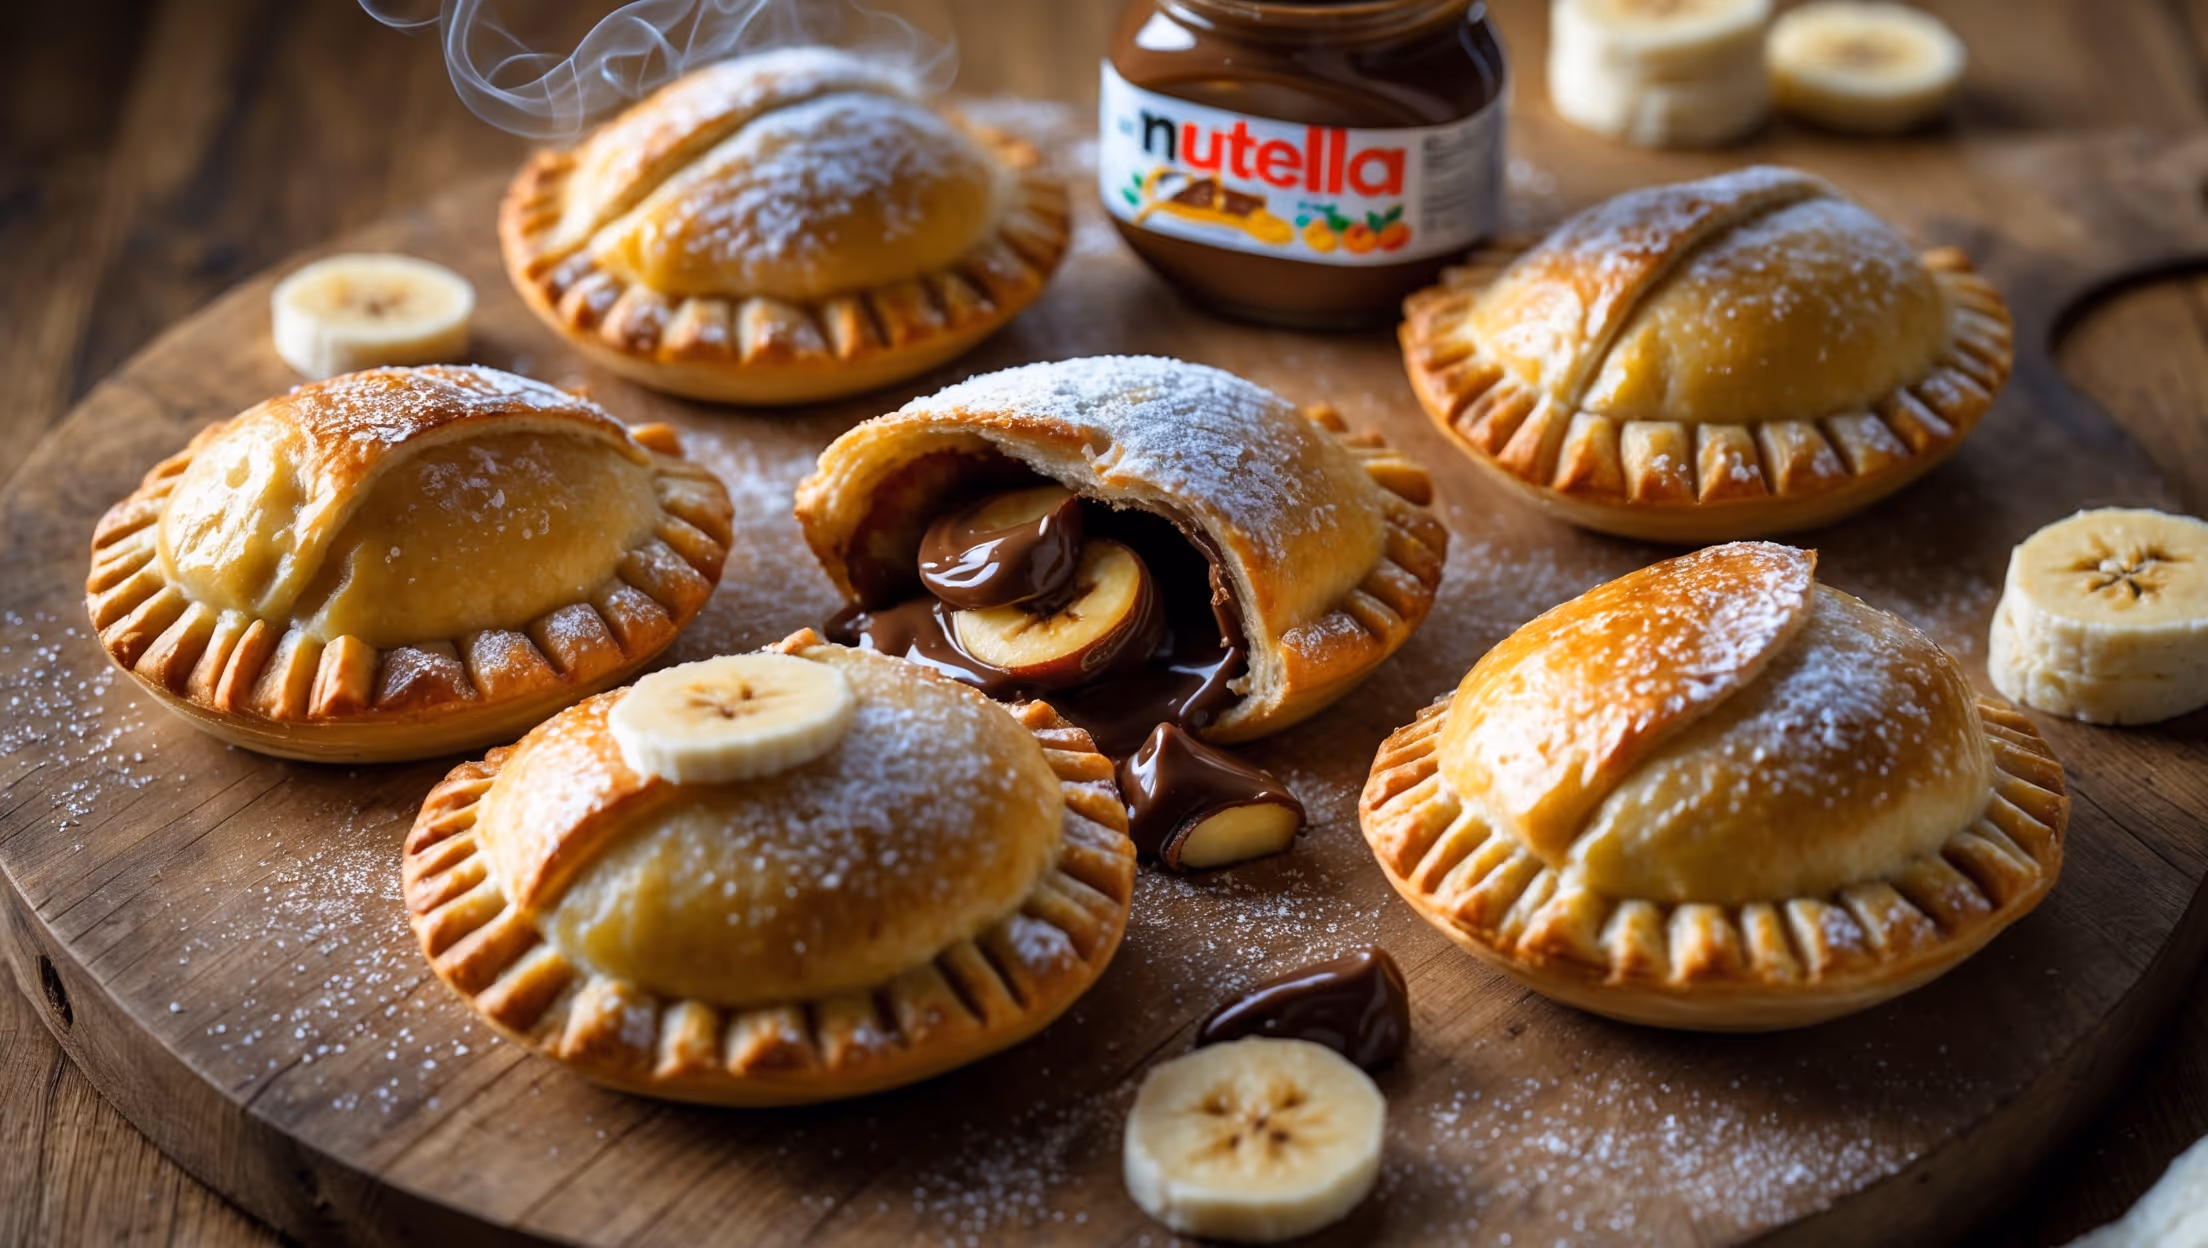
These hand pies require all-purpose flour, salt, sugar, cold butter, ice water, vinegar for the pastry; ripe bananas, butter, brown sugar, cinnamon, vanilla for the caramelized filling; and Nutella. For assembly, you'll need egg wash and sugar for sprinkling.
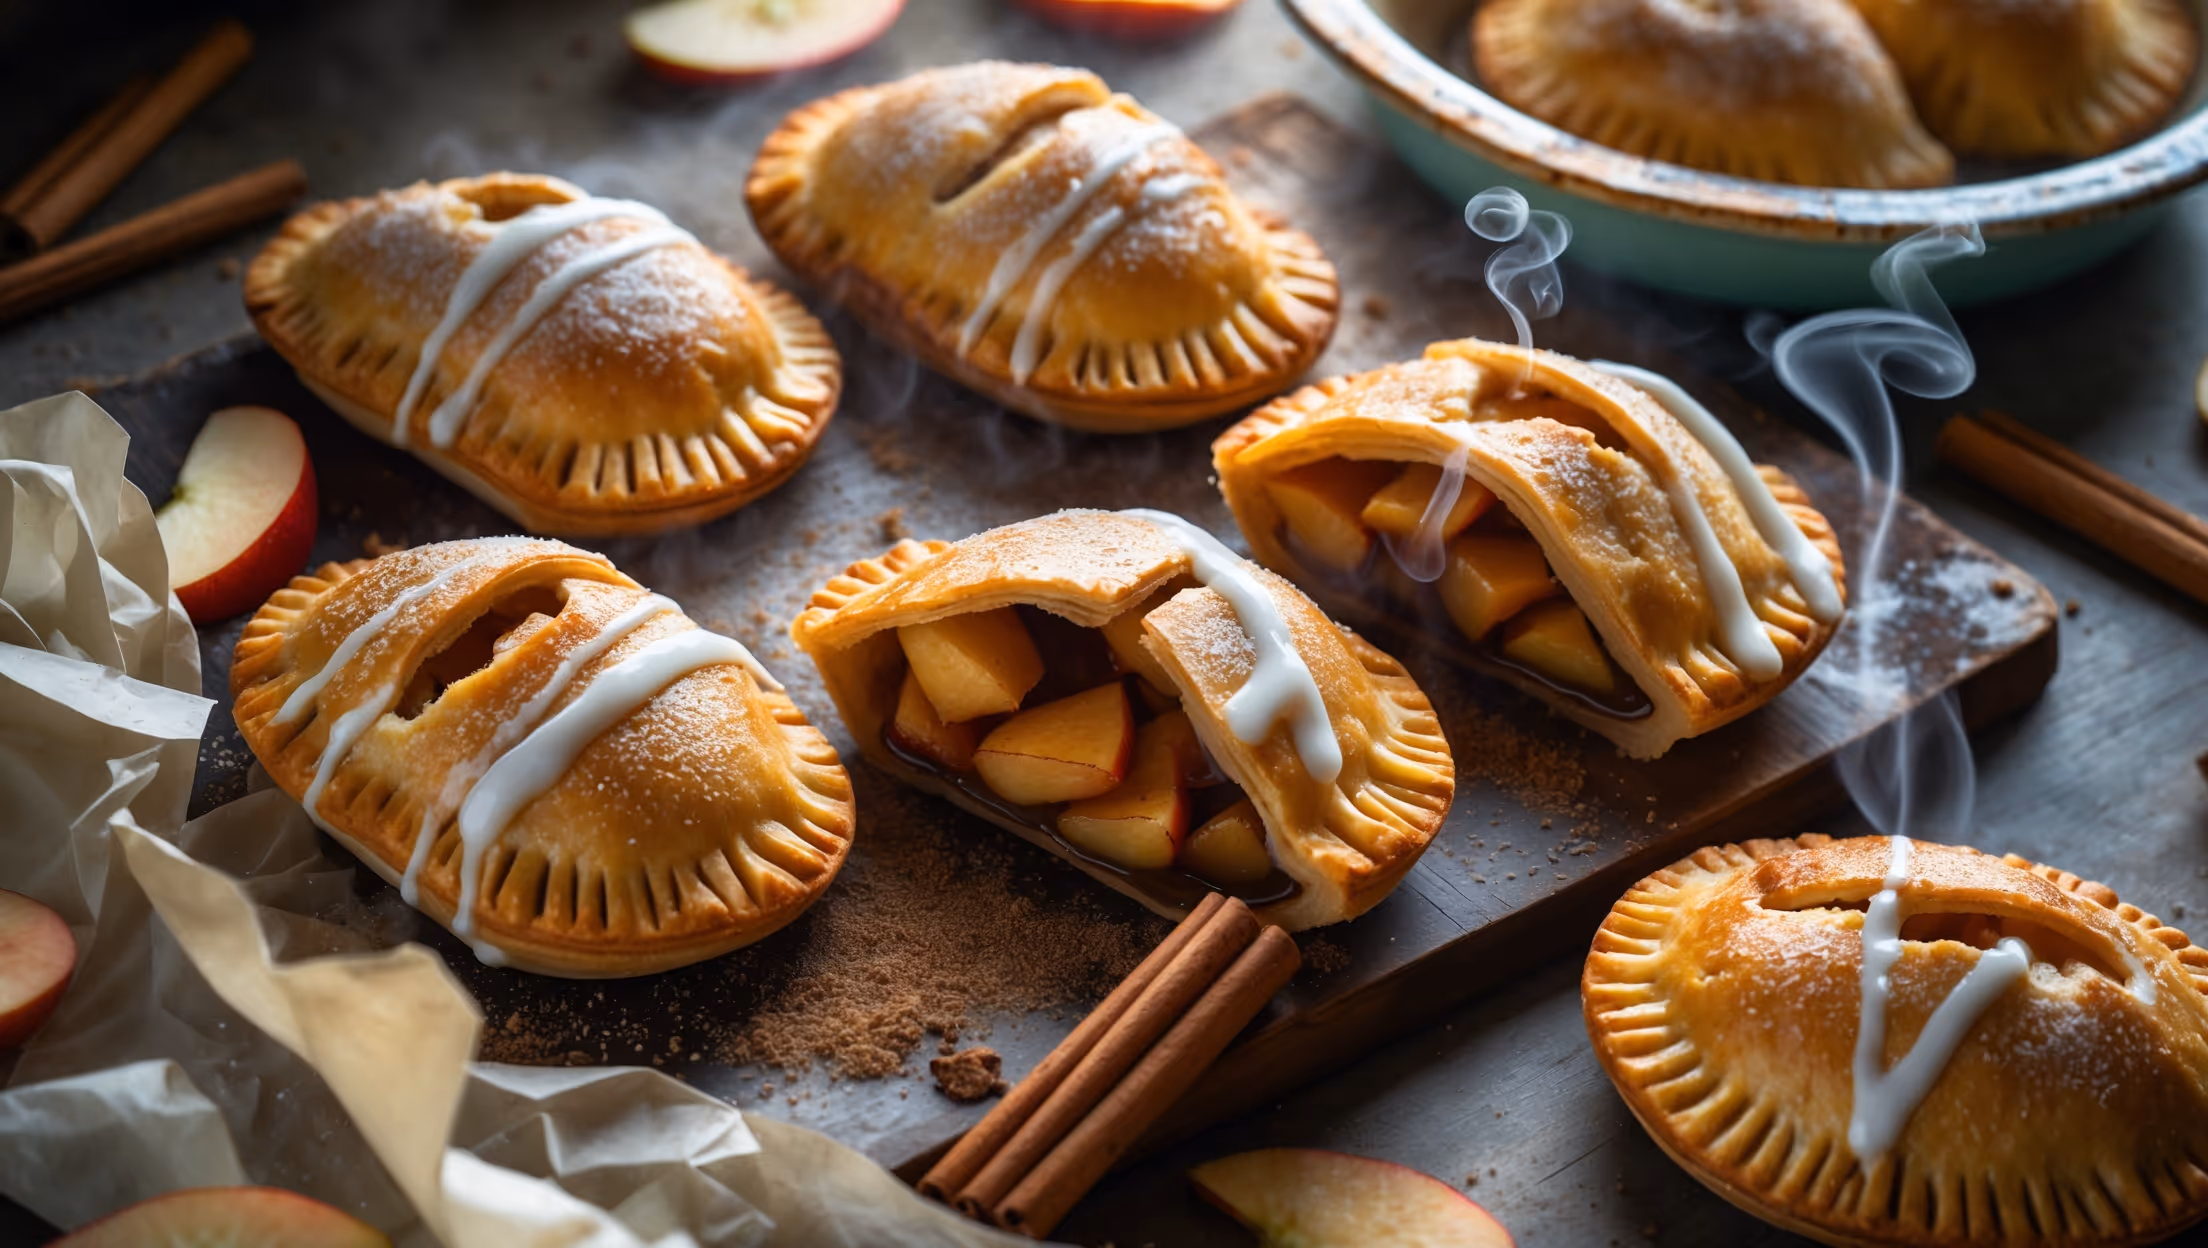
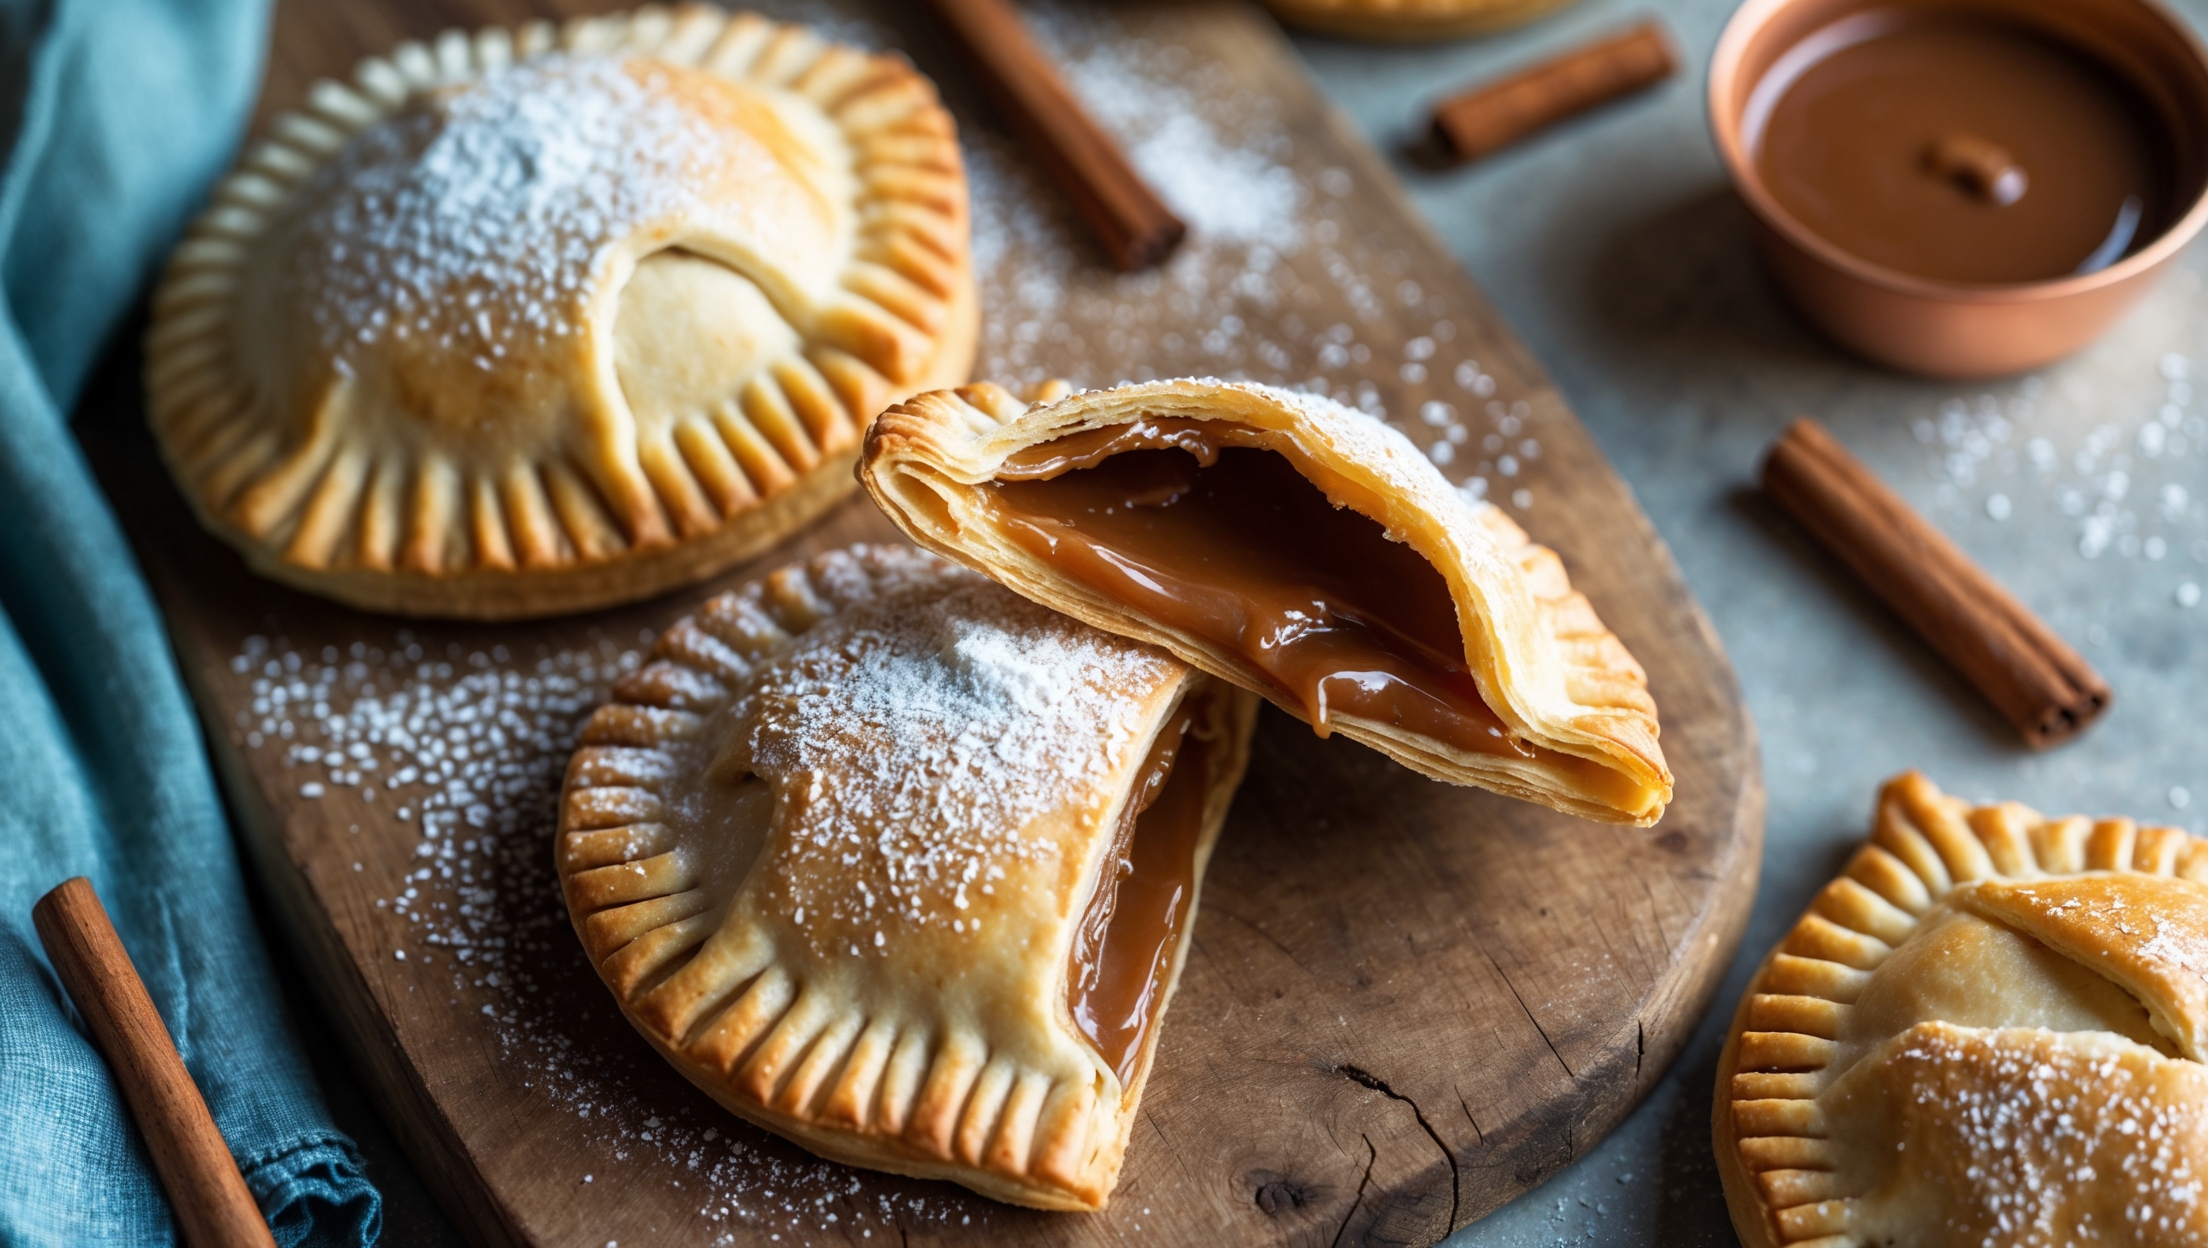
Learn how to cook Banana Nutella Hand Pies by first making a flaky pastry with cold butter, then creating a caramelized banana filling. Fill pastry circles with Nutella and the banana mixture, seal edges firmly, brush with egg wash, and bake at 190°C for 22-25 minutes until golden brown. Allow to cool slightly before enjoying these gooey, delicious treats.
Absolutely! The pastry dough can be made up to 2 days in advance and stored in the refrigerator. You can also freeze it for up to 3 months - just thaw overnight in the fridge before rolling. This advance preparation makes the hand pie assembly much quicker on baking day.
The secrets to flaky hand pie crust are: using very cold butter, not overworking the dough, adding vinegar to inhibit gluten development, allowing proper chilling time before rolling, and chilling the assembled pies before baking. These steps preserve butter pieces that create steam pockets for flakiness.
To prevent leaking, avoid overfilling (use only 1 teaspoon each of Nutella and banana filling), leave a 1cm border around edges, seal thoroughly with egg wash, crimp edges firmly with a fork, chill assembled pies before baking, and cut proper vents to release steam that could otherwise cause ruptures.
Hand Pies
Try following recommended recipes