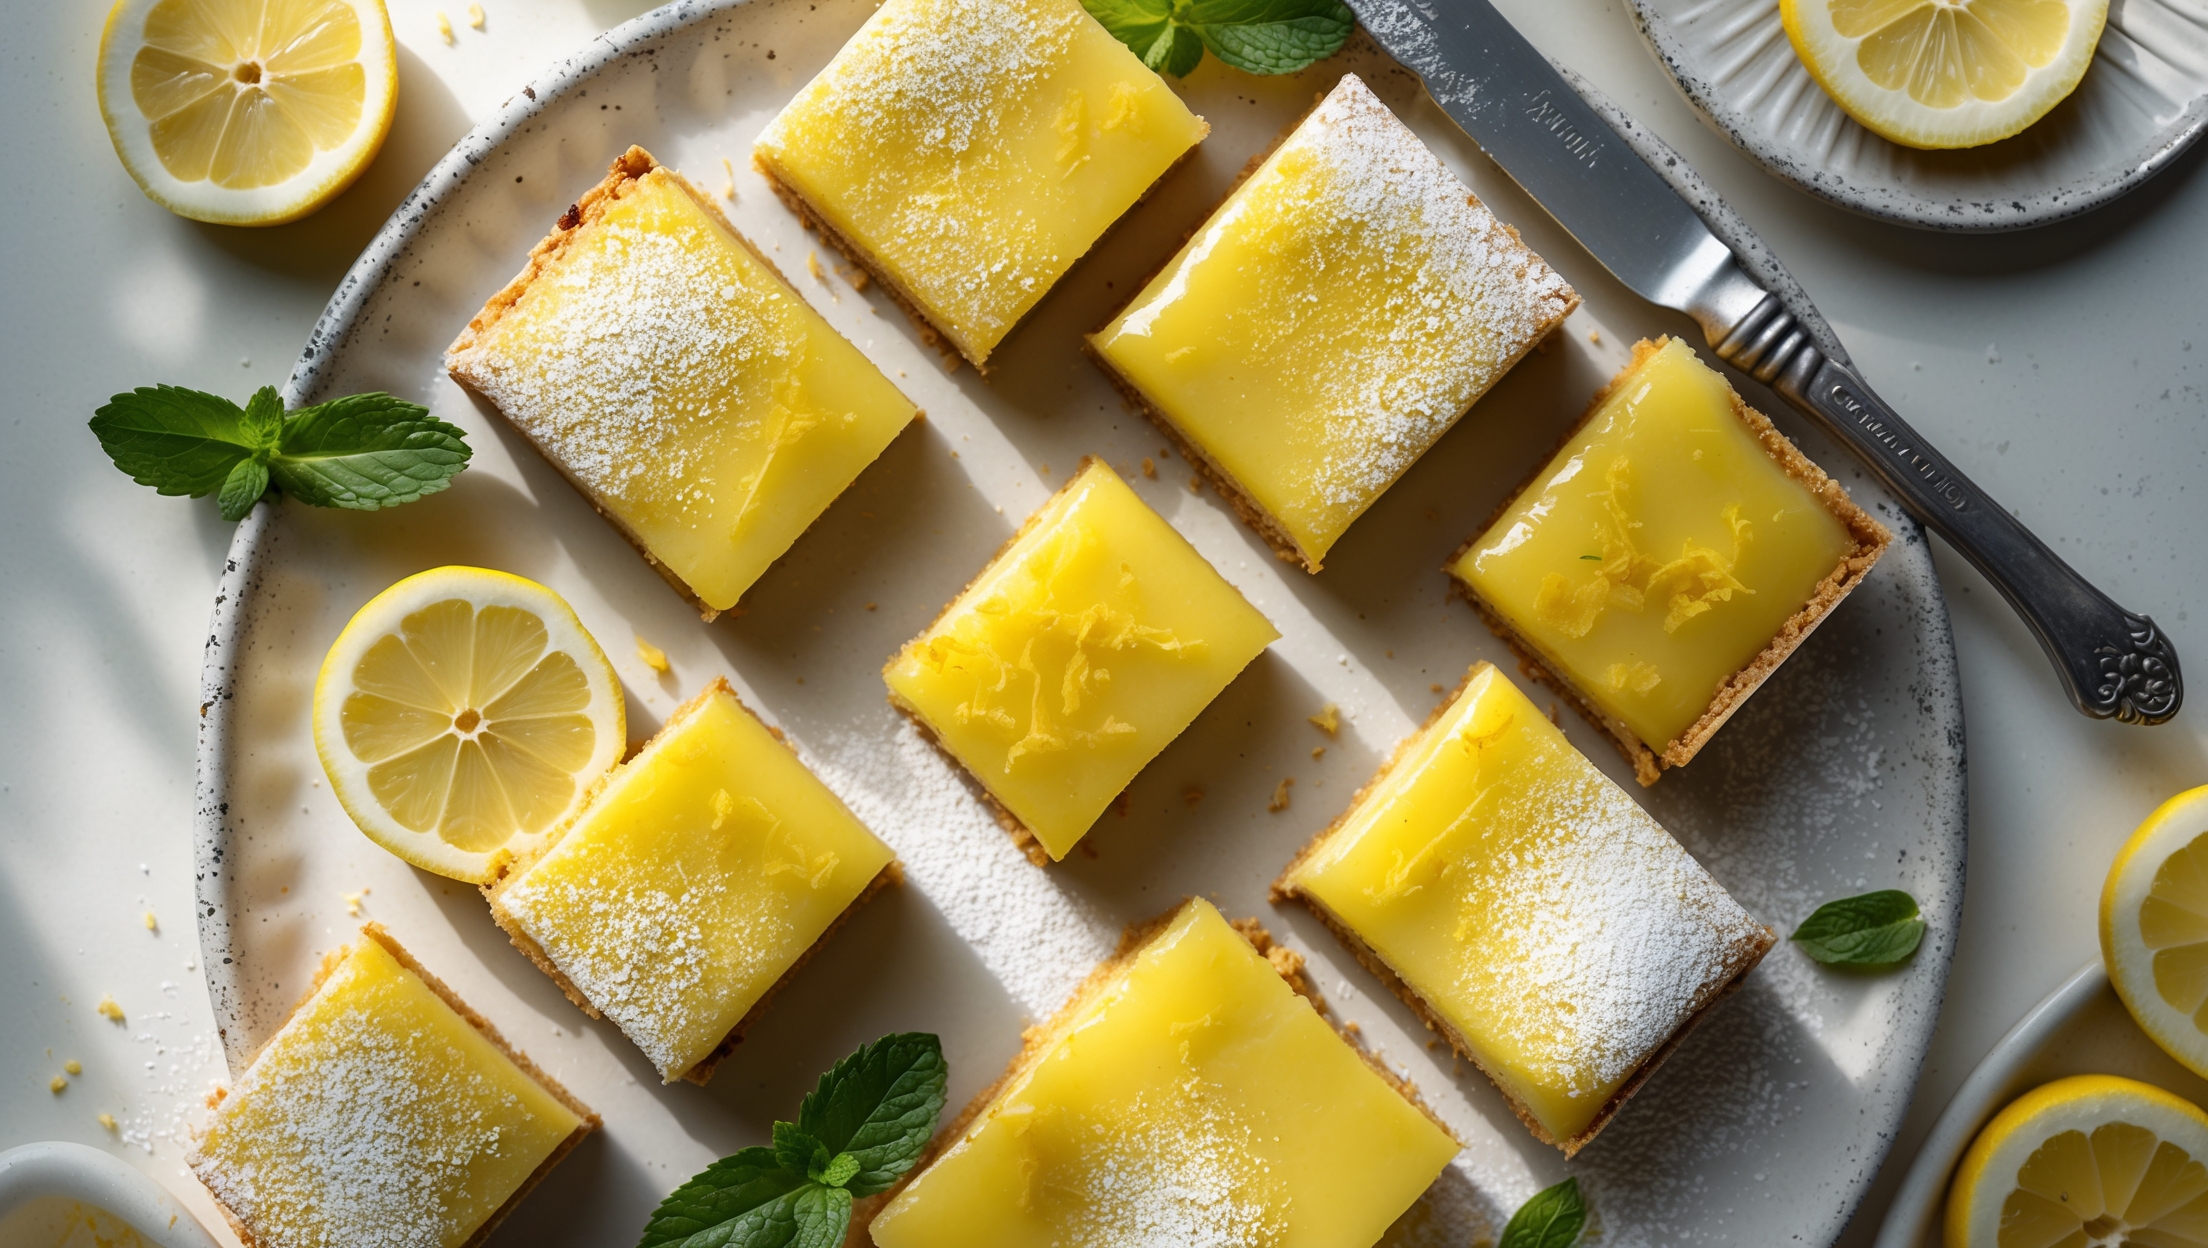
Gluten-Free Lemon Bars Recipe
Ingredients
Equipment
Directions
FAQs
Find answers to your most pressing questions about this delicious recipe right here.
The main ingredients include almond flour, tapioca flour, butter, vanilla, granulated sugar, eggs, fresh lemon juice, lemon zest, gluten-free all-purpose flour, and powdered sugar for dusting. These combine to create a buttery almond crust and tangy lemon filling.
Learn how to cook Gluten-Free Lemon Bars by first baking an almond flour crust until golden, then pouring a fresh lemon filling over the hot base and returning to the oven until just set. The key is not overbaking the filling and allowing proper chilling time for the flavours to develop and bars to set properly.
Yes! Simply substitute the butter with coconut oil or a plant-based butter alternative at a 1:1 ratio. The texture may be slightly different, but the bars will still set beautifully and maintain their delicious flavour profile while being both gluten-free and dairy-free.
Undercooked filling, insufficient chilling time, or too much lemon juice can prevent proper setting. Ensure you bake until the filling has just a slight jiggle in the centre (about 20-22 minutes), then cool completely at room temperature before chilling for at least 2 hours.
The key is using fresh lemon juice and zest (never bottled) and the proper ratio of sugar to lemon. If you prefer a more tart bar, reduce sugar by 20-30g. For sweeter bars, add an extra tablespoon of sugar or increase the powdered sugar dusting on top.
Gluten-Free Desserts
Try following recommended recipes