Halloween Oreo Sandwich Cookies Recipe
Learn how to make homemade Halloween Oreo sandwich cookies with this easy baking recipe. The perfect balance of rich chocolate wafers and vibrant orange cream filling creates the best festive treats for your Halloween party. These spooky cookies look impressive but are surprisingly simple to make!
Difficulty:
Intermediate
Prep Time:
45 mins
Cook Time:
12 mins
Serves:
24 sandwich cookies
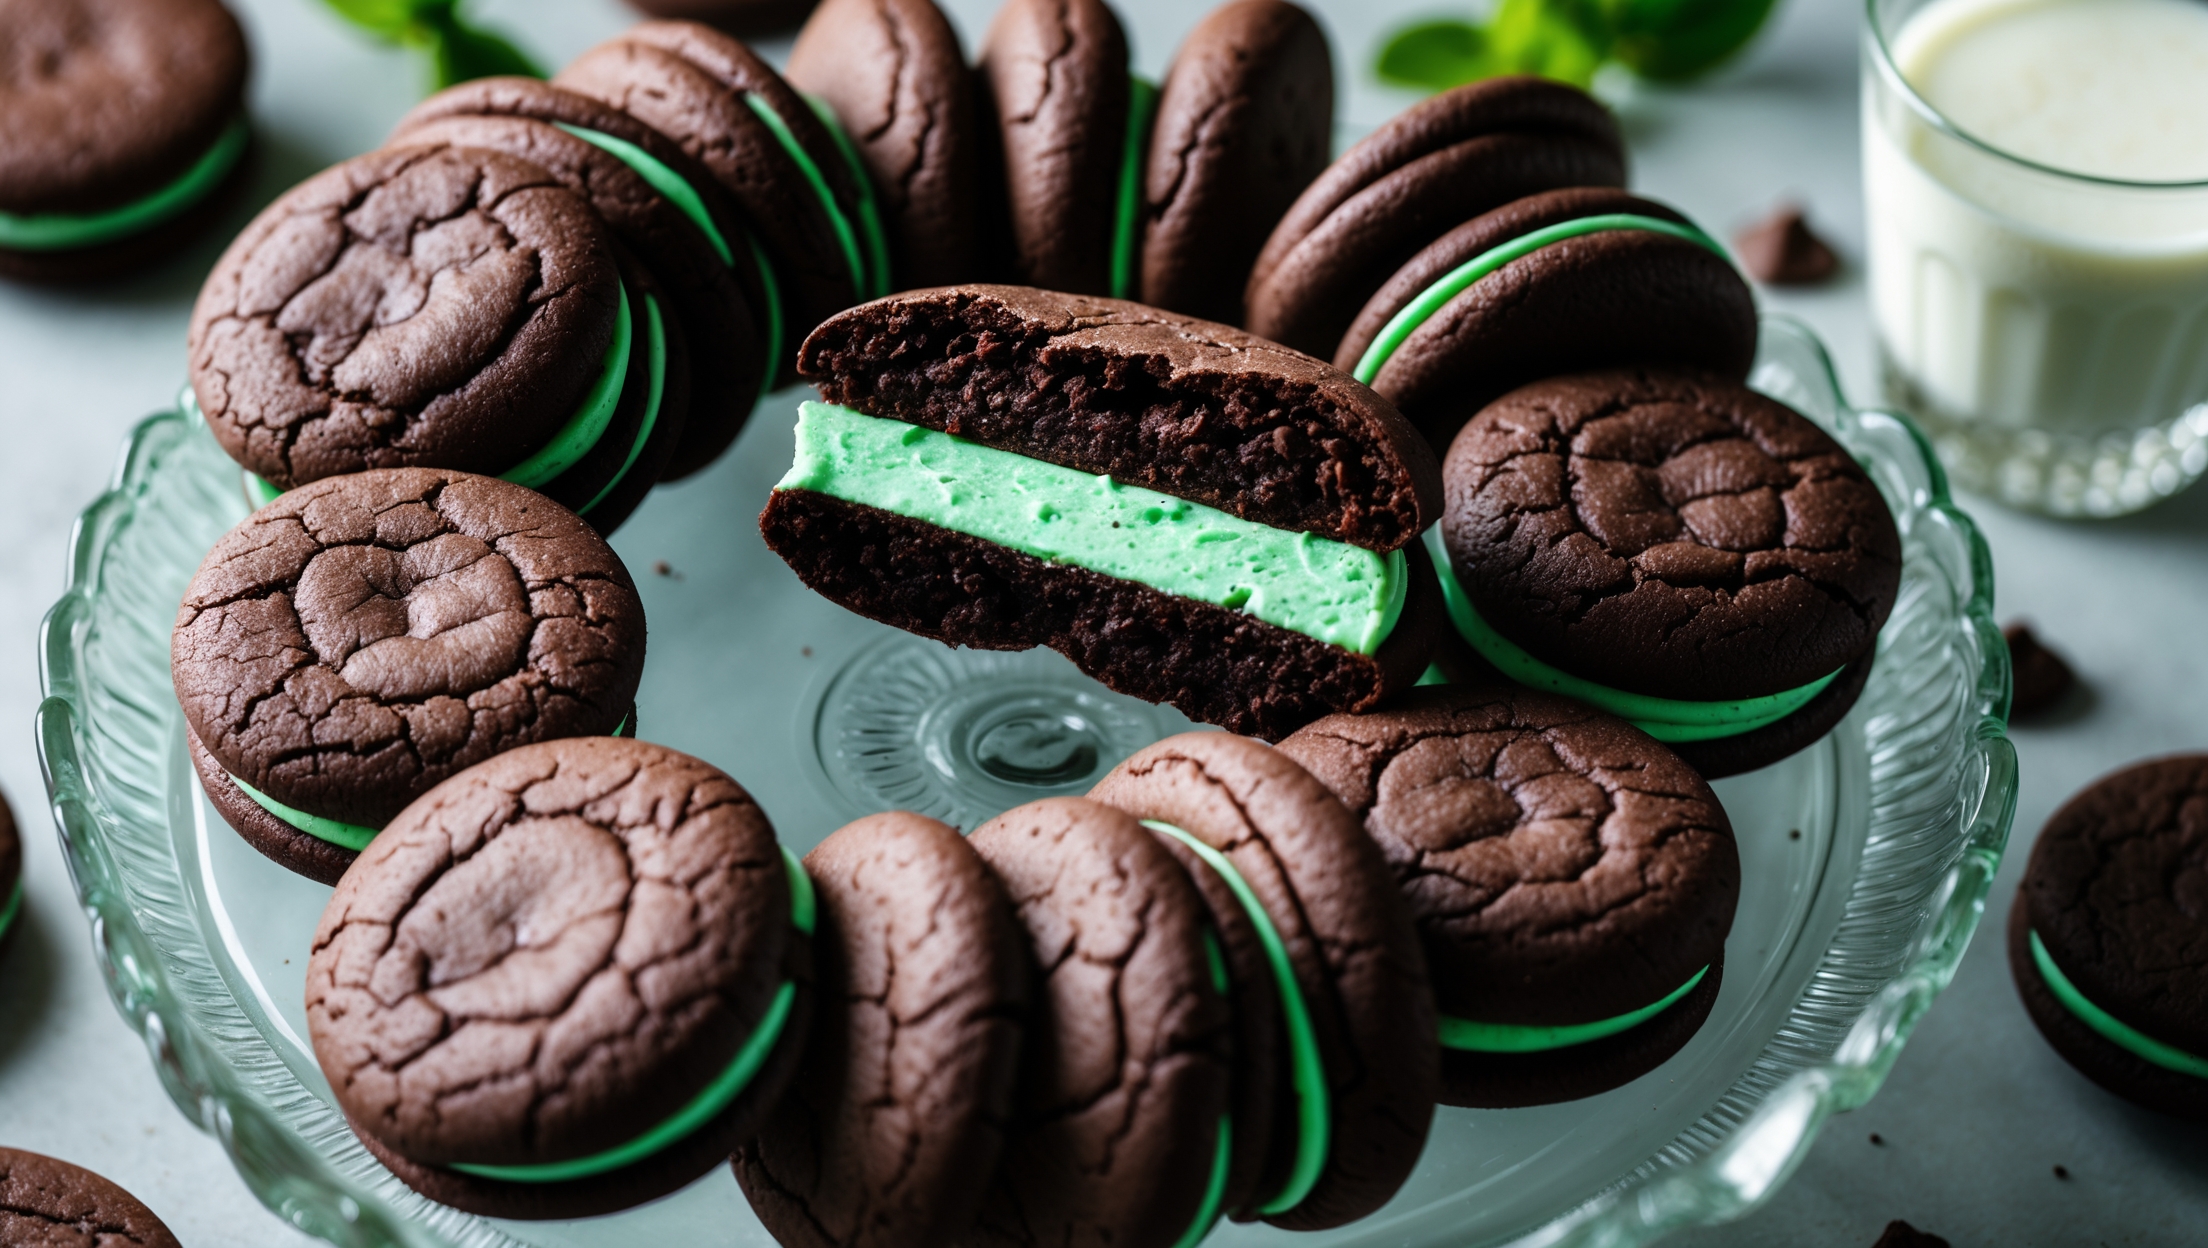
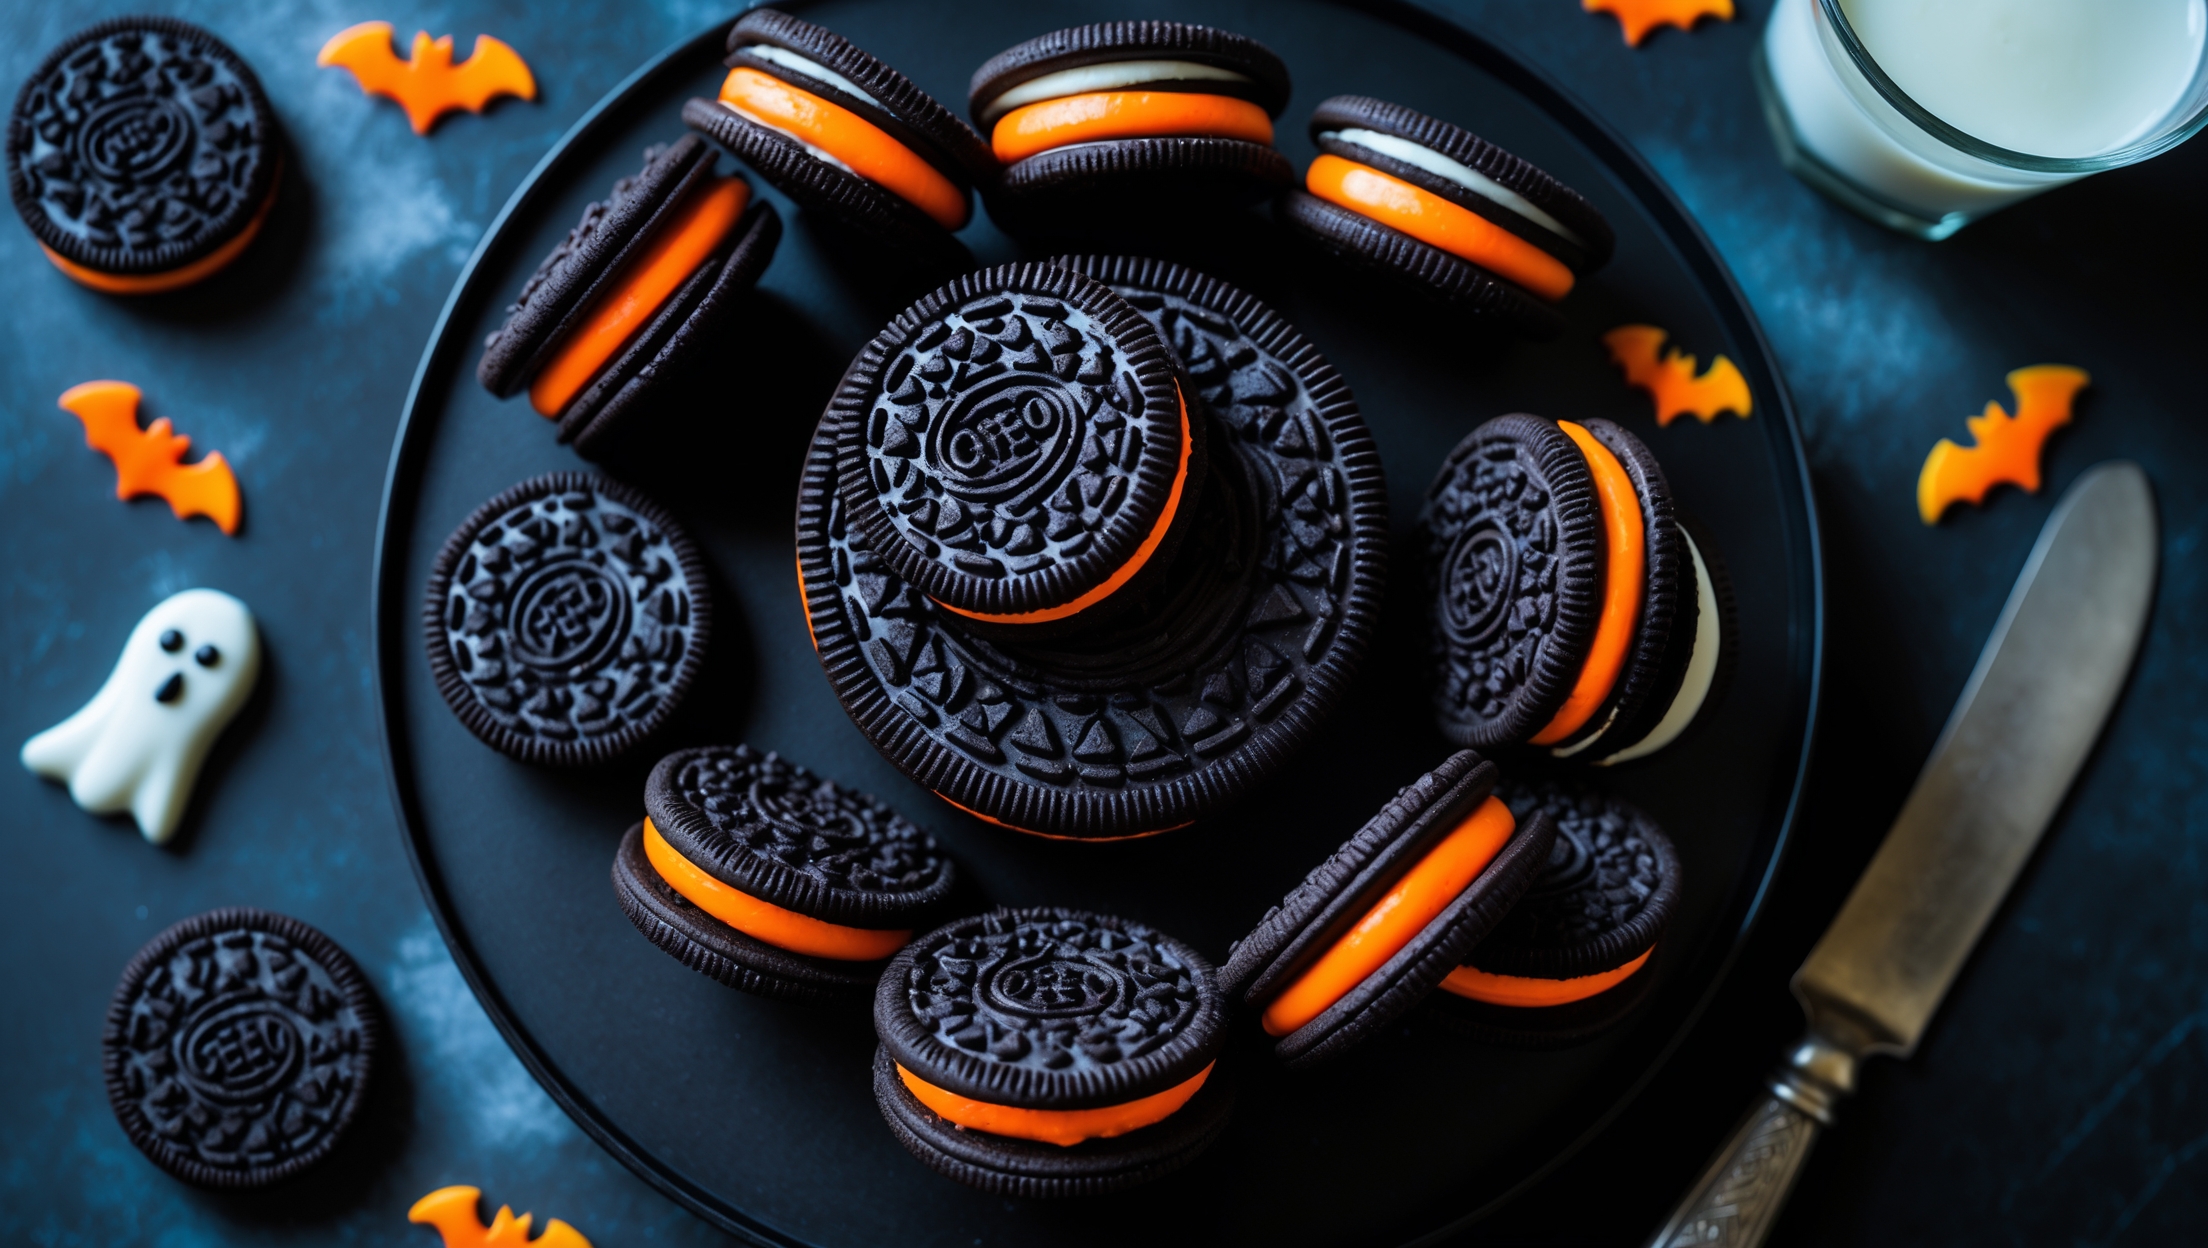
An overhead shot of black chocolate Halloween Oreo sandwich cookies arranged in a spiral pattern on a matte black cake stand. The cookies' bright orange cream filling peeks out enticingly between the dark wafers, creating a striking color contrast. Several cookies are stacked to showcase the layers, while a few are broken in half to reveal the smooth, creamy center. Tiny sugar ghost and bat decorations are scattered around, and the scene is lit with soft, slightly blue-toned light that creates subtle shadows, enhancing the spooky Halloween mood. A vintage silver serving knife rests nearby, and a glass of milk sits just at the edge of the frame.

Ingredients

<ul class="ingredients-main-list"><li class="ingredients-single-item">For the chocolate cookies:</li><li class="ingredients-single-item">200g all-purpose flour</li><li class="ingredients-single-item">60g Dutch-processed cocoa powder</li><li class="ingredients-single-item">1/2 tsp baking soda</li><li class="ingredients-single-item">1/4 tsp baking powder</li><li class="ingredients-single-item">1/4 tsp salt</li><li class="ingredients-single-item">130g unsalted butter, at room temperature</li><li class="ingredients-single-item">200g granulated sugar</li><li class="ingredients-single-item">1 large egg, at room temperature</li><li class="ingredients-single-item">1 tsp vanilla extract</li><li class="ingredients-single-item">For the orange cream filling:</li><li class="ingredients-single-item">120g unsalted butter, at room temperature</li><li class="ingredients-single-item">250g powdered sugar, sifted</li><li class="ingredients-single-item">1 tsp vanilla extract</li><li class="ingredients-single-item">1/4 tsp salt</li><li class="ingredients-single-item">Orange gel food coloring</li><li class="ingredients-single-item">Optional: 1/2 tsp orange extract for flavor</li></ul>

Nutrition Facts (per serving)

🍽️ Serving Size: 1 serving
🔥 Calories: 185 calories
🥑 Fat: 9 g
🧈 Saturated Fat: 5 g
🍞 Carbohydrates: 24 g
🍭 Sugar: 15 g
🍗 Protein: 2 g
🫀 Cholesterol: 30 mg
🧂 Sodium: 120 mg

Equipment

<ul class="equipment-main-list"><li class="equipment-single-item">Stand mixer with paddle attachment</li><li class="equipment-single-item">5cm (2-inch) round cookie cutter</li><li class="equipment-single-item">Baking sheets</li><li class="equipment-single-item">Parchment paper or silicone baking mats</li><li class="equipment-single-item">Cooling racks</li><li class="equipment-single-item">Piping bag (optional)</li></ul>

Directions

<ol class="no-list-style"><li class="MethodStepper"><h4 class="step-title">Step 1</h4>In a medium bowl, whisk together the flour, cocoa powder, baking soda, baking powder, and salt. The cocoa powder provides both flavor and color - Dutch-processed gives the cookies that deep, dark Oreo-like appearance. Set this mixture aside while you prepare the wet ingredients.</li><li class="MethodStepper"><h4 class="step-title">Step 2</h4>In the bowl of your stand mixer fitted with the paddle attachment, cream together the butter and sugar on medium speed for about 3 minutes until light and fluffy. This incorporates air into the mixture, helping your cookies maintain their shape during baking.</li><li class="MethodStepper"><h4 class="step-title">Step 3</h4>Add the egg and vanilla extract to the butter mixture and beat until fully incorporated, scraping down the sides of the bowl as needed. The mixture should look smooth and slightly glossy.</li><li class="MethodStepper"><h4 class="step-title">Step 4</h4>With the mixer on low speed, gradually add the dry ingredients to the wet ingredients until just combined. Be careful not to overmix as this can develop the gluten and make your cookies tough rather than crisp.</li><li class="MethodStepper"><h4 class="step-title">Step 5</h4>Divide the dough into two equal portions and flatten each into a disc. Wrap in plastic wrap and refrigerate for at least 1 hour or up to 2 days. Chilling the dough is crucial as it firms up the butter, preventing the cookies from spreading too much during baking.</li><li class="MethodStepper"><h4 class="step-title">Step 6</h4>When ready to bake, preheat your oven to 175°C (350°F). Line baking sheets with parchment paper or silicone mats. Remove one disc of dough from the refrigerator.</li><li class="MethodStepper"><h4 class="step-title">Step 7</h4>On a lightly floured surface, roll the dough to about 3mm (1/8 inch) thickness. Cut out cookies using a 5cm (2-inch) round cookie cutter, transferring them to the prepared baking sheets, spacing them about 2.5cm (1 inch) apart.</li><li class="MethodStepper"><h4 class="step-title">Step 8</h4>For the authentic Oreo look, use a toothpick to create a simple pattern on top of half the cookies (these will be your tops). You can make lines, dots, or even tiny Halloween designs like bats or pumpkins. This adds that special Halloween touch!</li><li class="MethodStepper"><h4 class="step-title">Step 9</h4>Bake for 10-12 minutes or until the edges are firm but not darkened. These cookies won't change color much during baking due to their dark chocolate appearance, so don't rely on color as your only indicator for doneness. They should be set but still slightly soft in the center.</li><li class="MethodStepper"><h4 class="step-title">Step 10</h4>Allow the cookies to cool on the baking sheet for 5 minutes before transferring to a wire rack to cool completely. They'll firm up as they cool, developing that signature crisp Oreo texture.</li><li class="MethodStepper"><h4 class="step-title">Step 11</h4>While the cookies cool, prepare the filling. In your stand mixer fitted with the paddle attachment, beat the butter until smooth and creamy, about 2 minutes.</li><li class="MethodStepper"><h4 class="step-title">Step 12</h4>Gradually add the powdered sugar, mixing on low speed until incorporated, then increase to medium speed and beat until light and fluffy, about 3-4 minutes. Add the vanilla extract, salt, and orange extract if using.</li><li class="MethodStepper"><h4 class="step-title">Step 13</h4>Add orange gel food coloring a little at a time, mixing thoroughly until you achieve a vibrant Halloween orange. Gel coloring is best as it won't thin your filling like liquid food coloring might.</li><li class="MethodStepper"><h4 class="step-title">Step 14</h4>Once the cookies are completely cool, match them in pairs of similar size. Spoon or pipe about 1-2 teaspoons of filling onto the flat side of one cookie from each pair. Gently press the second cookie on top, flat side down, to create a sandwich, being careful not to press too hard or the filling will squeeze out.</li><li class="MethodStepper"><h4 class="step-title">Step 15</h4>For the best flavor and texture, let the assembled cookies sit for at least 2 hours before serving. This allows the filling to set and the flavors to meld. Store your Halloween Oreos in an airtight container at room temperature for up to 5 days, or refrigerate for up to 2 weeks. They'll actually improve and soften slightly after a day!</li></ol>

FAQs

Find answers to your most pressing questions about this delicious recipe right here.

What ingredients are used in Halloween Oreo Sandwich Cookies?

The main ingredients include all-purpose flour, Dutch-processed cocoa powder, butter, sugar, egg, vanilla extract for the chocolate cookies, and butter, powdered sugar, vanilla extract, and orange food colouring for the vibrant orange filling.

How to cook Halloween Oreo Sandwich Cookies at home?

Learn how to cook Halloween Oreo Sandwich Cookies by preparing a chocolate cookie dough, chilling it, rolling it out and cutting into rounds. Bake until just set, then cool completely. Make a vibrant orange buttercream filling, sandwich between cookie pairs, and allow to rest for a few hours for the best texture and flavour.

Can I make these spooky sandwich cookies ahead of time for a Halloween party?

Yes! These cookies actually improve with time. You can make them 2-3 days before your party and store in an airtight container. The filling will slightly soften the cookies, creating that perfect Oreo-like texture that's crisp yet slightly tender.

How do I achieve the darkest black colour for chocolate sandwich cookies?

Dutch-processed cocoa powder is key for achieving that deep black colour. For even darker cookies, you can add a small amount (1/4 tsp) of black food colouring gel to the dough, or replace 2 tablespoons of cocoa powder with black cocoa powder.

What are some creative Halloween designs I can add to my homemade sandwich cookies?

Use a toothpick to create spider webs, bat shapes, or simple jack-o'-lantern faces on top cookies before baking. You can also press small Halloween-themed cookie cutters partially into the dough for outline impressions, or use themed cookie stamps for quick designs.

Want to try something else in ...

Sandwich Cookies

Try following recommended recipes
No items found.

{ "@context": "http://schema.org/", "@type": "Recipe", "name": "Halloween Oreo Sandwich Cookies Recipe", "image": ["https://cdn.prod.website-files.com/67f19ab882e7325b0d63c86a/6837d3f09ca38595fc95f2d0_Leonardo_Phoenix_10_An_overhead_shot_of_black_chocolate_Hallow_0.jpeg"], "author": { "@type": "Person", "name": "Gurbir Aujla", "brand": "What's Baking?", "jobTitle": "Baker" }, "datePublished": "2024-05-23", "description": "Learn how to make homemade Halloween Oreo sandwich cookies with this easy baking recipe. The perfect balance of rich chocolate wafers and vibrant orange cream filling creates the best festive treats for your Halloween party. These spooky cookies look impressive but are surprisingly simple to make!", "prepTime": "PT45M", "cookTime": "PT12M", "totalTime": "PT57M", "keywords": "Halloween cookies, homemade Oreos, chocolate sandwich cookies, orange cream filling, spooky treats", "recipeYield": "24 sandwich cookies", "recipeCategory": "Dessert", "recipeCuisine": "American", "nutrition": { "@type": "NutritionInformation", "calories": "185 calories", "carbohydrateContent": "24 g", "proteinContent": "2 g", "fatContent": "9 g", "saturatedFatContent": "5 g", "cholesterolContent": "30 mg", "sodiumContent": "120 mg", "sugarContent": "15 g", "servingSize": "1 serving" }, "recipeIngredient": [ "200g all-purpose flour", "60g Dutch-processed cocoa powder", "1/2 tsp baking soda", "1/4 tsp baking powder", "1/4 tsp salt", "130g unsalted butter, at room temperature", "200g granulated sugar", "1 large egg, at room temperature", "1 tsp vanilla extract", "120g unsalted butter, at room temperature (for filling)", "250g powdered sugar, sifted", "1 tsp vanilla extract (for filling)", "1/4 tsp salt (for filling)", "Orange gel food coloring", "Optional: 1/2 tsp orange extract for flavor" ], "recipeInstructions": [ { "@type": "HowToStep", "name": "Prepare dry ingredients", "text": "In a medium bowl, whisk together the flour, cocoa powder, baking soda, baking powder, and salt. The cocoa powder provides both flavor and color - Dutch-processed gives the cookies that deep, dark Oreo-like appearance. Set this mixture aside while you prepare the wet ingredients." }, { "@type": "HowToStep", "name": "Cream butter and sugar", "text": "In the bowl of your stand mixer fitted with the paddle attachment, cream together the butter and sugar on medium speed for about 3 minutes until light and fluffy. This incorporates air into the mixture, helping your cookies maintain their shape during baking." }, { "@type": "HowToStep", "name": "Add wet ingredients", "text": "Add the egg and vanilla extract to the butter mixture and beat until fully incorporated, scraping down the sides of the bowl as needed. The mixture should look smooth and slightly glossy." }, { "@type": "HowToStep", "name": "Combine mixtures", "text": "With the mixer on low speed, gradually add the dry ingredients to the wet ingredients until just combined. Be careful not to overmix as this can develop the gluten and make your cookies tough rather than crisp." }, { "@type": "HowToStep", "name": "Chill dough", "text": "Divide the dough into two equal portions and flatten each into a disc. Wrap in plastic wrap and refrigerate for at least 1 hour or up to 2 days. Chilling the dough is crucial as it firms up the butter, preventing the cookies from spreading too much during baking." }, { "@type": "HowToStep", "name": "Prepare for baking", "text": "When ready to bake, preheat your oven to 175°C (350°F). Line baking sheets with parchment paper or silicone mats. Remove one disc of dough from the refrigerator." }, { "@type": "HowToStep", "name": "Roll and cut dough", "text": "On a lightly floured surface, roll the dough to about 3mm (1/8 inch) thickness. Cut out cookies using a 5cm (2-inch) round cookie cutter, transferring them to the prepared baking sheets, spacing them about 2.5cm (1 inch) apart." }, { "@type": "HowToStep", "name": "Add decoration", "text": "For the authentic Oreo look, use a toothpick to create a simple pattern on top of half the cookies (these will be your tops). You can make lines, dots, or even tiny Halloween designs like bats or pumpkins. This adds that special Halloween touch!" }, { "@type": "HowToStep", "name": "Bake cookies", "text": "Bake for 10-12 minutes or until the edges are firm but not darkened. These cookies won't change color much during baking due to their dark chocolate appearance, so don't rely on color as your only indicator for doneness. They should be set but still slightly soft in the center." }, { "@type": "HowToStep", "name": "Cool cookies", "text": "Allow the cookies to cool on the baking sheet for 5 minutes before transferring to a wire rack to cool completely. They'll firm up as they cool, developing that signature crisp Oreo texture." }, { "@type": "HowToStep", "name": "Prepare filling base", "text": "While the cookies cool, prepare the filling. In your stand mixer fitted with the paddle attachment, beat the butter until smooth and creamy, about 2 minutes." }, { "@type": "HowToStep", "name": "Complete filling", "text": "Gradually add the powdered sugar, mixing on low speed until incorporated, then increase to medium speed and beat until light and fluffy, about 3-4 minutes. Add the vanilla extract, salt, and orange extract if using." }, { "@type": "HowToStep", "name": "Color filling", "text": "Add orange gel food coloring a little at a time, mixing thoroughly until you achieve a vibrant Halloween orange. Gel coloring is best as it won't thin your filling like liquid food coloring might." }, { "@type": "HowToStep", "name": "Assemble cookies", "text": "Once the cookies are completely cool, match them in pairs of similar size. Spoon or pipe about 1-2 teaspoons of filling onto the flat side of one cookie from each pair. Gently press the second cookie on top, flat side down, to create a sandwich, being careful not to press too hard or the filling will squeeze out." }, { "@type": "HowToStep", "name": "Set and serve", "text": "For the best flavor and texture, let the assembled cookies sit for at least 2 hours before serving. This allows the filling to set and the flavors to meld. Store your Halloween Oreos in an airtight container at room temperature for up to 5 days, or refrigerate for up to 2 weeks. They'll actually improve and soften slightly after a day!" } ], "aggregateRating": { "@type": "AggregateRating", "ratingValue": "5", "ratingCount": "174" }, "review": [ { "@type": "Review", "author": "Sophia Chen", "datePublished": "2024-05-01", "reviewBody": "Perfect spooky treat for Halloween parties! My children were absolutely delighted with these cookies. The orange filling really pops against the dark chocolate cookies, making them look so festive.", "name": "Spooktacular Success", "reviewRating": { "@type": "Rating", "ratingValue": "5" } }, { "@type": "Review", "author": "Amir Hassan", "datePublished": "2024-05-03", "reviewBody": "The kids went crazy for these! I made them for my son's Halloween party and they disappeared within minutes. They taste much better than store-bought versions, and the homemade touch was really appreciated.", "name": "Kid-Approved Halloween Treat", "reviewRating": { "@type": "Rating", "ratingValue": "5" } }, { "@type": "Review", "author": "Lucia Fernandez", "datePublished": "2024-05-10", "reviewBody": "I've made these three times already! The recipe is so well-written and the cookies come out perfectly crisp with creamy centers every time. I added a bit more orange extract to enhance the flavor and it was divine.", "name": "Repeat Baker's Delight", "reviewRating": { "@type": "Rating", "ratingValue": "5" } }, { "@type": "Review", "author": "Dmitri Petrov", "datePublished": "2024-05-15", "reviewBody": "Worth the time investment! These cookies look so impressive but aren't actually difficult to make. The contrast between the black cookies and orange filling creates a stunning presentation that's perfect for Halloween.", "name": "Impressive Halloween Showstopper", "reviewRating": { "@type": "Rating", "ratingValue": "5" } }, { "@type": "Review", "author": "Gabriela Torres", "datePublished": "2024-05-18", "reviewBody": "These have become our Halloween baking tradition now! The cookies have the perfect texture - crisp but not hard, and the filling is so much creamier than store-bought Oreos. Everyone asks for the recipe!", "name": "New Family Tradition", "reviewRating": { "@type": "Rating", "ratingValue": "5" } } ]}

{ "@context": "https://schema.org", "@type": "FAQPage", "mainEntity": [ { "@type": "Question", "name": "What ingredients are used in Halloween Oreo Sandwich Cookies?", "acceptedAnswer": { "@type": "Answer", "text": "The main ingredients include all-purpose flour, Dutch-processed cocoa powder, butter, sugar, egg, vanilla extract for the chocolate cookies, and butter, powdered sugar, vanilla extract, and orange food colouring for the vibrant orange filling." } }, { "@type": "Question", "name": "How to cook Halloween Oreo Sandwich Cookies at home?", "acceptedAnswer": { "@type": "Answer", "text": "Learn how to cook Halloween Oreo Sandwich Cookies by preparing a chocolate cookie dough, chilling it, rolling it out and cutting into rounds. Bake until just set, then cool completely. Make a vibrant orange buttercream filling, sandwich between cookie pairs, and allow to rest for a few hours for the best texture and flavour." } }, { "@type": "Question", "name": "Can I make these spooky sandwich cookies ahead of time for a Halloween party?", "acceptedAnswer": { "@type": "Answer", "text": "Yes! These cookies actually improve with time. You can make them 2-3 days before your party and store in an airtight container. The filling will slightly soften the cookies, creating that perfect Oreo-like texture that's crisp yet slightly tender." } }, { "@type": "Question", "name": "How do I achieve the darkest black colour for chocolate sandwich cookies?", "acceptedAnswer": { "@type": "Answer", "text": "Dutch-processed cocoa powder is key for achieving that deep black colour. For even darker cookies, you can add a small amount (1/4 tsp) of black food colouring gel to the dough, or replace 2 tablespoons of cocoa powder with black cocoa powder." } }, { "@type": "Question", "name": "What are some creative Halloween designs I can add to my homemade sandwich cookies?", "acceptedAnswer": { "@type": "Answer", "text": "Use a toothpick to create spider webs, bat shapes, or simple jack-o'-lantern faces on top cookies before baking. You can also press small Halloween-themed cookie cutters partially into the dough for outline impressions, or use themed cookie stamps for quick designs." } } ]}