Contest-Winning Chocolate Mint Sandwich Cookies Recipe

Learn how to make these award-winning homemade chocolate mint sandwich cookies that rival any store-bought version. The perfect balance of rich chocolate and cool mint flavors, these easy-to-master cookies feature a crisp exterior and smooth, creamy filling that will impress at any gathering.
Difficulty:
Intermediate
Prep Time:
45 mins
Cook Time:
10 mins
Serves:
24 sandwich cookies
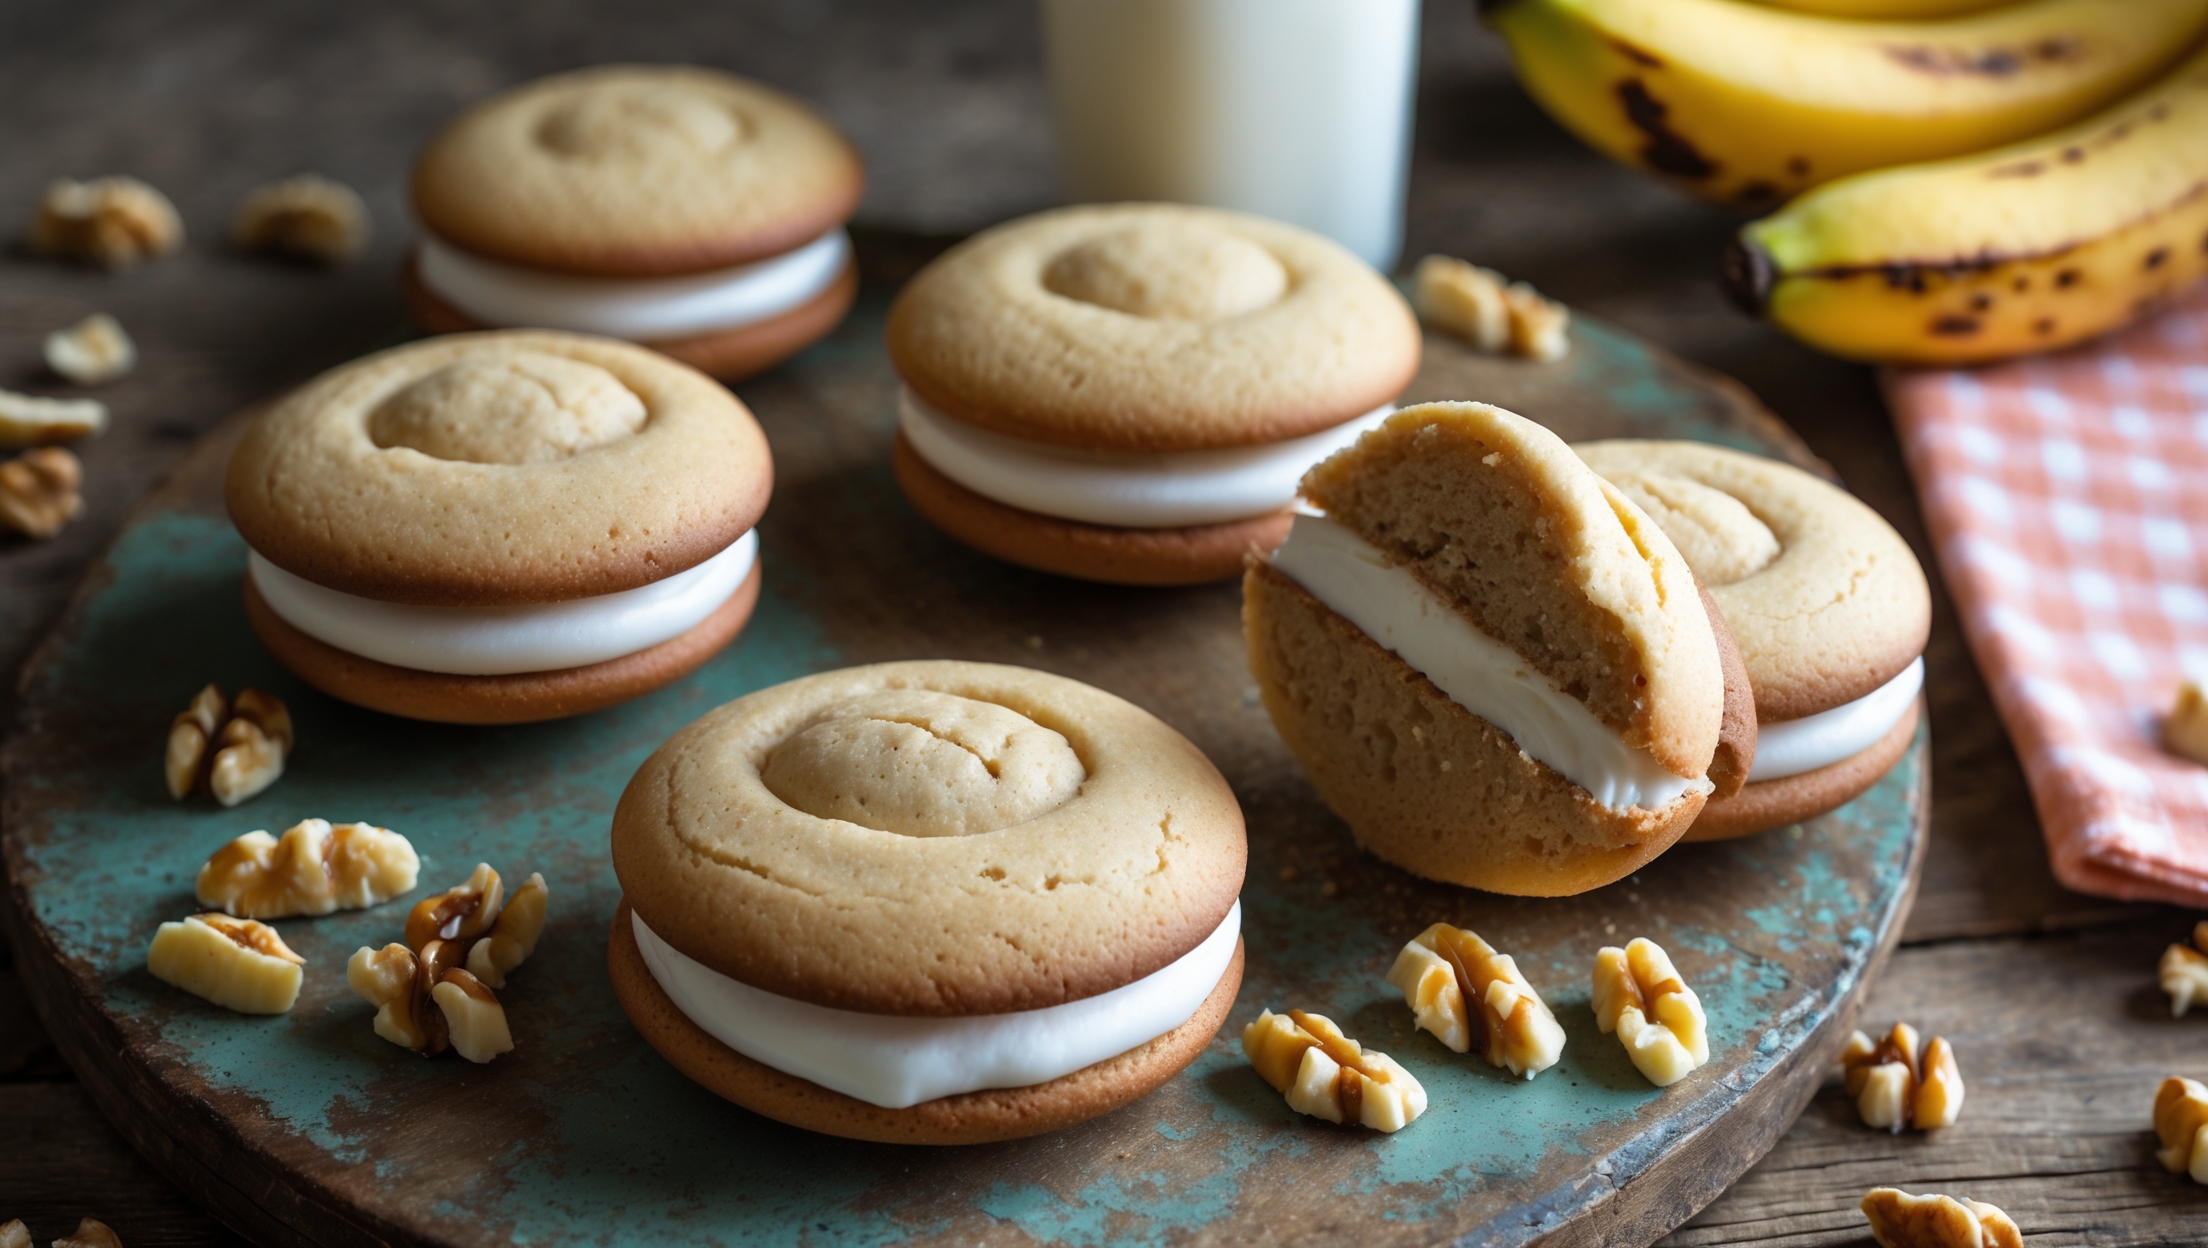
An overhead shot of perfectly round chocolate sandwich cookies arranged in a spiral pattern on a vintage milk-glass cake stand, with one cookie broken in half to reveal the vibrant mint-green filling inside. Soft natural light highlights the slightly crackled texture of the deep chocolate cookies and the smooth, creamy filling. In the background, a few fresh mint sprigs and scattered chocolate chips add context, while a glass of milk sits partially in frame. The contrast between the dark chocolate cookies and bright mint filling creates visual drama, with tiny flecks of chocolate visible in the filling for authentic homemade character.

Ingredients

<ul class="ingredients-main-list"><li class="ingredients-single-item">280g all-purpose flour</li><li class="ingredients-single-item">75g unsweetened cocoa powder</li><li class="ingredients-single-item">1/2 tsp baking powder</li><li class="ingredients-single-item">1/4 tsp salt</li><li class="ingredients-single-item">225g unsalted butter, softened</li><li class="ingredients-single-item">200g granulated sugar</li><li class="ingredients-single-item">1 large egg</li><li class="ingredients-single-item">2 tsp vanilla extract</li><li class="ingredients-single-item">For the mint filling:</li><li class="ingredients-single-item">115g unsalted butter, softened</li><li class="ingredients-single-item">300g powdered sugar, sifted</li><li class="ingredients-single-item">2-3 tbsp milk</li><li class="ingredients-single-item">1 tsp peppermint extract</li><li class="ingredients-single-item">1/4 tsp vanilla extract</li><li class="ingredients-single-item">Green food coloring (optional)</li><li class="ingredients-single-item">60g mini chocolate chips or finely chopped dark chocolate (optional)</li></ul>

Nutrition Facts (per serving)

🍽️ Serving Size: 1 sandwich cookie
🔥 Calories: 225 calories
🥑 Fat: 12 g
🧈 Saturated Fat: 7 g
🍞 Carbohydrates: 28 g
🍭 Sugar: 18 g
🍗 Protein: 2 g
🫀 Cholesterol: 45 mg
🧂 Sodium: 85 mg

Equipment

<ul class="equipment-main-list"><li class="equipment-single-item">Stand mixer or electric hand mixer</li><li class="equipment-single-item">5cm (2-inch) round cookie cutter</li><li class="equipment-single-item">Rolling pin</li><li class="equipment-single-item">Baking sheets</li><li class="equipment-single-item">Parchment paper or silicone baking mats</li></ul>

Directions

<ol class="no-list-style"><li class="MethodStepper"><h4 class="step-title">Step 1</h4>In a medium bowl, whisk together the flour, cocoa powder, baking powder, and salt until well combined. The cocoa powder tends to form clumps, so be sure to whisk thoroughly to create a uniform dry mixture that will distribute the chocolate flavor evenly throughout your cookies.</li><li class="MethodStepper"><h4 class="step-title">Step 2</h4>In the bowl of your stand mixer fitted with the paddle attachment (or using a hand mixer), cream the butter and sugar together on medium-high speed until light and fluffy, about 3-4 minutes. This extended creaming process incorporates air into the mixture, creating a lighter cookie texture that will still maintain its structure when filled.</li><li class="MethodStepper"><h4 class="step-title">Step 3</h4>Add the egg and vanilla extract to the butter mixture and beat until fully incorporated, scraping down the sides of the bowl as needed. The mixture should look smooth and glossy at this point.</li><li class="MethodStepper"><h4 class="step-title">Step 4</h4>With your mixer on low speed, gradually add the flour mixture to the wet ingredients until just combined. Be careful not to overmix, as this can develop the gluten in the flour and make your cookies tough rather than tender. The dough will be relatively stiff but should hold together when pressed.</li><li class="MethodStepper"><h4 class="step-title">Step 5</h4>Divide the dough in half and form each portion into a disk. Wrap each disk in plastic wrap and refrigerate for at least 1 hour or up to 2 days. This chilling time allows the flour to fully hydrate and the butter to solidify, which prevents the cookies from spreading too much during baking and helps maintain their shape.</li><li class="MethodStepper"><h4 class="step-title">Step 6</h4>When ready to bake, preheat your oven to 180°C and line baking sheets with parchment paper or silicone mats. Remove one disk of dough from the refrigerator and let it sit at room temperature for about 5-10 minutes to slightly soften.</li><li class="MethodStepper"><h4 class="step-title">Step 7</h4>On a lightly floured surface, roll the dough to about 3mm thickness. If the dough sticks, sprinkle a bit more flour underneath and on top. Using your 5cm round cookie cutter, cut out as many circles as possible. Re-roll the scraps once to cut additional cookies. Place the cut cookies about 2.5cm apart on your prepared baking sheets.</li><li class="MethodStepper"><h4 class="step-title">Step 8</h4>Bake the cookies for 8-10 minutes, just until the edges are firm and the centers are set. They won't change color much due to their chocolate content, so look for a matte finish rather than a glossy appearance. Be careful not to overbake as chocolate cookies burn easily and can become bitter.</li><li class="MethodStepper"><h4 class="step-title">Step 9</h4>Allow the cookies to cool on the baking sheet for 5 minutes before transferring them to a wire rack to cool completely. Repeat the process with the remaining dough, being sure your baking sheets are completely cool before placing new dough on them.</li><li class="MethodStepper"><h4 class="step-title">Step 10</h4>While the cookies cool, prepare the mint filling. In your clean mixer bowl, beat the softened butter until creamy. Gradually add the sifted powdered sugar, about 100g at a time, beating well after each addition. The slow incorporation prevents a powdered sugar cloud and ensures a smooth texture.</li><li class="MethodStepper"><h4 class="step-title">Step 11</h4>Add the peppermint extract, vanilla extract, and 2 tablespoons of milk, beating until smooth and creamy. If the filling seems too stiff, add the remaining tablespoon of milk. The filling should be thick enough to hold its shape but spreadable. Add a few drops of green food coloring if desired, mixing until you achieve an even, pale mint color.</li><li class="MethodStepper"><h4 class="step-title">Step 12</h4>If using, fold in the mini chocolate chips or finely chopped chocolate by hand. These add a wonderful textural contrast and enhance the chocolate-mint flavor combination.</li><li class="MethodStepper"><h4 class="step-title">Step 13</h4>Once cookies are completely cool, turn half of them upside down. Using a piping bag fitted with a round tip, or a small offset spatula, place about 1-1.5 teaspoons of filling in the center of each upside-down cookie. Top with another cookie, right side up, and gently press until the filling reaches the edges.</li><li class="MethodStepper"><h4 class="step-title">Step 14</h4>Allow the sandwich cookies to set at room temperature for about 30 minutes, which helps the filling firm up slightly. For the best flavor, let them sit for at least 2 hours before serving to allow the mint flavor to permeate throughout the cookie. Store in an airtight container at room temperature for up to 5 days, or refrigerate for up to 1 week, bringing to room temperature before serving for the best texture and flavor.</li></ol>

FAQs

Find answers to your most pressing questions about this delicious recipe right here.

What ingredients are used in Contest-Winning Chocolate Mint Sandwich Cookies Recipe?

These cookies require all-purpose flour, cocoa powder, baking powder, salt, butter, sugar, eggs, and vanilla for the chocolate wafers. The mint filling needs butter, powdered sugar, milk, peppermint extract, vanilla, and optional green food colouring and chocolate chips.

How to cook Contest-Winning Chocolate Mint Sandwich Cookies Recipe at home?

Learn how to cook Contest-Winning Chocolate Mint Sandwich Cookies by making a chocolate cookie dough, chilling it, rolling to 3mm thickness, and cutting into rounds. Bake for 8-10 minutes at 180°C. Once cooled, sandwich pairs of cookies with a homemade mint buttercream filling that's tinted green and optionally studded with chocolate chips.

How do you achieve the perfect crisp texture for chocolate sandwich cookies?

For perfectly crisp chocolate sandwich cookies, roll the dough to an even 3mm thickness, avoid overbaking (8-10 minutes is ideal), and look for a matte rather than glossy finish. Allow cookies to cool completely before filling, and let the assembled cookies rest for 2 hours to develop the best texture.

Can you freeze homemade mint chocolate sandwich cookies?

Yes, these mint chocolate sandwich cookies freeze beautifully for up to 3 months. You can freeze them assembled or freeze the unfilled cookies and filling separately. Thaw at room temperature for about an hour before serving. The texture remains crisp and the mint filling stays creamy.

What makes the mint filling in these cookies so smooth and creamy?

The secret to the smooth, creamy filling is gradually incorporating sifted powdered sugar into softened butter, adding liquid (milk) incrementally, and beating until perfectly incorporated. The peppermint extract provides flavour without affecting texture, while optional mini chocolate chips add delightful texture contrast.

Want to try something else in ...

Sandwich Cookies

Try following recommended recipes

{ "@context": "http://schema.org/", "@type": "Recipe", "name": "Contest-Winning Chocolate Mint Sandwich Cookies Recipe", "image": ["https://cdn.prod.website-files.com/67f19ab882e7325b0d63c86a/6837de7ae644ab5369aef844_Leonardo_Phoenix_10_An_overhead_shot_of_perfectly_round_chocol_0.jpeg"], "author": { "@type": "Person", "name": "Gurbir Aujla", "brand": "What's Baking?", "jobTitle": "Baker" }, "datePublished": "2024-06-23", "description": "Learn how to make these award-winning homemade chocolate mint sandwich cookies that rival any store-bought version. The perfect balance of rich chocolate and cool mint flavors, these easy-to-master cookies feature a crisp exterior and smooth, creamy filling that will impress at any gathering.", "prepTime": "PT45M", "cookTime": "PT10M", "totalTime": "PT55M", "keywords": "chocolate mint cookies, sandwich cookies, homemade Oreos, mint filling, holiday cookies", "recipeYield": "24", "recipeCategory": "Dessert", "recipeCuisine": "American", "nutrition": { "@type": "NutritionInformation", "calories": "225 calories", "carbohydrateContent": "28 g", "proteinContent": "2 g", "fatContent": "12 g", "saturatedFatContent": "7 g", "cholesterolContent": "45 mg", "sodiumContent": "85 mg", "sugarContent": "18 g", "servingSize": "1 sandwich cookie" }, "recipeIngredient": [ "280g all-purpose flour", "75g unsweetened cocoa powder", "1/2 tsp baking powder", "1/4 tsp salt", "225g unsalted butter, softened", "200g granulated sugar", "1 large egg", "2 tsp vanilla extract", "115g unsalted butter, softened (for filling)", "300g powdered sugar, sifted", "2-3 tbsp milk", "1 tsp peppermint extract", "1/4 tsp vanilla extract", "Green food coloring (optional)", "60g mini chocolate chips or finely chopped dark chocolate (optional)" ], "recipeInstructions": [ { "@type": "HowToStep", "name": "Prepare dry ingredients", "text": "In a medium bowl, whisk together the flour, cocoa powder, baking powder, and salt until well combined. The cocoa powder tends to form clumps, so be sure to whisk thoroughly to create a uniform dry mixture that will distribute the chocolate flavor evenly throughout your cookies." }, { "@type": "HowToStep", "name": "Cream butter and sugar", "text": "In the bowl of your stand mixer fitted with the paddle attachment (or using a hand mixer), cream the butter and sugar together on medium-high speed until light and fluffy, about 3-4 minutes. This extended creaming process incorporates air into the mixture, creating a lighter cookie texture that will still maintain its structure when filled." }, { "@type": "HowToStep", "name": "Add wet ingredients", "text": "Add the egg and vanilla extract to the butter mixture and beat until fully incorporated, scraping down the sides of the bowl as needed. The mixture should look smooth and glossy at this point." }, { "@type": "HowToStep", "name": "Combine dry and wet ingredients", "text": "With your mixer on low speed, gradually add the flour mixture to the wet ingredients until just combined. Be careful not to overmix, as this can develop the gluten in the flour and make your cookies tough rather than tender. The dough will be relatively stiff but should hold together when pressed." }, { "@type": "HowToStep", "name": "Chill dough", "text": "Divide the dough in half and form each portion into a disk. Wrap each disk in plastic wrap and refrigerate for at least 1 hour or up to 2 days. This chilling time allows the flour to fully hydrate and the butter to solidify, which prevents the cookies from spreading too much during baking and helps maintain their shape." }, { "@type": "HowToStep", "name": "Prepare for baking", "text": "When ready to bake, preheat your oven to 180°C and line baking sheets with parchment paper or silicone mats. Remove one disk of dough from the refrigerator and let it sit at room temperature for about 5-10 minutes to slightly soften." }, { "@type": "HowToStep", "name": "Roll and cut cookies", "text": "On a lightly floured surface, roll the dough to about 3mm thickness. If the dough sticks, sprinkle a bit more flour underneath and on top. Using your 5cm round cookie cutter, cut out as many circles as possible. Re-roll the scraps once to cut additional cookies. Place the cut cookies about 2.5cm apart on your prepared baking sheets." }, { "@type": "HowToStep", "name": "Bake cookies", "text": "Bake the cookies for 8-10 minutes, just until the edges are firm and the centers are set. They won't change color much due to their chocolate content, so look for a matte finish rather than a glossy appearance. Be careful not to overbake as chocolate cookies burn easily and can become bitter." }, { "@type": "HowToStep", "name": "Cool cookies", "text": "Allow the cookies to cool on the baking sheet for 5 minutes before transferring them to a wire rack to cool completely. Repeat the process with the remaining dough, being sure your baking sheets are completely cool before placing new dough on them." }, { "@type": "HowToStep", "name": "Prepare mint filling", "text": "In your clean mixer bowl, beat the softened butter until creamy. Gradually add the sifted powdered sugar, about 100g at a time, beating well after each addition. The slow incorporation prevents a powdered sugar cloud and ensures a smooth texture." }, { "@type": "HowToStep", "name": "Flavor filling", "text": "Add the peppermint extract, vanilla extract, and 2 tablespoons of milk, beating until smooth and creamy. If the filling seems too stiff, add the remaining tablespoon of milk. The filling should be thick enough to hold its shape but spreadable. Add a few drops of green food coloring if desired, mixing until you achieve an even, pale mint color." }, { "@type": "HowToStep", "name": "Add chocolate chips (optional)", "text": "If using, fold in the mini chocolate chips or finely chopped chocolate by hand. These add a wonderful textural contrast and enhance the chocolate-mint flavor combination." }, { "@type": "HowToStep", "name": "Assemble cookies", "text": "Once cookies are completely cool, turn half of them upside down. Using a piping bag fitted with a round tip, or a small offset spatula, place about 1-1.5 teaspoons of filling in the center of each upside-down cookie. Top with another cookie, right side up, and gently press until the filling reaches the edges." }, { "@type": "HowToStep", "name": "Set and serve", "text": "Allow the sandwich cookies to set at room temperature for about 30 minutes, which helps the filling firm up slightly. For the best flavor, let them sit for at least 2 hours before serving to allow the mint flavor to permeate throughout the cookie. Store in an airtight container at room temperature for up to 5 days, or refrigerate for up to 1 week, bringing to room temperature before serving for the best texture and flavor." } ], "aggregateRating": { "@type": "AggregateRating", "ratingValue": "5", "ratingCount": "178" }, "review": [ { "@type": "Review", "author": "Sofia Mendoza", "datePublished": "2024-06-15", "reviewBody": "These cookies are incredible! The balance between chocolate and mint is absolute perfection. I've made them three times already, and they disappear within hours every time. They've become our family's new favorite treat!", "name": "Perfect Mint-Chocolate Balance", "reviewRating": { "@type": "Rating", "ratingValue": "5" } }, { "@type": "Review", "author": "Liam O'Connor", "datePublished": "2024-06-10", "reviewBody": "I was skeptical these could rival store-bought mint chocolate cookies, but they're actually much better! The cookies have the perfect snap and the filling is so much more flavorful than commercial versions. Absolutely worth the effort!", "name": "Better Than Store-Bought", "reviewRating": { "@type": "Rating", "ratingValue": "5" } }, { "@type": "Review", "author": "Aisha Patel", "datePublished": "2024-06-05", "reviewBody": "I entered these in our annual family baking competition and they won first place! Everyone was impressed by how professional they looked and how authentic they tasted. The green filling makes them so festive and fun too!", "name": "Competition Winner", "reviewRating": { "@type": "Rating", "ratingValue": "5" } }, { "@type": "Review", "author": "Mateo Rodriguez", "datePublished": "2024-05-30", "reviewBody": "The mint filling in these cookies is absolutely divine - so smooth and creamy! I added the mini chocolate chips to the filling which gave it an amazing texture contrast. These cookies stayed fresh for nearly a week in an airtight container.", "name": "Perfectly Smooth Filling", "reviewRating": { "@type": "Rating", "ratingValue": "5" } }, { "@type": "Review", "author": "Emiko Tanaka", "datePublished": "2024-05-25", "reviewBody": "I made these for holiday gifts last year and received so many compliments! The cookies have the perfect crisp exterior with a deliciously creamy filling. The recipe is detailed and foolproof - even for someone with intermediate baking skills like me.", "name": "Perfect Holiday Gift", "reviewRating": { "@type": "Rating", "ratingValue": "5" } } ]}

{ "@context": "https://schema.org", "@type": "FAQPage", "mainEntity": [ { "@type": "Question", "name": "What ingredients are used in Contest-Winning Chocolate Mint Sandwich Cookies Recipe?", "acceptedAnswer": { "@type": "Answer", "text": "These cookies require all-purpose flour, cocoa powder, baking powder, salt, butter, sugar, eggs, and vanilla for the chocolate wafers. The mint filling needs butter, powdered sugar, milk, peppermint extract, vanilla, and optional green food colouring and chocolate chips." } }, { "@type": "Question", "name": "How to cook Contest-Winning Chocolate Mint Sandwich Cookies Recipe at home?", "acceptedAnswer": { "@type": "Answer", "text": "Learn how to cook Contest-Winning Chocolate Mint Sandwich Cookies by making a chocolate cookie dough, chilling it, rolling to 3mm thickness, and cutting into rounds. Bake for 8-10 minutes at 180°C. Once cooled, sandwich pairs of cookies with a homemade mint buttercream filling that's tinted green and optionally studded with chocolate chips." } }, { "@type": "Question", "name": "How do you achieve the perfect crisp texture for chocolate sandwich cookies?", "acceptedAnswer": { "@type": "Answer", "text": "For perfectly crisp chocolate sandwich cookies, roll the dough to an even 3mm thickness, avoid overbaking (8-10 minutes is ideal), and look for a matte rather than glossy finish. Allow cookies to cool completely before filling, and let the assembled cookies rest for 2 hours to develop the best texture." } }, { "@type": "Question", "name": "Can you freeze homemade mint chocolate sandwich cookies?", "acceptedAnswer": { "@type": "Answer", "text": "Yes, these mint chocolate sandwich cookies freeze beautifully for up to 3 months. You can freeze them assembled or freeze the unfilled cookies and filling separately. Thaw at room temperature for about an hour before serving. The texture remains crisp and the mint filling stays creamy." } }, { "@type": "Question", "name": "What makes the mint filling in these cookies so smooth and creamy?", "acceptedAnswer": { "@type": "Answer", "text": "The secret to the smooth, creamy filling is gradually incorporating sifted powdered sugar into softened butter, adding liquid (milk) incrementally, and beating until perfectly incorporated. The peppermint extract provides flavour without affecting texture, while optional mini chocolate chips add delightful texture contrast." } } ]}