Directions
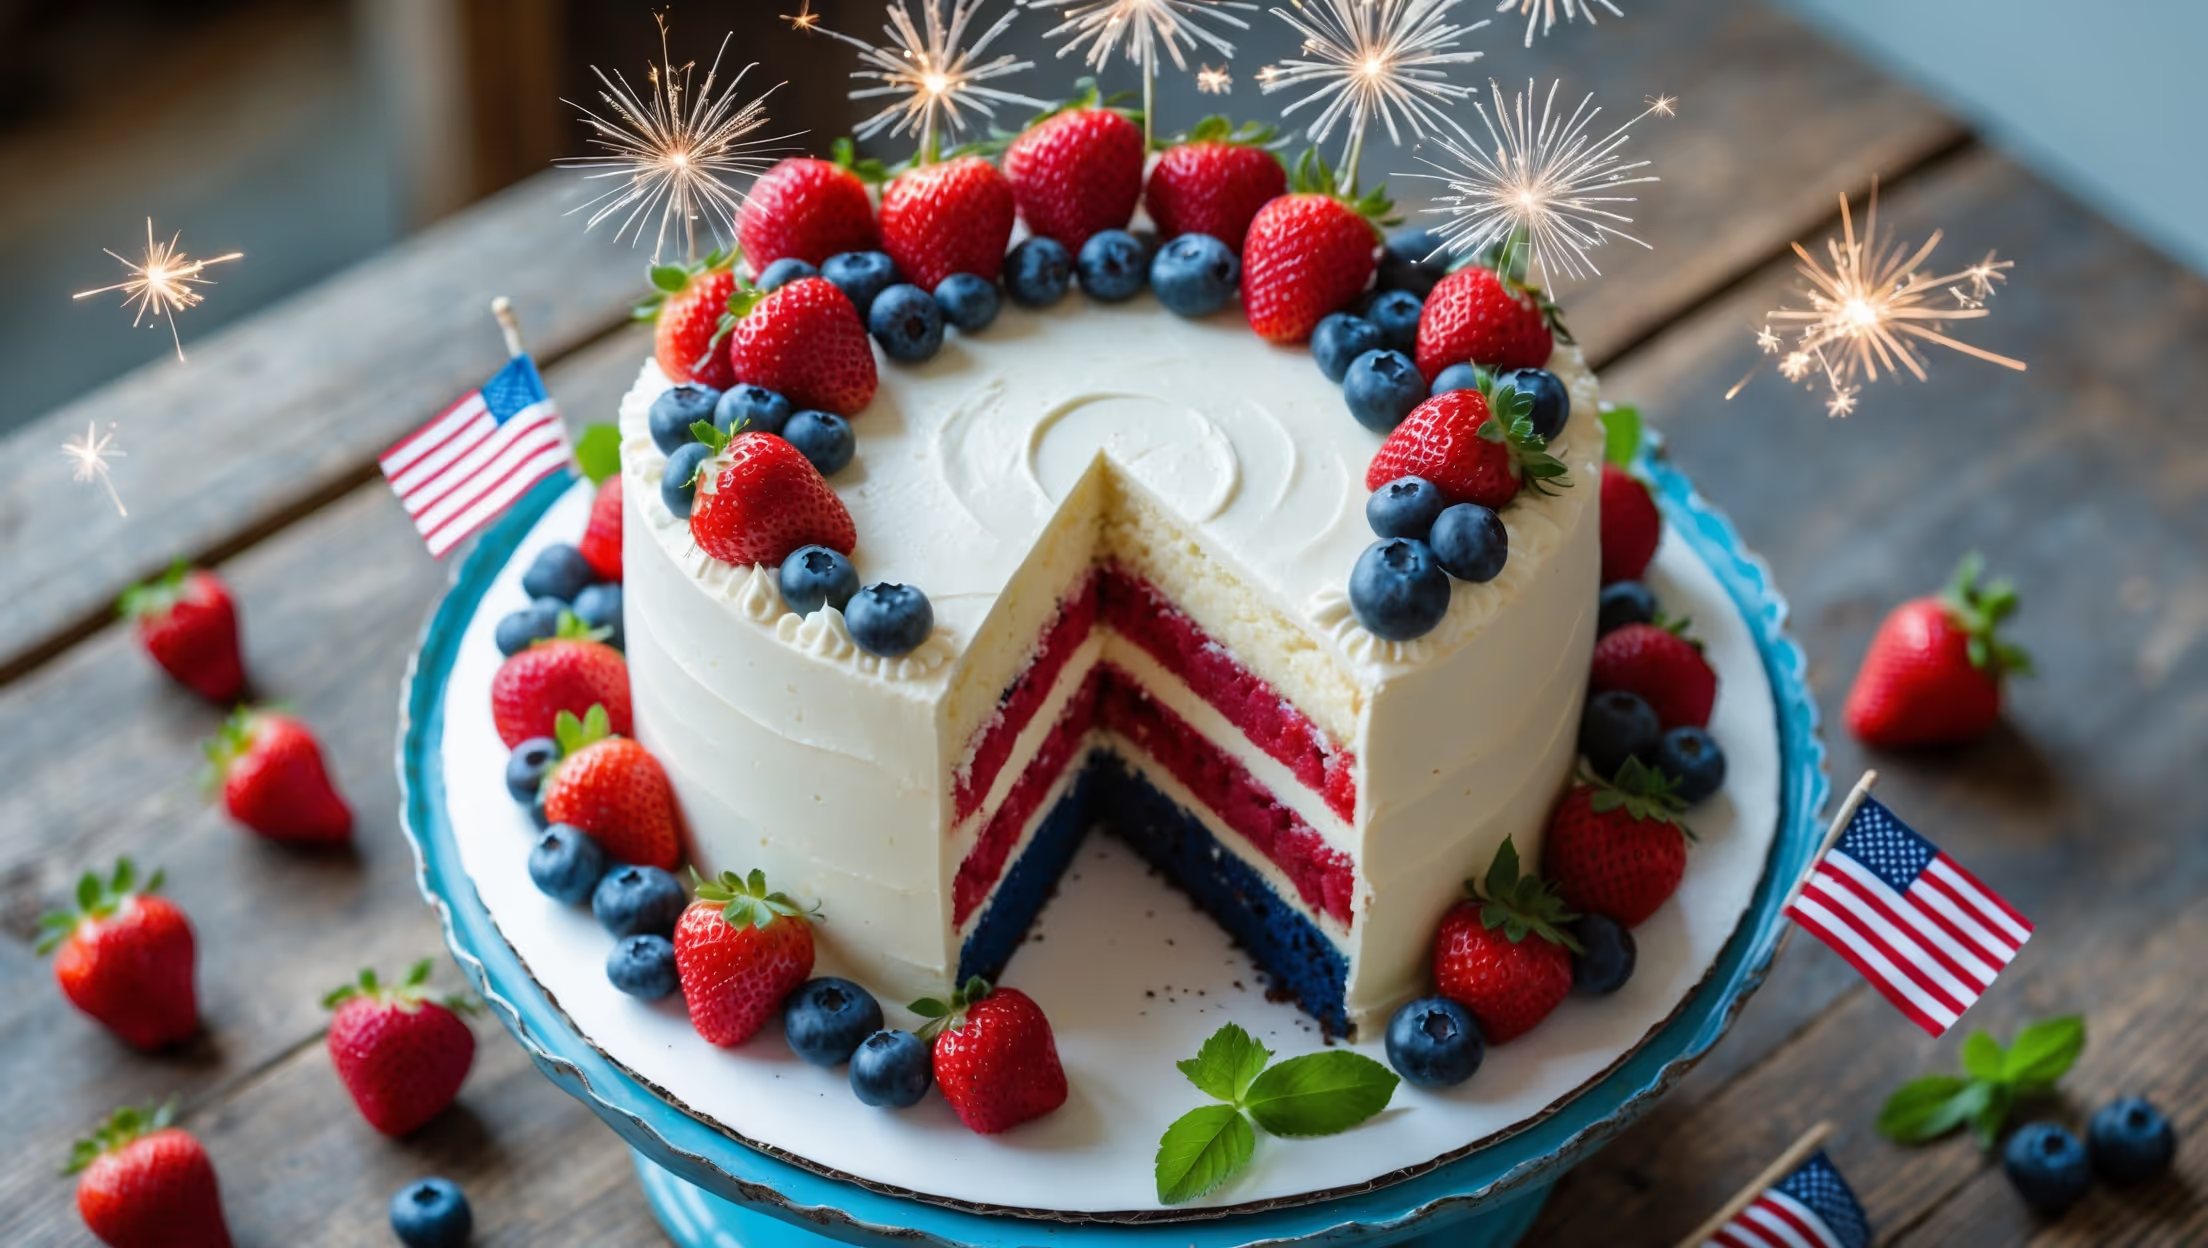
<ol class="no-list-style"><li class="MethodStepper"><h4 class="step-title">Step 1</h4>Preheat your oven to 175°C (350°F). Grease three 20cm (8-inch) round cake pans, line the bottoms with parchment paper circles, then grease the paper and dust lightly with flour. This thorough preparation ensures your cakes will release cleanly from the pans.</li><li class="MethodStepper"><h4 class="step-title">Step 2</h4>In a medium bowl, whisk together the cake flour, baking powder, baking soda, and salt. Proper mixing of dry ingredients ensures they'll distribute evenly throughout the batter, leading to consistent texture.</li><li class="MethodStepper"><h4 class="step-title">Step 3</h4>In the bowl of your stand mixer fitted with the paddle attachment, beat the butter on medium speed until creamy, about 1 minute. Gradually add the sugar and continue beating on medium-high speed until light and fluffy, about 5 minutes. This extended creaming process incorporates air bubbles that help your cake rise and achieve a tender crumb.</li><li class="MethodStepper"><h4 class="step-title">Step 4</h4>Add eggs one at a time, beating well after each addition and scraping down the sides of the bowl as needed. Mix in the vanilla extract. Your mixture might look slightly curdled – that's perfectly normal!</li><li class="MethodStepper"><h4 class="step-title">Step 5</h4>On low speed, add the flour mixture in three additions, alternating with the buttermilk (beginning and ending with flour). Mix just until combined after each addition – overmixing develops gluten which can make your cake tough.</li><li class="MethodStepper"><h4 class="step-title">Step 6</h4>Divide the batter equally into three portions (about 550g each for precision). Leave one portion white for the middle layer. This will be your "white" layer – transfer to one of the prepared pans.</li><li class="MethodStepper"><h4 class="step-title">Step 7</h4>In a food processor or blender, puree the blueberries with the blueberry jam until smooth. Add this to one portion of the batter and gently fold until incorporated. If the color isn't vibrant enough, add a tiny amount of blue food coloring gel. Pour into the second prepared pan. The natural acids in blueberries can react with leavening agents to enhance cake rise.</li><li class="MethodStepper"><h4 class="step-title">Step 8</h4>Repeat the process with the strawberries and strawberry jam for the third portion of batter, adding a touch of red food coloring if desired for a more vibrant hue. Transfer to the final prepared pan.</li><li class="MethodStepper"><h4 class="step-title">Step 9</h4>Bake the cakes for 23-27 minutes, or until a toothpick inserted in the center comes out clean or with a few moist crumbs. The cakes should also spring back when lightly touched. Be careful not to overbake, as this can dry out your cake.</li><li class="MethodStepper"><h4 class="step-title">Step 10</h4>Allow the cakes to cool in the pans for 10 minutes (this sets the structure), then invert onto wire racks, remove parchment paper, and let cool completely. If the cakes have domed tops, level them with a serrated knife for perfectly flat layers.</li><li class="MethodStepper"><h4 class="step-title">Step 11</h4>While the cakes cool, prepare the cream cheese frosting. Beat the cream cheese and butter together on medium-high speed until smooth and creamy, about 2 minutes. The temperature of these ingredients is crucial – if they're too cold, your frosting will be lumpy.</li><li class="MethodStepper"><h4 class="step-title">Step 12</h4>Add the powdered sugar one cup at a time, beating on low speed after each addition. Once all sugar is incorporated, add vanilla and salt, then increase to high speed and beat for 2 minutes until fluffy. The extended beating incorporates air and creates a silkier texture.</li><li class="MethodStepper"><h4 class="step-title">Step 13</h4>To assemble, place the red (strawberry) cake layer on your serving plate or cake stand. Spread about 3/4 cup of frosting evenly over the top. The frosting layer should be thick enough to be visible when the cake is sliced but not so thick that it squishes out.</li><li class="MethodStepper"><h4 class="step-title">Step 14</h4>Place the white (vanilla) layer on top and repeat with another 3/4 cup of frosting, spreading it to the edges. Top with the blue (blueberry) layer. This order creates the classic patriotic red, white, and blue effect.</li><li class="MethodStepper"><h4 class="step-title">Step 15</h4>Apply a thin layer of frosting around the entire cake to seal in crumbs (this is called a crumb coat). Refrigerate for 30 minutes to set this layer. The cold temperature firms up the frosting and makes the final coating much easier to apply smoothly.</li><li class="MethodStepper"><h4 class="step-title">Step 16</h4>Use the remaining frosting to cover the cake completely with a smooth, even layer. For best results, use an offset spatula and rotate your cake stand as you work. The smooth white exterior creates a perfect canvas for your patriotic decorations.</li><li class="MethodStepper"><h4 class="step-title">Step 17</h4>Decorate the top of the cake with fresh berries in a pattern that resembles fireworks or stars – use blueberries, strawberries, and raspberries. Add fresh mint leaves as accents. If desired, place small clusters of berries around the base of the cake for additional color.</li><li class="MethodStepper"><h4 class="step-title">Step 18</h4>For the best flavor, allow the cake to sit at room temperature for 1-2 hours before serving, as the flavors continue to develop and meld. If making ahead, refrigerate the frosted cake, then bring to room temperature before serving. The cake will maintain its moisture for up to three days when properly stored.</li></ol>