Sweet Potato Custard Tart Recipe

A silky smooth custard infused with caramelized sweet potato nestled in a buttery shortcrust pastry, creating a harmonious blend of comforting autumn flavors and delicate textures.
Difficulty:
Intermediate
Prep Time:
45 mins
Cook Time:
1 hour 15 mins
Serves:
1 tart (8 slices)
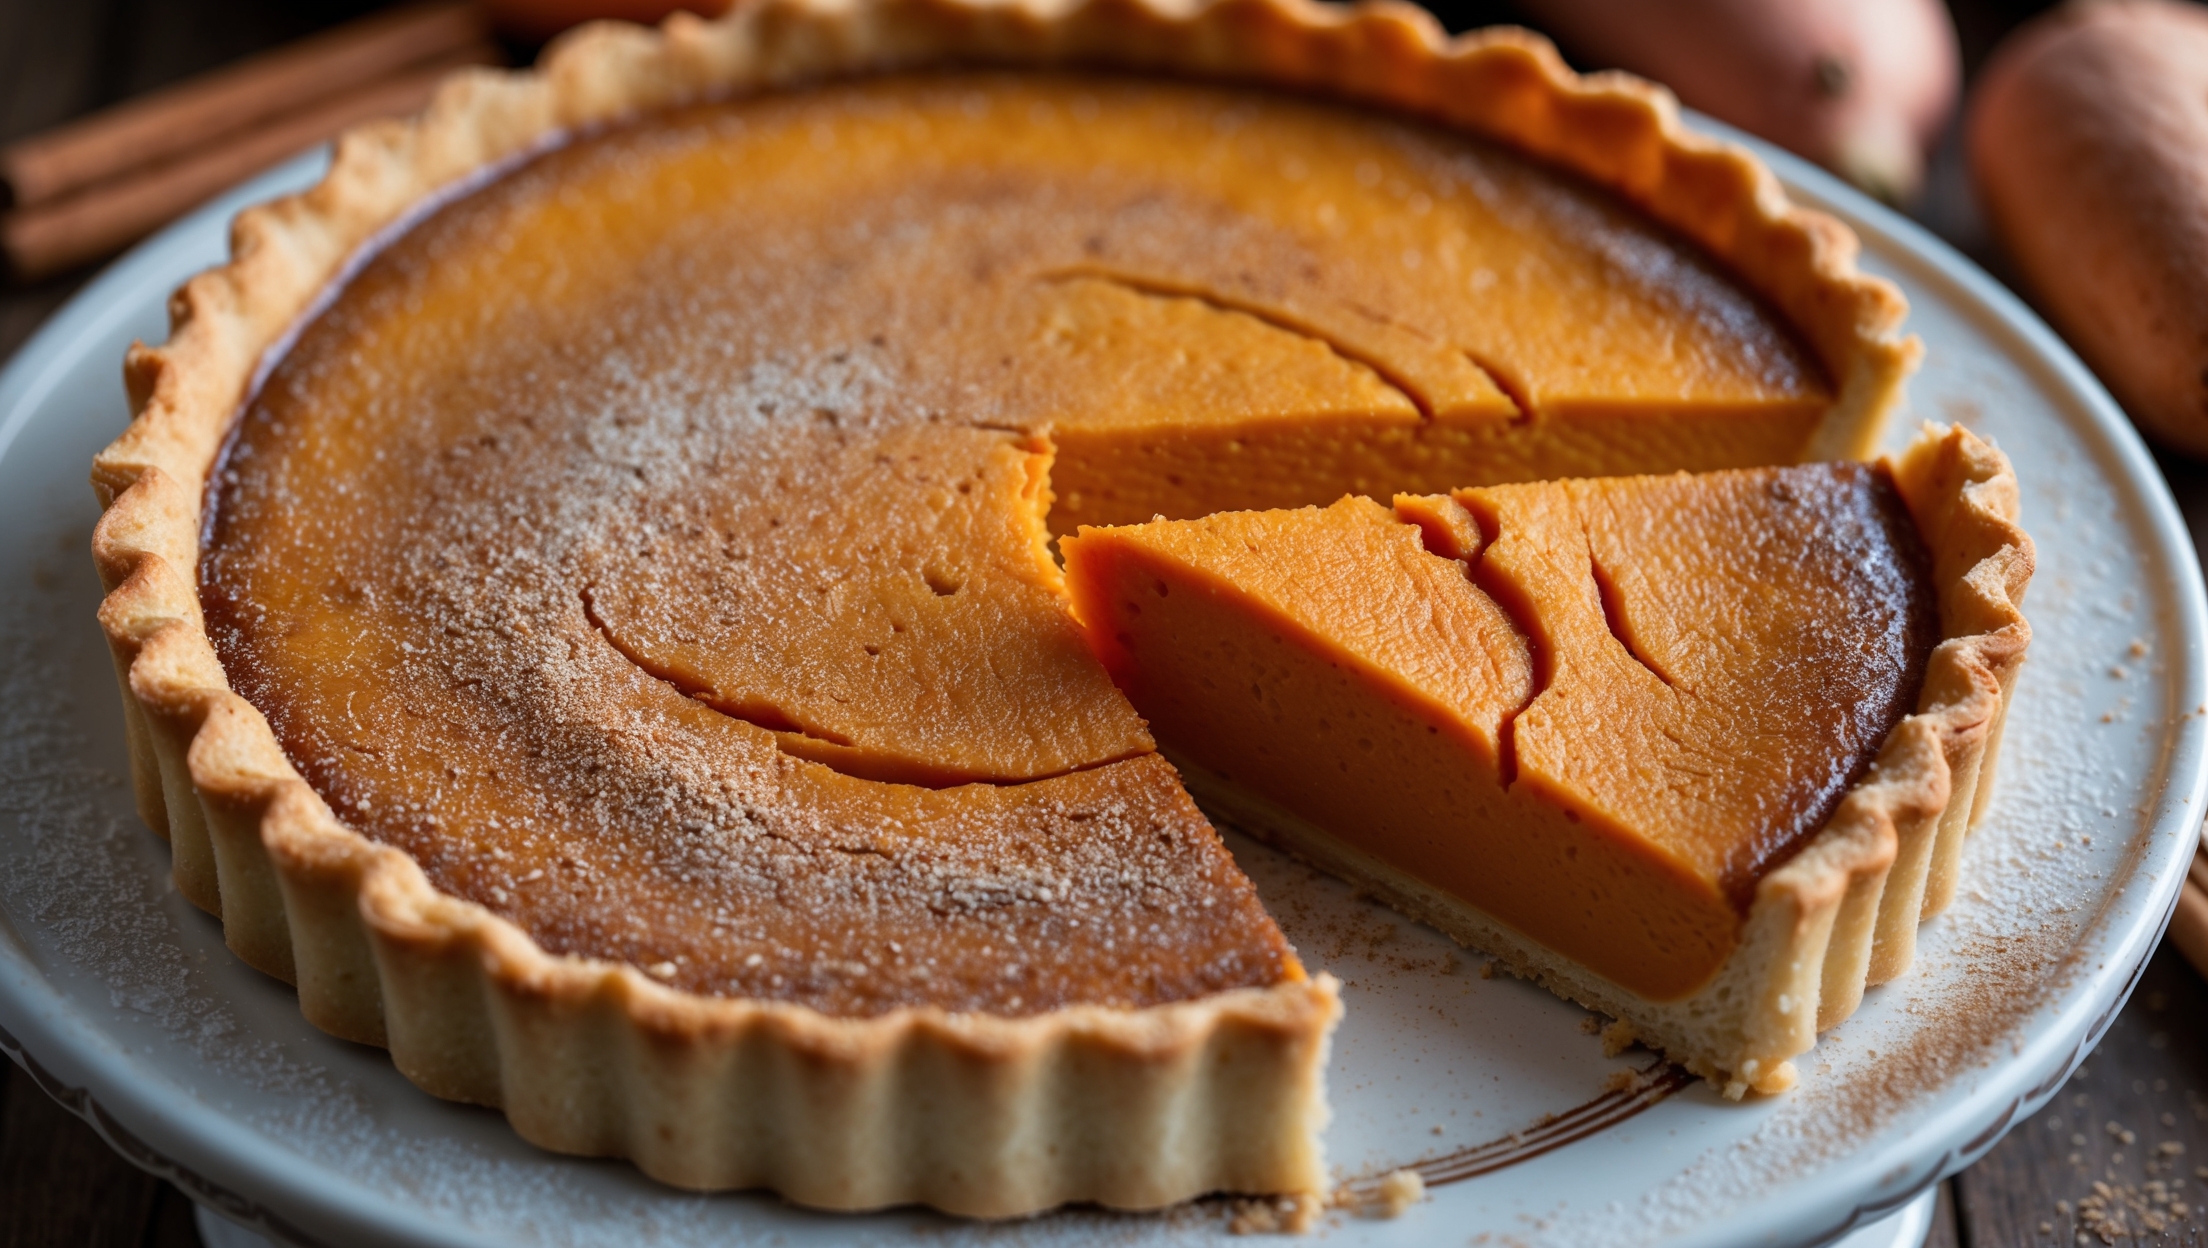
An overhead shot of a perfectly baked sweet potato custard tart, its surface showing a gentle caramelization with subtle cracks that reveal the velvety custard beneath. The tart is positioned on a vintage ceramic cake stand against a backdrop of scattered cinnamon sticks and raw sweet potatoes. The cross-section slice being lifted reveals the distinct layers - the crisp golden pastry base, the vibrant orange sweet potato filling with its silky texture, and the delicate custard layer on top. Soft natural light streams in from the side, highlighting the warm amber tones of the filling and the flaky texture of the pastry edges. A light dusting of powdered sugar and freshly grated nutmeg adds dimension and texture to the surface.

Ingredients

<ul class="ingredients-main-list"><li class="ingredients-single-item">For the pastry:</li><li class="ingredients-single-item">200g plain flour</li><li class="ingredients-single-item">100g cold unsalted butter, cubed</li><li class="ingredients-single-item">30g caster sugar</li><li class="ingredients-single-item">1 large egg yolk</li><li class="ingredients-single-item">2-3 tbsp ice-cold water</li><li class="ingredients-single-item">¼ tsp salt</li><li class="ingredients-single-item">For the filling:</li><li class="ingredients-single-item">400g sweet potatoes (about 2 medium)</li><li class="ingredients-single-item">120g light brown sugar</li><li class="ingredients-single-item">3 large eggs</li><li class="ingredients-single-item">200ml double cream</li><li class="ingredients-single-item">100ml whole milk</li><li class="ingredients-single-item">1 tsp vanilla extract</li><li class="ingredients-single-item">1 tsp ground cinnamon</li><li class="ingredients-single-item">½ tsp ground nutmeg</li><li class="ingredients-single-item">¼ tsp ground ginger</li><li class="ingredients-single-item">¼ tsp salt</li><li class="ingredients-single-item">For serving (optional):</li><li class="ingredients-single-item">200ml whipped cream</li><li class="ingredients-single-item">Extra ground cinnamon for dusting</li></ul>

Equipment

<ul class="equipment-main-list"><li class="equipment-single-item">23cm (9-inch) loose-bottomed tart tin</li><li class="equipment-single-item">Baking beans or rice (for blind baking)</li><li class="equipment-single-item">Parchment paper</li><li class="equipment-single-item">Food processor (optional)</li><li class="equipment-single-item">Fine mesh sieve</li></ul>
BAKE SMARTER

Kitchen Converter

Quickly switch between common baking units without leaving the recipe.

Convert
Result—

Volume uses US cups, tablespoons, and teaspoons. Converting weight to volume depends on the ingredient.

Directions

<ol class="no-list-style"><li class="MethodStepper"><h4 class="step-title">Step 1</h4>Preheat your oven to 200°C (180°C fan). Prick the sweet potatoes all over with a fork, place on a baking tray lined with foil, and roast for 45-60 minutes until completely tender when pierced with a knife. Roasting rather than boiling intensifies the sweet potato's natural sweetness through caramelization.</li><li class="MethodStepper"><h4 class="step-title">Step 2</h4>While the sweet potatoes roast, make the pastry. In a large bowl (or food processor), combine the flour, sugar and salt. Add the cold cubed butter and rub in with your fingertips until the mixture resembles fine breadcrumbs (or pulse in the processor). The cold butter creates pockets of steam during baking, resulting in a flaky texture.</li><li class="MethodStepper"><h4 class="step-title">Step 3</h4>Add the egg yolk and 2 tablespoons of ice-cold water, mixing with a knife until the dough just comes together, adding the remaining water if needed. The dough should be slightly crumbly but hold together when squeezed. Form into a disc, wrap in cling film and chill for at least 30 minutes. Resting allows the gluten to relax, preventing shrinkage during baking.</li><li class="MethodStepper"><h4 class="step-title">Step 4</h4>On a lightly floured surface, roll the pastry to about 3mm thickness and large enough to line your tart tin. Carefully transfer the pastry to the tin, gently pressing it into the corners without stretching. Trim the excess, leaving a small overhang. Prick the base with a fork and chill for 15 minutes to prevent shrinkage.</li><li class="MethodStepper"><h4 class="step-title">Step 5</h4>Line the chilled pastry case with parchment paper and fill with baking beans or rice. Blind bake at 180°C for 15 minutes, then remove the paper and beans and bake for a further 5-7 minutes until the base is pale golden. The blind baking ensures your pastry cooks fully, preventing a soggy bottom.</li><li class="MethodStepper"><h4 class="step-title">Step 6</h4>When the sweet potatoes are completely soft, remove from the oven and reduce the temperature to 170°C. Allow the potatoes to cool slightly, then peel and place the flesh in a large bowl. Mash thoroughly until smooth, then pass through a fine mesh sieve to ensure a silky texture.</li><li class="MethodStepper"><h4 class="step-title">Step 7</h4>Measure out 300g of the sweet potato purée (save any extra for another use). While still warm, mix in the brown sugar until fully incorporated. The warmth helps dissolve the sugar, creating a smoother filling.</li><li class="MethodStepper"><h4 class="step-title">Step 8</h4>In a separate bowl, whisk the eggs until well combined, then add the cream, milk, vanilla, and spices. Whisk until smooth, then gradually incorporate into the sweet potato mixture, whisking constantly to prevent the eggs from scrambling.</li><li class="MethodStepper"><h4 class="step-title">Step 9</h4>Pour the filling into the par-baked tart case, filling it to about 5mm from the top. Carefully transfer to the oven and bake for 35-40 minutes until the edges are set but the center still has a slight wobble when gently shaken - this ensures your custard remains creamy rather than rubbery.</li><li class="MethodStepper"><h4 class="step-title">Step 10</h4>Turn off the oven and leave the tart inside with the door slightly ajar for 15 minutes. This gentle cooling helps prevent the custard from cracking due to sudden temperature changes. Then remove from the oven and cool completely on a wire rack.</li><li class="MethodStepper"><h4 class="step-title">Step 11</h4>Once cooled, carefully remove the tart from the tin and place on a serving plate. For best results, chill for at least 2 hours before serving to allow the custard to fully set and the flavors to develop.</li><li class="MethodStepper"><h4 class="step-title">Step 12</h4>Serve slices with a dollop of freshly whipped cream and a light dusting of cinnamon if desired. The tart can be made a day ahead and stored, covered, in the refrigerator, but is best enjoyed within 48 hours of baking.</li></ol>
Nutrition Facts (per serving)

🍽️ Serving Size: 1 slice
🔥 Calories: 185 calories
🥑 Fat: 4 g
🧈 Saturated Fat: 2 g
🍞 Carbohydrates: 34 g
🍭 Sugar: 6 g
🍗 Protein: 5 g
🫀 Cholesterol: 25 mg
🧂 Sodium: 210 mg

Chef’s Notes

A few helpful details for making this recipe.

Can I make this tart ahead of time for a dinner party?

Yes! This sweet potato tart actually benefits from being made a day ahead as it allows the flavours to develop and the custard to fully set. Store covered in the refrigerator for up to 48 hours. Just bring to room temperature for about 30 minutes before serving for the best texture.

Why do I need to sieve the sweet potato for the custard filling?

Sieving the sweet potato purée is crucial for achieving that silky-smooth custard texture without any fibrous bits. This extra step removes any stringy elements or lumps that would disrupt the velvety consistency of your tart filling, resulting in a professional-quality dessert.

What's the secret to preventing cracks in a custard tart?

The key to crack-free custard is gentle baking and cooling. Bake until the edges are set but the centre still has a slight wobble, then cool gradually by turning off the oven and leaving the door ajar. Never rush the cooling process, as sudden temperature changes cause those dreaded cracks.

Want to try something else in ...

More recipes you might like

Keep exploring with more recipes from What's Baking.