Keto Taco Bowls (Cheese shell or lettuce wrap) Recipe

Crispy cheese shells or fresh lettuce wraps cradle seasoned ground meat, creamy avocado, and zesty toppings for a satisfying low-carb taco experience that delivers all the Mexican flavors without the carbs.
Difficulty:
Beginner
Prep Time:
15 mins
Cook Time:
15 mins
Serves:
4 taco bowls
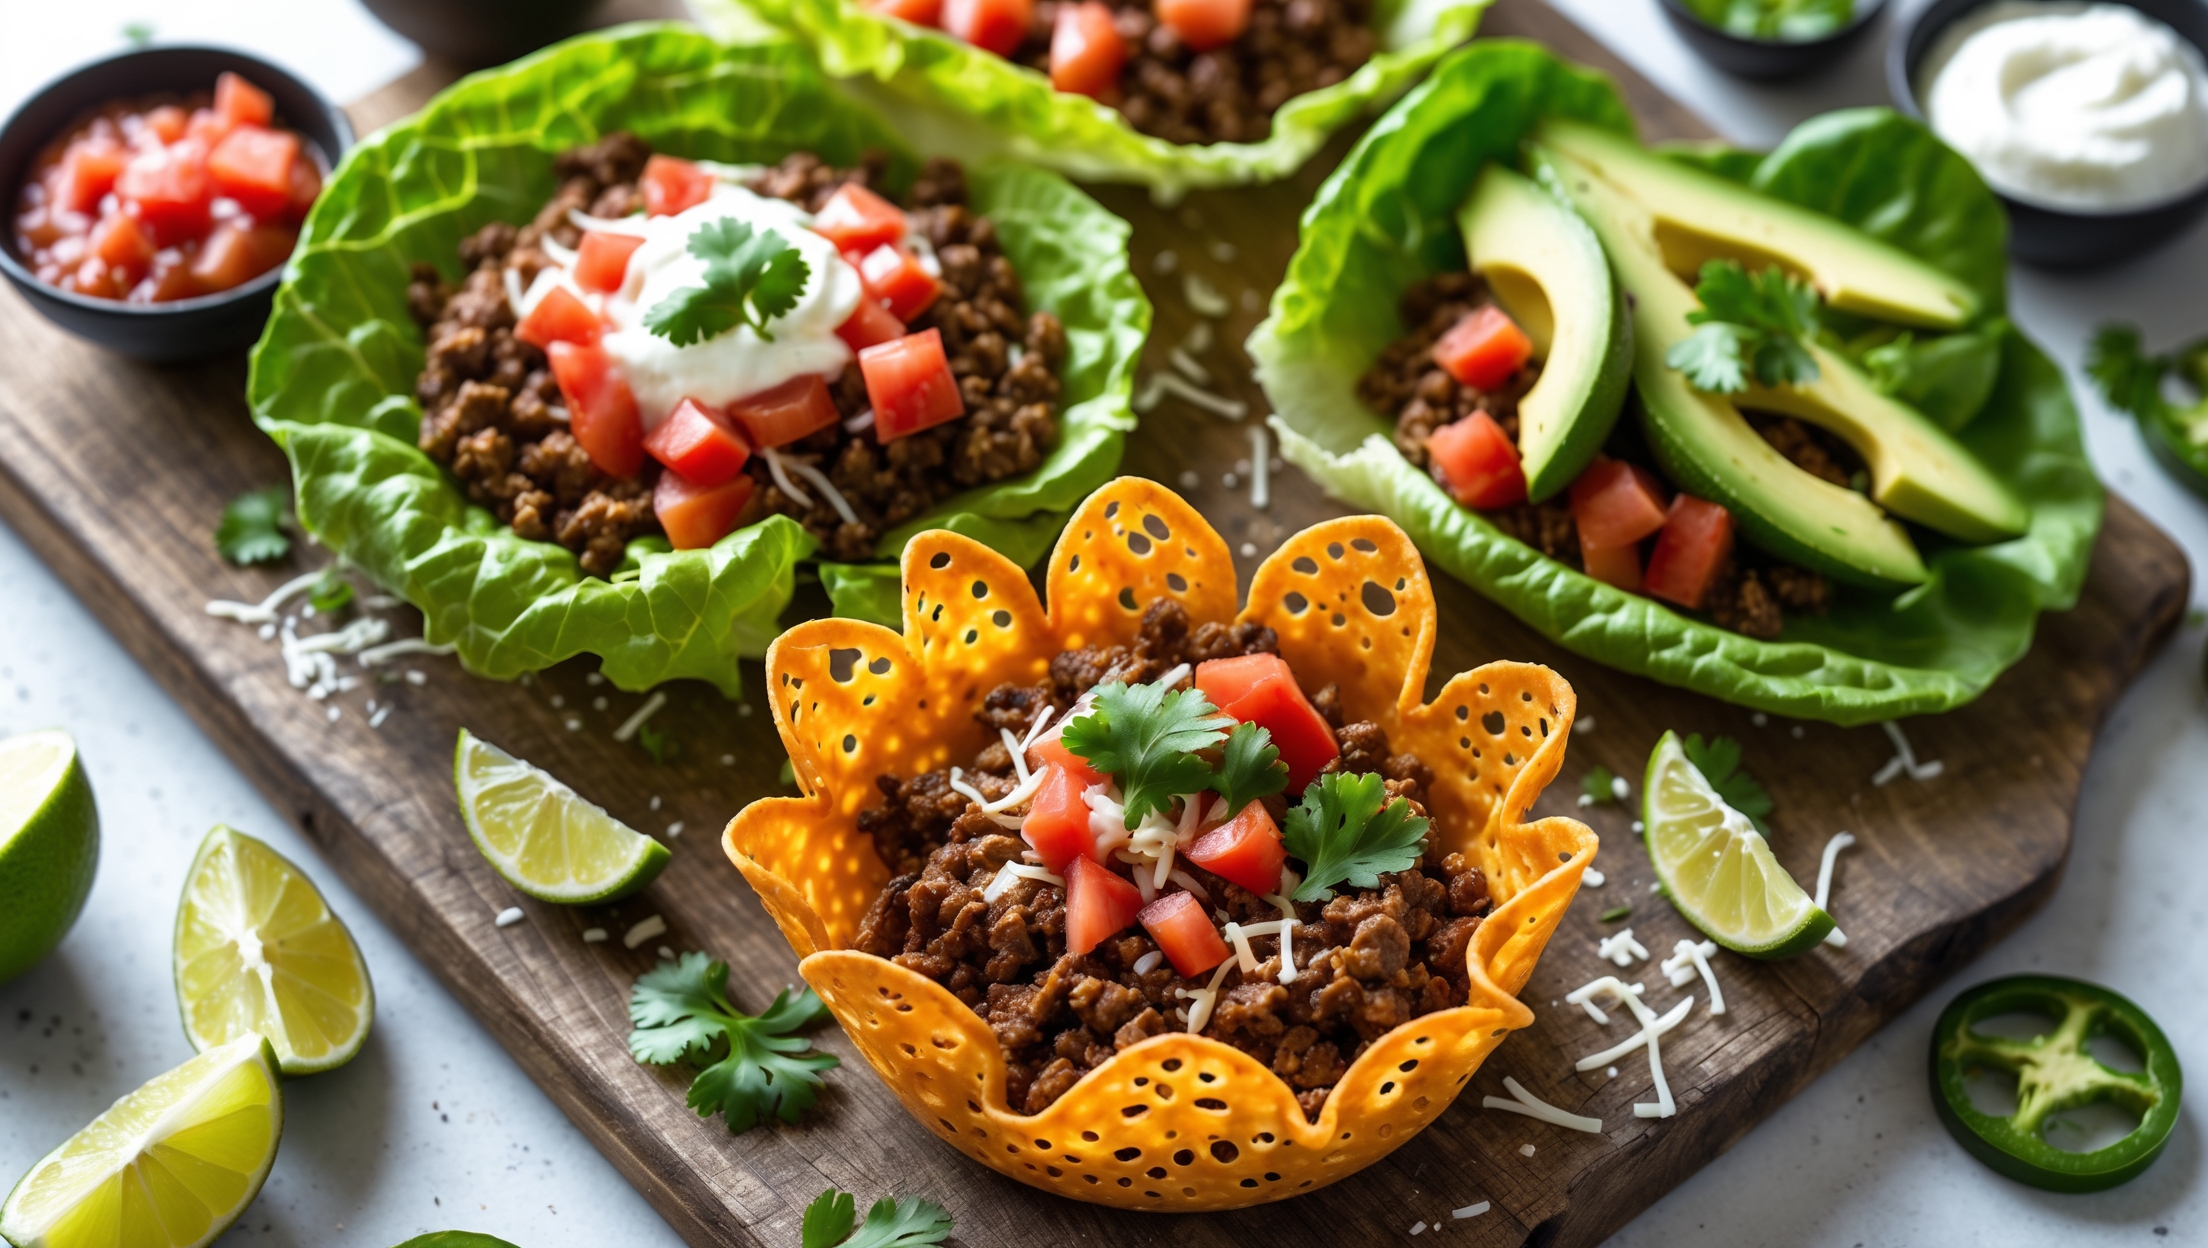
An overhead shot of three vibrant keto taco bowls arranged on a rustic wooden serving board, captured in bright natural light. The foreground features a taco bowl with a golden-brown, lacy cheese shell curled into a perfect bowl shape, filled with seasoned ground beef that's glistening with spices. Next to it sits a lettuce wrap version, where bright green romaine leaves create a fresh, crisp vessel. Both are generously topped with vibrant red diced tomatoes, creamy sliced avocado, grated cheese, and sprinkles of fresh cilantro. Scattered around the board are lime wedges for squeezing, small bowls of sour cream and salsa, and a few jalapeño slices for those who enjoy extra heat. Light catches the edges of the cheese shells, highlighting their intricate crispy texture.

Ingredients

<ul class="ingredients-main-list"><li class="ingredients-single-item">For Cheese Shells:</li><li class="ingredients-single-item">200g shredded cheddar cheese (or a Mexican blend)</li><li class="ingredients-single-item">For Lettuce Wraps:</li><li class="ingredients-single-item">8 large romaine or butter lettuce leaves</li><li class="ingredients-single-item">For Taco Filling:</li><li class="ingredients-single-item">500g ground beef (80% lean)</li><li class="ingredients-single-item">1 tbsp olive oil</li><li class="ingredients-single-item">2 cloves garlic, minced</li><li class="ingredients-single-item">1 tbsp chili powder</li><li class="ingredients-single-item">2 tsp ground cumin</li><li class="ingredients-single-item">1 tsp paprika</li><li class="ingredients-single-item">1/2 tsp dried oregano</li><li class="ingredients-single-item">1/4 tsp cayenne pepper (optional)</li><li class="ingredients-single-item">Salt and black pepper to taste</li><li class="ingredients-single-item">60ml water</li><li class="ingredients-single-item">For Toppings:</li><li class="ingredients-single-item">1 medium avocado, sliced or diced</li><li class="ingredients-single-item">100g cherry tomatoes, quartered</li><li class="ingredients-single-item">50g red onion, finely diced</li><li class="ingredients-single-item">30g fresh cilantro, chopped</li><li class="ingredients-single-item">120ml sour cream</li><li class="ingredients-single-item">1 lime, cut into wedges</li><li class="ingredients-single-item">30g sliced jalapeños (optional)</li></ul>

Equipment

<ul class="equipment-main-list"><li class="equipment-single-item">Baking sheet</li><li class="equipment-single-item">Parchment paper or silicone baking mat</li><li class="equipment-single-item">Small bowls (for serving toppings)</li><li class="equipment-single-item">Large skillet</li><li class="equipment-single-item">Spatula</li></ul>
BAKE SMARTER

Kitchen Converter

Quickly switch between common baking units without leaving the recipe.

Convert
Result—

Volume uses US cups, tablespoons, and teaspoons. Converting weight to volume depends on the ingredient.

Directions

<ol class="no-list-style"><li class="MethodStepper"><h4 class="step-title">Step 1</h4>For the cheese shells, preheat your oven to 190°C and line a baking sheet with parchment paper or a silicone mat. Place four 50g piles of shredded cheese about 10cm apart on the baking sheet, spreading each into a thin, even circle about 15cm in diameter. The thin layer ensures even melting and proper crisping of the cheese.</li><li class="MethodStepper"><h4 class="step-title">Step 2</h4>Bake the cheese circles for 5-7 minutes until the edges are golden brown but the cheese is still pliable in the center. Watch carefully as they can burn quickly! The cheese will bubble and release oils as it bakes, which helps create that crispy texture.</li><li class="MethodStepper"><h4 class="step-title">Step 3</h4>Remove from oven and let cool for about 30 seconds (just until you can handle them without burning yourself). While still warm and flexible, drape each cheese circle over an upside-down bowl or mug to create a bowl shape. Allow to cool completely (about 5 minutes) until hardened into crisp taco shells. The cooling process is critical for achieving structural integrity in your cheese shells.</li><li class="MethodStepper"><h4 class="step-title">Step 4</h4>If using lettuce wraps instead, carefully separate and wash the romaine leaves, then pat completely dry with paper towels. For the best results, choose the larger, outer leaves that naturally form a bowl shape. You'll need about 2 leaves per serving to create a sturdy enough "bowl."</li><li class="MethodStepper"><h4 class="step-title">Step 5</h4>For the taco filling, heat olive oil in a large skillet over medium-high heat. Add the ground beef and break it apart with a spatula. Cook until it begins to brown, about 5-7 minutes, stirring occasionally to ensure even cooking.</li><li class="MethodStepper"><h4 class="step-title">Step 6</h4>Add the minced garlic and cook for another 30 seconds until fragrant. The brief cooking time for garlic prevents it from burning while still releasing its aromatic compounds into the oil and meat.</li><li class="MethodStepper"><h4 class="step-title">Step 7</h4>Stir in all the spices: chili powder, cumin, paprika, oregano, cayenne (if using), salt, and pepper. Cook for 1 minute to toast the spices, which releases their essential oils and deepens their flavor profile.</li><li class="MethodStepper"><h4 class="step-title">Step 8</h4>Add the water and simmer until most of the liquid has evaporated and the meat is fully cooked, about 3-5 minutes. The water helps distribute the spices evenly throughout the meat while keeping it moist.</li><li class="MethodStepper"><h4 class="step-title">Step 9</h4>To assemble the taco bowls, place a cheese shell or 2 overlapping lettuce leaves on each plate. Fill with a generous portion of the seasoned ground beef mixture. The warm meat will slightly soften the lettuce if using that option, creating a more pliable wrap.</li><li class="MethodStepper"><h4 class="step-title">Step 10</h4>Top with your desired toppings: avocado, tomatoes, red onion, cilantro, sour cream, and jalapeños if using. Serve with lime wedges for squeezing over the top. For best texture contrast, add cold toppings just before serving so they remain fresh against the warm meat.</li></ol>
Nutrition Facts (per serving)

🍽️ Serving Size: 1 serving
🔥 Calories: 420 calories
🥑 Fat: 32 g
🧈 Saturated Fat: 5 g
🍞 Carbohydrates: 8 g
🍭 Sugar: 2 g
🍗 Protein: 28 g
🫀 Cholesterol: 45 mg
🧂 Sodium: 390 mg

Chef’s Notes

A few helpful details for making this recipe.

Can I make cheese taco shells in advance?

Yes, cheese taco shells can be made up to 3 days ahead. Allow them to cool completely before storing in an airtight container with parchment paper between each shell to prevent sticking. Reheat briefly in a 180°C oven for 1-2 minutes to restore crispness.

What's the best cheese to use for keto taco shells?

Hard cheeses with lower moisture content work best for keto taco shells. Cheddar, Monterey Jack, and Mexican blends create crispy shells with great structure. Avoid mozzarella alone as it's too stretchy. Pre-shredded cheese works well but freshly grated has fewer additives.

How can I prevent my lettuce wrap tacos from falling apart?

Use romaine or butter lettuce leaves with firm ribs, double-layer overlapping leaves, pat them completely dry before filling, let your meat mixture cool slightly before adding, place toppings in the center rather than edges, and serve with small forks for easier eating.

Want to try something else in ...

More recipes you might like

Keep exploring with more recipes from What's Baking.