Keto Garlic Butter Chicken Thighs Recipe

Juicy, crispy-skinned chicken thighs bathed in a rich garlic butter sauce create a low-carb masterpiece that's both indulgently satisfying and keto-friendly.
Difficulty:
Beginner
Prep Time:
10 mins
Cook Time:
35 mins
Serves:
4 servings
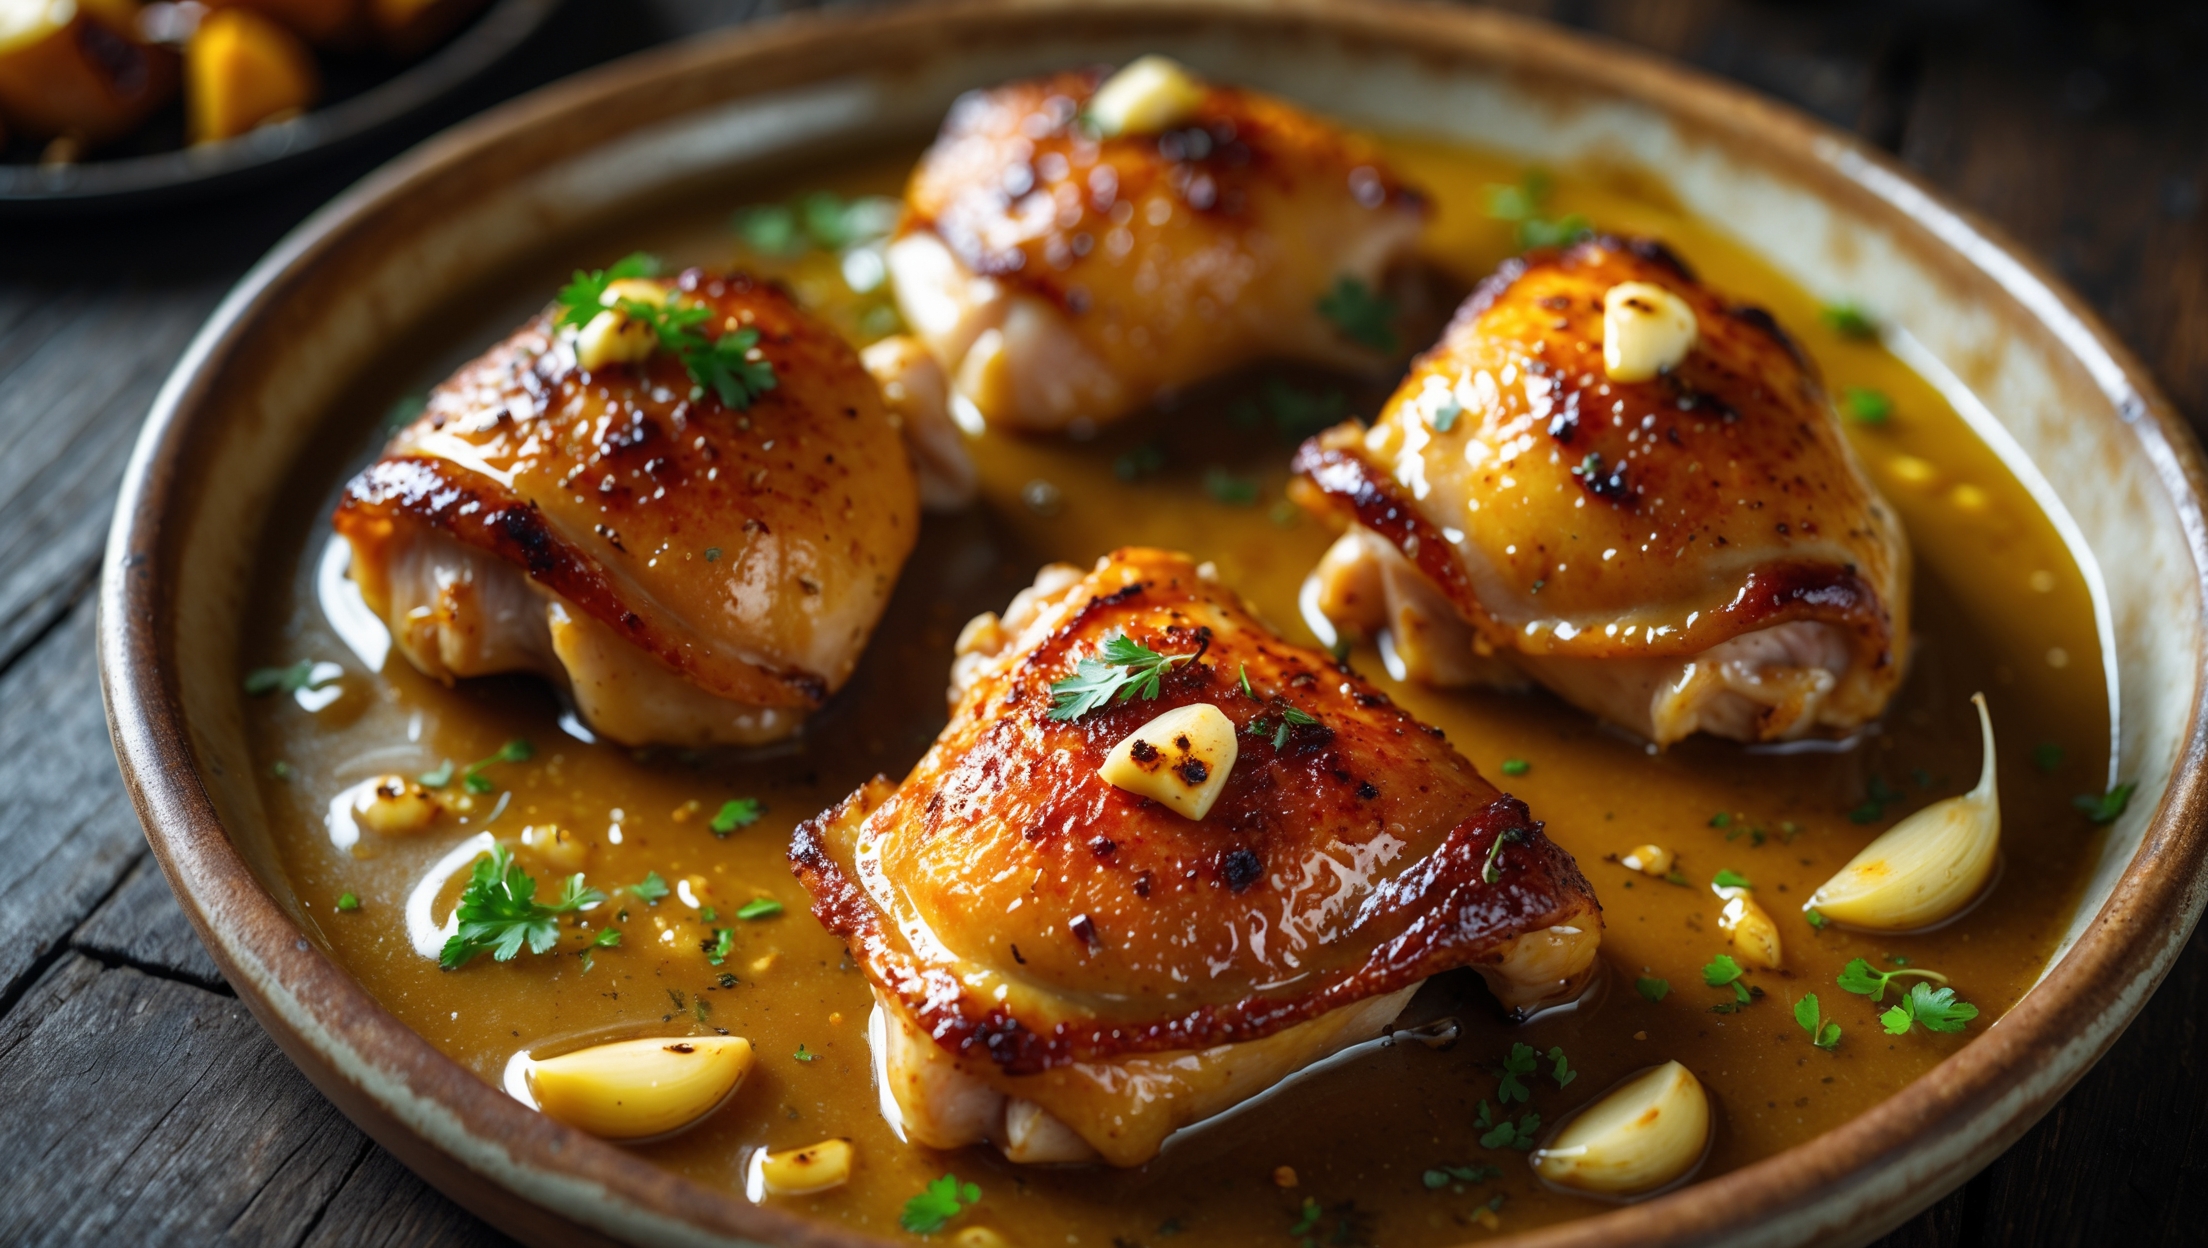
Overhead shot of golden-brown chicken thighs glistening with garlic butter sauce on a rustic ceramic platter. The crispy skin shows caramelization marks while the meat remains visibly tender and juicy. Pools of amber-colored butter sauce studded with toasted garlic pieces and flecks of fresh herbs surround the thighs. Soft natural lighting highlights the rendered fat's sheen and brings out the vibrant green of scattered parsley. In the background, slightly blurred roasted vegetables complement the dish, all captured on a dark wooden table that enhances the warm, inviting colors of the chicken.

Ingredients

<ul class="ingredients-main-list"> <li class="ingredients-single-item">8 chicken thighs (bone-in, skin-on, about 1kg total)</li> <li class="ingredients-single-item">90g unsalted butter</li> <li class="ingredients-single-item">6 garlic cloves, minced</li> <li class="ingredients-single-item">1 tbsp fresh thyme leaves (or 1 tsp dried)</li> <li class="ingredients-single-item">1 tbsp fresh rosemary, chopped (or 1 tsp dried)</li> <li class="ingredients-single-item">2 tbsp fresh parsley, chopped</li> <li class="ingredients-single-item">1 tsp paprika</li> <li class="ingredients-single-item">1 tbsp olive oil</li> <li class="ingredients-single-item">1 tbsp lemon juice</li> <li class="ingredients-single-item">2 tsp salt</li> <li class="ingredients-single-item">1 tsp black pepper</li> </ul>

Equipment

<ul class="equipment-main-list"> <li class="equipment-single-item">Baking dish or cast iron skillet</li> <li class="equipment-single-item">Meat thermometer</li> <li class="equipment-single-item">Small saucepan</li> </ul>
BAKE SMARTER

Kitchen Converter

Quickly switch between common baking units without leaving the recipe.

Convert
Result—

Volume uses US cups, tablespoons, and teaspoons. Converting weight to volume depends on the ingredient.

Directions

<ol class="no-list-style"> <li class="MethodStepper"> <h4 class="step-title">Step 1</h4> Preheat your oven to 190°C. Pat the chicken thighs completely dry with paper towels - this is crucial for achieving crispy skin. Removing surface moisture allows the skin to render and crisp properly during baking. </li> <li class="MethodStepper"> <h4 class="step-title">Step 2</h4> Place the chicken thighs in a large baking dish or cast iron skillet, skin side up. Drizzle with olive oil, then season generously with 1.5 teaspoons of salt and the black pepper, ensuring you season both sides but especially the skin. </li> <li class="MethodStepper"> <h4 class="step-title">Step 3</h4> In a small saucepan over medium-low heat, melt the butter. Add the minced garlic and cook for 1-2 minutes until fragrant but not browned. Garlic burns easily, so watch it carefully - burnt garlic will impart a bitter taste to the dish. </li> <li class="MethodStepper"> <h4 class="step-title">Step 4</h4> Remove the garlic butter from heat and stir in the thyme, rosemary, half the parsley, paprika, lemon juice, and remaining 1/2 teaspoon of salt. The warm butter will bloom the herbs and spices, releasing their essential oils and enhancing their flavors. </li> <li class="MethodStepper"> <h4 class="step-title">Step 5</h4> Pour about two-thirds of the garlic butter mixture over the chicken thighs, ensuring it gets under the skin where possible. Reserve the remaining butter for later. Lifting the skin gently and adding butter underneath creates an extra layer of flavor and helps keep the meat incredibly moist. </li> <li class="MethodStepper"> <h4 class="step-title">Step 6</h4> Bake in the preheated oven for 30-35 minutes or until the skin is golden brown and crispy, and the internal temperature reads 75°C on a meat thermometer. The high fat content in chicken thighs makes them forgiving - they'll remain juicy even if slightly overcooked. </li> <li class="MethodStepper"> <h4 class="step-title">Step 7</h4> Once done, remove the chicken from the oven and let it rest for 5 minutes. This resting period allows the juices to redistribute throughout the meat rather than running out when cut. </li> <li class="MethodStepper"> <h4 class="step-title">Step 8</h4> Just before serving, warm the reserved garlic butter mixture and drizzle it over the chicken thighs. Sprinkle with the remaining fresh parsley for a bright contrast of flavor and color. The fresh herb finish provides a beautiful aromatic element that complements the rich, buttery chicken perfectly. </li> </ol>
Chef’s Notes

A few helpful details for making this recipe.

Why is it important to pat chicken thighs dry before cooking?

Patting chicken thighs dry removes surface moisture, which is crucial for achieving crispy skin. Any moisture left on the skin will create steam during cooking, preventing proper rendering and crisping. This simple step makes the difference between soggy and restaurant-quality crispy skin.

Can I make garlic butter chicken thighs in an air fryer?

Yes! Air fryers are excellent for crispy-skinned chicken thighs. Cook at 190°C for 20-25 minutes, turning halfway through. The circulating hot air creates exceptionally crispy skin, though you may want to add the garlic butter sauce after cooking to prevent it from burning.

How do I know when chicken thighs are properly cooked?

Chicken thighs are properly cooked when they reach an internal temperature of 75°C (165°F) at the thickest part, measured with a meat thermometer. The juices should run clear, not pink, and the meat should pull away easily from the bone when done.

Want to try something else in ...

More recipes you might like

Keep exploring with more recipes from What's Baking.