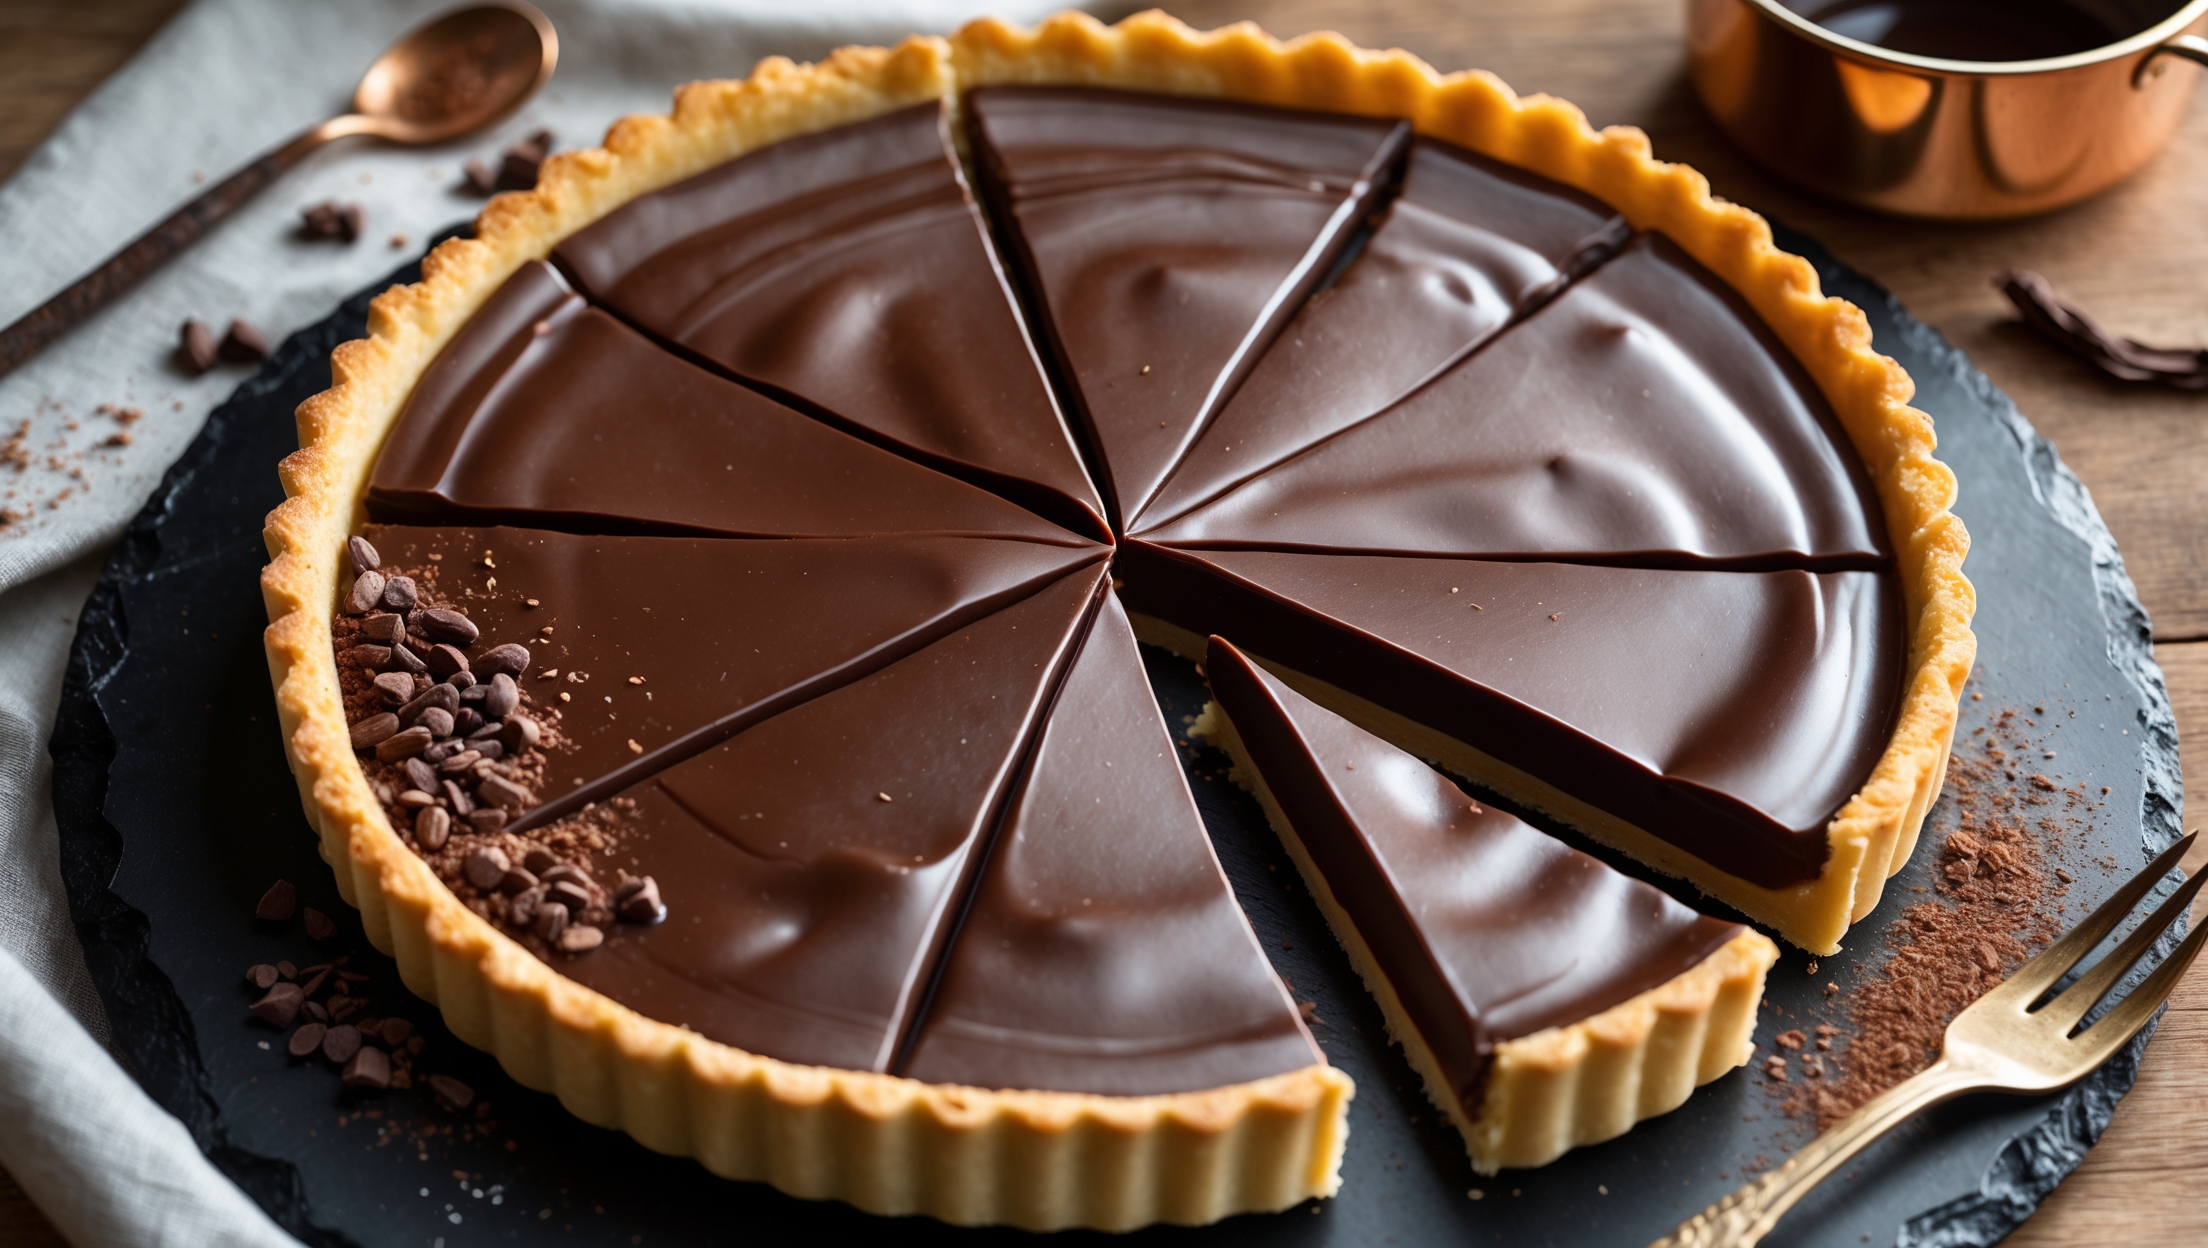
Chocolate Custard Tart Recipe
Ingredients
Equipment
Directions
FAQs
Find answers to your most pressing questions about this delicious recipe right here.
The main ingredients include plain flour, cold unsalted butter, icing sugar, eggs, double cream, whole milk, dark chocolate (70% cocoa solids), caster sugar, and vanilla extract. Optional decorations include cocoa powder and fresh berries.
Learn how to cook Chocolate Custard Tart Recipe by first making a buttery shortcrust pastry, blind baking it until golden, then filling it with a silky chocolate custard made from tempered eggs, cream, and high-quality dark chocolate. Bake until just set with a slight wobble, then chill thoroughly before serving at room temperature for the best flavour.
Blind baking is essential to prevent the dreaded "soggy bottom." This technique partially cooks the pastry before adding the wet filling, ensuring a crisp, flaky base that provides textural contrast to the silky custard. Without blind baking, moisture from the filling would make the pastry doughy.
The perfect chocolate custard filling should have a slight wobble in the centre when gently shaken—similar to set jelly. It shouldn't be completely firm as it will continue to set while cooling. If a knife inserted 1cm from the edge comes out clean, it's ready.
Absolutely! This tart actually benefits from being made a day ahead as the resting time allows flavours to develop. Simply store it covered in the refrigerator overnight, then bring to room temperature for about 30 minutes before serving to enhance the chocolate flavour.
Custard Tarts
Try following recommended recipes