Banana Custard Tart Recipe

A buttery crisp pastry shell cradles silky homemade custard studded with caramelized banana slices, creating a perfect balance of creamy, fruity, and crunchy textures.
Difficulty:
Intermediate
Prep Time:
45 mins
Cook Time:
35 mins
Serves:
1 tart (8 slices)
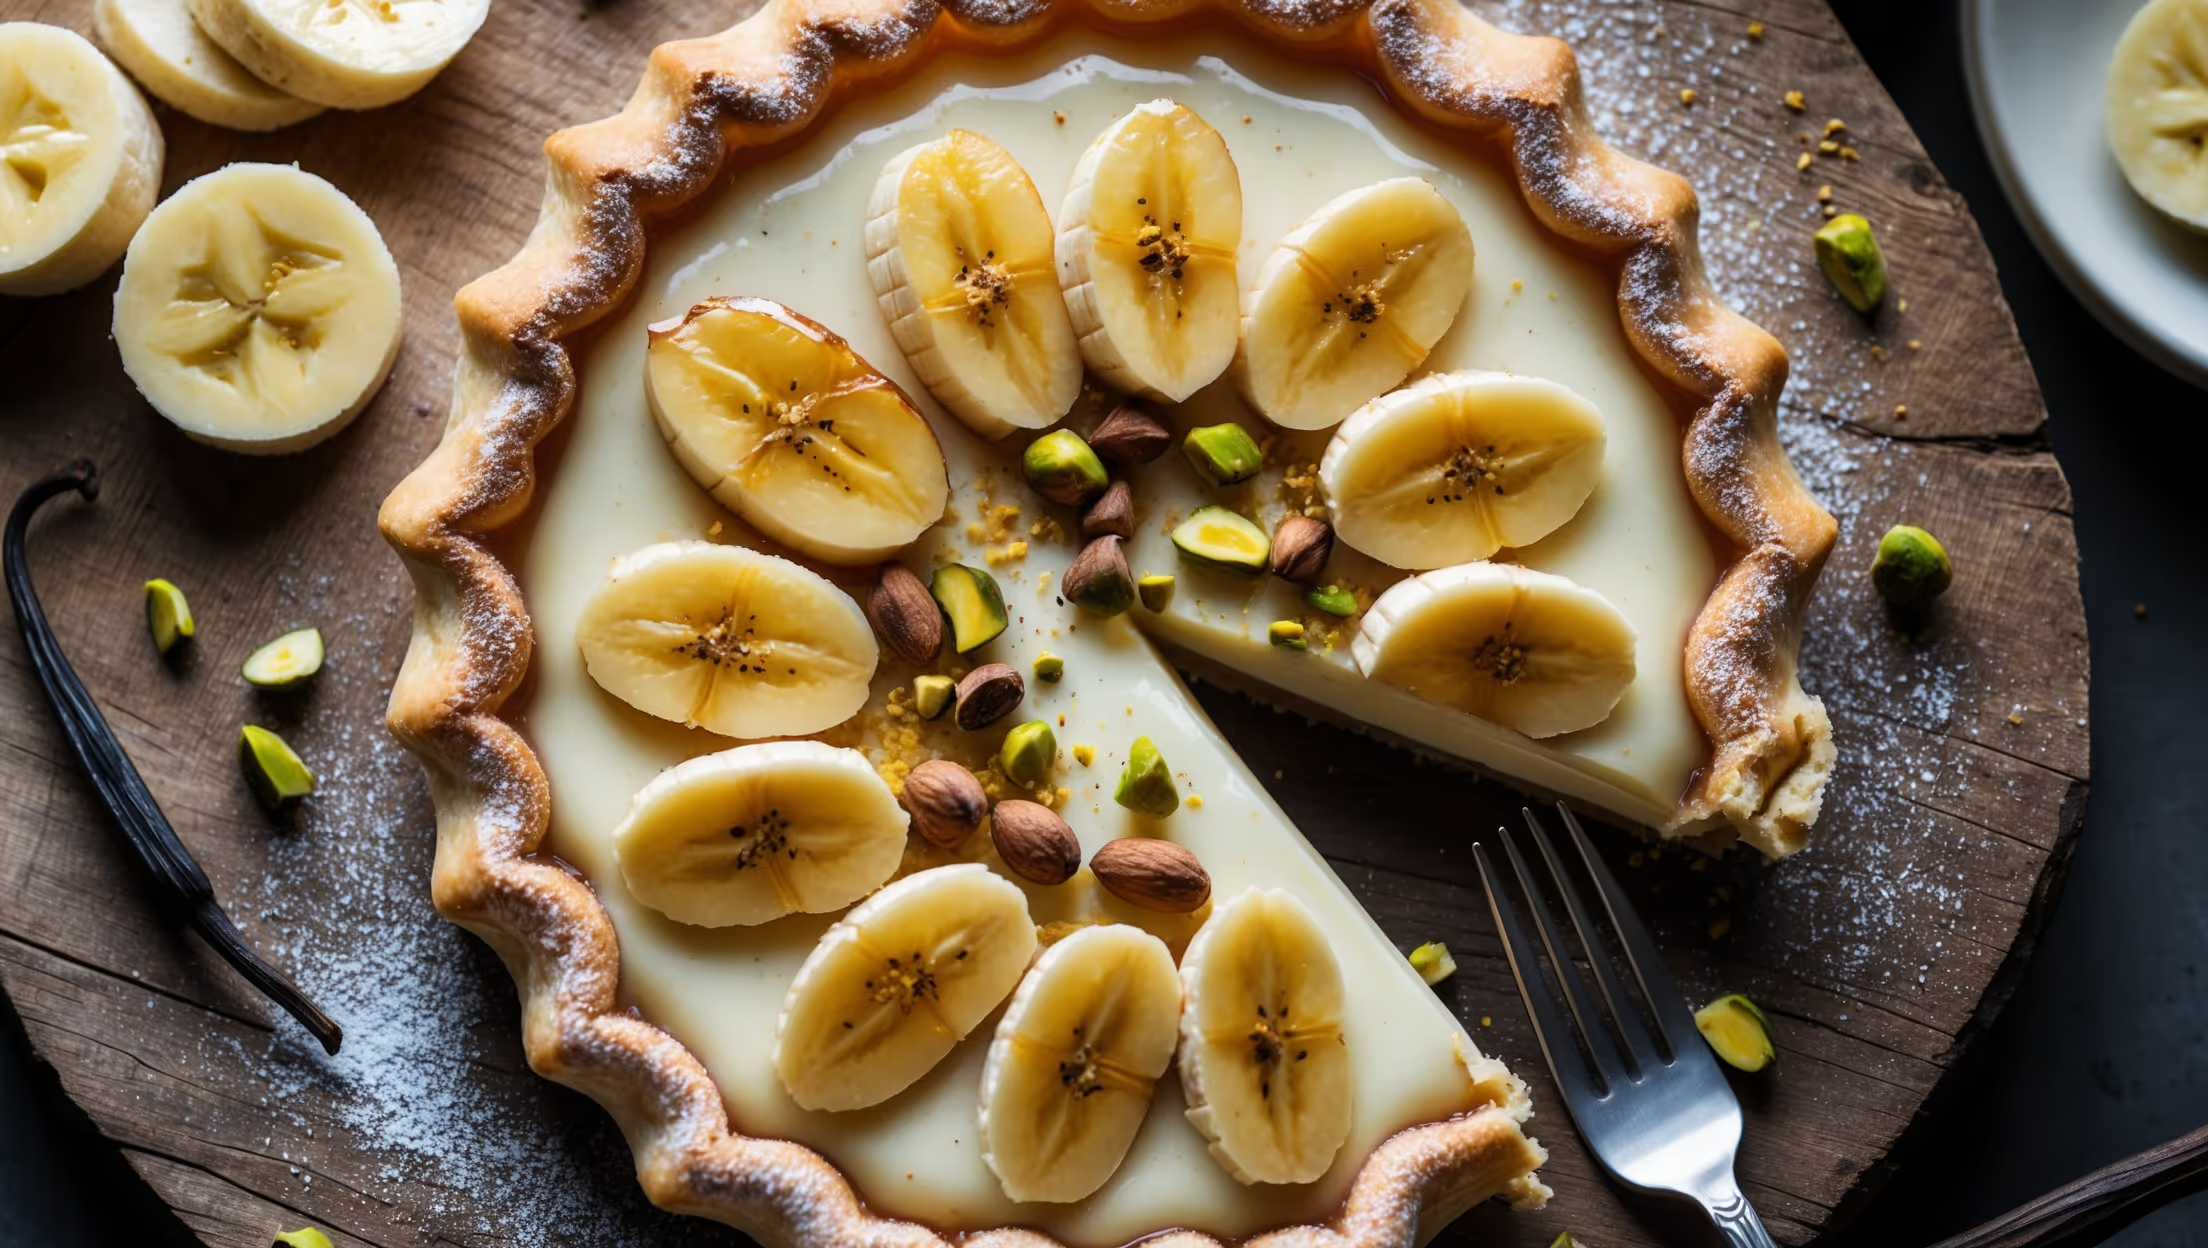
Overhead shot of a golden-brown tart with a perfectly crimped edge, the surface adorned with beautifully caramelized banana slices arranged in a spiral pattern atop a glossy vanilla custard. Soft natural lighting highlights the contrast between the crisp pastry shell and the creamy filling, while a dusting of powdered sugar adds dimension. The tart is presented on a rustic wooden serving board with fresh banana slices, a vanilla pod, and scattered crushed pistachios providing context and color. A slice being removed reveals the luscious layers of custard and fruit, with a fork collecting a perfect bite nearby.

Ingredients

<ul class="ingredients-main-list"><li class="ingredients-single-item">For the pastry:</li><li class="ingredients-single-item">200g plain flour</li><li class="ingredients-single-item">100g cold unsalted butter, cubed</li><li class="ingredients-single-item">30g caster sugar</li><li class="ingredients-single-item">1 large egg yolk</li><li class="ingredients-single-item">2-3 tbsp ice-cold water</li><li class="ingredients-single-item">¼ tsp salt</li><li class="ingredients-single-item">For the custard:</li><li class="ingredients-single-item">500ml whole milk</li><li class="ingredients-single-item">1 vanilla pod, split and seeds scraped (or 2 tsp vanilla extract)</li><li class="ingredients-single-item">4 large egg yolks</li><li class="ingredients-single-item">75g caster sugar</li><li class="ingredients-single-item">40g cornflour</li><li class="ingredients-single-item">25g unsalted butter</li><li class="ingredients-single-item">For the topping:</li><li class="ingredients-single-item">3-4 ripe but firm bananas</li><li class="ingredients-single-item">30g unsalted butter</li><li class="ingredients-single-item">2 tbsp light brown sugar</li><li class="ingredients-single-item">Optional: 1 tbsp icing sugar for dusting</li></ul>

Equipment

<ul class="equipment-main-list"><li class="equipment-single-item">23cm fluted tart tin with removable base</li><li class="equipment-single-item">Baking beans or dried rice (for blind baking)</li><li class="equipment-single-item">Baking parchment</li><li class="equipment-single-item">Rolling pin</li><li class="equipment-single-item">Whisk</li></ul>
BAKE SMARTER

Kitchen Converter

Quickly switch between common baking units without leaving the recipe.

Convert
Result—

Volume uses US cups, tablespoons, and teaspoons. Converting weight to volume depends on the ingredient.

Directions

<ol class="no-list-style"><li class="MethodStepper"><h4 class="step-title">Step 1</h4>For the pastry, place the flour, butter and salt in a food processor and pulse until the mixture resembles fine breadcrumbs. Alternatively, rub the butter into the flour with your fingertips. The key is to work quickly to keep the ingredients cool, which results in a flakier pastry.</li><li class="MethodStepper"><h4 class="step-title">Step 2</h4>Add the sugar, egg yolk and 2 tablespoons of ice-cold water. Pulse or mix until the dough just comes together, adding the extra tablespoon of water if needed. The dough should hold together but shouldn't be sticky. Form into a disc, wrap in cling film and refrigerate for at least 30 minutes to relax the gluten and firm the butter.</li><li class="MethodStepper"><h4 class="step-title">Step 3</h4>Preheat your oven to 190°C (170°C fan). Roll out the chilled pastry on a lightly floured surface to about 3mm thickness and large enough to line your tart tin. Carefully drape the pastry over your rolling pin to transfer it to the tin, then gently press into the fluted edges. Trim any excess, leaving a small overhang to allow for shrinkage.</li><li class="MethodStepper"><h4 class="step-title">Step 4</h4>Prick the base all over with a fork (this prevents air bubbles forming), then line with baking parchment and fill with baking beans or rice. Blind bake for 15 minutes, then remove the beans and paper and bake for another 5-7 minutes until the pastry is golden and crisp. The blind baking ensures your pastry base won't become soggy when filled with custard. Once baked, trim any excess pastry with a small sharp knife and set aside to cool completely.</li><li class="MethodStepper"><h4 class="step-title">Step 5</h4>While the pastry cools, make the custard. In a medium saucepan, heat the milk with the vanilla pod and seeds (or extract) until just below boiling point. Meanwhile, in a large heatproof bowl, whisk together the egg yolks, sugar and cornflour until pale and thick. The cornflour acts as both a thickener and stabilizer for the custard.</li><li class="MethodStepper"><h4 class="step-title">Step 6</h4>Remove the vanilla pod from the hot milk, then gradually pour the milk onto the egg mixture, whisking constantly to prevent the eggs from curdling. Pour the mixture back into the clean saucepan and cook over medium heat, whisking continuously, until the custard thickens substantially - it should coat the back of a wooden spoon. This will take about 3-5 minutes.</li><li class="MethodStepper"><h4 class="step-title">Step 7</h4>Remove from the heat and whisk in the butter until melted and incorporated - this gives the custard a beautiful glossy finish and rich flavor. Transfer to a bowl, cover the surface directly with cling film to prevent a skin forming, and allow to cool slightly before refrigerating for about 30 minutes until thickened but still spreadable.</li><li class="MethodStepper"><h4 class="step-title">Step 8</h4>While the custard chills, prepare the caramelized bananas. Slice 2 bananas into 1cm thick diagonal slices. In a non-stick frying pan, melt the butter with the brown sugar until bubbling. Add the banana slices and cook for 1-2 minutes on each side until golden and caramelized but still holding their shape. Transfer to a plate to cool.</li><li class="MethodStepper"><h4 class="step-title">Step 9</h4>To assemble the tart, whisk the cooled custard to loosen it slightly, then spread evenly into the pastry case. Slice the remaining banana(s) and arrange decoratively on top of the custard, either in concentric circles or another pattern of your choice. Arrange the caramelized banana slices on top, gently pressing them into the custard.</li><li class="MethodStepper"><h4 class="step-title">Step 10</h4>Refrigerate the tart for at least 2 hours to set completely. Just before serving, dust with icing sugar if desired. The tart is best enjoyed on the day it's assembled, as the bananas will naturally darken over time. Your Banana Custard Tart is now ready to impress with its beautiful appearance and delicious combination of crisp pastry, silky custard and sweet, fruity banana!</li></ol>
Nutrition Facts (per serving)

🍽️ Serving Size: 1 slice
🔥 Calories: 385 calories
🥑 Fat: 22 g
🧈 Saturated Fat: 13 g
🍞 Carbohydrates: 43 g
🍭 Sugar: 28 g
🍗 Protein: 5 g
🫀 Cholesterol: 180 mg
🧂 Sodium: 165 mg

Chef’s Notes

A few helpful details for making this recipe.

How do I prevent my custard from curdling when making a fruit tart?

To prevent curdling, temper the eggs by gradually adding hot milk while whisking constantly. Cook over medium heat, not high, and stir continuously. Use cornflour as a stabiliser and strain the custard if you notice any lumps. Removing from heat immediately when thickened also helps maintain a silky texture.

Can I prepare a banana dessert tart in advance for a dinner party?

You can prepare the pastry case and custard up to 2 days ahead, storing them separately in the refrigerator. However, only assemble and add the bananas 2-4 hours before serving, as bananas naturally darken when exposed to air. For best results, add a squeeze of lemon juice to fresh bananas.

What's the secret to achieving a perfectly crisp pastry base for custard-filled tarts?

The secret lies in thorough blind baking. Line chilled pastry with parchment and baking beans, then bake until edges golden. Remove beans and continue baking until completely dry and golden. Allow to cool fully before adding custard. Working with cold ingredients and resting the dough also helps achieve flakiness.

Want to try something else in ...

More recipes you might like

Keep exploring with more recipes from What's Baking.