Veggie Dip Cups Recipe

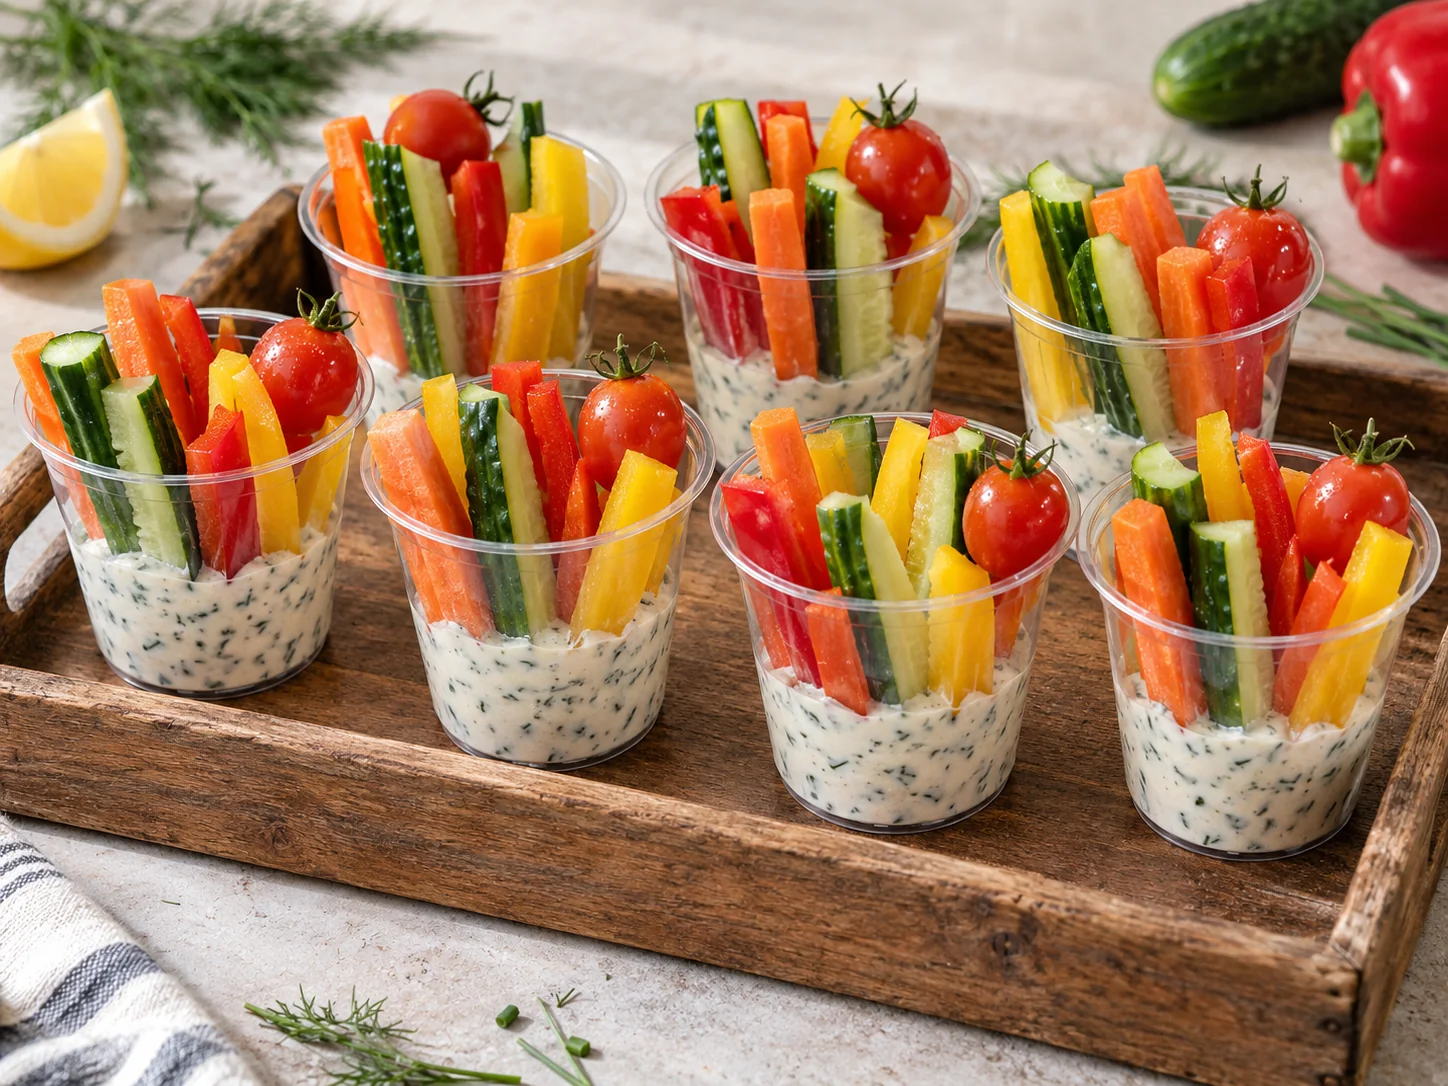
Fresh vegetables layered with creamy herb-infused dip in individual portions, creating a perfect balance of crisp textures and rich flavors in each convenient, portable cup.
Difficulty:
Beginner
Prep Time:
25 mins
Cook Time:
0 mins
Serves:
8 cups
Finished Veggie Dip Cups — approved recipe photograph.

Ingredients

<ul class="ingredients-main-list"><li class="ingredients-single-item">200g cream cheese, softened</li><li class="ingredients-single-item">150g Greek yogurt</li><li class="ingredients-single-item">2 tbsp fresh dill, finely chopped</li><li class="ingredients-single-item">2 tbsp fresh chives, finely chopped</li><li class="ingredients-single-item">1 garlic clove, minced</li><li class="ingredients-single-item">1 tbsp lemon juice</li><li class="ingredients-single-item">1/2 tsp onion powder</li><li class="ingredients-single-item">1/4 tsp black pepper</li><li class="ingredients-single-item">1/4 tsp salt</li><li class="ingredients-single-item">1 medium cucumber, cut into sticks</li><li class="ingredients-single-item">2 medium carrots, cut into sticks</li><li class="ingredients-single-item">1 red bell pepper, cut into sticks</li><li class="ingredients-single-item">1 yellow bell pepper, cut into sticks</li><li class="ingredients-single-item">8 cherry tomatoes</li><li class="ingredients-single-item">8 clear plastic cups (240ml/8oz)</li></ul>

Equipment

<ul class="equipment-main-list"><li class="equipment-single-item">Food processor (optional for smoother dip)</li><li class="equipment-single-item">Vegetable peeler</li><li class="equipment-single-item">Small piping bag (optional for decorative presentation)</li></ul>
BAKE SMARTER

Kitchen Converter

Quickly switch between common baking units without leaving the recipe.

Convert
Result—

Volume uses US cups, tablespoons, and teaspoons. Converting weight to volume depends on the ingredient.

Directions

<ol class="no-list-style"><li class="MethodStepper"><h4 class="step-title">Step 1</h4>In a medium bowl, combine the softened cream cheese and Greek yogurt. Whisk vigorously until completely smooth with no lumps. The temperature of the cream cheese is crucial here - if it's properly softened (but not melted), you'll achieve a silky-smooth texture without much effort.</li><li class="MethodStepper"><h4 class="step-title">Step 2</h4>Add the chopped dill, chives, minced garlic, lemon juice, onion powder, black pepper, and salt to the cream cheese mixture. Stir thoroughly to distribute all herbs and seasonings evenly throughout the dip. The lemon juice not only adds brightness but also helps preserve the fresh herbs' color.</li><li class="MethodStepper"><h4 class="step-title">Step 3</h4>Cover the dip and refrigerate for at least 30 minutes (or up to 24 hours) to allow the flavors to meld together. This resting period allows the aromatic compounds in the herbs to infuse throughout the creamy base, creating a more developed flavor profile.</li><li class="MethodStepper"><h4 class="step-title">Step 4</h4>While the dip chills, prepare your vegetables. Wash all produce thoroughly and pat dry with paper towels. Excess moisture will dilute your dip and reduce the vegetables' crispness, so this step shouldn't be rushed.</li><li class="MethodStepper"><h4 class="step-title">Step 5</h4>Cut cucumbers, carrots, and bell peppers into uniform sticks about 10cm long and 1cm thick. Keeping the cuts consistent helps with both presentation and ensuring each vegetable provides the perfect dipping experience. Leave cherry tomatoes whole for color contrast and textural variety.</li><li class="MethodStepper"><h4 class="step-title">Step 6</h4>Spoon or pipe approximately 3 tablespoons of the chilled dip into the bottom of each clear cup. For a more polished look, you can transfer some dip to a piping bag and pipe a decorative swirl at the bottom of each cup.</li><li class="MethodStepper"><h4 class="step-title">Step 7</h4>Arrange the vegetable sticks vertically in each cup, placing them standing upright in the dip. Aim for a colorful mix in each cup, combining different vegetables for visual appeal and flavor variety. Place a cherry tomato along the rim of each cup as a finishing touch.</li><li class="MethodStepper"><h4 class="step-title">Step 8</h4>If not serving immediately, cover each cup with plastic wrap and refrigerate for up to 8 hours. The separation between the dip and vegetables helps maintain their individual textures — the vegetables stay crisp while the dip remains creamy. Just before serving, garnish with an additional sprinkle of fresh herbs if desired.</li></ol>

Nutrition Facts (per serving)

🍽️ Serving Size: 1 serving
🔥 Calories: 186 calories
🥑 Fat: 15 g
🧈 Saturated Fat: 8 g
🍞 Carbohydrates: 10 g
🍭 Sugar: 5 g
🍗 Protein: 5 g
🫀 Cholesterol: 45 mg
🧂 Sodium: 320 mg

Chef’s Notes

A few helpful details for making this recipe.

How far in advance can I prepare these veggie cups for a party?

You can prepare veggie dip cups up to 8 hours in advance. The dip can be made 24 hours ahead and stored separately. For best results, assemble just a few hours before serving to maintain the vegetables' crispness while allowing flavours to develop in the dip.

What's the best way to keep vegetables crisp in individual dip cups?

To maintain vegetable crispness in dip cups, thoroughly dry vegetables after washing, keep the dip at the bottom with minimal vegetable contact, and refrigerate until serving. Using fresh, firm vegetables and cutting them just before assembling also helps preserve their satisfying crunch.

Can I make this herb dip dairy-free for guests with dietary restrictions?

Yes! For a dairy-free version, substitute the cream cheese and Greek yogurt with dairy-free alternatives like cashew cream cheese and coconut yoghurt. The herbs and seasonings remain the same, creating a similarly creamy texture while accommodating guests with dairy restrictions.

Want to try something else in ...

More recipes you might like

Keep exploring with more recipes from What's Baking.