Spiced Apple Hand Pies Recipe
Ingredients
Equipment
Directions
FAQs
Find answers to your most pressing questions about this delicious recipe right here.
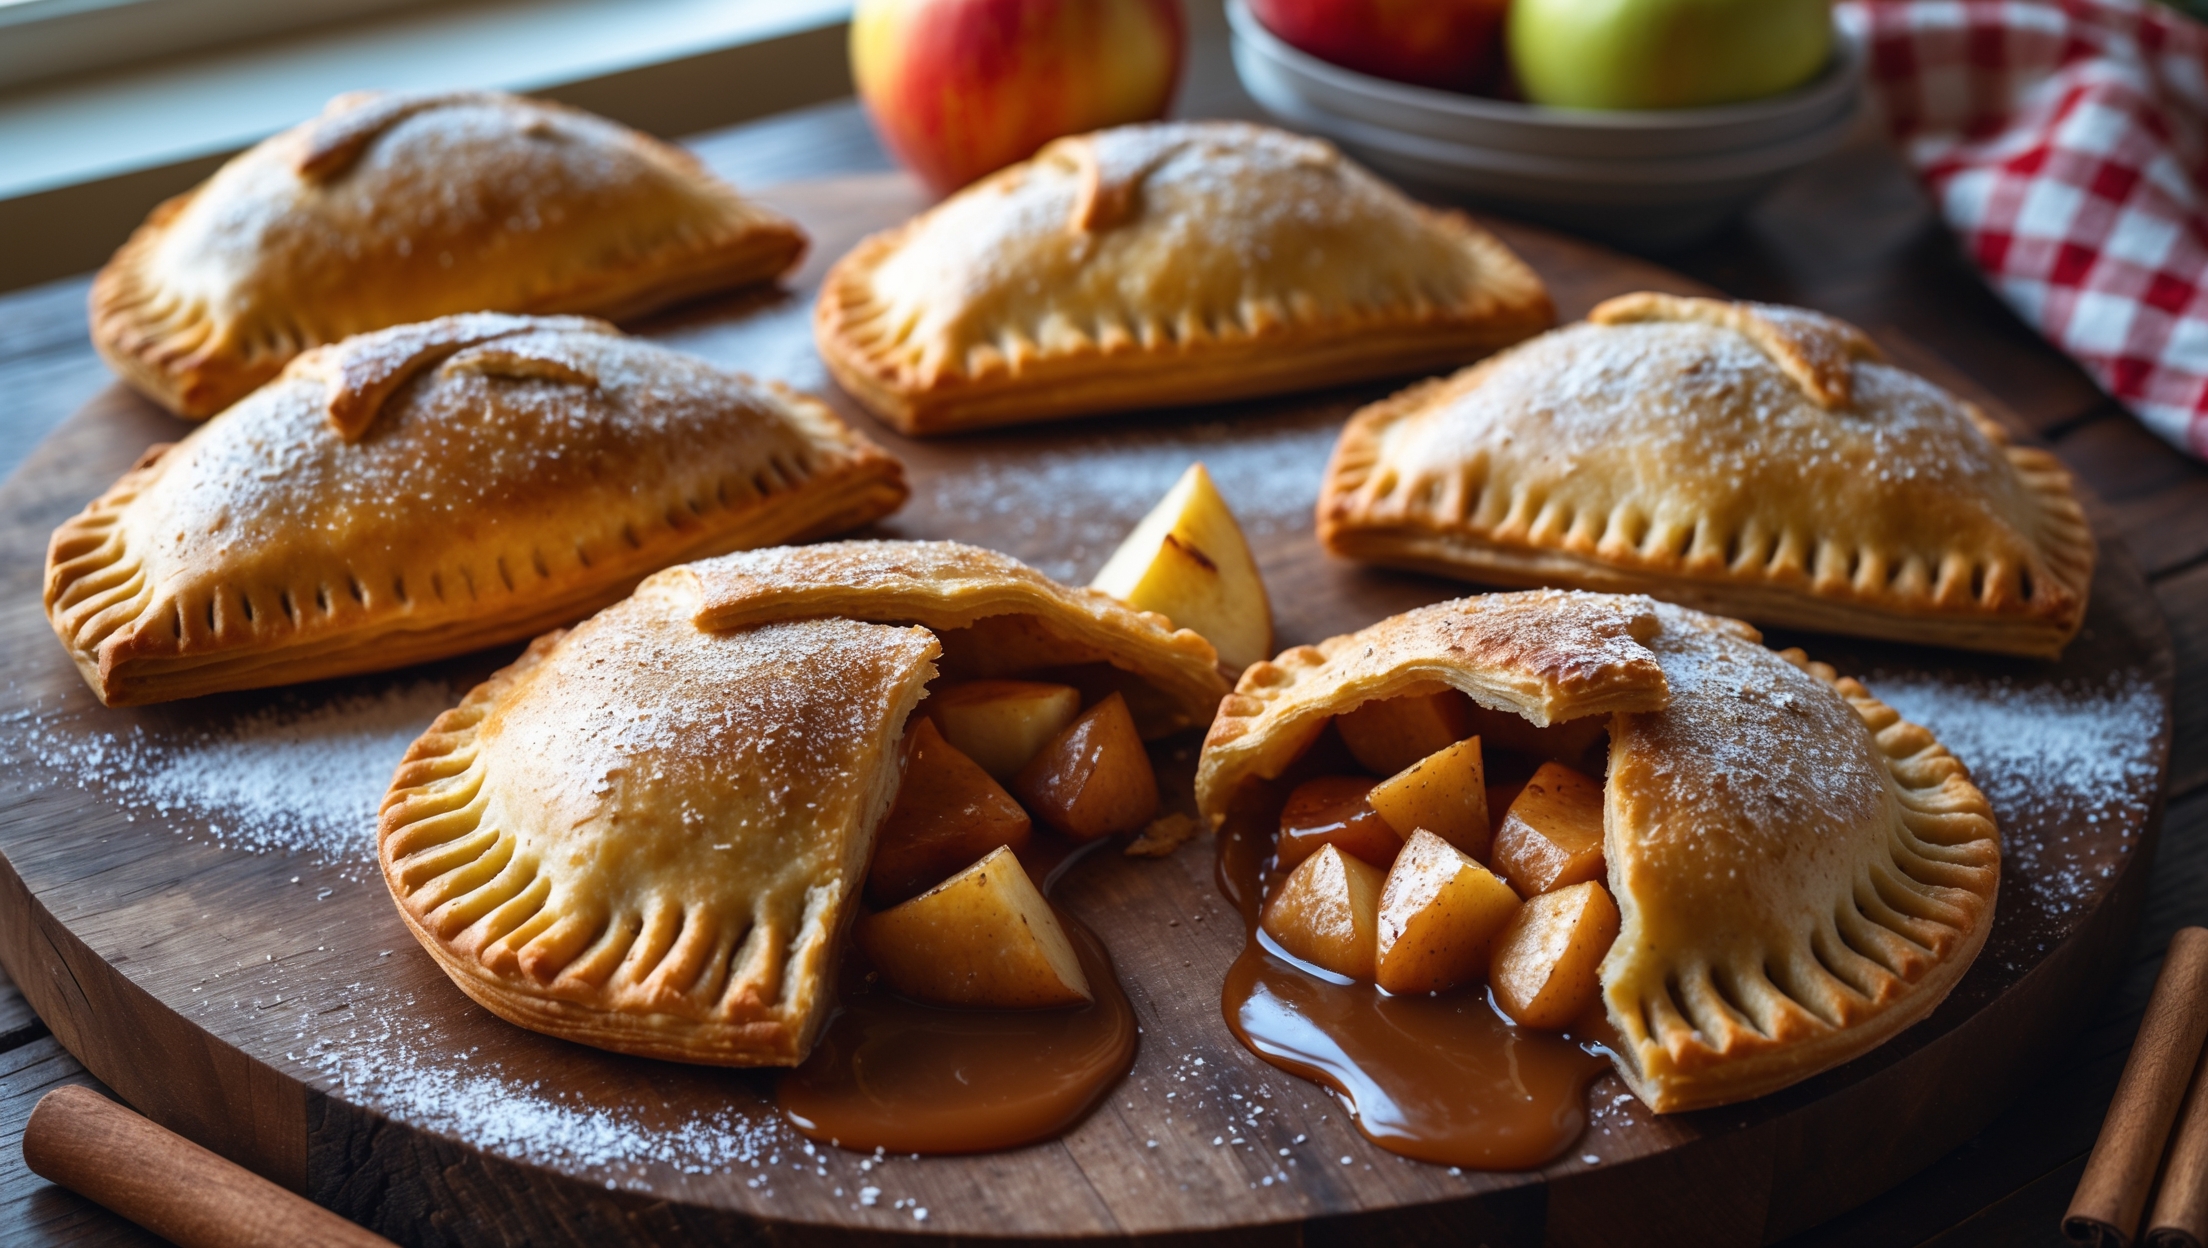
The key ingredients include all-purpose flour, cold butter, and ice water for the pastry; Granny Smith apples, brown sugar, lemon juice, and warming spices (cinnamon, nutmeg, ginger, and cloves) for the filling; plus egg wash and demerara sugar for assembly.
Learn how to cook Spiced Apple Hand Pies by first making a flaky pastry with cold butter, then preparing a spiced apple filling that's partially cooked on the stovetop. Cut pastry circles, add filling, seal the edges, and bake at 190°C for 22-25 minutes until golden brown. The key to success is keeping the pastry cold and not overfilling the pies.
Yes! While Granny Smith provides ideal tartness and structure, other firm apples like Honeycrisp, Braeburn, or Pink Lady work well. Avoid softer varieties like McIntosh or Red Delicious as they break down too much during cooking, resulting in a mushy filling.
The secrets to flaky hand pie pastry are: using very cold butter, not overworking the dough, adding apple cider vinegar to inhibit gluten development, chilling the dough thoroughly before rolling, and ensuring the filling is completely cool before assembly to prevent the butter in the pastry from melting prematurely.
Absolutely! These hand pies freeze beautifully. Assemble them completely, then freeze unbaked on a baking sheet until solid. Transfer to freezer bags for storage up to 3 months. When ready to enjoy, bake directly from frozen, adding 5-7 minutes to the baking time.
Puff Pastry
Try following recommended recipes