Raspberry Tart Recipe
Ingredients
Equipment
Directions
FAQs
Find answers to your most pressing questions about this delicious recipe right here.
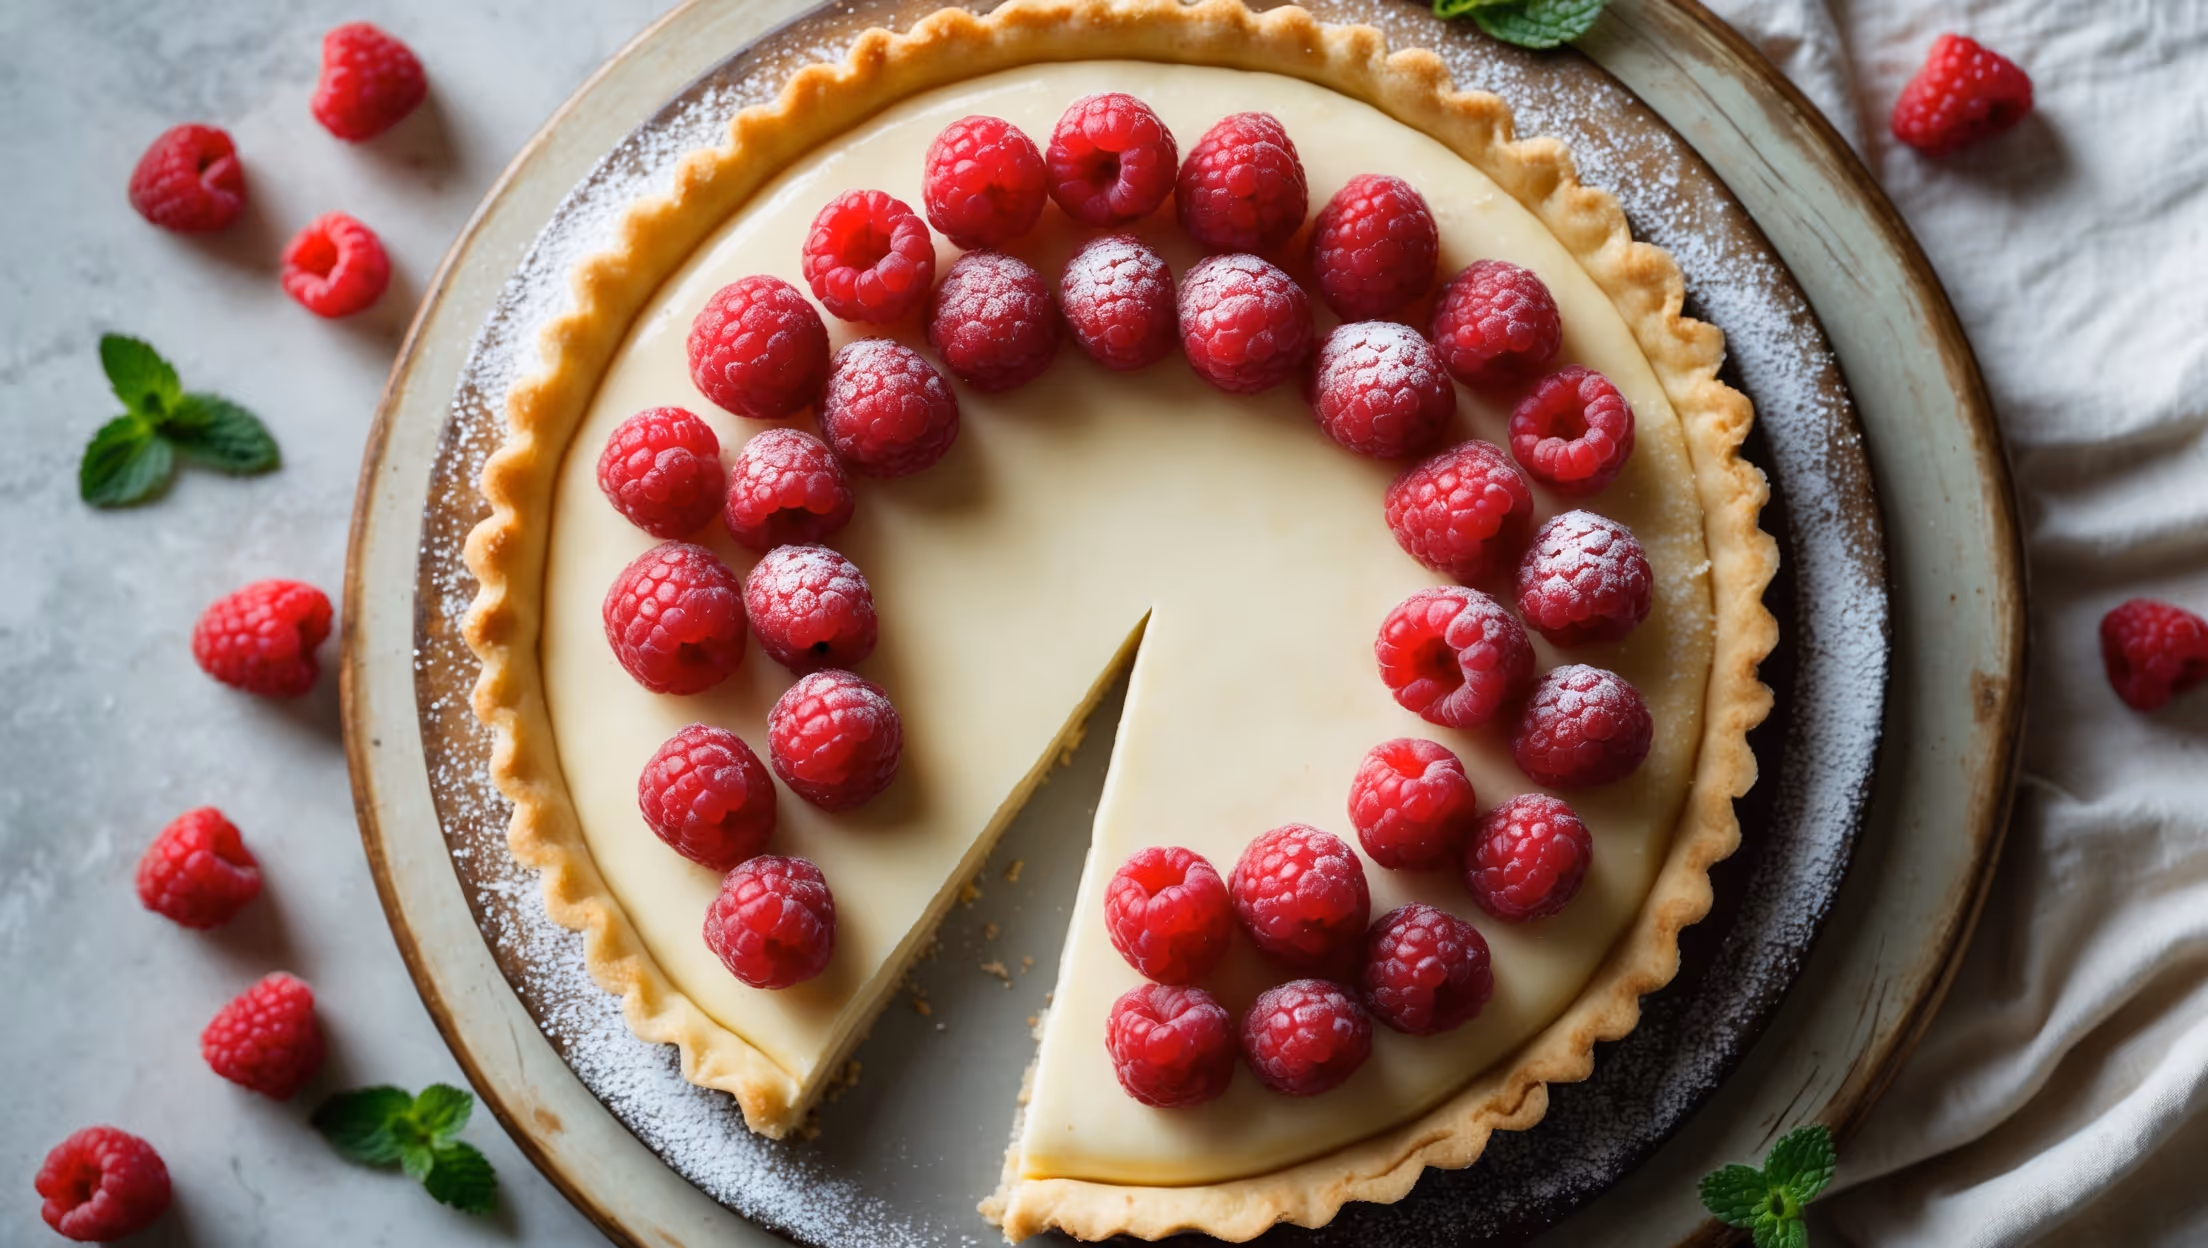
This classic raspberry tart uses plain flour, butter, and egg for the shortcrust pastry; whole milk, vanilla, egg yolks, sugar and cornflour for the silky custard filling; and fresh raspberries, apricot jam and icing sugar for the stunning topping.
Learn how to cook Raspberry Tart by first blind baking a buttery shortcrust pastry case until golden, then filling it with homemade vanilla custard that's cooled to room temperature. Top with fresh raspberries in a decorative pattern and finish with a glossy apricot jam glaze for that professional patisserie finish.
Blind baking is essential - fully pre-bake your pastry case until golden and crisp before adding any filling. Ensure both the pastry case and custard are completely cool before assembly, and apply the apricot glaze only to the fruit, not the custard, to maintain the crisp texture.
Fresh raspberries are best for this tart as frozen berries release too much moisture when thawed, making the custard soggy. If using frozen berries, thaw and drain them thoroughly, then pat dry with kitchen paper before arranging on the tart, and consume within 24 hours.
The secret to silky custard is constant, gentle whisking while cooking over medium heat, and straining the mixture if needed. Adding hot milk gradually to the egg mixture prevents curdling, and pressing cling film directly onto the surface while cooling prevents skin formation.
Shortcrust Pastry
Try following recommended recipes


