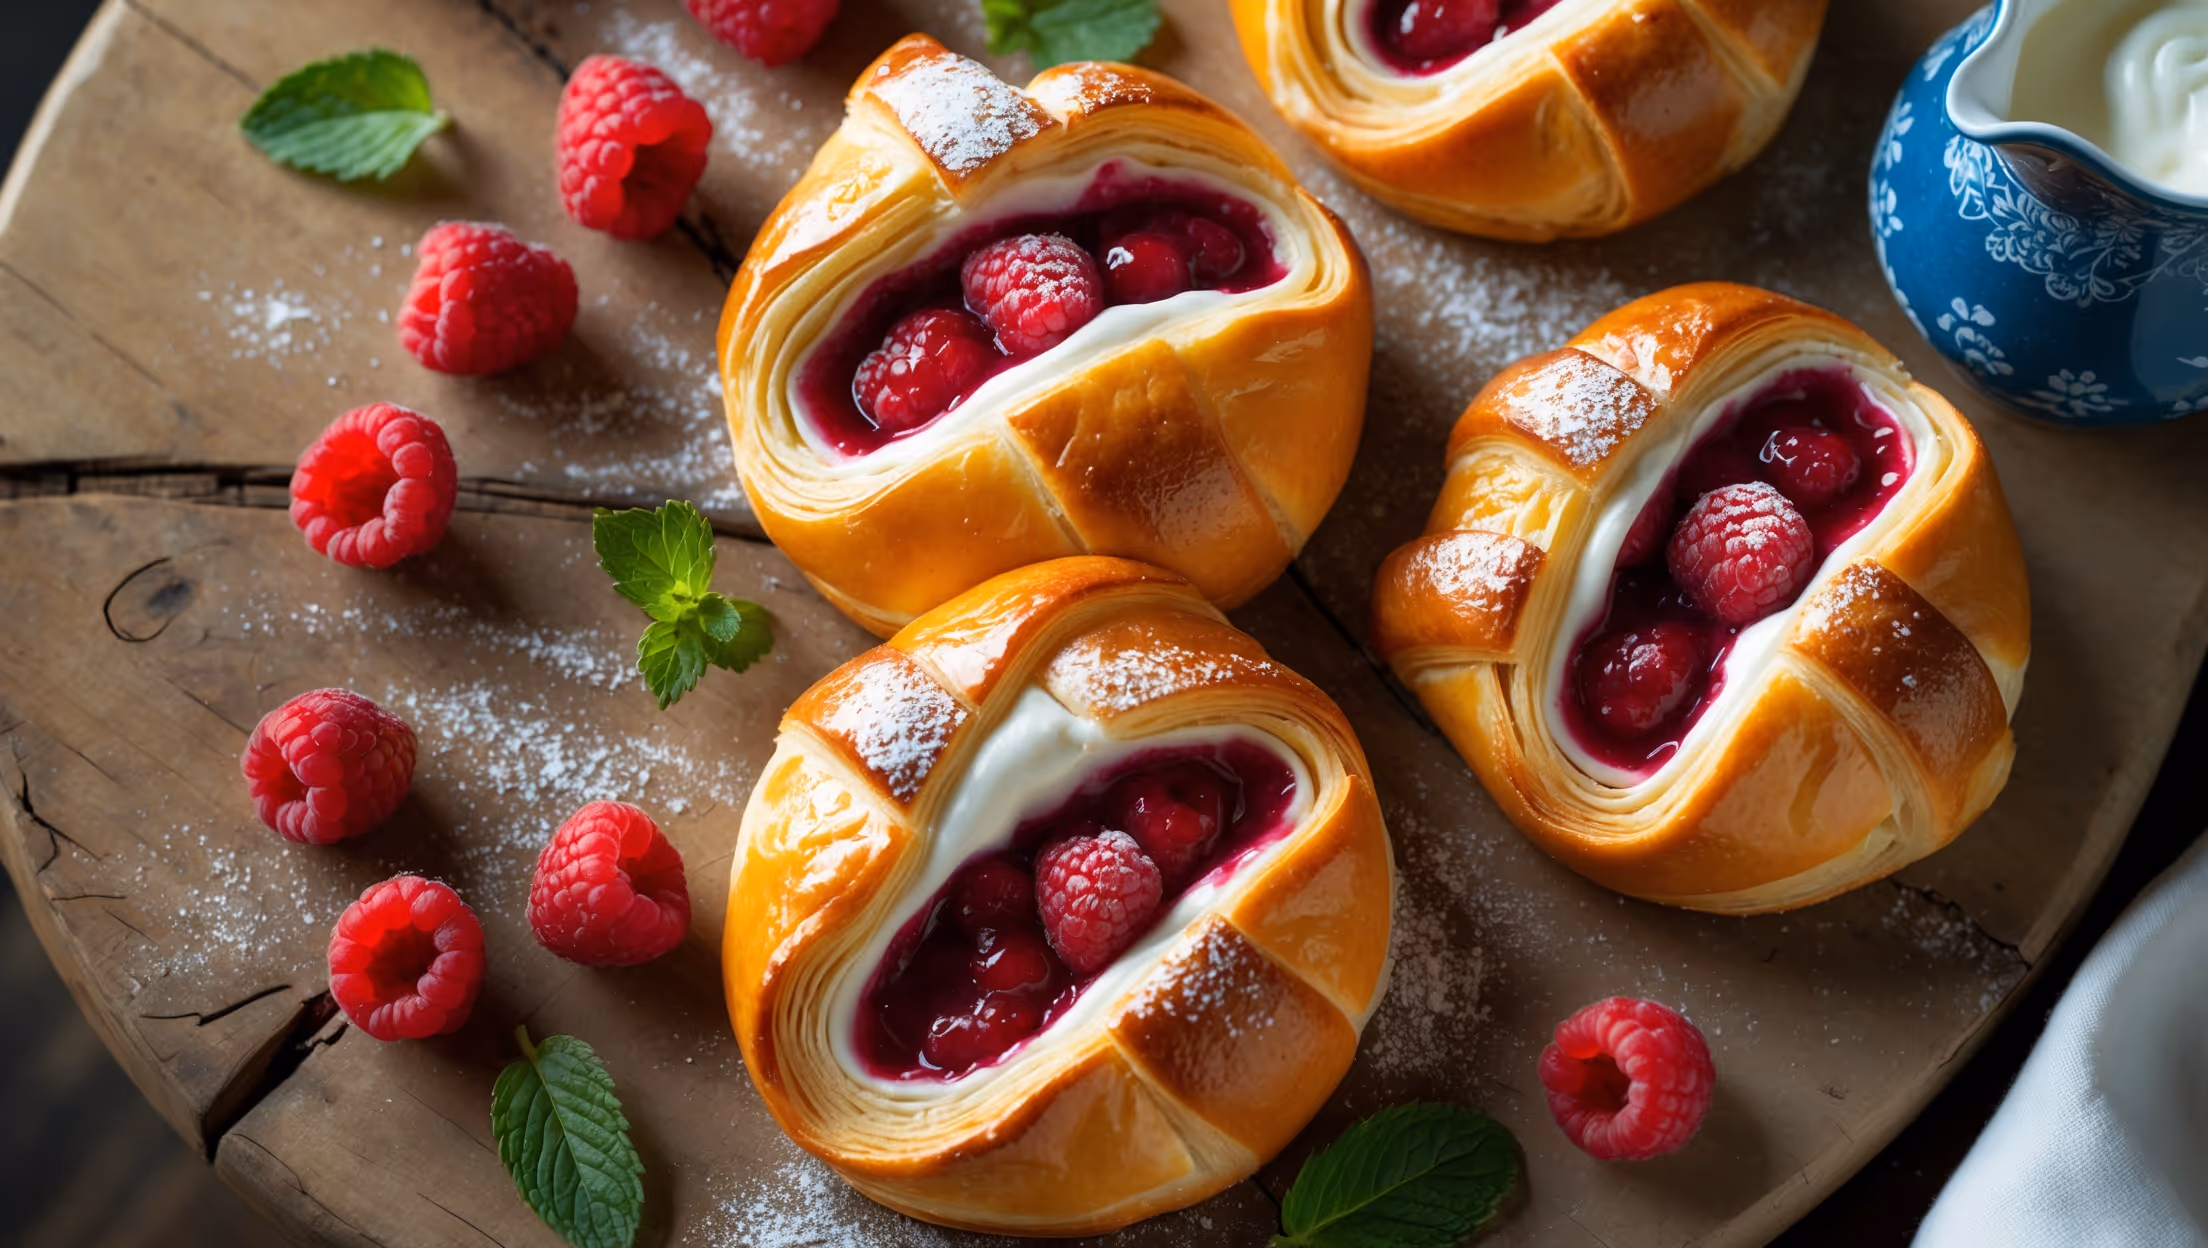
Raspberry Cream Cheese Danish Recipe
Ingredients
Equipment
Directions
FAQs
Find answers to your most pressing questions about this delicious recipe right here.
This recipe requires all-purpose flour, sugar, yeast, salt, milk, eggs, vanilla, cold butter for lamination, cream cheese, lemon zest, fresh or frozen raspberries, cornstarch, and ingredients for the glaze: powdered sugar, milk, and vanilla extract.
Learn how to cook Raspberry Cream Cheese Danish by creating a laminated dough with butter layers, preparing cream cheese and raspberry fillings, shaping the pastries, and baking until golden brown. The key techniques include proper lamination (folding butter into dough), careful temperature control, and allowing proper proofing time before baking.
Danish pastry dough is a laminated dough containing layers of butter folded between layers of yeasted dough. This creates the characteristic flaky, buttery texture when baked as the butter creates steam pockets between the dough layers. Regular bread dough lacks these distinct butter layers.
Yes, you can freeze these pastries either before or after baking. For unbaked pastries, freeze after shaping (before proofing) and bake from frozen. For baked pastries, cool completely before freezing and reheat in a 150°C oven for 8-10 minutes when ready to serve.
The secret lies in maintaining cold butter throughout the lamination process, proper resting between folds to relax the gluten, and not rushing the process. Keep your work surface cool, work quickly, and ensure the butter stays pliable but not warm enough to melt into the dough.
Puff Pastry
Try following recommended recipes