Directions
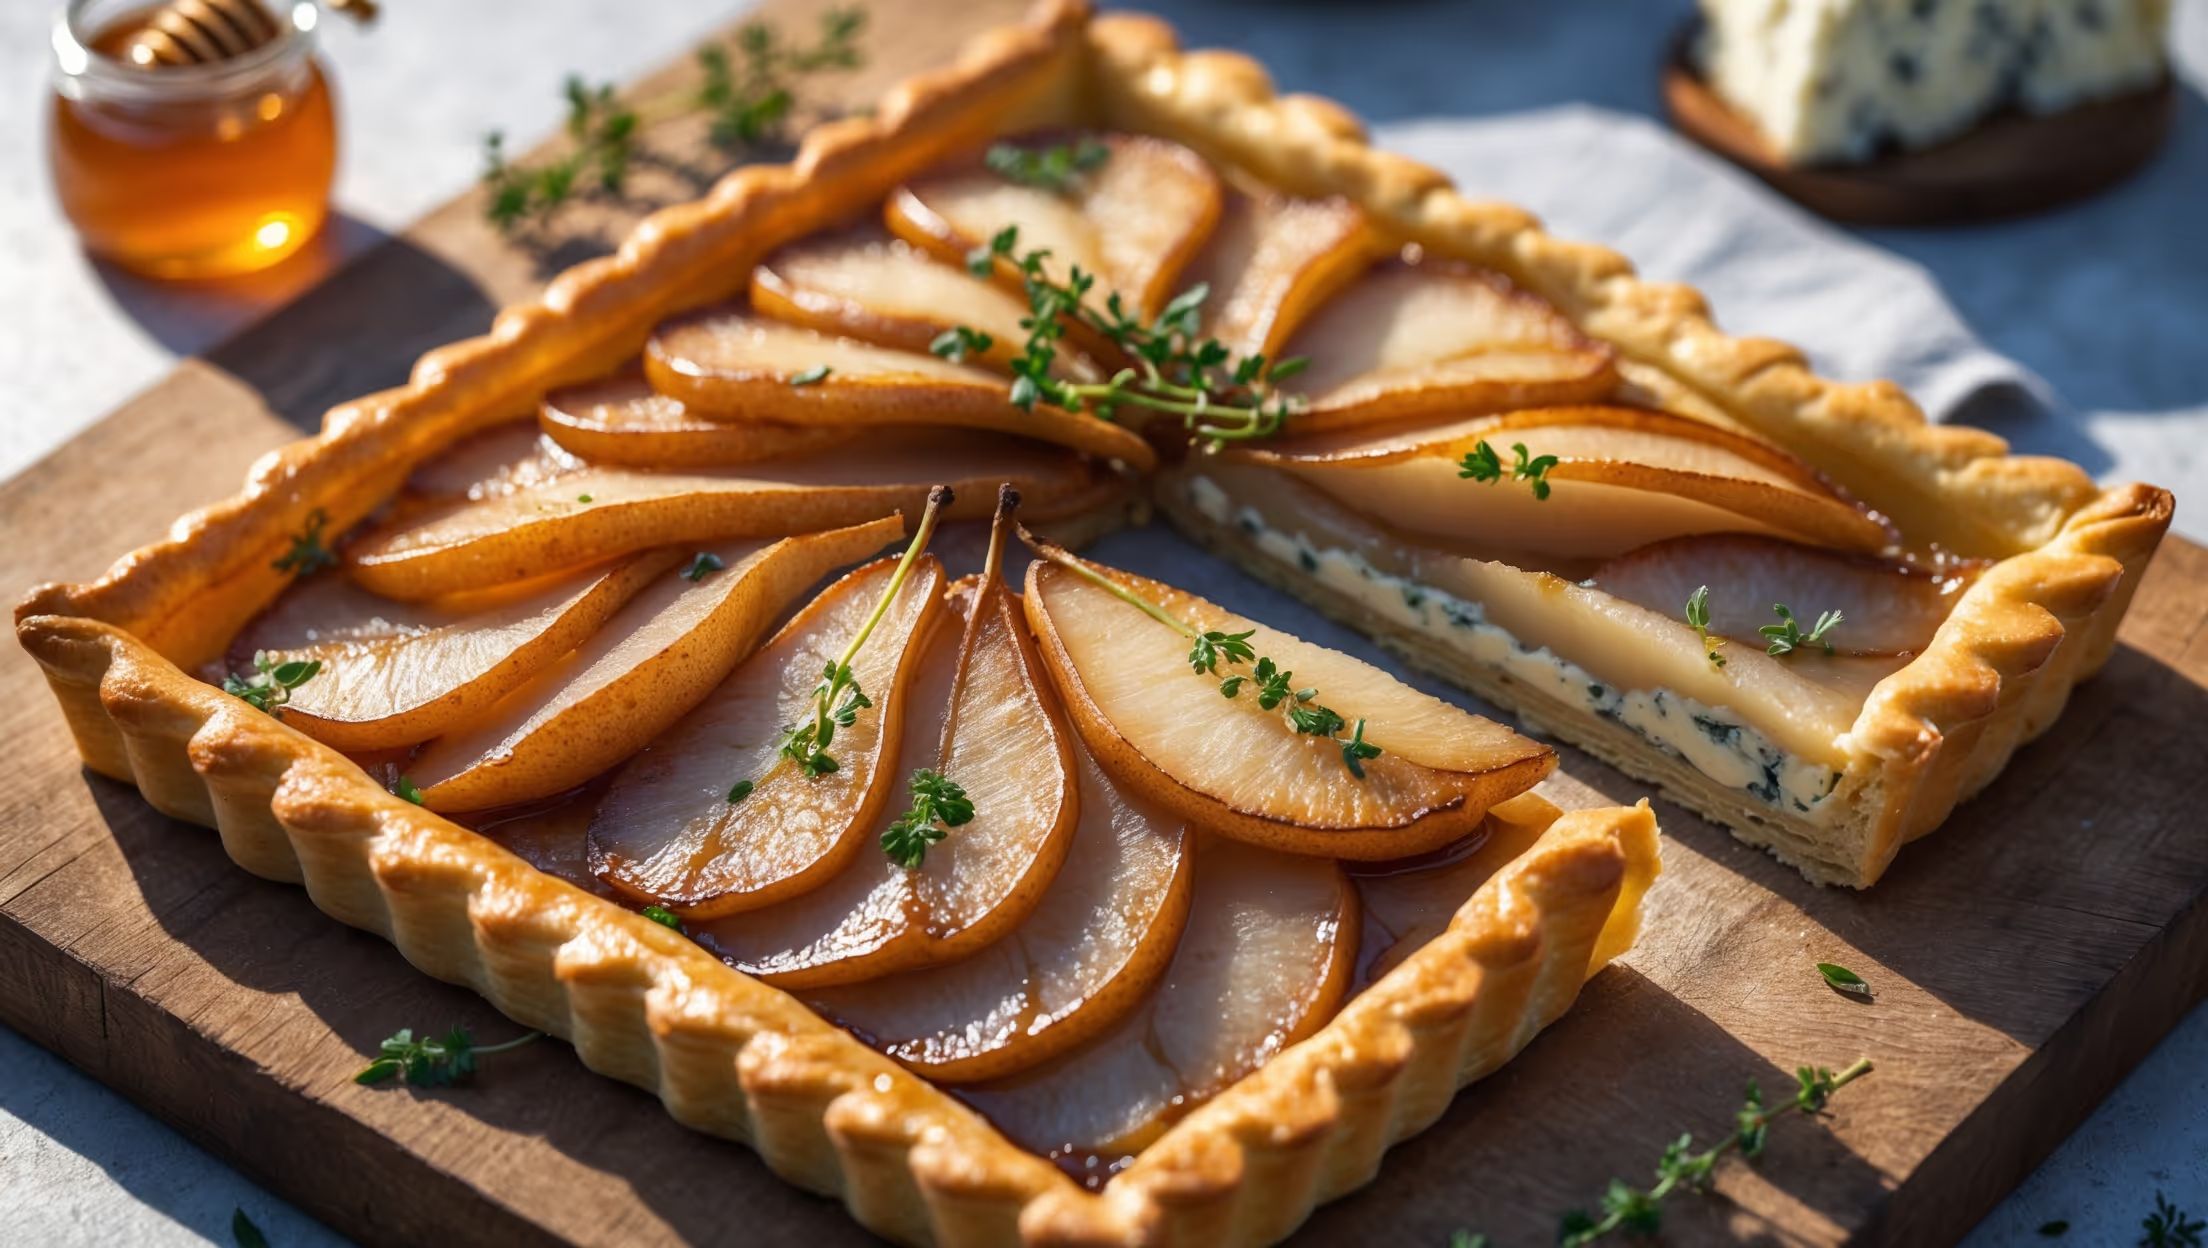
<ol class="no-list-style"><li class="MethodStepper"><h4 class="step-title">Step 1</h4>Begin by making the pastry. In a food processor (or by hand using a pastry cutter), combine the flour, salt, and sugar. Add the cold cubed butter and pulse until the mixture resembles coarse breadcrumbs with some pea-sized pieces of butter still visible – these butter pockets create steam when baking, resulting in delicious flaky layers.</li><li class="MethodStepper"><h4 class="step-title">Step 2</h4>Gradually add the ice-cold water, 1 tablespoon at a time, pulsing between additions until the dough just begins to come together. You may not need all the water – stop when the dough holds together when pinched. Cold ingredients and minimal handling prevent gluten development, ensuring a tender crust.</li><li class="MethodStepper"><h4 class="step-title">Step 3</h4>Turn the dough onto a lightly floured surface and gently shape into a flat disc without kneading. Wrap in plastic film and refrigerate for at least 30 minutes. This resting period relaxes the gluten and solidifies the butter, preventing shrinkage during baking.</li><li class="MethodStepper"><h4 class="step-title">Step 4</h4>While the dough chills, prepare the pears. Peel, quarter, and core them, then slice each quarter into thin slices, about 5mm thick. Heat a large frying pan over medium heat and add the butter. Once melted, add the pear slices, brown sugar, and 1 tablespoon of honey. Cook for 8-10 minutes, gently turning occasionally, until the pears are tender and caramelized. The caramelization process enhances the natural sweetness of the fruit, creating complex flavors.</li><li class="MethodStepper"><h4 class="step-title">Step 5</h4>Remove the pears from the heat and allow them to cool slightly. Stir in the fresh thyme leaves. Preheat your oven to 200°C (180°C fan/Gas 6) and line a baking tray with parchment paper.</li><li class="MethodStepper"><h4 class="step-title">Step 6</h4>Remove the pastry from the refrigerator and roll it out on a lightly floured surface to form a rectangle approximately 30cm x 40cm, with a thickness of about 3-4mm. Don't worry if the edges are irregular – this adds to the rustic charm of the tart.</li><li class="MethodStepper"><h4 class="step-title">Step 7</h4>Carefully transfer the rolled pastry to your prepared baking tray. Leaving a 5cm border around the edges, arrange the caramelized pear slices in overlapping rows across the center of the pastry. Reserve any caramel syrup from the pan.</li><li class="MethodStepper"><h4 class="step-title">Step 8</h4>Crumble the blue cheese evenly over the pears, tucking some pieces between the fruit slices. The moisture content of the cheese will determine how it melts – a creamier blue cheese will spread more during baking.</li><li class="MethodStepper"><h4 class="step-title">Step 9</h4>Gently fold the pastry edges over the filling, pleating as needed to create a rustic border. Brush the exposed pastry with beaten egg wash, which will give your tart a beautiful golden shine.</li><li class="MethodStepper"><h4 class="step-title">Step 10</h4>Drizzle the remaining tablespoon of honey over the exposed pears and cheese, and sprinkle the pastry edges with a pinch of flaky sea salt to enhance all the flavors.</li><li class="MethodStepper"><h4 class="step-title">Step 11</h4>Bake in the preheated oven for 30-35 minutes until the pastry is deeply golden and crisp. If you notice the pastry browning too quickly, loosely cover the edges with foil to prevent burning.</li><li class="MethodStepper"><h4 class="step-title">Step 12</h4>Remove from the oven and allow to cool for 10 minutes on the tray before transferring to a wire rack or serving board. This resting time allows the filling to set slightly and makes slicing easier.</li><li class="MethodStepper"><h4 class="step-title">Step 13</h4>Just before serving, drizzle with any reserved caramel syrup from cooking the pears and scatter with additional fresh thyme leaves. Serve warm or at room temperature – the flavors will be most pronounced when not overly hot. This tart pairs wonderfully with a simple green salad for a light meal or can be served as an elegant appetizer.</li></ol>