Pastel de Nata (Portuguese Custard Tarts) Recipe
Ingredients
Equipment
Directions
FAQs
Find answers to your most pressing questions about this delicious recipe right here.
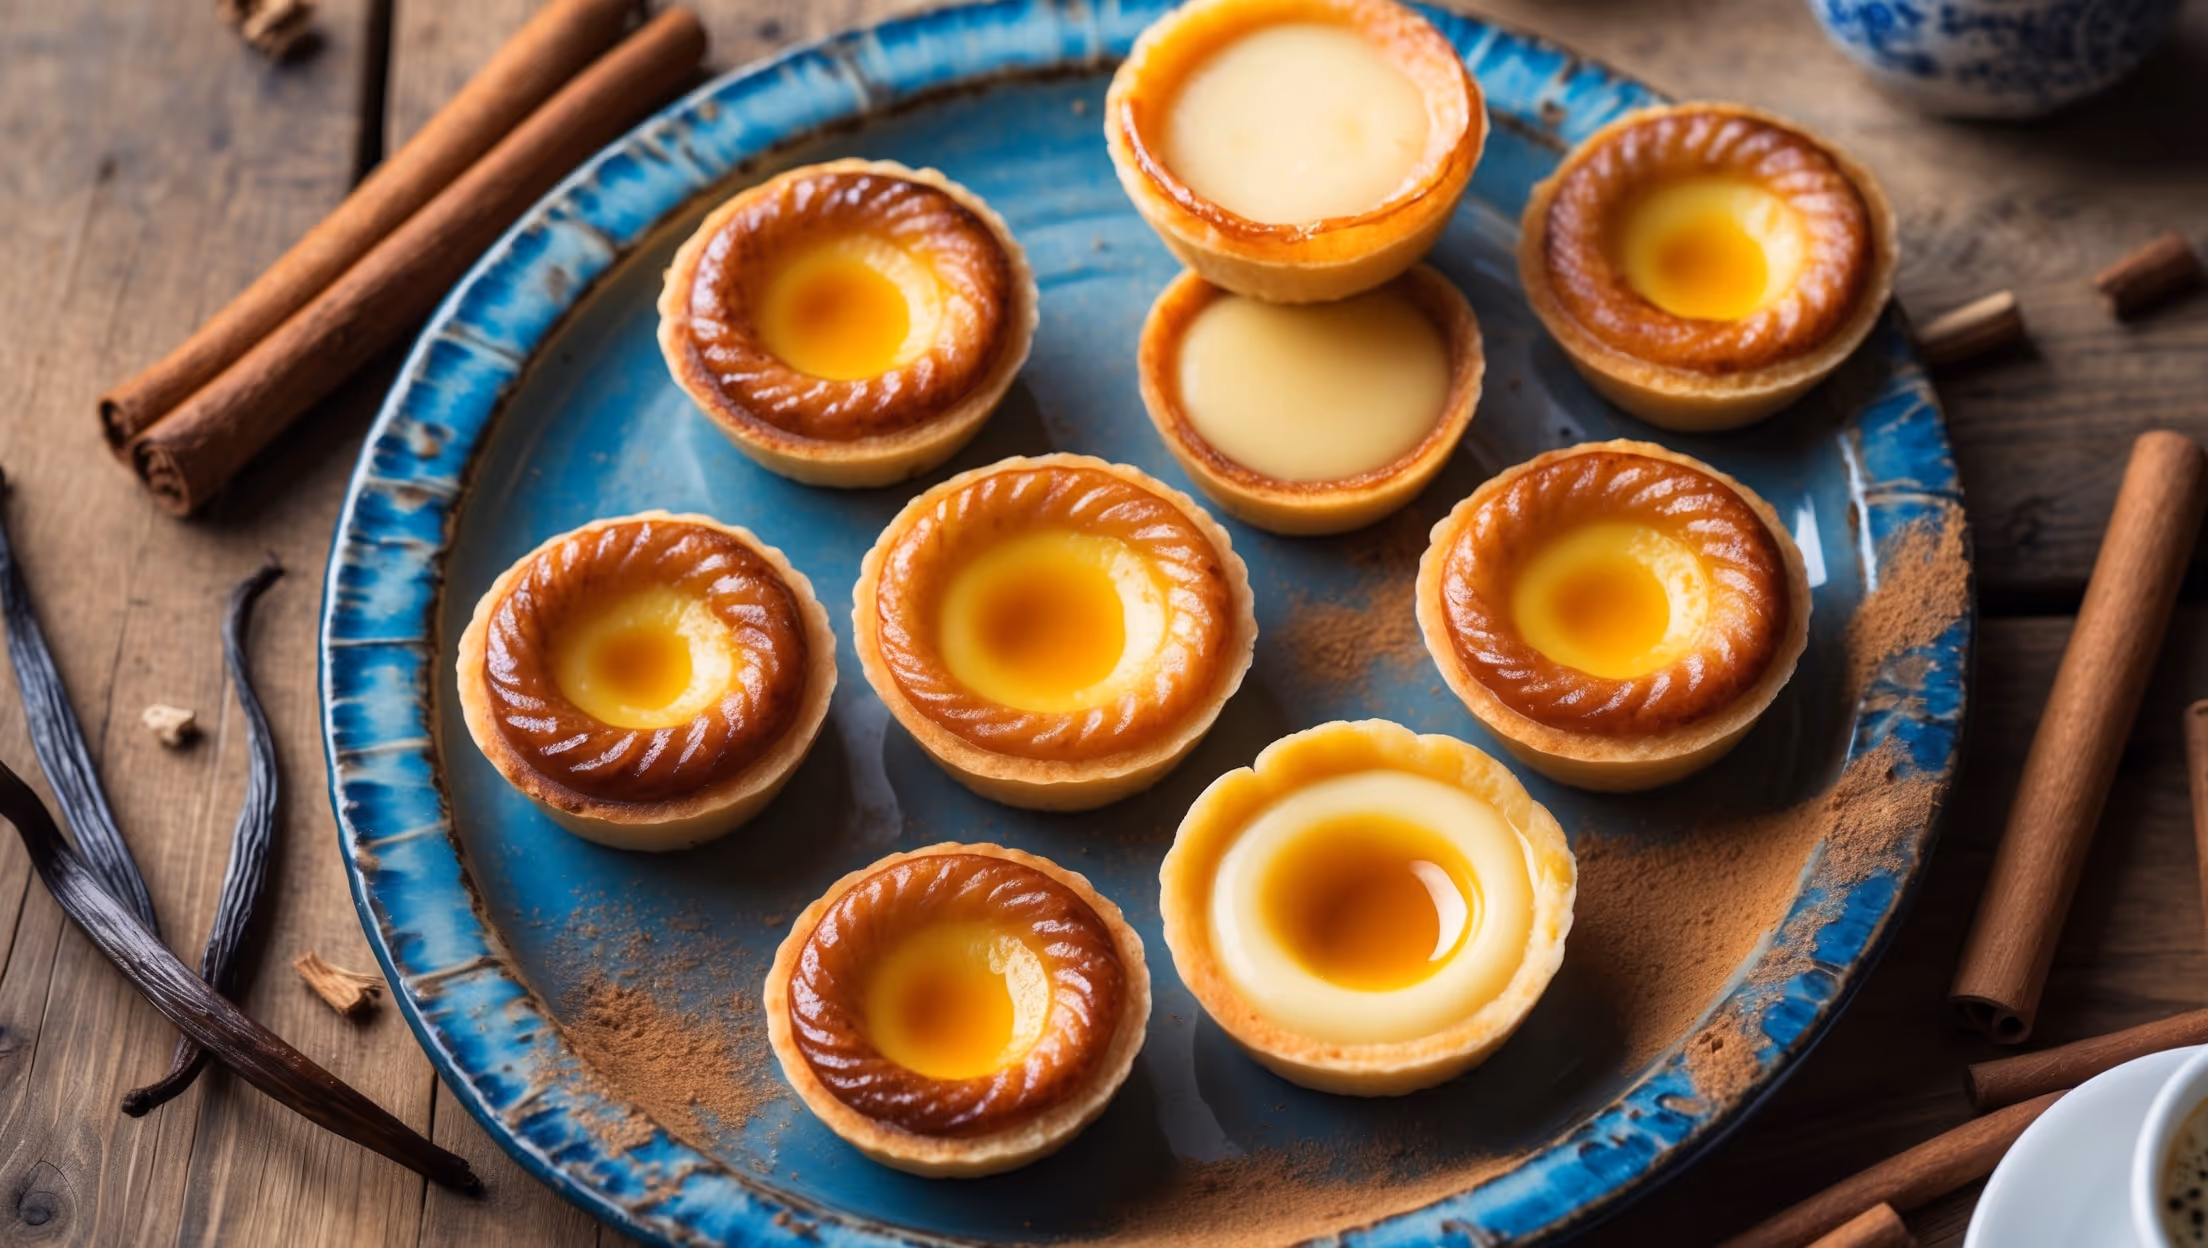
Traditional Pasteis de Nata require all-purpose flour, butter, salt, water, milk, sugar, egg yolks, cornstarch, vanilla, cinnamon stick, and lemon peel. These ingredients combine to create the signature flaky pastry shell and creamy, caramelized custard filling.
Learn how to cook Pastel de Nata by mastering two key components: laminated dough and custard filling. Create a buttery layered dough through multiple folding techniques, form shells in a muffin tin, then fill with infused custard before baking at high heat (240-250°C) until the tops caramelize and the pastry turns golden and crisp.
The extremely high temperature (240-250°C) is crucial for authentic results—it creates the signature caramelized spots on the custard while simultaneously crisping the pastry layers. This method mimics the traditional stone ovens in Portuguese bakeries that reach even higher temperatures.
The flaky layers come from proper lamination—folding butter between dough layers and maintaining cold temperatures throughout. The chilling between folds is crucial, as is rolling the dough tightly into a log before cutting into rounds, which creates the characteristic spiral pattern.
Perfect custard tarts have a golden-brown, crisp pastry shell and a custard top with dark caramelized spots (not burnt). The filling should be set but still slightly wobbly in the centre. They're best served warm, when the contrast between crisp pastry and silky custard is most pronounced.
Shortcrust Pastry
Try following recommended recipes


