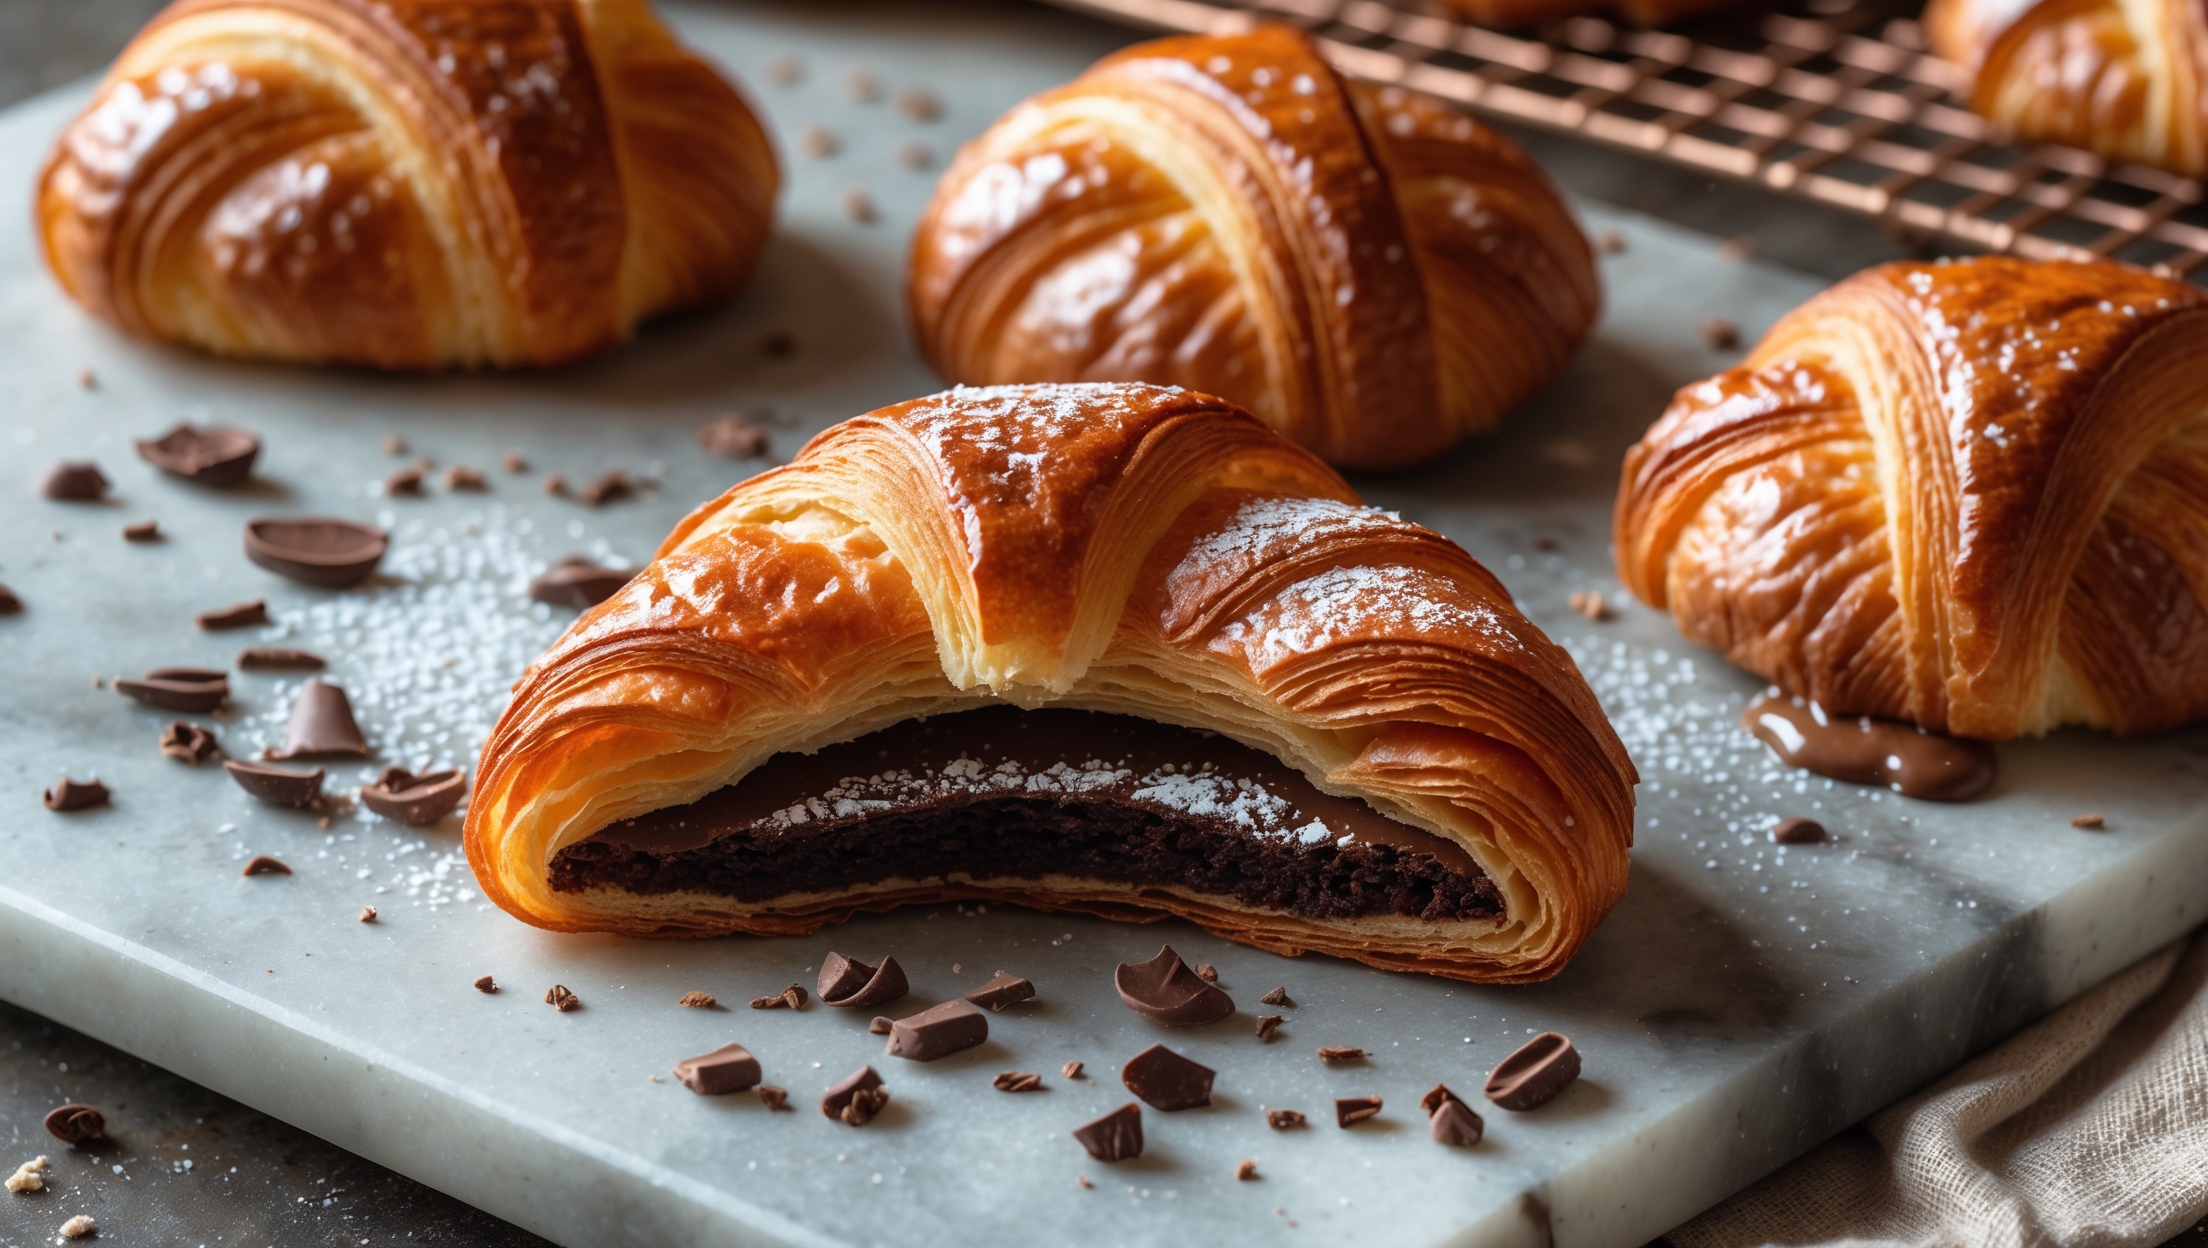
Pain au Chocolat Recipe

Ingredients
Equipment
Directions
FAQs
Find answers to your most pressing questions about this delicious recipe right here.
Traditional pain au chocolat requires strong bread flour, salt, sugar, yeast, water, butter for lamination, eggs for wash, and chocolate batons. The high-quality butter is crucial for achieving authentic flaky layers, while proper chocolate batons provide the perfect melt.
Learn how to cook Pain au Chocolat by creating a laminated dough through multiple folding processes that create distinct buttery layers. After shaping and proofing, bake at 200°C for 15-18 minutes until deeply golden brown. The key is patience during the lamination process and maintaining proper temperature control throughout.
Flaky layer failure often comes from butter temperature issues - if too warm, it absorbs into the dough; if too cold, it breaks and punctures layers. Work in a cool kitchen, maintain proper chilling between folds, and ensure even pressure when rolling to create those distinctive honeycombed layers.
Yes, these pastries freeze beautifully! You can freeze them either before baking (after shaping) or after baking once completely cooled. Pre-baked pastries should be frozen on a tray first, then transferred to an airtight container. Refresh in a 160°C oven for 5 minutes before serving.
While often called "chocolate croissants" in English, pain au chocolat and croissants differ in shape and assembly. Croissants are rolled from triangles into crescents, while pain au chocolat are made from rectangles rolled around chocolate batons, resulting in a straight, cylindrical shape.
Puff Pastry
Try following recommended recipes