Honey Tart Recipe

A buttery shortcrust pastry filled with silky, aromatic honey custard, offering a perfect balance of sweetness and rich caramelized notes in every heavenly bite.
Difficulty:
Intermediate
Prep Time:
30 mins
Cook Time:
45 mins
Serves:
1 tart (8 slices)
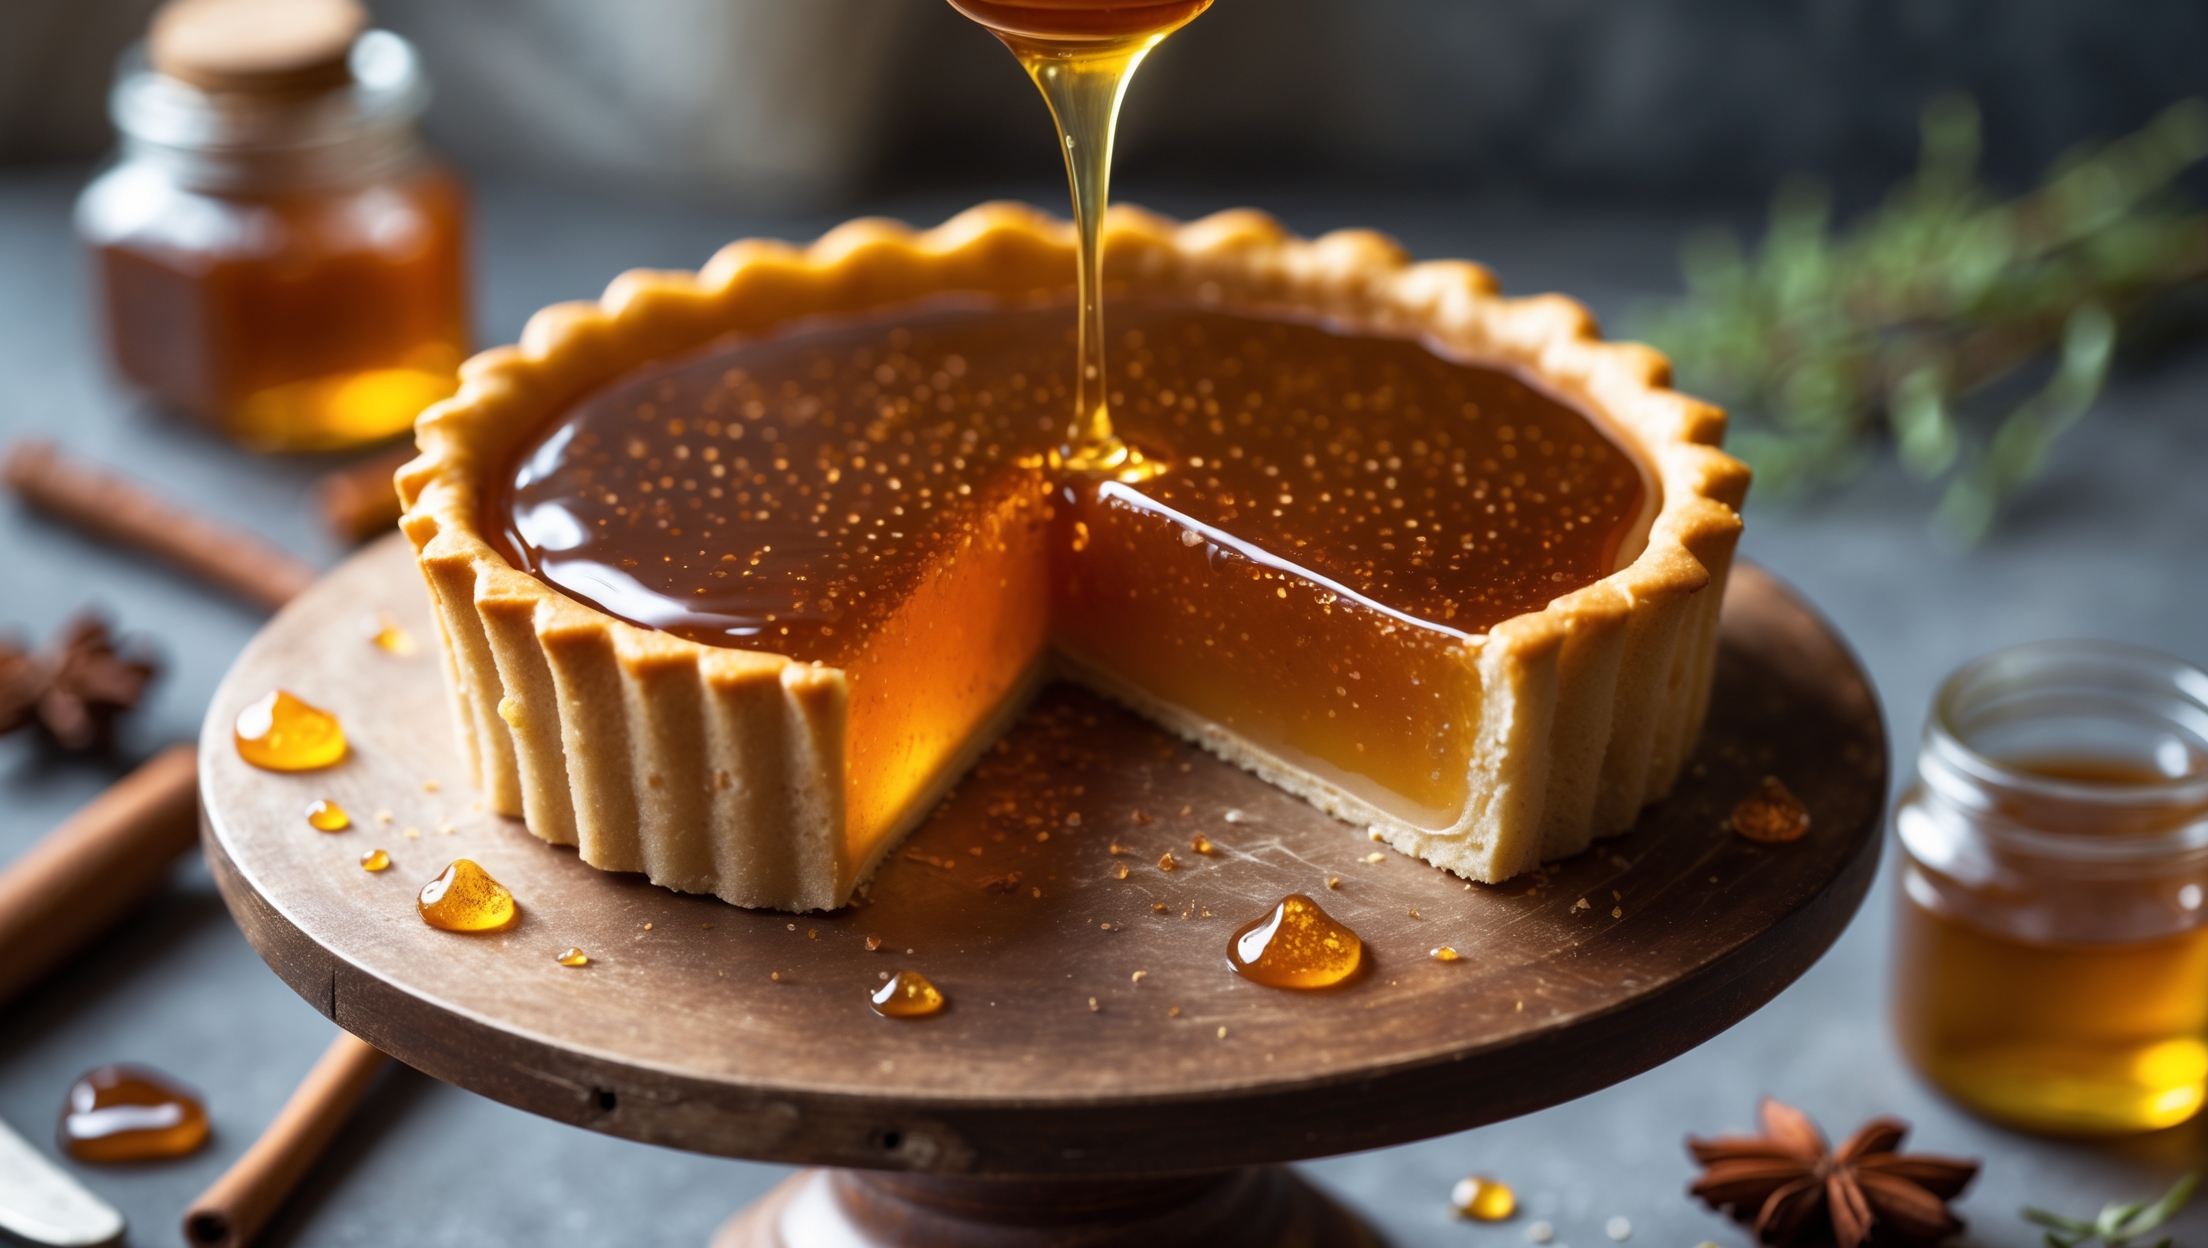
A golden-hued honey tart photographed in soft natural light, with the cross-section revealing its perfect layers – a crisp, golden-brown shortcrust base supporting a glistening amber honey filling. The surface catches light, highlighting its mirror-like sheen and tiny caramelized bubbles. Shot from a slightly elevated angle on a vintage wooden cake stand, with scattered star anise, cinnamon sticks, and crystallized honey drips nearby. A small jar of raw honey and a few sprigs of fresh thyme sit in the blurred background, while a slice being lifted shows the perfect clean cut and silky texture of the filling.

Ingredients

<ul class="ingredients-main-list"><li class="ingredients-single-item">For the pastry:</li><li class="ingredients-single-item">200g plain flour</li><li class="ingredients-single-item">100g cold unsalted butter, cubed</li><li class="ingredients-single-item">30g caster sugar</li><li class="ingredients-single-item">1 large egg yolk</li><li class="ingredients-single-item">2-3 tbsp ice-cold water</li><li class="ingredients-single-item">Pinch of salt</li><li class="ingredients-single-item">For the filling:</li><li class="ingredients-single-item">250g high-quality honey (ideally wildflower or acacia)</li><li class="ingredients-single-item">100g unsalted butter</li><li class="ingredients-single-item">150ml double cream</li><li class="ingredients-single-item">3 large eggs</li><li class="ingredients-single-item">2 large egg yolks</li><li class="ingredients-single-item">1 tsp vanilla extract</li><li class="ingredients-single-item">¼ tsp sea salt</li><li class="ingredients-single-item">Optional garnish:</li><li class="ingredients-single-item">Fresh thyme leaves</li><li class="ingredients-single-item">Sea salt flakes</li></ul>

Equipment

<ul class="equipment-main-list"><li class="equipment-single-item">23cm (9-inch) loose-bottomed tart tin</li><li class="equipment-single-item">Baking beans or rice (for blind baking)</li><li class="equipment-single-item">Baking parchment</li><li class="equipment-single-item">Food processor (optional)</li><li class="equipment-single-item">Digital kitchen thermometer</li></ul>
BAKE SMARTER

Kitchen Converter

Quickly switch between common baking units without leaving the recipe.

Convert
Result—

Volume uses US cups, tablespoons, and teaspoons. Converting weight to volume depends on the ingredient.

Directions

<ol class="no-list-style"><li class="MethodStepper"><h4 class="step-title">Step 1</h4>Start with the pastry. In a food processor (or by hand using fingertips), combine the flour, butter, and salt until the mixture resembles fine breadcrumbs. The butter should be very cold to create a flaky texture – this prevents the fat from melting too quickly during baking, allowing for those desirable layers to form.</li><li class="MethodStepper"><h4 class="step-title">Step 2</h4>Mix in the caster sugar, then add the egg yolk and just enough ice-cold water to bind the dough together. Be careful not to overwork the pastry – minimal handling keeps it tender. Form into a disc, wrap in cling film, and chill for at least 30 minutes. This relaxes the gluten and firms up the butter.</li><li class="MethodStepper"><h4 class="step-title">Step 3</h4>Preheat your oven to 180°C (160°C fan). Roll out the chilled pastry on a lightly floured surface to about 3mm thickness, creating a circle large enough to line your tart tin with a slight overhang. Carefully drape the pastry over your rolling pin to transfer it to the tin.</li><li class="MethodStepper"><h4 class="step-title">Step 4</h4>Gently press the pastry into the corners of the tin, being careful not to stretch it (stretching causes shrinkage during baking). Trim the excess leaving a small overhang to allow for shrinkage. Prick the base with a fork and return to the refrigerator for 15 minutes to prevent shrinkage.</li><li class="MethodStepper"><h4 class="step-title">Step 5</h4>Line the chilled pastry case with baking parchment and fill with baking beans or rice. Blind bake for 15 minutes, then remove the beans and parchment, and bake for another 5-7 minutes until the base is just starting to color but not fully cooked. The pastry should look dry and set but not browned. Trim any overhanging pastry for a clean edge.</li><li class="MethodStepper"><h4 class="step-title">Step 6</h4>While the pastry case cools slightly, prepare the honey filling. In a medium saucepan, gently heat the honey until it's warm but not boiling. Add the butter and stir until melted. Remove from heat and whisk in the double cream. The temperature should be warm but not hot enough to scramble the eggs in the next step.</li><li class="MethodStepper"><h4 class="step-title">Step 7</h4>In a large bowl, whisk together the eggs, egg yolks, vanilla extract, and salt until just combined. Gradually add the warm honey mixture, whisking constantly to prevent the eggs from curdling. This tempering technique ensures a smooth custard with no scrambled bits.</li><li class="MethodStepper"><h4 class="step-title">Step 8</h4>Place the pastry case on a baking sheet (this makes it easier to transfer to the oven). Pour the filling carefully into the pastry case, filling it about 90% full. The custard will puff slightly during baking before setting.</li><li class="MethodStepper"><h4 class="step-title">Step 9</h4>Reduce the oven temperature to 170°C (150°C fan) and bake the tart for 25-30 minutes, or until the filling is set around the edges but still has a slight wobble in the center – similar to how you'd test a cheesecake. The filling will continue to set as it cools, so be careful not to overbake, which would make the texture grainy.</li><li class="MethodStepper"><h4 class="step-title">Step 10</h4>Allow the tart to cool completely on a wire rack (at least 2 hours) before removing from the tin. The cooling process is crucial for the custard to set properly. If desired, sprinkle with a few fresh thyme leaves and a light dusting of sea salt flakes just before serving to enhance the honey flavor.</li><li class="MethodStepper"><h4 class="step-title">Step 11</h4>For the best texture and flavor, serve at room temperature. The tart can be made a day ahead and stored in the refrigerator – just bring it back to room temperature before serving to allow the honey flavors to fully express themselves and the butter in the pastry to soften slightly.</li></ol>
Nutrition Facts (per serving)

🍽️ Serving Size: 1 slice
🔥 Calories: 375 calories
🥑 Fat: 22 g
🧈 Saturated Fat: 13 g
🍞 Carbohydrates: 42 g
🍭 Sugar: 28 g
🍗 Protein: 5 g
🫀 Cholesterol: 180 mg
🧂 Sodium: 185 mg

Chef’s Notes

A few helpful details for making this recipe.

Why is my honey custard filling curdling or becoming grainy?

Curdling occurs when eggs cook too quickly in hot honey mixture. Always temper eggs by gradually adding warm (not hot) honey-butter mixture while constantly whisking. Use a digital thermometer to ensure your mixture stays below 80°C, and bake at a moderate temperature to maintain a silky, smooth consistency.

Can I make this tart with different types of honey?

Absolutely! Different honeys will create unique flavour profiles. Wildflower or acacia honey offers delicate floral notes, while orange blossom provides citrus undertones. Darker varieties like buckwheat or heather honey create more robust, caramelised flavours. Premium, single-origin honeys are worth the splurge here.

How do I prevent a soggy bottom on my honey tart?

Ensure a crisp base by thoroughly blind baking the pastry case before adding filling. Use cold ingredients when making the pastry, rest it properly, prick the base, and use baking beans. A preheated baking sheet under the tart tin helps conduct heat directly to the base for even cooking.

Want to try something else in ...

More recipes you might like

Keep exploring with more recipes from What's Baking.