Directions
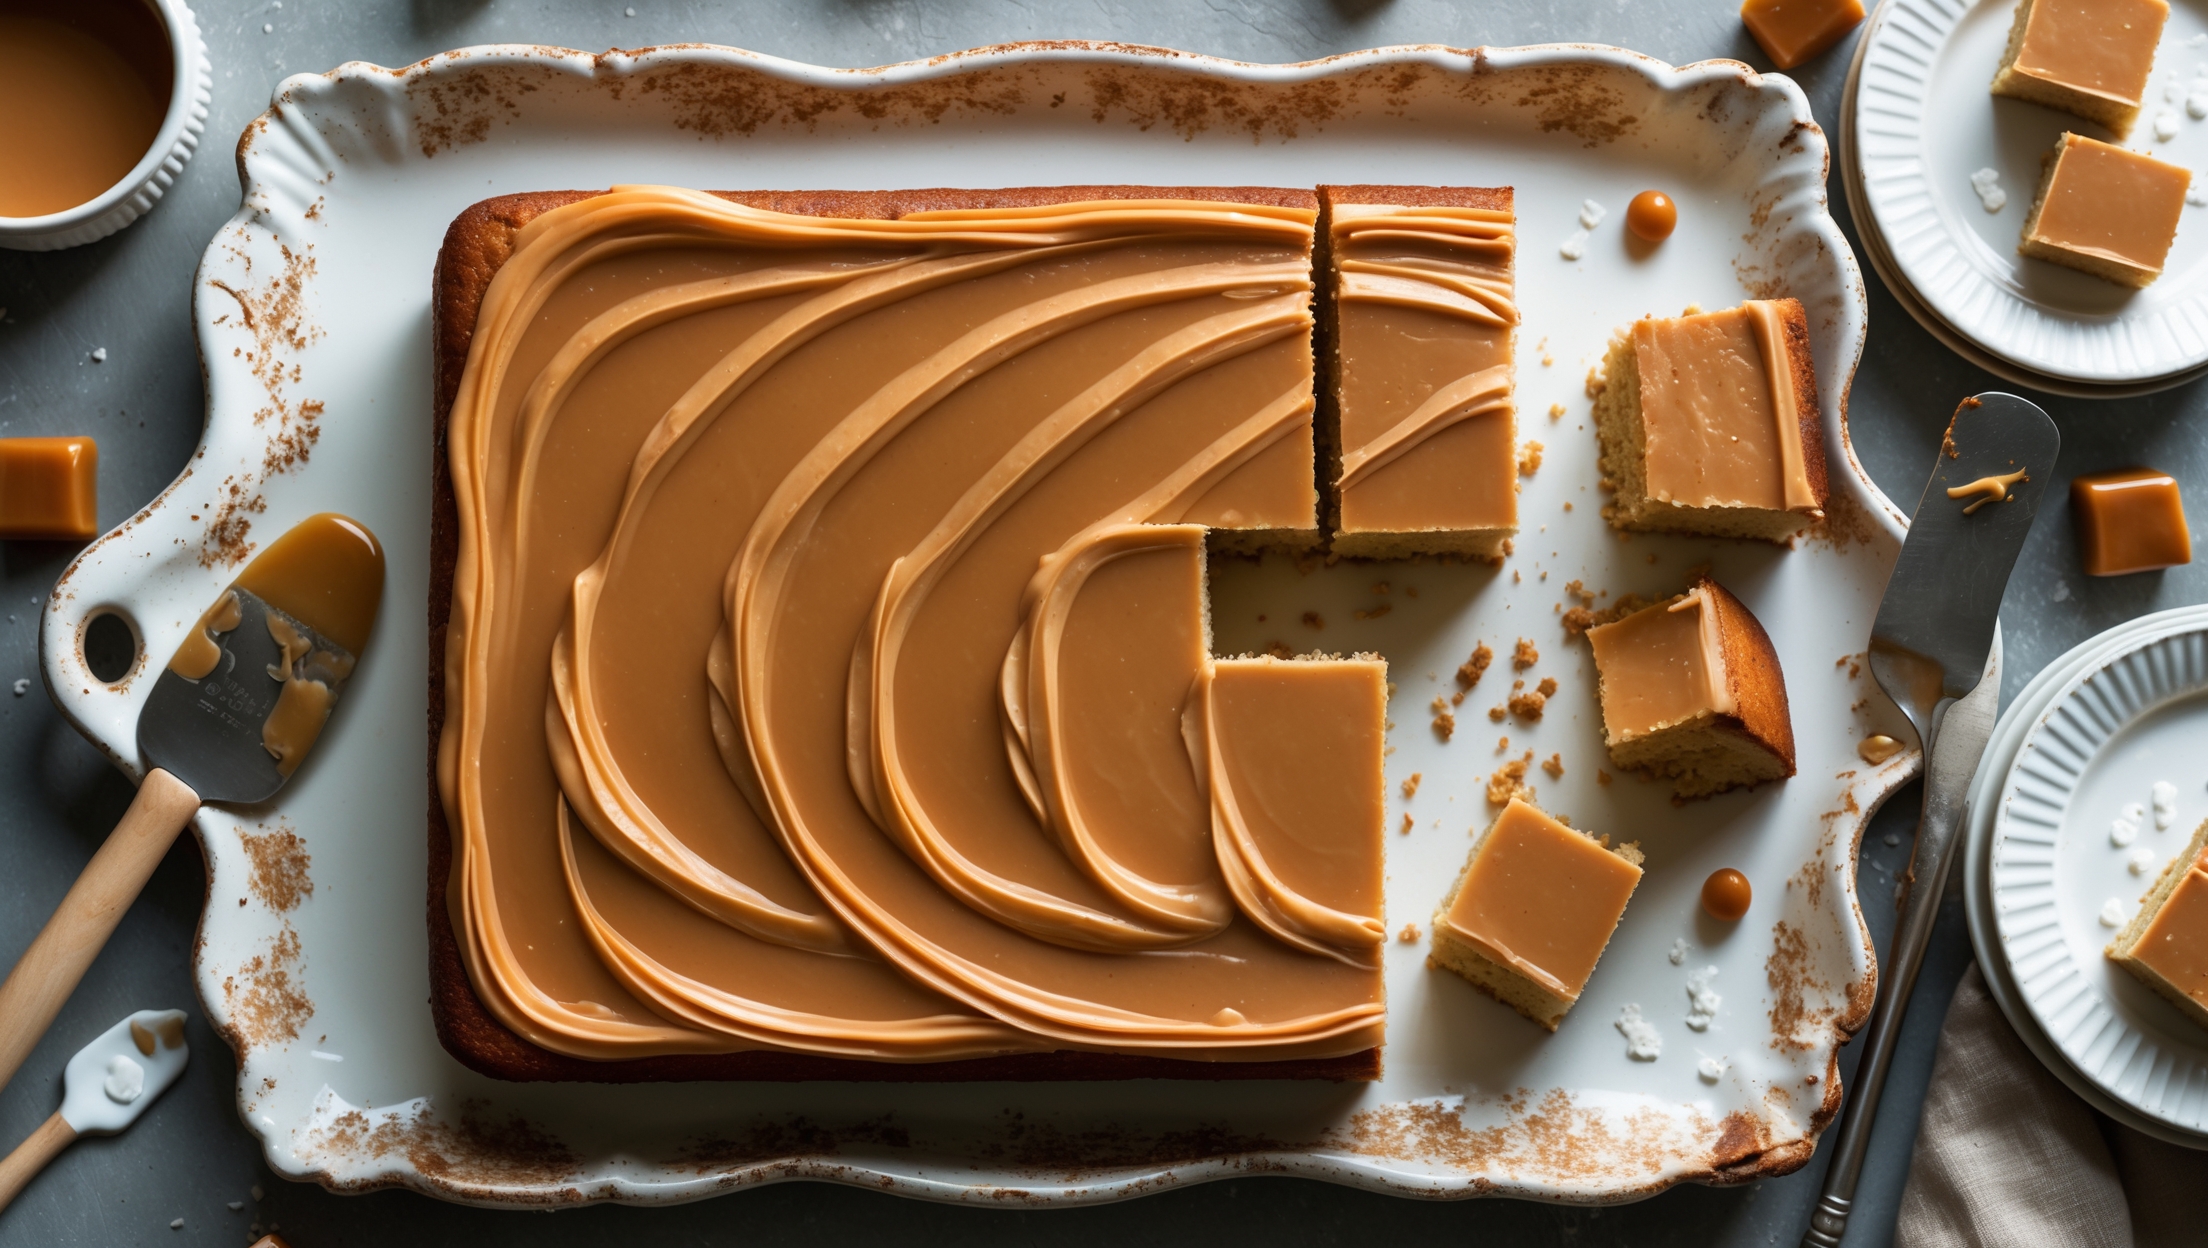
<ol class="no-list-style"><li class="MethodStepper"><h4 class="step-title">Step 1</h4>First, prepare your homemade dulce de leche. Pour the contents of 2 cans of sweetened condensed milk into a large heat-proof bowl and stir in 1/2 teaspoon of sea salt. Cover tightly with aluminum foil. Place this bowl in a deep roasting pan and fill with hot water until it reaches halfway up the sides of the bowl. Bake at 160°C for 2-3 hours, checking every 30 minutes and replenishing water as needed. The condensed milk will gradually transform into a gorgeous caramel color. When it's a deep amber color and thick like caramel, it's ready. You can prepare this a day ahead and refrigerate.</li><li class="MethodStepper"><h4 class="step-title">Step 2</h4>For the cake, preheat your oven to 180°C. Grease your baking pan thoroughly and line with parchment paper, leaving an overhang on the sides for easy removal. The parchment is crucial for preventing sticking, as this is a moist cake.</li><li class="MethodStepper"><h4 class="step-title">Step 3</h4>In a medium bowl, whisk together the flour, baking powder, baking soda, and salt. Proper mixing of dry ingredients ensures even leavening throughout the cake, preventing dense spots.</li><li class="MethodStepper"><h4 class="step-title">Step 4</h4>In the bowl of your stand mixer fitted with the paddle attachment, cream the butter on medium speed until smooth and creamy, about 1 minute. This initial beating creates a proper foundation for incorporating the sugar. Add the sugar gradually and beat on medium-high for 4-5 minutes until extremely light and fluffy. This extended creaming process incorporates air that helps create a tender crumb.</li><li class="MethodStepper"><h4 class="step-title">Step 5</h4>Add the eggs one at a time, beating well after each addition and scraping down the sides of the bowl as needed. The mixture might look slightly curdled – this is normal! Mix in the vanilla extract. The gradual addition of eggs emulsifies them into the fat, creating a stable cake batter structure.</li><li class="MethodStepper"><h4 class="step-title">Step 6</h4>On low speed, add the flour mixture in three portions, alternating with the buttermilk in two portions (beginning and ending with flour). Mix just until combined after each addition. Overmixing at this stage can develop gluten and make your cake tough, so be gentle but thorough.</li><li class="MethodStepper"><h4 class="step-title">Step 7</h4>Pour the batter into your prepared pan and smooth the top with an offset spatula. Give the pan a gentle tap on the counter to remove any large air bubbles. Bake for 30-35 minutes, or until a wooden pick inserted in the center comes out clean and the cake springs back when lightly touched. The cake should be golden brown with a slight dome.</li><li class="MethodStepper"><h4 class="step-title">Step 8</h4>While the cake is still warm (but not hot), poke holes all over the surface using a wooden skewer or fork. Reserve about 400g of your dulce de leche for the frosting and warm the remaining dulce de leche slightly in the microwave until it's pourable. Pour half of this warmed dulce de leche over the warm cake, allowing it to soak in. The warm cake will absorb the dulce de leche more effectively, creating pockets of caramel flavor throughout.</li><li class="MethodStepper"><h4 class="step-title">Step 9</h4>Let the cake cool completely in the pan on a wire rack, about 2 hours. As it cools, it will continue to absorb the dulce de leche. Once cool, pour the remaining warmed dulce de leche over the cake for an extra layer of flavor.</li><li class="MethodStepper"><h4 class="step-title">Step 10</h4>For the frosting, beat the butter in your stand mixer on medium-high speed until pale and fluffy, about 3 minutes. Add the reserved 400g of dulce de leche and beat until well combined. Gradually add the powdered sugar, mixing on low speed until incorporated. Add the vanilla extract and salt, then increase the speed to medium-high and beat for 2 minutes. Add heavy cream one tablespoon at a time until you reach your desired consistency – it should be smooth and spreadable but still hold its shape.</li><li class="MethodStepper"><h4 class="step-title">Step 11</h4>Use your offset spatula to spread the frosting over the cooled cake in decorative swirls. If desired, sprinkle with a little flaky sea salt to balance the sweetness – the contrast of sweet and salty will elevate the flavor profile dramatically.</li><li class="MethodStepper"><h4 class="step-title">Step 12</h4>Allow the cake to set for about 30 minutes before slicing. This cake is even better the next day as the flavors meld and develop, so consider making it ahead of time for an even more intense caramel flavor. Store covered at room temperature for up to 3 days, or refrigerate for up to a week. Bring to room temperature before serving for the best texture and flavor.</li></ol>