Classic Fruit Tart Recipe
Ingredients
Equipment
Directions
FAQs
Find answers to your most pressing questions about this delicious recipe right here.
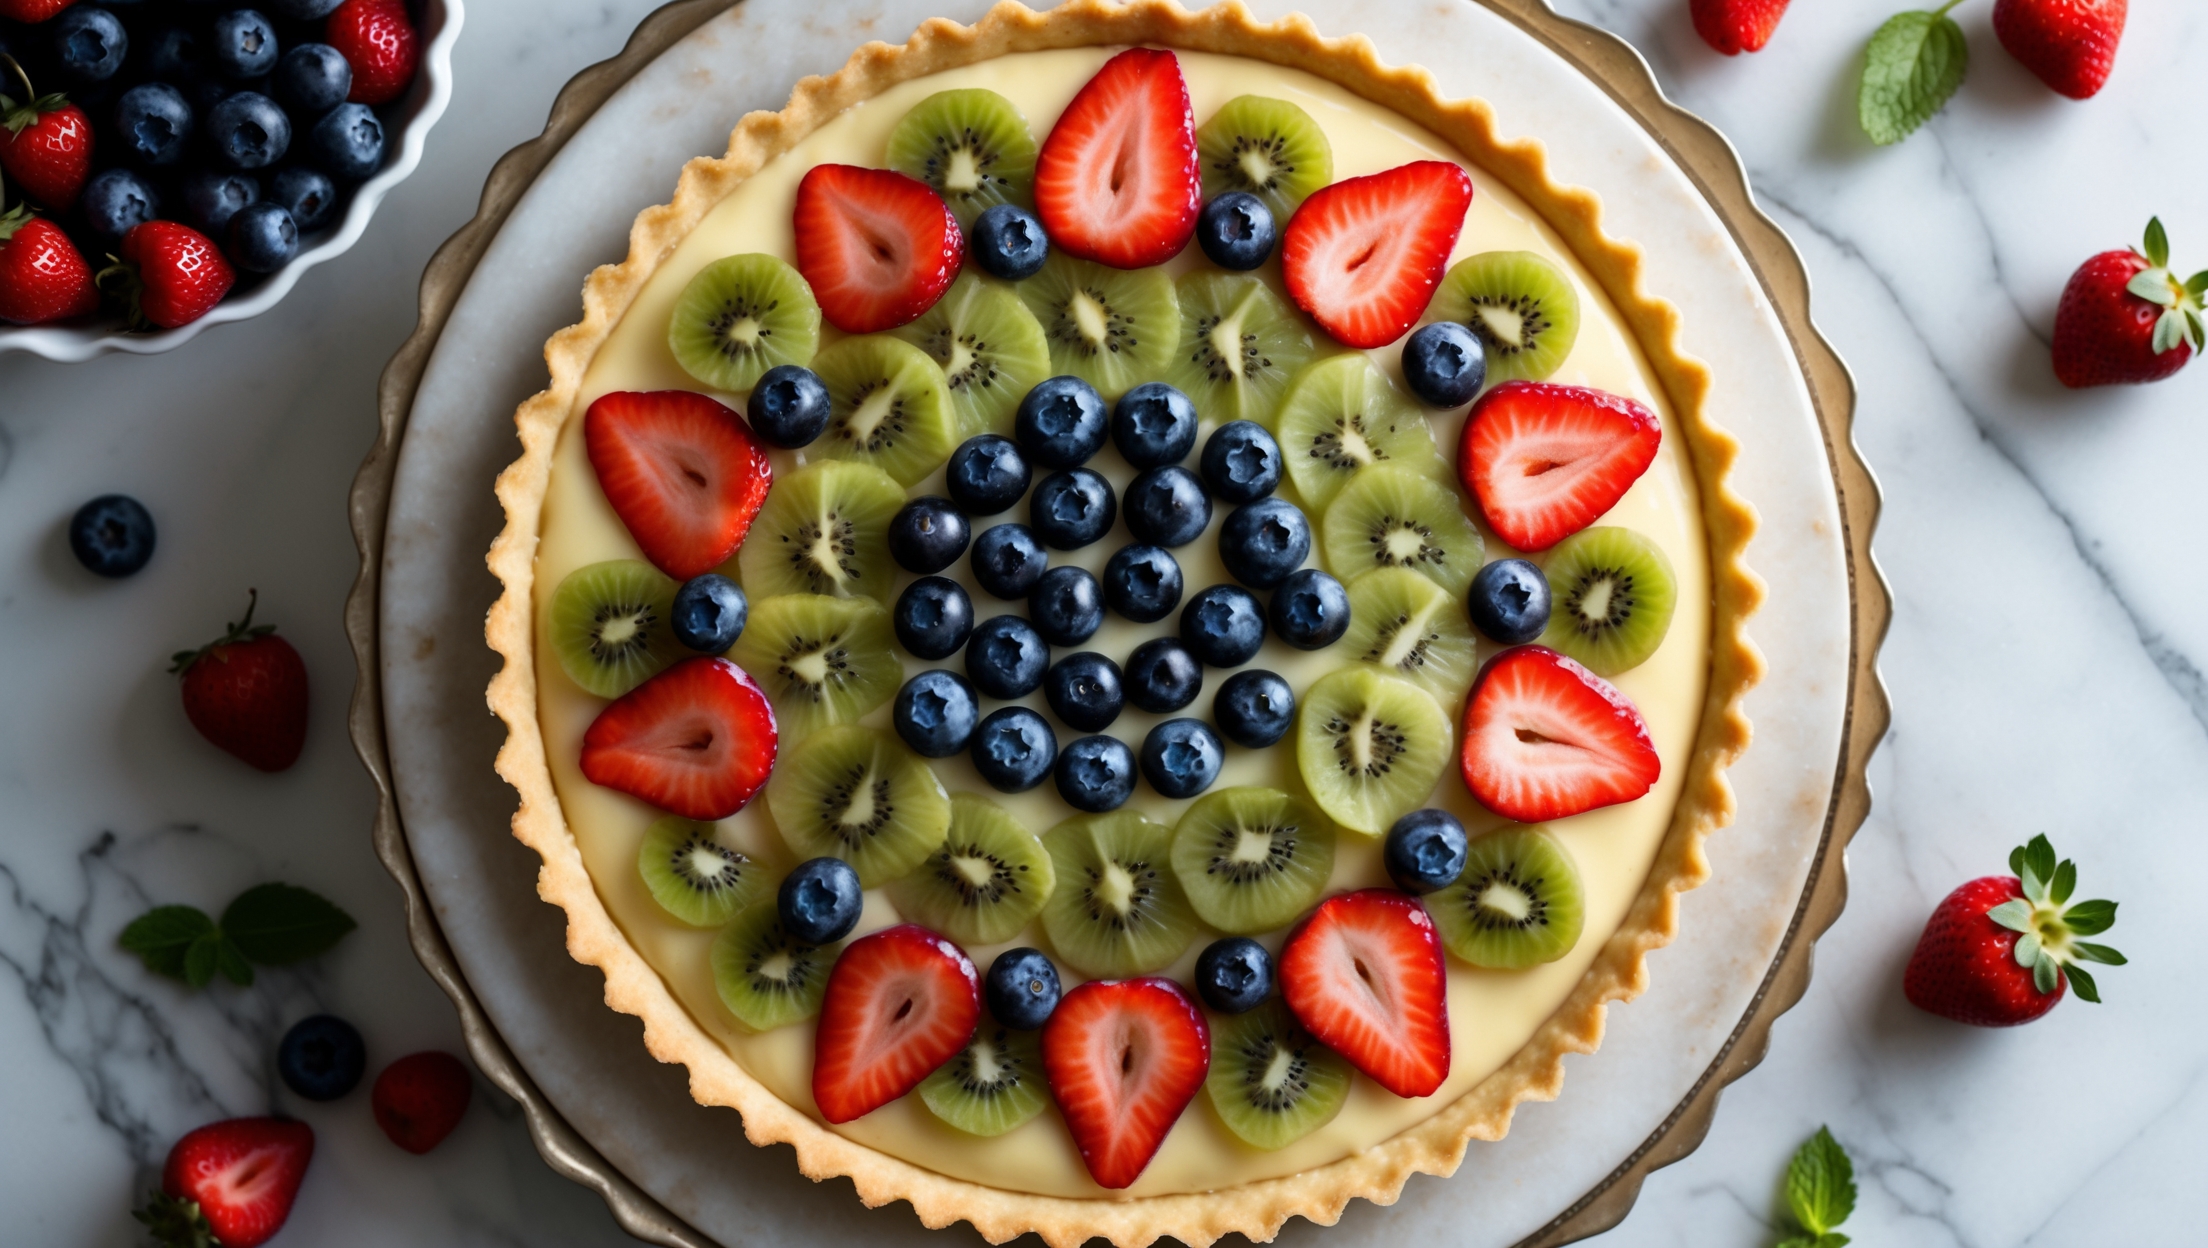
Classic Fruit Tart requires plain flour, butter, eggs, and sugar for the shortcrust pastry; whole milk, vanilla, sugar, egg yolks, cornflour, and butter for the custard; and fresh fruits (strawberries, blueberries, kiwi, mandarin) with apricot jam for the glaze.
Learn how to cook Classic Fruit Tart by first making a buttery shortcrust pastry, blind baking until golden, then filling with homemade vanilla custard. Once cooled, arrange fresh fruits in an attractive pattern on top and finish with an apricot jam glaze. The key is allowing proper cooling time between each stage for the best texture.
To prevent a soggy tart base, ensure you blind bake the pastry case thoroughly until golden and completely cooked. Cool the pastry case fully before adding custard, and make sure your custard is thick enough. Always pat fruit dry before arranging on top to avoid excess moisture seeping into the tart.
Yes, you can prepare components separately up to 24 hours ahead - bake the pastry case and make the custard, storing them separately. Assemble the tart up to 4 hours before serving, adding fruit and glaze last minute to maintain freshness and prevent the pastry from softening.
For a professional fruit arrangement, ensure all fruits are completely dry and similar in size. Work in concentric circles from the outside in, overlapping slices slightly. Alternate colours and textures for visual appeal, and finish with smaller fruits in the centre. The apricot glaze adds the essential professional shine.
Shortcrust Pastry
Try following recommended recipes


