Butter Tarts Recipe
Ingredients
Equipment
Directions
FAQs
Find answers to your most pressing questions about this delicious recipe right here.
Classic butter tarts require simple pantry staples: flour, butter, and salt for the pastry; brown sugar, eggs, vanilla, and maple syrup for the filling. Unlike American pecan pies, traditional Canadian butter tarts don't need corn syrup, making them accessible to home bakers.
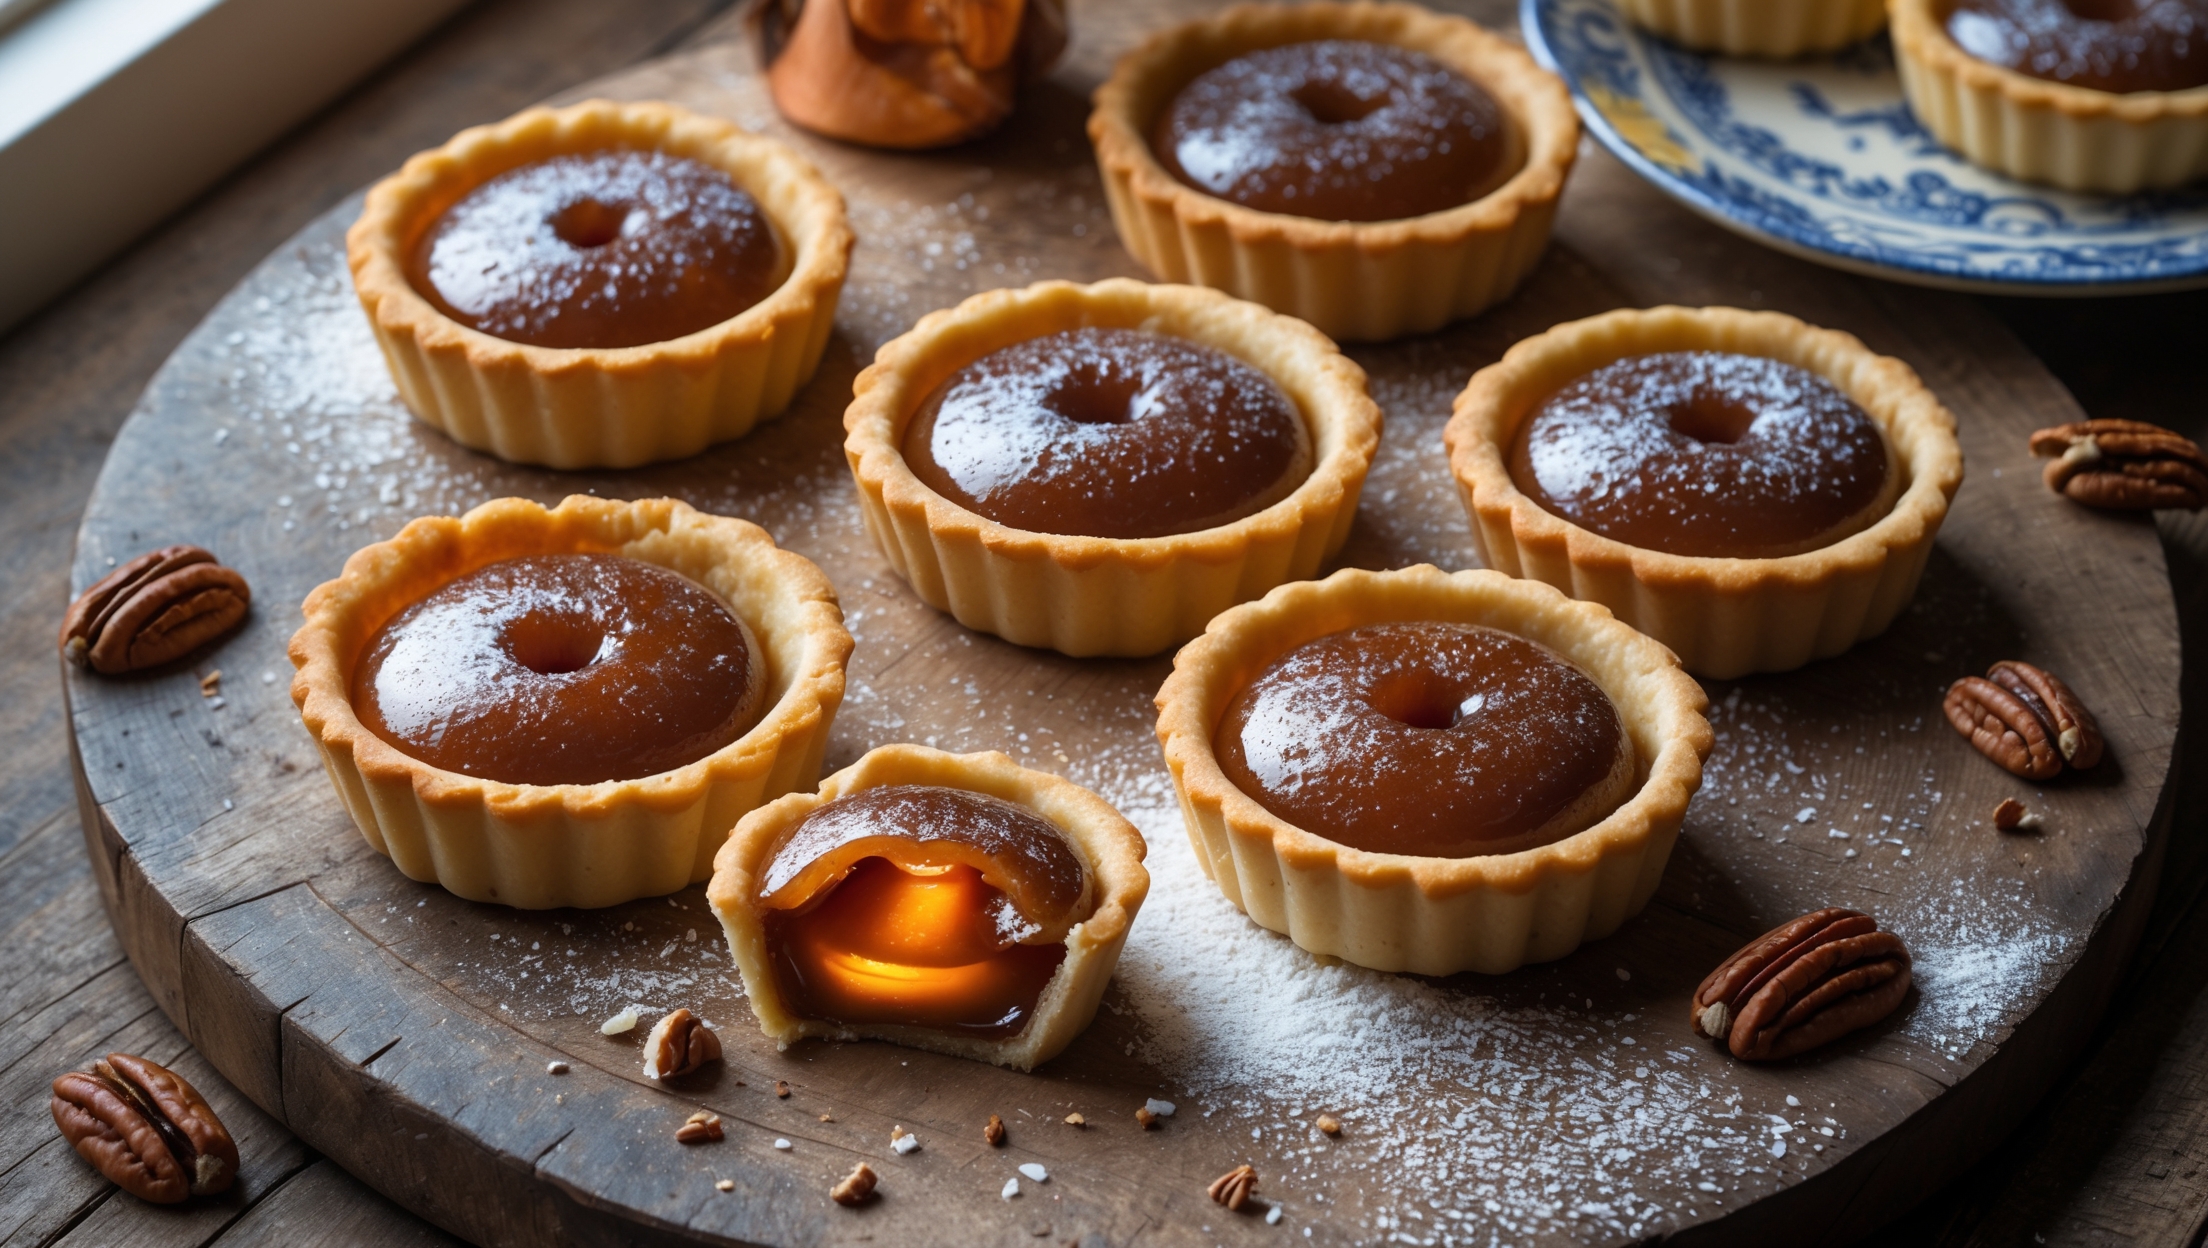
Learn how to cook Butter Tarts by mastering two key components: a flaky pastry and gooey filling. The secret lies in keeping butter cold for the pastry, using vinegar to ensure tenderness, and carefully timing the bake—about 15 minutes at 190°C gives you that perfect balance of set edges and a slightly jiggly centre that's characteristic of authentic Canadian butter tarts.
Authentic Canadian butter tarts traditionally feature a runny, gooey centre—it's their defining characteristic! The filling should set just enough at the edges while remaining deliciously oozy in the middle. This texture comes from the precise ratio of eggs to sugar and careful baking timing to avoid over-setting.
The raisin vs. pecan debate divides Canadian butter tart enthusiasts! Historically, plain or raisin-filled tarts were most traditional, dating back to early 1900s recipes. Pecans became popular later. True butter tart connoisseurs have strong opinions, but the beauty is you can make them plain, with raisins, or with nuts—all are delicious!
For supremely flaky tart shells, keep everything cold—especially the butter. The visible butter pieces create steam pockets during baking that form delicate layers. Adding vinegar to the dough inhibits gluten formation, while a proper rest in the refrigerator relaxes the dough. Handle minimally and chill the shaped shells before filling.
Shortcrust Pastry
Try following recommended recipes


