Blood Orange Tart Recipe
Ingredients
Equipment
Directions
FAQs
Find answers to your most pressing questions about this delicious recipe right here.
The main ingredients include plain flour, cold unsalted butter, eggs, blood oranges, caster sugar, and icing sugar for the pastry and filling. For decoration, you'll need additional blood oranges, apricot jam, and optionally pistachios for garnish.
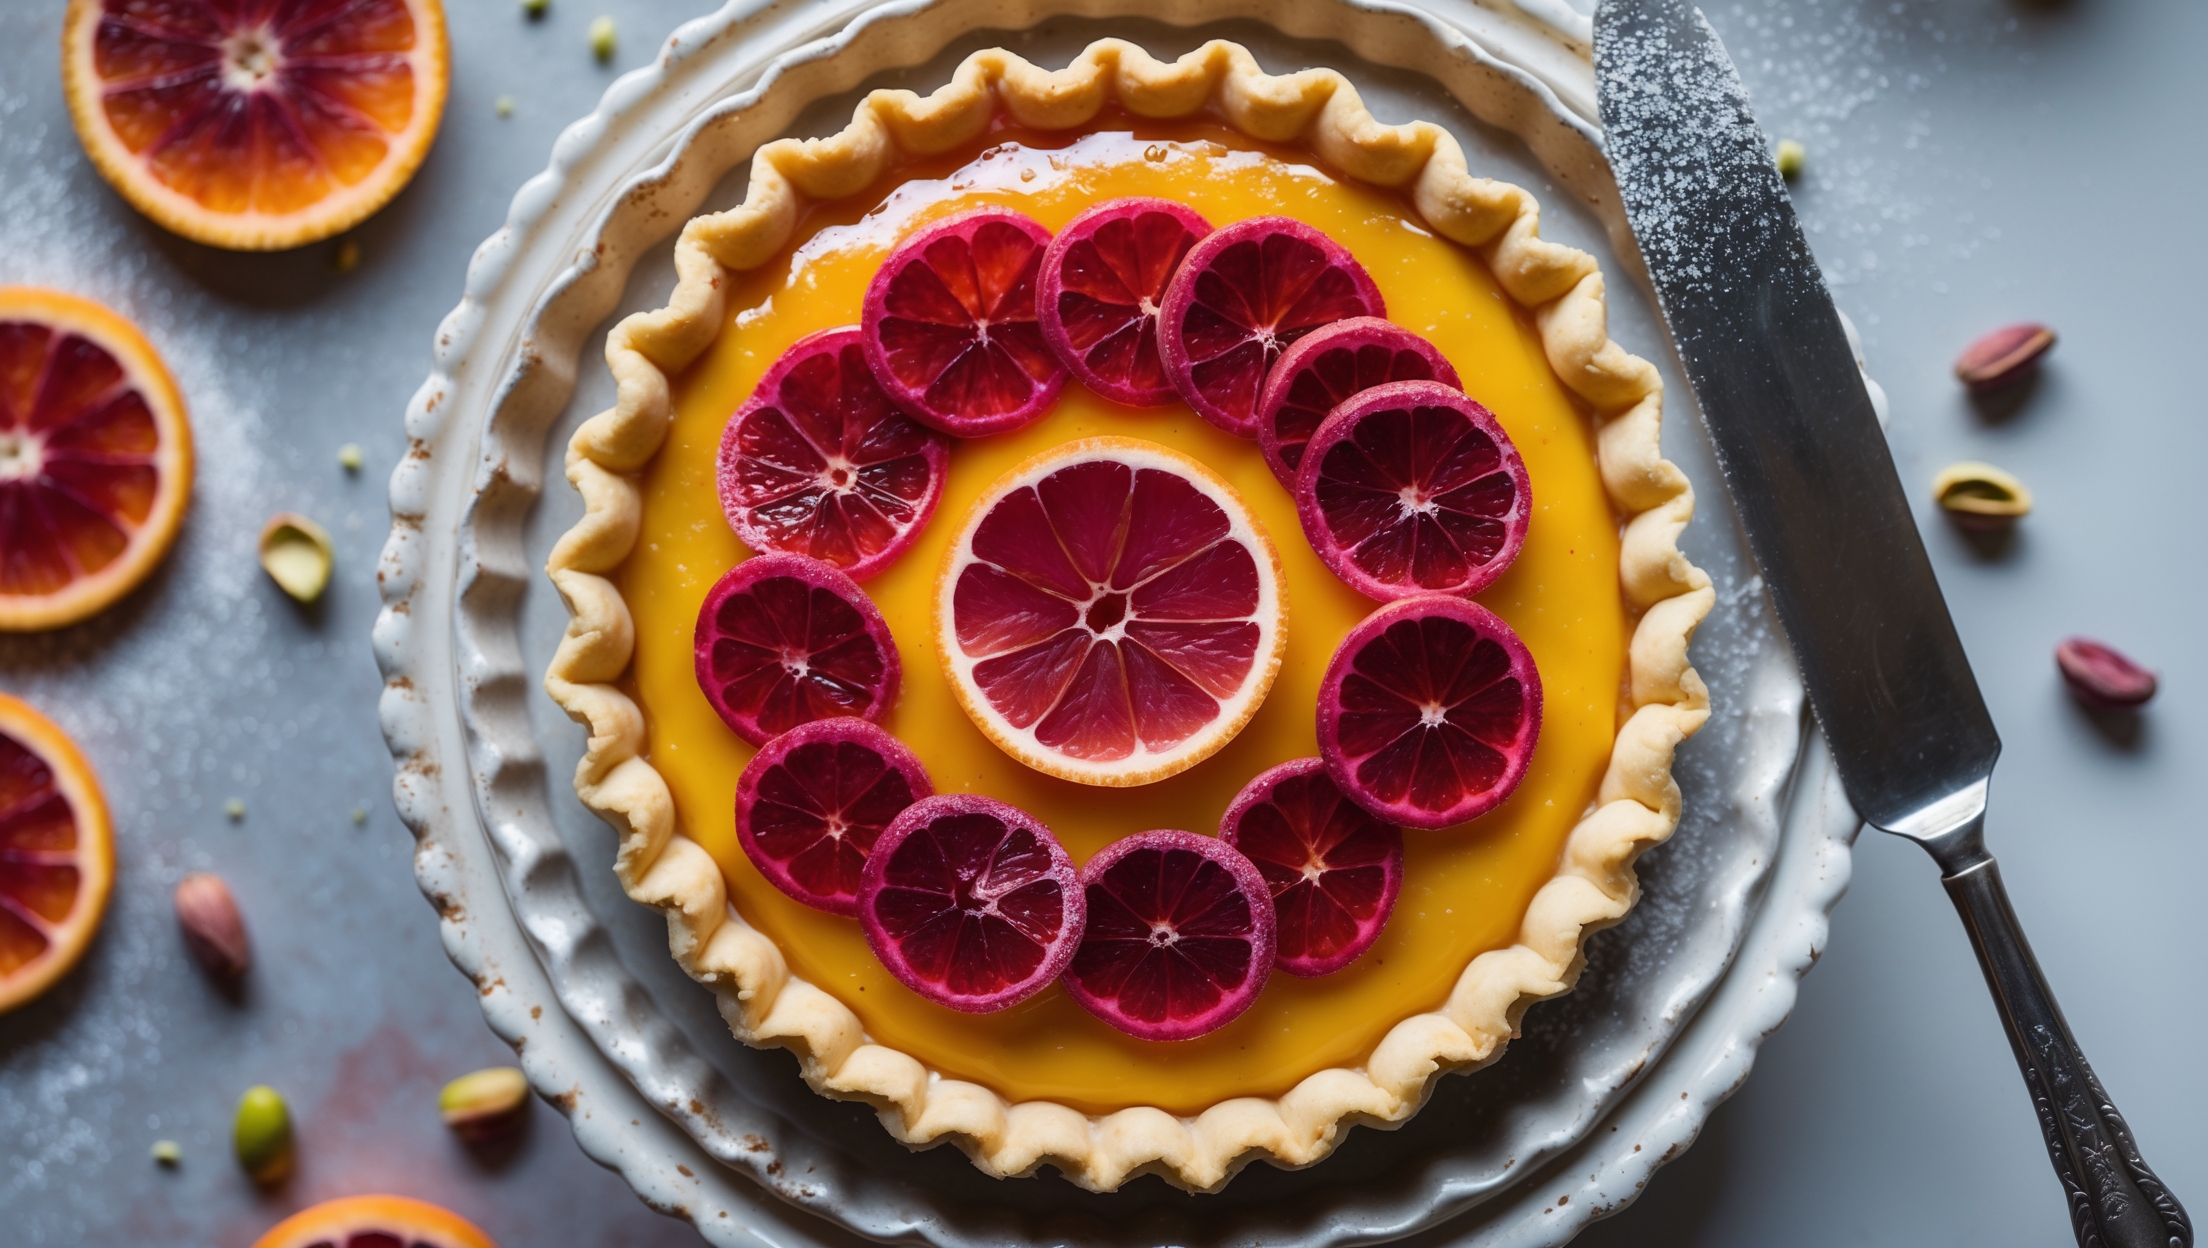
Learn how to cook Blood Orange Tart by first making a buttery shortcrust pastry that's blind baked until golden. Meanwhile, prepare the blood orange curd by gently cooking blood orange juice, zest, sugar, eggs and butter until thickened. Pour into the pastry case, bake until just set, then decorate with thinly sliced blood oranges and a glaze.
Blood oranges contain anthocyanins, natural pigments that create their distinctive ruby-red colour. These compounds develop in response to cold temperatures and give the tart filling its stunning jewel-like appearance. Regular oranges lack these pigments, resulting in a less vibrant hue.
A properly cooked citrus curd should reach 75-80°C and coat the back of a spoon. When you run your finger through it, a clear path should remain without the sides running together. It should be thick enough to hold its shape but still be pourable with a silky consistency.
For a crisp base, thoroughly blind bake your pastry case until golden, creating a moisture barrier. Ensure the filling has thickened properly before adding it to the case, and don't overfill. Let the tart cool completely in the tin before removing to allow the structure to set properly.
Shortcrust Pastry
Try following recommended recipes


