Toasted Marshmallow Layer Cake Recipe
Ingredients
Equipment
Directions
FAQs
Find answers to your most pressing questions about this delicious recipe right here.
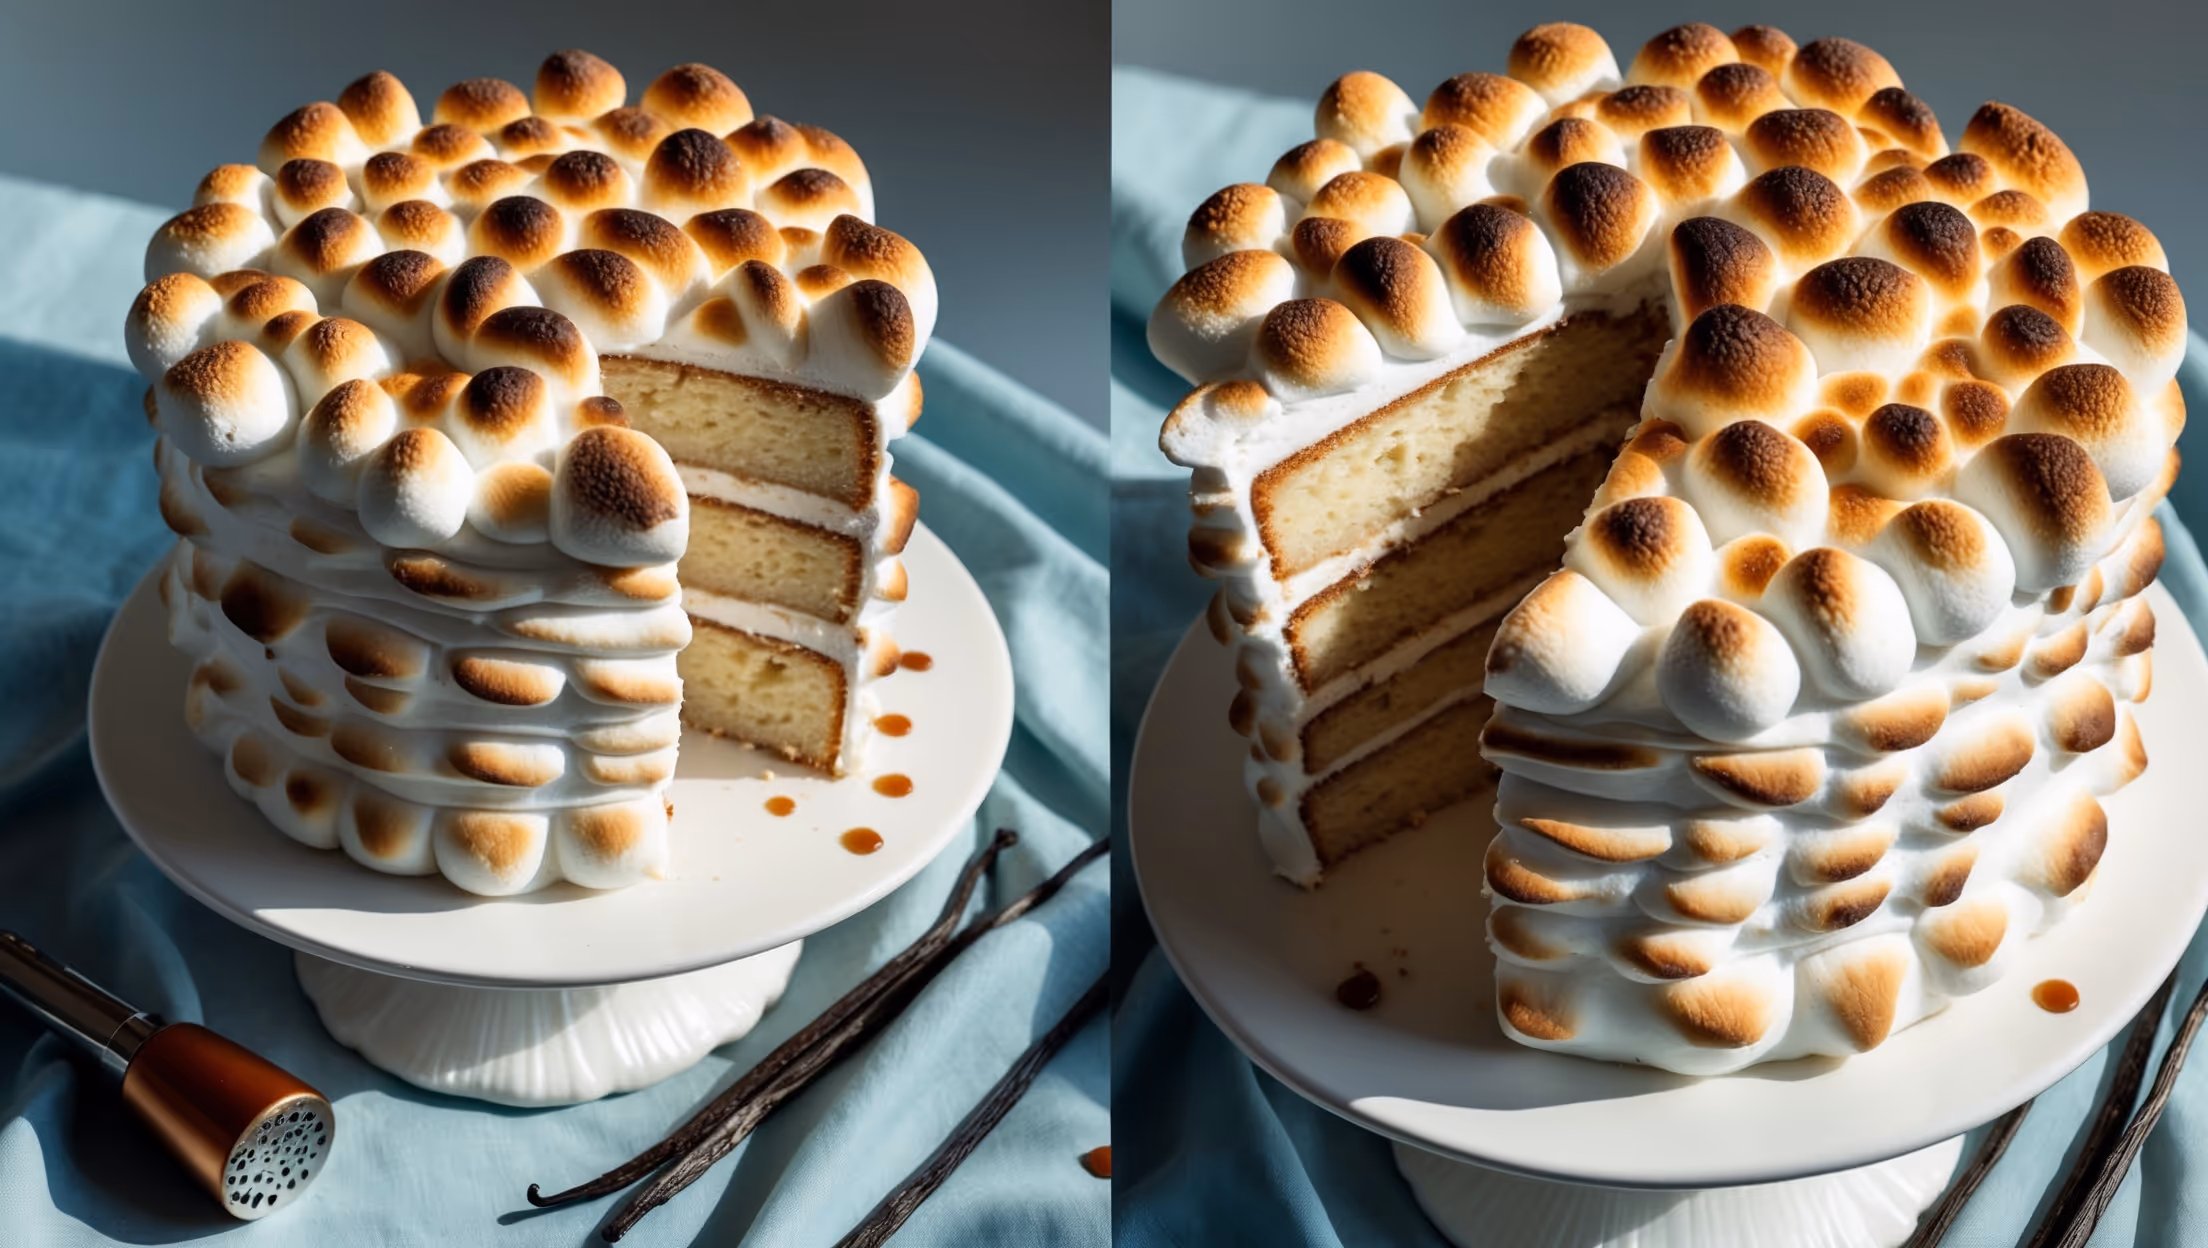
This cake requires all-purpose flour, baking powder, baking soda, salt, butter, sugar, eggs, vanilla extract, and buttermilk for the cake layers. The marshmallow frosting needs egg whites, sugar, cream of tartar, and vanilla. The exterior is finished with melted marshmallows.
Learn how to cook Toasted Marshmallow Layer Cake by baking three vanilla cake layers, creating a silky marshmallow frosting with egg whites and sugar heated to 70°C, assembling with frosting between layers, and finishing with melted marshmallows that are carefully toasted to a golden brown using a kitchen torch or broiler for that signature caramelised exterior.
Use a kitchen torch held 10-15cm from the surface, moving continuously to prevent burning. Work in small sections, rotating the cake for even coverage. If using a broiler instead, place the cake on the middle rack, watch constantly, and rotate every 15 seconds for uniform golden-brown colour.
Ensure your egg white mixture reaches 70°C to fully dissolve the sugar, beat until completely cool before using, avoid refrigerating the finished cake (as condensation can cause weeping), and toast the exterior soon after applying the melted marshmallow coating.
You can bake the cake layers 1-2 days ahead and store well-wrapped at room temperature. The assembled cake is best enjoyed within 24 hours of completion as the toasted marshmallow exterior will begin to soften over time. Avoid refrigeration as it affects the texture.
Layer Cakes
Try following recommended recipes