Sushi Bowl Recipe

These homemade Sushi Bowls feature perfectly seasoned sushi rice topped with fresh seafood, crisp vegetables, and umami-rich sauces for a customizable, deconstructed sushi experience.
Difficulty:
Beginner
Prep Time:
30 mins
Cook Time:
20 mins
Serves:
4 bowls
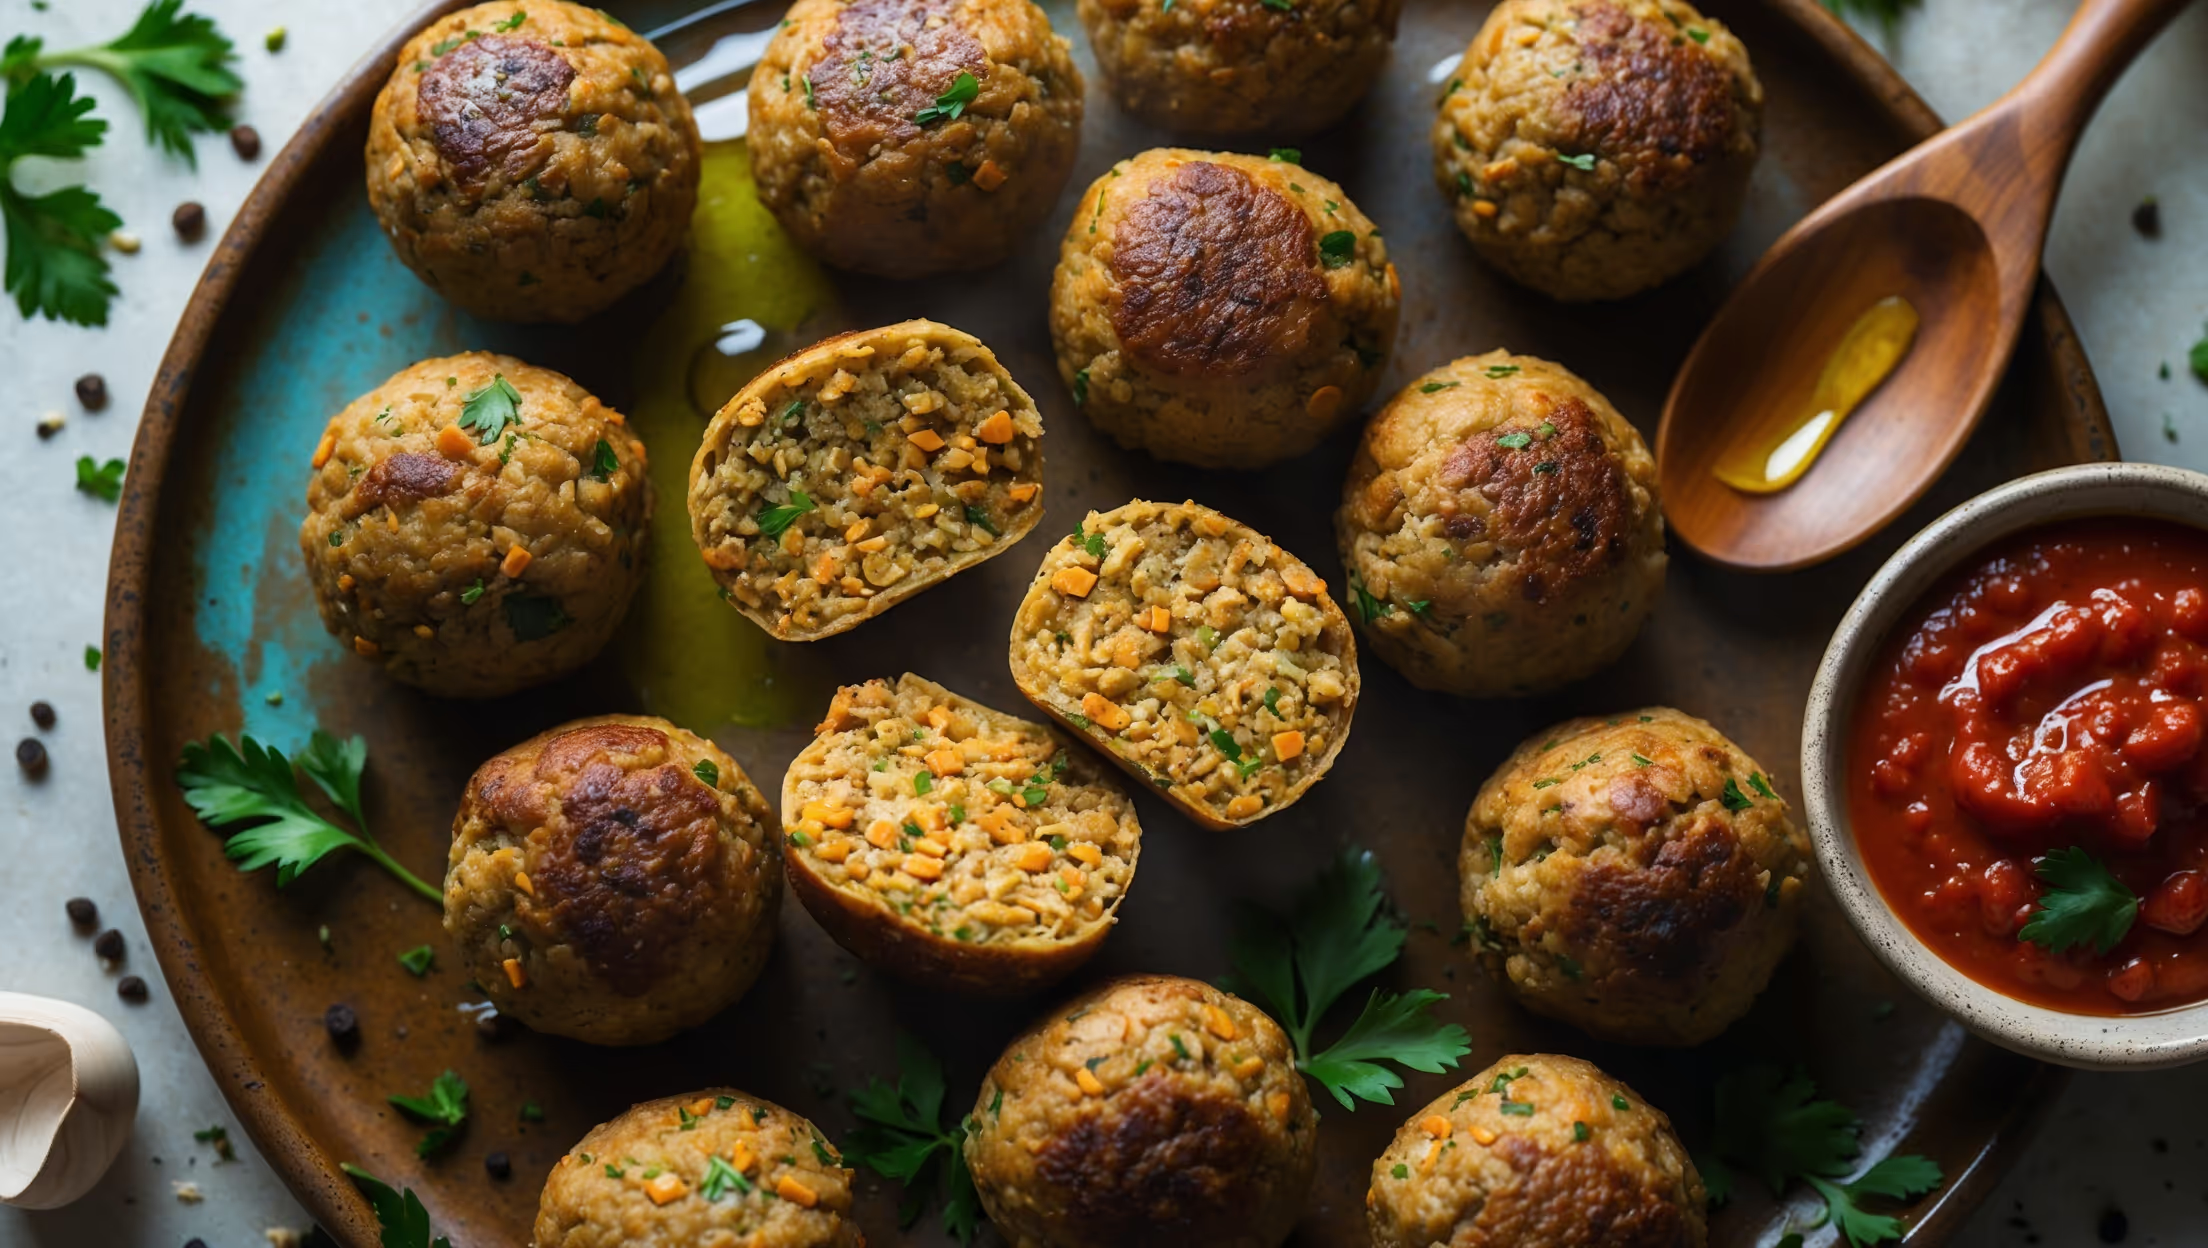
An overhead shot of a vibrant Sushi Bowl served in a handcrafted ceramic bowl, capturing the colorful array of ingredients arranged in sections atop pristine white sushi rice. Soft natural light illuminates the glistening slices of sashimi-grade salmon and tuna, vibrant avocado wedges, and julienned cucumber. The composition highlights the contrasting textures – the silky fish, creamy avocado, crunchy vegetables, and perfectly seasoned rice speckled with black sesame seeds. Droplets of soy sauce and wasabi create artistic accents around the bowl's edge, while wooden chopsticks rest alongside, partially visible on a natural slate serving board scattered with nori flakes and microgreens.

Ingredients

<ul class="ingredients-main-list"> <li class="ingredients-single-item"><strong>For the Sushi Rice:</strong></li> <li class="ingredients-single-item">400g Japanese short-grain rice</li> <li class="ingredients-single-item">480ml water</li> <li class="ingredients-single-item">60ml rice vinegar</li> <li class="ingredients-single-item">30g granulated sugar</li> <li class="ingredients-single-item">5g salt</li> <li class="ingredients-single-item"><strong>For the Toppings:</strong></li> <li class="ingredients-single-item">250g sashimi-grade fish (salmon, tuna, or your preference)</li> <li class="ingredients-single-item">1 avocado, sliced</li> <li class="ingredients-single-item">1 cucumber, julienned</li> <li class="ingredients-single-item">2 carrots, julienned or grated</li> <li class="ingredients-single-item">1 sheet nori, cut into thin strips</li> <li class="ingredients-single-item">4 radishes, thinly sliced</li> <li class="ingredients-single-item">100g edamame beans, shelled and cooked</li> <li class="ingredients-single-item"><strong>For the Garnish:</strong></li> <li class="ingredients-single-item">15g toasted sesame seeds</li> <li class="ingredients-single-item">4 spring onions, finely sliced</li> <li class="ingredients-single-item">30ml soy sauce</li> <li class="ingredients-single-item">15g pickled ginger</li> <li class="ingredients-single-item">10g wasabi paste</li> <li class="ingredients-single-item">15ml sesame oil</li> </ul>

Equipment

<ul class="equipment-main-list"> <li class="equipment-single-item">Rice cooker or heavy-bottomed pot</li> <li class="equipment-single-item">Sharp knife for slicing fish</li> <li class="equipment-single-item">Bamboo rice paddle or wooden spoon</li> <li class="equipment-single-item">Large mixing bowl for rice</li> <li class="equipment-single-item">Small fan (optional, for cooling rice)</li> </ul>
BAKE SMARTER

Kitchen Converter

Quickly switch between common baking units without leaving the recipe.

Convert
Result—

Volume uses US cups, tablespoons, and teaspoons. Converting weight to volume depends on the ingredient.

Directions

<ol class="no-list-style"> <li class="MethodStepper"> <h4 class="step-title">Step 1</h4> Rinse the sushi rice thoroughly in cold water, changing the water several times until it runs clear. This removes excess starch and prevents the rice from becoming gummy. Drain well in a fine-mesh sieve for 15-20 minutes to remove excess moisture. </li> <li class="MethodStepper"> <h4 class="step-title">Step 2</h4> Cook the rice according to your rice cooker instructions, or place in a heavy-bottomed pot with the measured water. If using a pot, bring to a boil, then reduce to a very low simmer and cover with a tight-fitting lid. Cook for 15 minutes without lifting the lid, then remove from heat and let steam for an additional 10 minutes. The rice should completely absorb the water and become tender. </li> <li class="MethodStepper"> <h4 class="step-title">Step 3</h4> While the rice cooks, prepare the sushi vinegar mixture by combining rice vinegar, sugar, and salt in a small saucepan. Heat gently until the sugar dissolves completely, then set aside to cool. This seasoning is what gives sushi rice its distinctive flavor and glossy appearance. </li> <li class="MethodStepper"> <h4 class="step-title">Step 4</h4> Transfer the hot cooked rice to a large, wide, non-metallic bowl (wooden or glass works best). Pour the vinegar mixture evenly over the rice while it's still hot. Using a cutting and folding motion with a wooden paddle or spatula, gently incorporate the vinegar mixture, being careful not to mash or crush the rice grains. Fan the rice as you mix to cool it quickly and create a glossy finish. The rapid cooling helps develop the characteristic texture of sushi rice. </li> <li class="MethodStepper"> <h4 class="step-title">Step 5</h4> While the rice is cooling to room temperature, prepare your toppings. Slice the fish into thin, bite-sized pieces using a very sharp knife. For the best texture and safety, ensure your fish is properly stored at cold temperatures and slice it just before serving. Julienne or slice all vegetables as directed. </li> <li class="MethodStepper"> <h4 class="step-title">Step 6</h4> To assemble the sushi bowls, divide the cooled rice among four serving bowls. Traditionally, the rice should be at room temperature, not refrigerated, to maintain its proper texture. Arrange the fish and vegetables in separate sections on top of the rice, creating a colorful presentation. </li> <li class="MethodStepper"> <h4 class="step-title">Step 7</h4> Garnish each bowl with nori strips, spring onions, and sesame seeds. The nori adds an authentic oceanic flavor, while the sesame seeds provide a pleasant crunch and nutty flavor. Serve with individual dishes of soy sauce, wasabi, and pickled ginger on the side. For an extra touch of flavor, drizzle each bowl lightly with sesame oil just before serving. </li> <li class="MethodStepper"> <h4 class="step-title">Step 8</h4> To eat, mix the ingredients together or enjoy each component separately. The beauty of a sushi bowl is in its customizability - each bite can be different! For the best experience, consume immediately after assembly to enjoy the contrasting temperatures and optimal texture of all ingredients. </li> </ol>
Nutrition Facts (per serving)

🍽️ Serving Size: 1 serving
🔥 Calories: 235 calories
🥑 Fat: 9 g
🧈 Saturated Fat: 5 g
🍞 Carbohydrates: 35 g
🍭 Sugar: 12 g
🍗 Protein: 5 g
🫀 Cholesterol: 95 mg
🧂 Sodium: 120 mg

Chef’s Notes

A few helpful details for making this recipe.

How do I ensure the fish is safe to eat raw in my Japanese rice bowls?

Always purchase sashimi-grade fish from reputable fishmongers or Japanese markets. Keep it refrigerated until just before serving. If you're concerned about raw fish, you can substitute with cooked prawns, crabsticks, or even flaked smoked salmon, which provides similar flavours with less food safety concern.

Can I make a vegetarian version of sushi bowls?

Absolutely! Replace fish with plant-based proteins like tofu, tempeh, or extra edamame. Increase avocado portions and add mangoes, pickled daikon, or roasted mushrooms for umami flavour. The seasoned sushi rice base works brilliantly with purely vegetable toppings for a satisfying meat-free option.

What's the secret to perfect sushi rice for homemade bowls?

Perfect sushi rice requires thorough rinsing to remove excess starch, precise water ratios, and proper seasoning while warm. The key is gently folding in the vinegar mixture using a cutting motion rather than stirring, which would make the rice gummy. Fanning while mixing creates the signature glossy texture.

Want to try something else in ...

More recipes you might like

Keep exploring with more recipes from What's Baking.