Rainier Cherry Pie Recipe
Ingredients
Equipment
Directions
FAQs
Find answers to your most pressing questions about this delicious recipe right here.
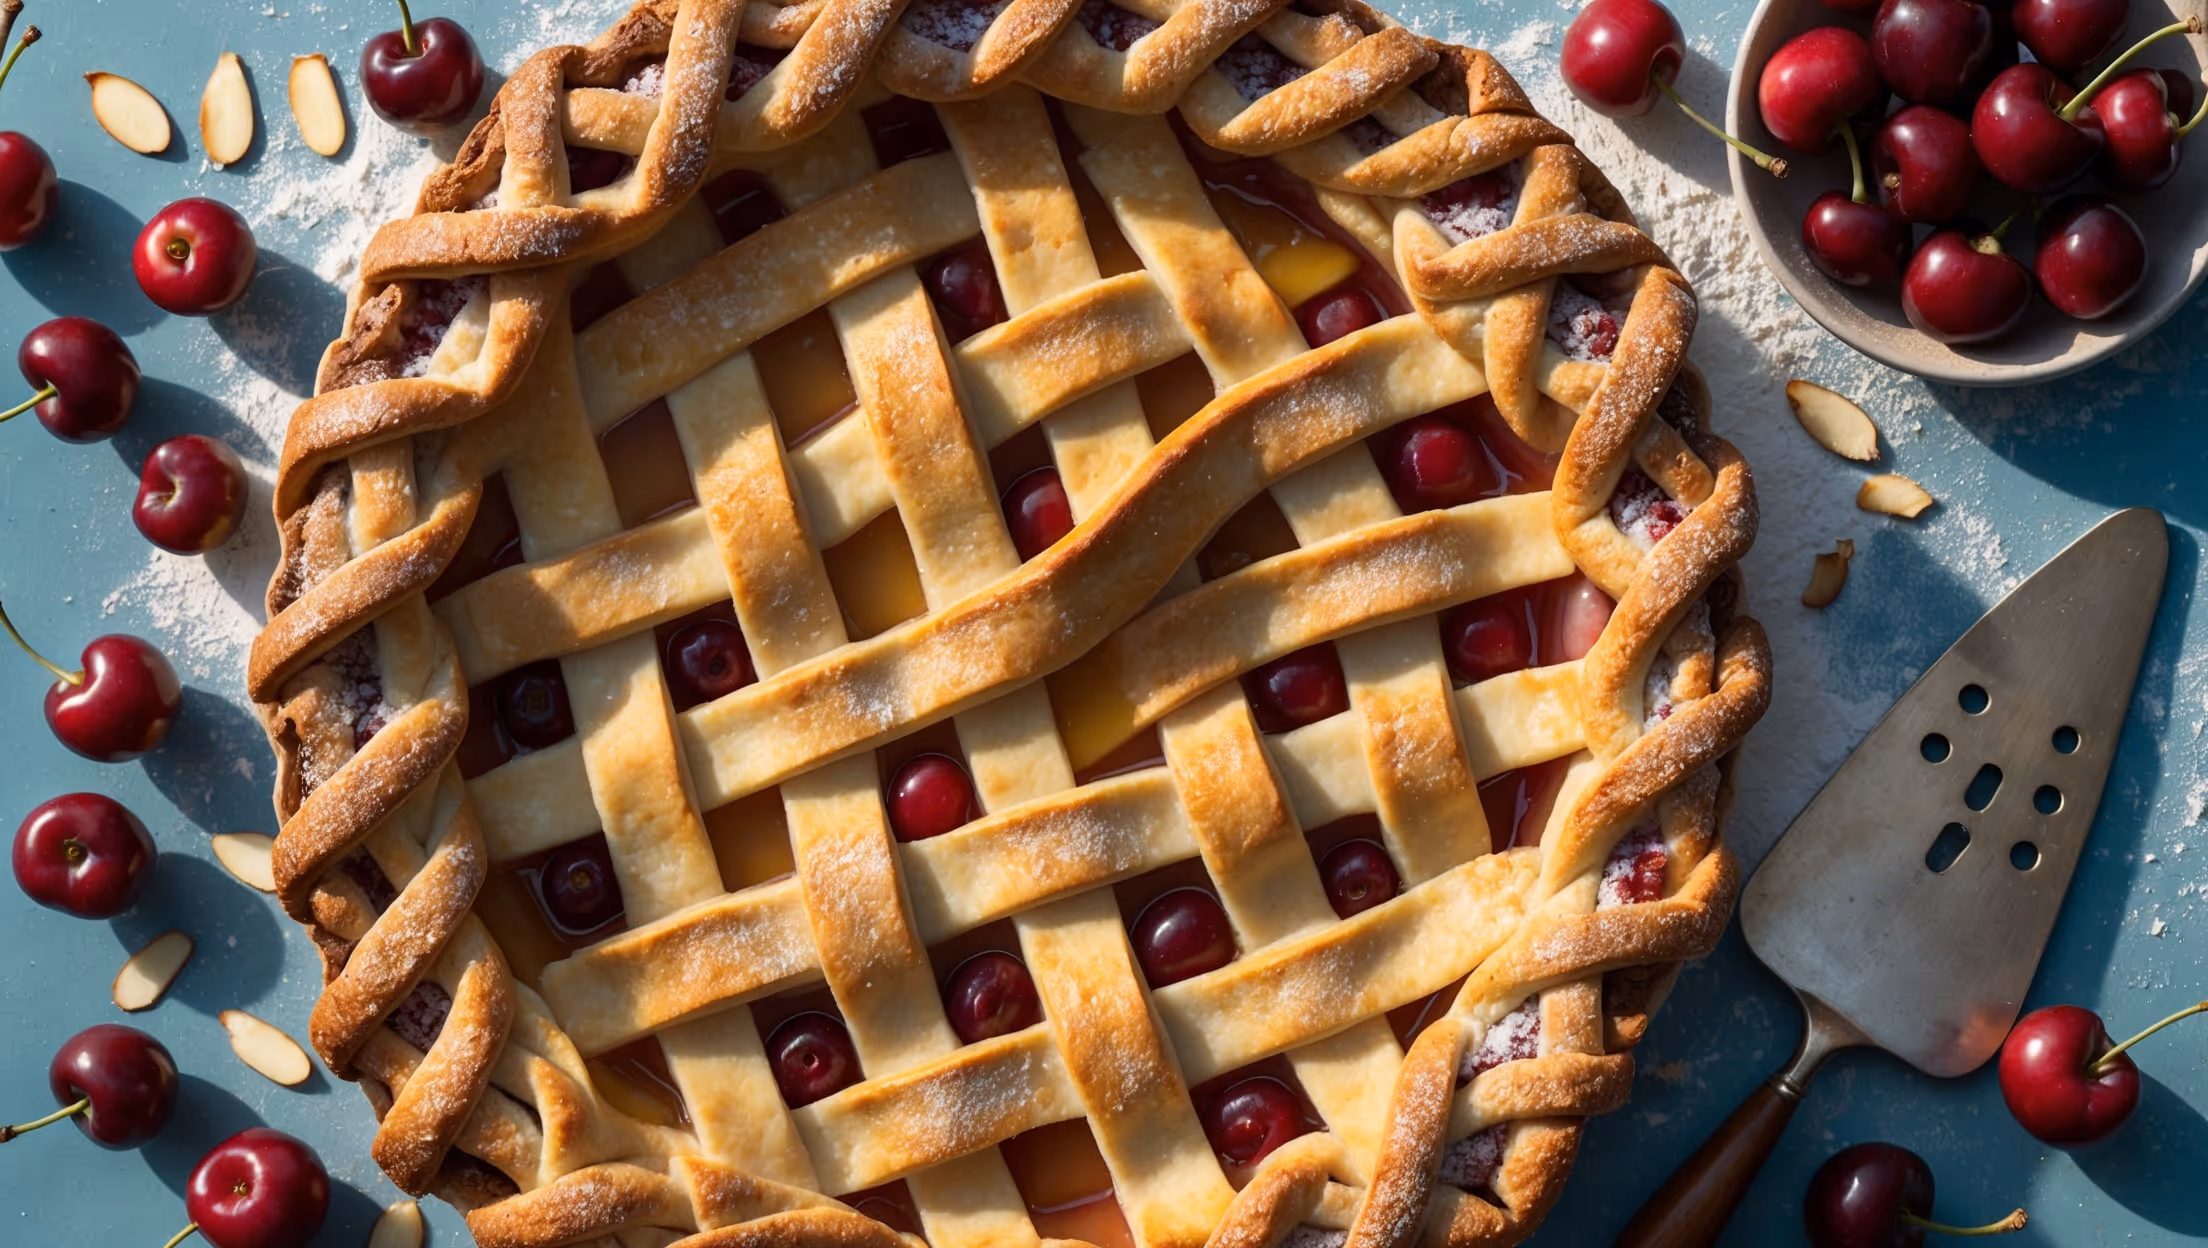
This pie combines fresh Rainier cherries, sugar, cornstarch, lemon juice, almond extract, and salt for the filling. The homemade crust requires flour, sugar, salt, cold butter, and ice water. It's finished with an egg wash, turbinado sugar, and optional sliced almonds.
Learn how to cook Rainier Cherry Pie Recipe by preparing a flaky butter crust, mixing fresh cherries with sugar and cornstarch, assembling a decorative lattice top, and baking until golden. The technique includes starting at a higher temperature (200°C) then reducing to 180°C, and allowing a full 4-hour cooling period for the filling to set properly.
Cornstarch is the thickening agent that transforms cherry juices into a glossy gel-like consistency. Without it, you'd end up with a soggy, runny pie. For Rainier cherries, which are particularly juicy, the 3 tablespoons recommended creates the perfect texture—sliceable but not too firm.
Yes, frozen cherries can work in a pinch, but they release more liquid. If using frozen Rainier or yellow cherries, increase the cornstarch to 4 tablespoons and don't thaw before mixing with other filling ingredients. The texture won't be quite as perfect, but the flavour will still shine.
A crisp lattice requires several techniques: preheating the baking sheet, starting with a higher oven temperature, ensuring the filling is properly thickened with cornstarch, creating adequate vents in the lattice pattern, and most importantly, allowing the pie to cool completely before cutting.
Fruit Pies
Try following recommended recipes


