Rainbow Layer Cake Recipe
Ingredients
Equipment
Directions
FAQs
Find answers to your most pressing questions about this delicious recipe right here.
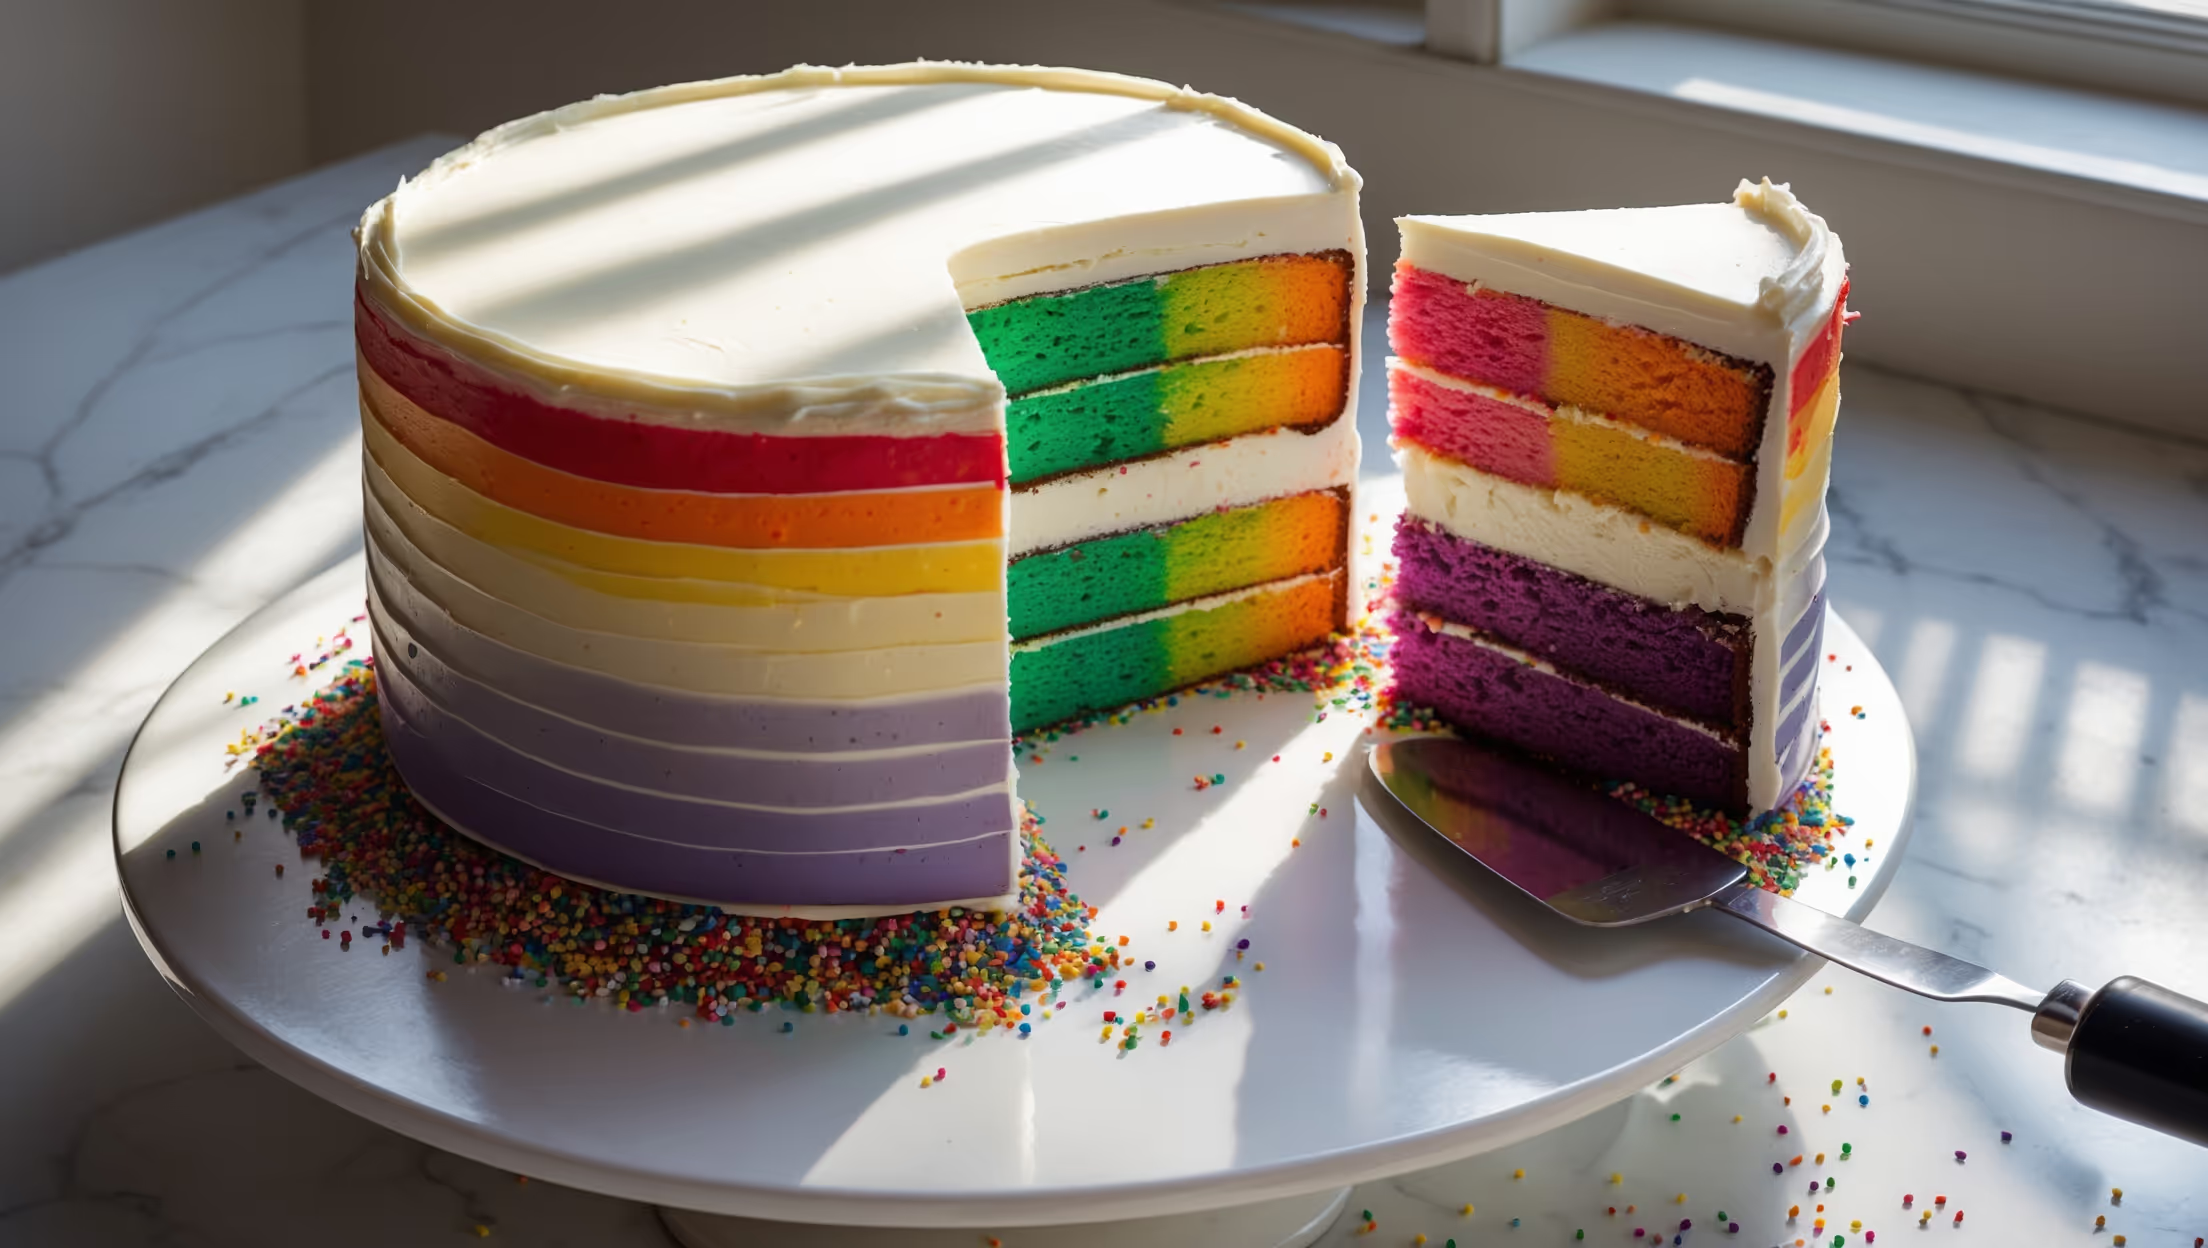
This vibrant cake requires unsalted butter, caster sugar, eggs, self-raising flour, vanilla extract, milk, and gel food colourings (red, orange, yellow, green, blue, purple). The buttercream frosting needs butter, icing sugar, vanilla, and milk, with optional rainbow sprinkles for decoration.
Learn how to cook Rainbow Layer Cake Recipe by creating a vanilla batter divided into six portions, each tinted with different food colourings. Bake thin layers at 180°C for 12-15 minutes until springy. Once cooled, stack them with buttercream between each layer, then coat the exterior with white frosting for a stunning contrast when sliced.
Use concentrated gel food colourings rather than liquid versions, as they provide intense colour without affecting the batter consistency. Add enough colouring to make the batter slightly darker than desired, as colours lighten during baking. Avoid overbaking, which can dull the colours.
Yes! You can bake the layers up to 2 days ahead and store them wrapped in cling film at room temperature. The assembled frosted cake keeps well for 3 days in a cool room. For longer storage, refrigerate the finished cake but bring to room temperature before serving for best texture.
For perfectly even layers, use digital scales to divide your batter equally (about 200g per layer). Bake each layer separately if possible, and once cooled, level the tops with a serrated knife. When assembling, use the same amount of buttercream between each layer and press down gently to eliminate air gaps.
Layer Cakes
Try following recommended recipes