Plum Pie Recipe

Learn how to make the best homemade plum pie with this easy baking recipe. This foolproof method creates the perfect balance of sweet-tart plums in a buttery, flaky crust. The secret lies in macerating the fruit before baking, ensuring a jammy, never-watery filling that captures summer's finest flavors.
Difficulty:
Intermediate
Prep Time:
45 mins
Cook Time:
55 mins
Serves:
1 pie (8 slices)
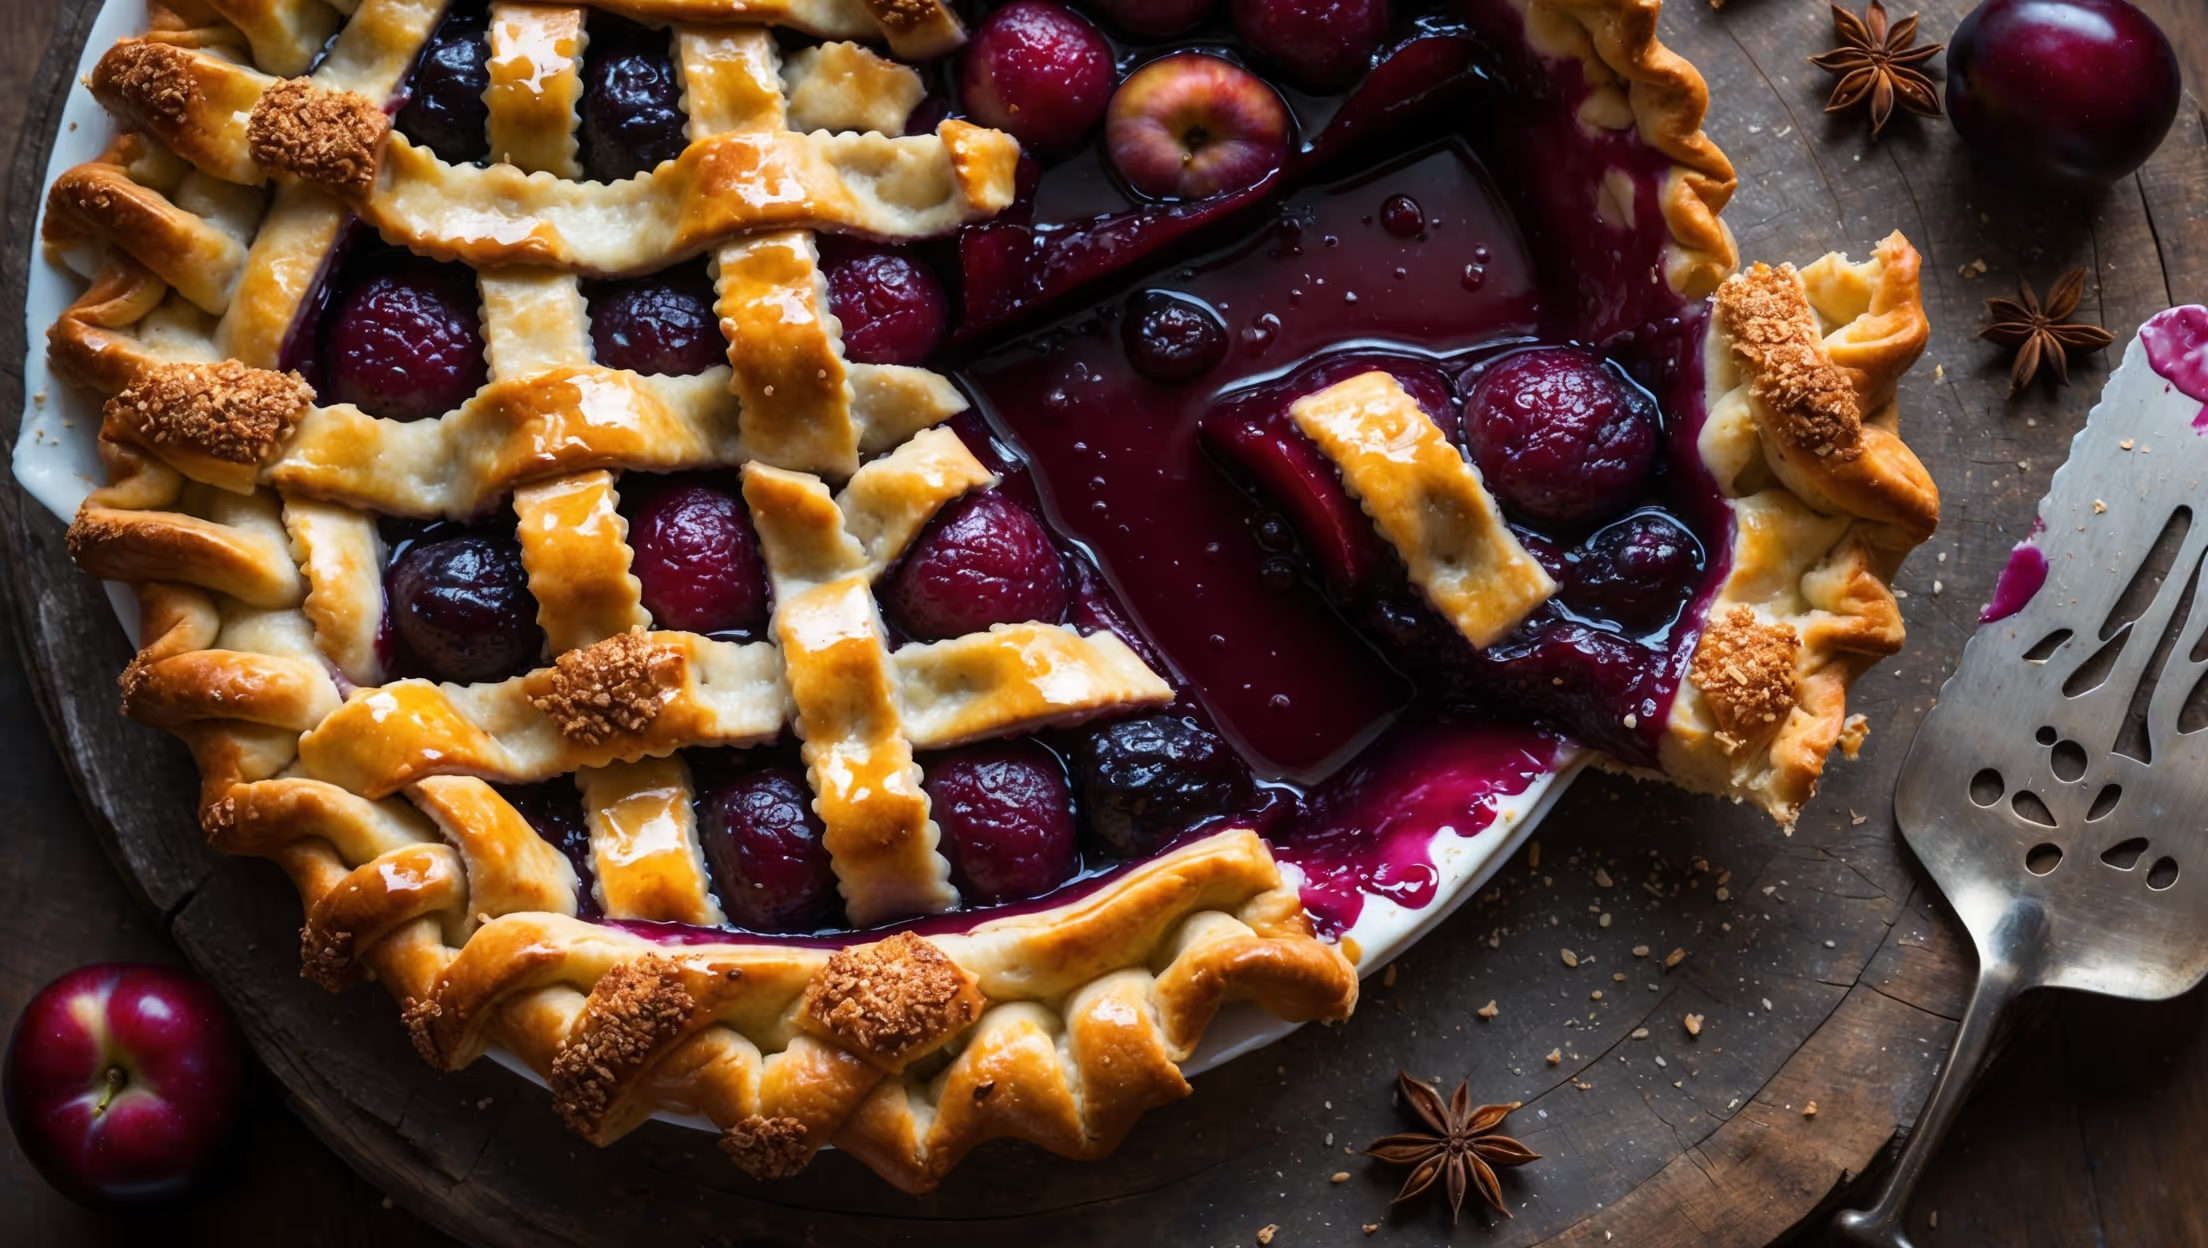
An overhead shot of a rustic plum pie with a lattice top crust, its golden-brown pastry glistening with turbinado sugar crystals. Through the lattice gaps, deep burgundy plum filling bubbles up enticingly, with some of the syrupy juices delicately overflowing onto the fluted crust edge. A slice has been removed, revealing the perfect balance of jammy fruit and tender pastry layers. The pie sits on a weathered wooden board, scattered with a few fresh plum slices and star anise pods, while a vintage pie server rests nearby. Soft natural light highlights the textural contrasts between the crisp pastry and the glossy, jewel-toned filling, creating an inviting warmth that emphasizes the homemade charm.

Ingredients

<ul class="ingredients-main-list"><li class="ingredients-single-item">For the pastry:</li><li class="ingredients-single-item">300g plain flour</li><li class="ingredients-single-item">150g cold unsalted butter, cubed</li><li class="ingredients-single-item">50g caster sugar</li><li class="ingredients-single-item">1/4 tsp salt</li><li class="ingredients-single-item">1 large egg, beaten</li><li class="ingredients-single-item">2-3 tbsp ice-cold water</li><li class="ingredients-single-item">For the filling:</li><li class="ingredients-single-item">900g ripe plums (about 10-12 plums)</li><li class="ingredients-single-item">120g granulated sugar</li><li class="ingredients-single-item">3 tbsp cornflour (cornstarch)</li><li class="ingredients-single-item">1 tbsp lemon juice</li><li class="ingredients-single-item">1/2 tsp ground cinnamon</li><li class="ingredients-single-item">1/4 tsp ground star anise (optional)</li><li class="ingredients-single-item">1 tsp vanilla extract</li><li class="ingredients-single-item">For finishing:</li><li class="ingredients-single-item">1 egg, beaten with 1 tbsp milk for egg wash</li><li class="ingredients-single-item">2 tbsp demerara or turbinado sugar</li></ul>

Equipment

<ul class="equipment-main-list"><li class="equipment-single-item">23cm (9-inch) pie dish</li><li class="equipment-single-item">Rolling pin</li><li class="equipment-single-item">Pastry brush</li><li class="equipment-single-item">Pastry wheel or sharp knife (for lattice)</li><li class="equipment-single-item">Baking sheet</li></ul>

Directions

<ol class="no-list-style"><li class="MethodStepper"><h4 class="step-title">Step 1</h4>First, prepare the pastry. In a large bowl, combine the flour, sugar, and salt. Add the cold cubed butter and rub it into the flour mixture using your fingertips until it resembles breadcrumbs with some pea-sized butter pieces remaining (these create flakiness in the finished pastry). Keep everything as cold as possible – cold butter creates steam pockets during baking that result in flaky layers.</li><li class="MethodStepper"><h4 class="step-title">Step 2</h4>Make a well in the center and add the beaten egg and 2 tablespoons of ice-cold water. Mix gently with a fork, then use your hands to bring the dough together, adding the remaining tablespoon of water only if needed. The dough should just hold together but not feel wet. Divide into two portions – one slightly larger (about 60%) for the base, and a smaller portion (about 40%) for the lattice top.</li><li class="MethodStepper"><h4 class="step-title">Step 3</h4>Shape each portion into a disc, wrap in cling film, and refrigerate for at least 1 hour, preferably 2. This resting period allows the gluten to relax (preventing shrinkage) and the butter to firm up again, which is essential for a flaky texture.</li><li class="MethodStepper"><h4 class="step-title">Step 4</h4>While the pastry chills, prepare the filling. Wash the plums, halve them, and remove the stones. Slice each half into about 4-6 wedges, depending on size. Place in a large bowl and add the sugar, cornflour, lemon juice, cinnamon, star anise (if using), and vanilla. Gently toss to coat all the fruit. The sugar will begin drawing out the plum juices – this is good! Let the fruit macerate for 30 minutes, stirring occasionally.</li><li class="MethodStepper"><h4 class="step-title">Step 5</h4>Preheat your oven to 200°C (180°C fan/Gas 6) and place a baking sheet in the oven to heat up. This will help cook the bottom crust properly, preventing the dreaded "soggy bottom."</li><li class="MethodStepper"><h4 class="step-title">Step 6</h4>On a lightly floured surface, roll out the larger piece of dough to about 3-4mm thickness and a diameter approximately 5cm larger than your pie dish. Keep rotating the dough as you roll to maintain an even circle. If the dough becomes too warm or sticky at any point, return it to the refrigerator for 10 minutes.</li><li class="MethodStepper"><h4 class="step-title">Step 7</h4>Carefully transfer the rolled dough to your pie dish by draping it over your rolling pin. Gently press it into the corners without stretching the dough (which would cause it to shrink back during baking). Trim the excess to about 2cm overhang. Return the pie shell to the refrigerator while you prepare the lattice.</li><li class="MethodStepper"><h4 class="step-title">Step 8</h4>Roll out the remaining dough to similar thickness. Using a pastry wheel or sharp knife, cut into strips approximately 2cm wide for the lattice. Place these strips on a baking sheet lined with parchment paper and refrigerate for 10 minutes to firm up.</li><li class="MethodStepper"><h4 class="step-title">Step 9</h4>Give the plum mixture a final stir, then use a slotted spoon to transfer the fruit to your chilled pie shell, leaving most of the excess liquid behind (too much liquid will make your pie soggy). Mound the fruit slightly higher in the center as it will settle during baking.</li><li class="MethodStepper"><h4 class="step-title">Step 10</h4>Create a lattice top by laying half the strips in one direction across the pie, spacing them evenly. Fold back every other strip halfway, then place one strip perpendicular to them in the center. Unfold the folded strips over the perpendicular strip. Now fold back the alternating strips and place another perpendicular strip. Continue this weaving process until the lattice covers the entire pie. Trim the edges of the strips to match the overhang of the bottom crust.</li><li class="MethodStepper"><h4 class="step-title">Step 11</h4>Fold the overhang up and over the edges of the lattice strips, then crimp the edges decoratively between your fingers to seal. Refrigerate the assembled pie for 15 minutes to ensure the pastry is thoroughly chilled before baking.</li><li class="MethodStepper"><h4 class="step-title">Step 12</h4>Brush the entire lattice and crust edge with egg wash, being careful not to let it pool. Sprinkle generously with demerara or turbinado sugar, which will give the finished pie a beautiful sparkle and delightful crunch.</li><li class="MethodStepper"><h4 class="step-title">Step 13</h4>Place the pie on the preheated baking sheet and bake for 20 minutes at 200°C. Then reduce the temperature to 180°C (160°C fan/Gas 4) and bake for an additional 35-40 minutes until the crust is deeply golden and the filling is bubbling vigorously through the lattice. If the edges brown too quickly, shield them with foil or a pie crust protector.</li><li class="MethodStepper"><h4 class="step-title">Step 14</h4>The most challenging part comes next – patience! Allow the pie to cool on a wire rack for at least 3 hours before slicing. This resting time is crucial as it allows the filling to set properly; cut too soon and you'll have a runny filling that doesn't hold its shape.</li><li class="MethodStepper"><h4 class="step-title">Step 15</h4>Serve at room temperature with a scoop of vanilla ice cream or lightly whipped cream. The pie will keep at room temperature, loosely covered, for 2 days, or refrigerated for up to 4 days (though the crust will soften somewhat over time). Enjoy your beautiful homemade plum pie!</li></ol>

FAQs

Find answers to your most pressing questions about this delicious recipe right here.

What ingredients are used in Plum Pie Recipe?

This plum pie features a butter-based pastry (plain flour, cold unsalted butter, caster sugar, salt, egg, ice water) and a fruit filling of ripe plums, granulated sugar, cornflour, lemon juice, cinnamon, optional star anise, and vanilla extract, finished with egg wash and demerara sugar.

How to cook Plum Pie Recipe at home?

Learn how to cook Plum Pie Recipe by first making a flaky pastry with cold butter, then preparing a sweet-tart plum filling enhanced with spices. Assemble with a lattice top, brush with egg wash, sprinkle with sugar, and bake until golden. The key technique is chilling the pastry between steps and allowing the finished pie to cool completely before slicing.

How do I prevent a soggy bottom when making fruit pies?

Prevent soggy bottoms by preheating a baking sheet in the oven and placing your pie directly on it, creating immediate heat to set the base. Also, use cornflour to thicken the filling, avoid excess liquid when adding the fruit, and let the fruit macerate separately before adding to the pastry case.

Can I use different varieties of plums for a pie filling?

Yes, different plum varieties create unique flavour profiles in your pie. Red plums offer sweetness, while black plums provide deeper flavour. Victoria plums are classic for baking. Damson plums deliver intense tartness, requiring more sugar. Mix varieties for complexity or choose based on your sweet-tart preference.

How long should a fruit pie cool before slicing?

Allow your pie to cool for at least 3 hours before slicing. This crucial resting time enables the filling to set properly, ensuring clean slices with filling that holds its shape rather than running everywhere. Cutting too soon results in a runny mess, while patience rewards you with perfect presentation.

Want to try something else in ...

Fruit Pies

Try following recommended recipes

{ "@context": "http://schema.org/", "@type": "Recipe", "name": "Plum Pie Recipe", "author": { "@type": "Person", "name": "Gurbir Aujla", "brand": "What's Baking?", "jobTitle": "Baker" }, "datePublished": "2024-04-24", "description": "Learn how to make the best homemade plum pie with this easy baking recipe. This foolproof method creates the perfect balance of sweet-tart plums in a buttery, flaky crust. The secret lies in macerating the fruit before baking, ensuring a jammy, never-watery filling that captures summer's finest flavors.", "prepTime": "PT45M", "cookTime": "PT55M", "totalTime": "PT4H40M", "keywords": "plum pie, homemade pie crust, summer dessert, fruit pie, lattice top pie", "recipeYield": "8", "recipeCategory": "Dessert", "recipeCuisine": "American", "nutrition": { "@type": "NutritionInformation", "calories": "325 calories", "carbohydrateContent": "48 g", "proteinContent": "3 g", "fatContent": "14 g", "saturatedFatContent": "8 g", "cholesterolContent": "55 mg", "sodiumContent": "180 mg", "sugarContent": "28 g", "servingSize": "1 slice" }, "recipeIngredient": [ "300g plain flour", "150g cold unsalted butter, cubed", "50g caster sugar", "1/4 tsp salt", "1 large egg, beaten", "2-3 tbsp ice-cold water", "900g ripe plums (about 10-12 plums)", "120g granulated sugar", "3 tbsp cornflour (cornstarch)", "1 tbsp lemon juice", "1/2 tsp ground cinnamon", "1/4 tsp ground star anise (optional)", "1 tsp vanilla extract", "1 egg, beaten with 1 tbsp milk for egg wash", "2 tbsp demerara or turbinado sugar" ], "recipeInstructions": [ { "@type": "HowToStep", "name": "Prepare pastry", "text": "In a large bowl, combine the flour, sugar, and salt. Add the cold cubed butter and rub it into the flour mixture using your fingertips until it resembles breadcrumbs with some pea-sized butter pieces remaining (these create flakiness in the finished pastry). Keep everything as cold as possible – cold butter creates steam pockets during baking that result in flaky layers." }, { "@type": "HowToStep", "name": "Form dough", "text": "Make a well in the center and add the beaten egg and 2 tablespoons of ice-cold water. Mix gently with a fork, then use your hands to bring the dough together, adding the remaining tablespoon of water only if needed. The dough should just hold together but not feel wet. Divide into two portions – one slightly larger (about 60%) for the base, and a smaller portion (about 40%) for the lattice top." }, { "@type": "HowToStep", "name": "Chill dough", "text": "Shape each portion into a disc, wrap in cling film, and refrigerate for at least 1 hour, preferably 2. This resting period allows the gluten to relax (preventing shrinkage) and the butter to firm up again, which is essential for a flaky texture." }, { "@type": "HowToStep", "name": "Prepare filling", "text": "Wash the plums, halve them, and remove the stones. Slice each half into about 4-6 wedges, depending on size. Place in a large bowl and add the sugar, cornflour, lemon juice, cinnamon, star anise (if using), and vanilla. Gently toss to coat all the fruit. The sugar will begin drawing out the plum juices – this is good! Let the fruit macerate for 30 minutes, stirring occasionally." }, { "@type": "HowToStep", "name": "Preheat oven", "text": "Preheat your oven to 200°C (180°C fan/Gas 6) and place a baking sheet in the oven to heat up. This will help cook the bottom crust properly, preventing the dreaded \"soggy bottom.\"" }, { "@type": "HowToStep", "name": "Roll base", "text": "On a lightly floured surface, roll out the larger piece of dough to about 3-4mm thickness and a diameter approximately 5cm larger than your pie dish. Keep rotating the dough as you roll to maintain an even circle. If the dough becomes too warm or sticky at any point, return it to the refrigerator for 10 minutes." }, { "@type": "HowToStep", "name": "Line pie dish", "text": "Carefully transfer the rolled dough to your pie dish by draping it over your rolling pin. Gently press it into the corners without stretching the dough (which would cause it to shrink back during baking). Trim the excess to about 2cm overhang. Return the pie shell to the refrigerator while you prepare the lattice." }, { "@type": "HowToStep", "name": "Prepare lattice", "text": "Roll out the remaining dough to similar thickness. Using a pastry wheel or sharp knife, cut into strips approximately 2cm wide for the lattice. Place these strips on a baking sheet lined with parchment paper and refrigerate for 10 minutes to firm up." }, { "@type": "HowToStep", "name": "Fill pie", "text": "Give the plum mixture a final stir, then use a slotted spoon to transfer the fruit to your chilled pie shell, leaving most of the excess liquid behind (too much liquid will make your pie soggy). Mound the fruit slightly higher in the center as it will settle during baking." }, { "@type": "HowToStep", "name": "Create lattice", "text": "Create a lattice top by laying half the strips in one direction across the pie, spacing them evenly. Fold back every other strip halfway, then place one strip perpendicular to them in the center. Unfold the folded strips over the perpendicular strip. Now fold back the alternating strips and place another perpendicular strip. Continue this weaving process until the lattice covers the entire pie. Trim the edges of the strips to match the overhang of the bottom crust." }, { "@type": "HowToStep", "name": "Finish edges", "text": "Fold the overhang up and over the edges of the lattice strips, then crimp the edges decoratively between your fingers to seal. Refrigerate the assembled pie for 15 minutes to ensure the pastry is thoroughly chilled before baking." }, { "@type": "HowToStep", "name": "Glaze and sugar", "text": "Brush the entire lattice and crust edge with egg wash, being careful not to let it pool. Sprinkle generously with demerara or turbinado sugar, which will give the finished pie a beautiful sparkle and delightful crunch." }, { "@type": "HowToStep", "name": "Bake", "text": "Place the pie on the preheated baking sheet and bake for 20 minutes at 200°C. Then reduce the temperature to 180°C (160°C fan/Gas 4) and bake for an additional 35-40 minutes until the crust is deeply golden and the filling is bubbling vigorously through the lattice. If the edges brown too quickly, shield them with foil or a pie crust protector." }, { "@type": "HowToStep", "name": "Cool", "text": "Allow the pie to cool on a wire rack for at least 3 hours before slicing. This resting time is crucial as it allows the filling to set properly; cut too soon and you'll have a runny filling that doesn't hold its shape." }, { "@type": "HowToStep", "name": "Serve", "text": "Serve at room temperature with a scoop of vanilla ice cream or lightly whipped cream. The pie will keep at room temperature, loosely covered, for 2 days, or refrigerated for up to 4 days (though the crust will soften somewhat over time)." } ], "aggregateRating": { "@type": "AggregateRating", "ratingValue": "5", "ratingCount": "178" }, "review": [ { "@type": "Review", "author": "Isabella Martinez", "datePublished": "2024-04-10", "reviewBody": "This plum pie is the perfect balance of sweet and tart! I was worried about a soggy bottom but following the instructions about macerating the fruit and using a hot baking sheet worked perfectly. The crust was buttery and flaky, just as promised.", "name": "Perfectly Balanced Flavors", "reviewRating": { "@type": "Rating", "ratingValue": "5" } }, { "@type": "Review", "author": "Hiroshi Nakamura", "datePublished": "2024-04-15", "reviewBody": "I've tried many pie recipes before, but this one truly delivers on the promise of a crisp, not soggy crust! The detailed instructions about managing the fruit juices made all the difference. My family was impressed with how professional it looked with the lattice top.", "name": "No More Soggy Crusts", "reviewRating": { "@type": "Rating", "ratingValue": "5" } }, { "@type": "Review", "author": "Anya Petrova", "datePublished": "2024-03-30", "reviewBody": "This recipe is the best way to use summer plums! I used a mix of red and black plums which created a beautiful jewel-toned filling. The addition of star anise gave it a subtle complexity that elevated the whole dessert. Will definitely make again when plums are in season.", "name": "Summer Fruit Perfection", "reviewRating": { "@type": "Rating", "ratingValue": "5" } }, { "@type": "Review", "author": "François Dubois", "datePublished": "2024-04-05", "reviewBody": "My family requested I make this for Thanksgiving too after trying it with summer plums! The pastry recipe is foolproof - I've struggled with pie dough before but the detailed instructions about keeping everything cold made such a difference. The turbinado sugar on top adds the perfect crunch.", "name": "Family Favorite", "reviewRating": { "@type": "Rating", "ratingValue": "5" } }, { "@type": "Review", "author": "Amara Okafor", "datePublished": "2024-04-18", "reviewBody": "Worth every minute of the chilling time! Don't skip these steps - they're essential for that perfect flaky crust. I was tempted to rush but followed the recipe exactly and was rewarded with the best plum pie I've ever made. The filling set perfectly without being runny or too firm.", "name": "Patience Rewarded", "reviewRating": { "@type": "Rating", "ratingValue": "5" } } ] }
{ "@context": "https://schema.org", "@type": "FAQPage", "mainEntity": [ { "@type": "Question", "name": "What ingredients are used in Plum Pie Recipe?", "acceptedAnswer": { "@type": "Answer", "text": "This plum pie features a butter-based pastry (plain flour, cold unsalted butter, caster sugar, salt, egg, ice water) and a fruit filling of ripe plums, granulated sugar, cornflour, lemon juice, cinnamon, optional star anise, and vanilla extract, finished with egg wash and demerara sugar." } }, { "@type": "Question", "name": "How to cook Plum Pie Recipe at home?", "acceptedAnswer": { "@type": "Answer", "text": "Learn how to cook Plum Pie Recipe by first making a flaky pastry with cold butter, then preparing a sweet-tart plum filling enhanced with spices. Assemble with a lattice top, brush with egg wash, sprinkle with sugar, and bake until golden. The key technique is chilling the pastry between steps and allowing the finished pie to cool completely before slicing." } }, { "@type": "Question", "name": "How do I prevent a soggy bottom when making fruit pies?", "acceptedAnswer": { "@type": "Answer", "text": "Prevent soggy bottoms by preheating a baking sheet in the oven and placing your pie directly on it, creating immediate heat to set the base. Also, use cornflour to thicken the filling, avoid excess liquid when adding the fruit, and let the fruit macerate separately before adding to the pastry case." } }, { "@type": "Question", "name": "Can I use different varieties of plums for a pie filling?", "acceptedAnswer": { "@type": "Answer", "text": "Yes, different plum varieties create unique flavour profiles in your pie. Red plums offer sweetness, while black plums provide deeper flavour. Victoria plums are classic for baking. Damson plums deliver intense tartness, requiring more sugar. Mix varieties for complexity or choose based on your sweet-tart preference." } }, { "@type": "Question", "name": "How long should a fruit pie cool before slicing?", "acceptedAnswer": { "@type": "Answer", "text": "Allow your pie to cool for at least 3 hours before slicing. This crucial resting time enables the filling to set properly, ensuring clean slices with filling that holds its shape rather than running everywhere. Cutting too soon results in a runny mess, while patience rewards you with perfect presentation." } } ] }