Homemade Quesadillas Recipe

Crispy golden tortillas filled with melty cheese and savory fillings, creating the perfect harmony of crunch, gooey richness, and bold flavors.
Difficulty:
Beginner
Prep Time:
10 mins
Cook Time:
5 mins
Serves:
4 quesadillas
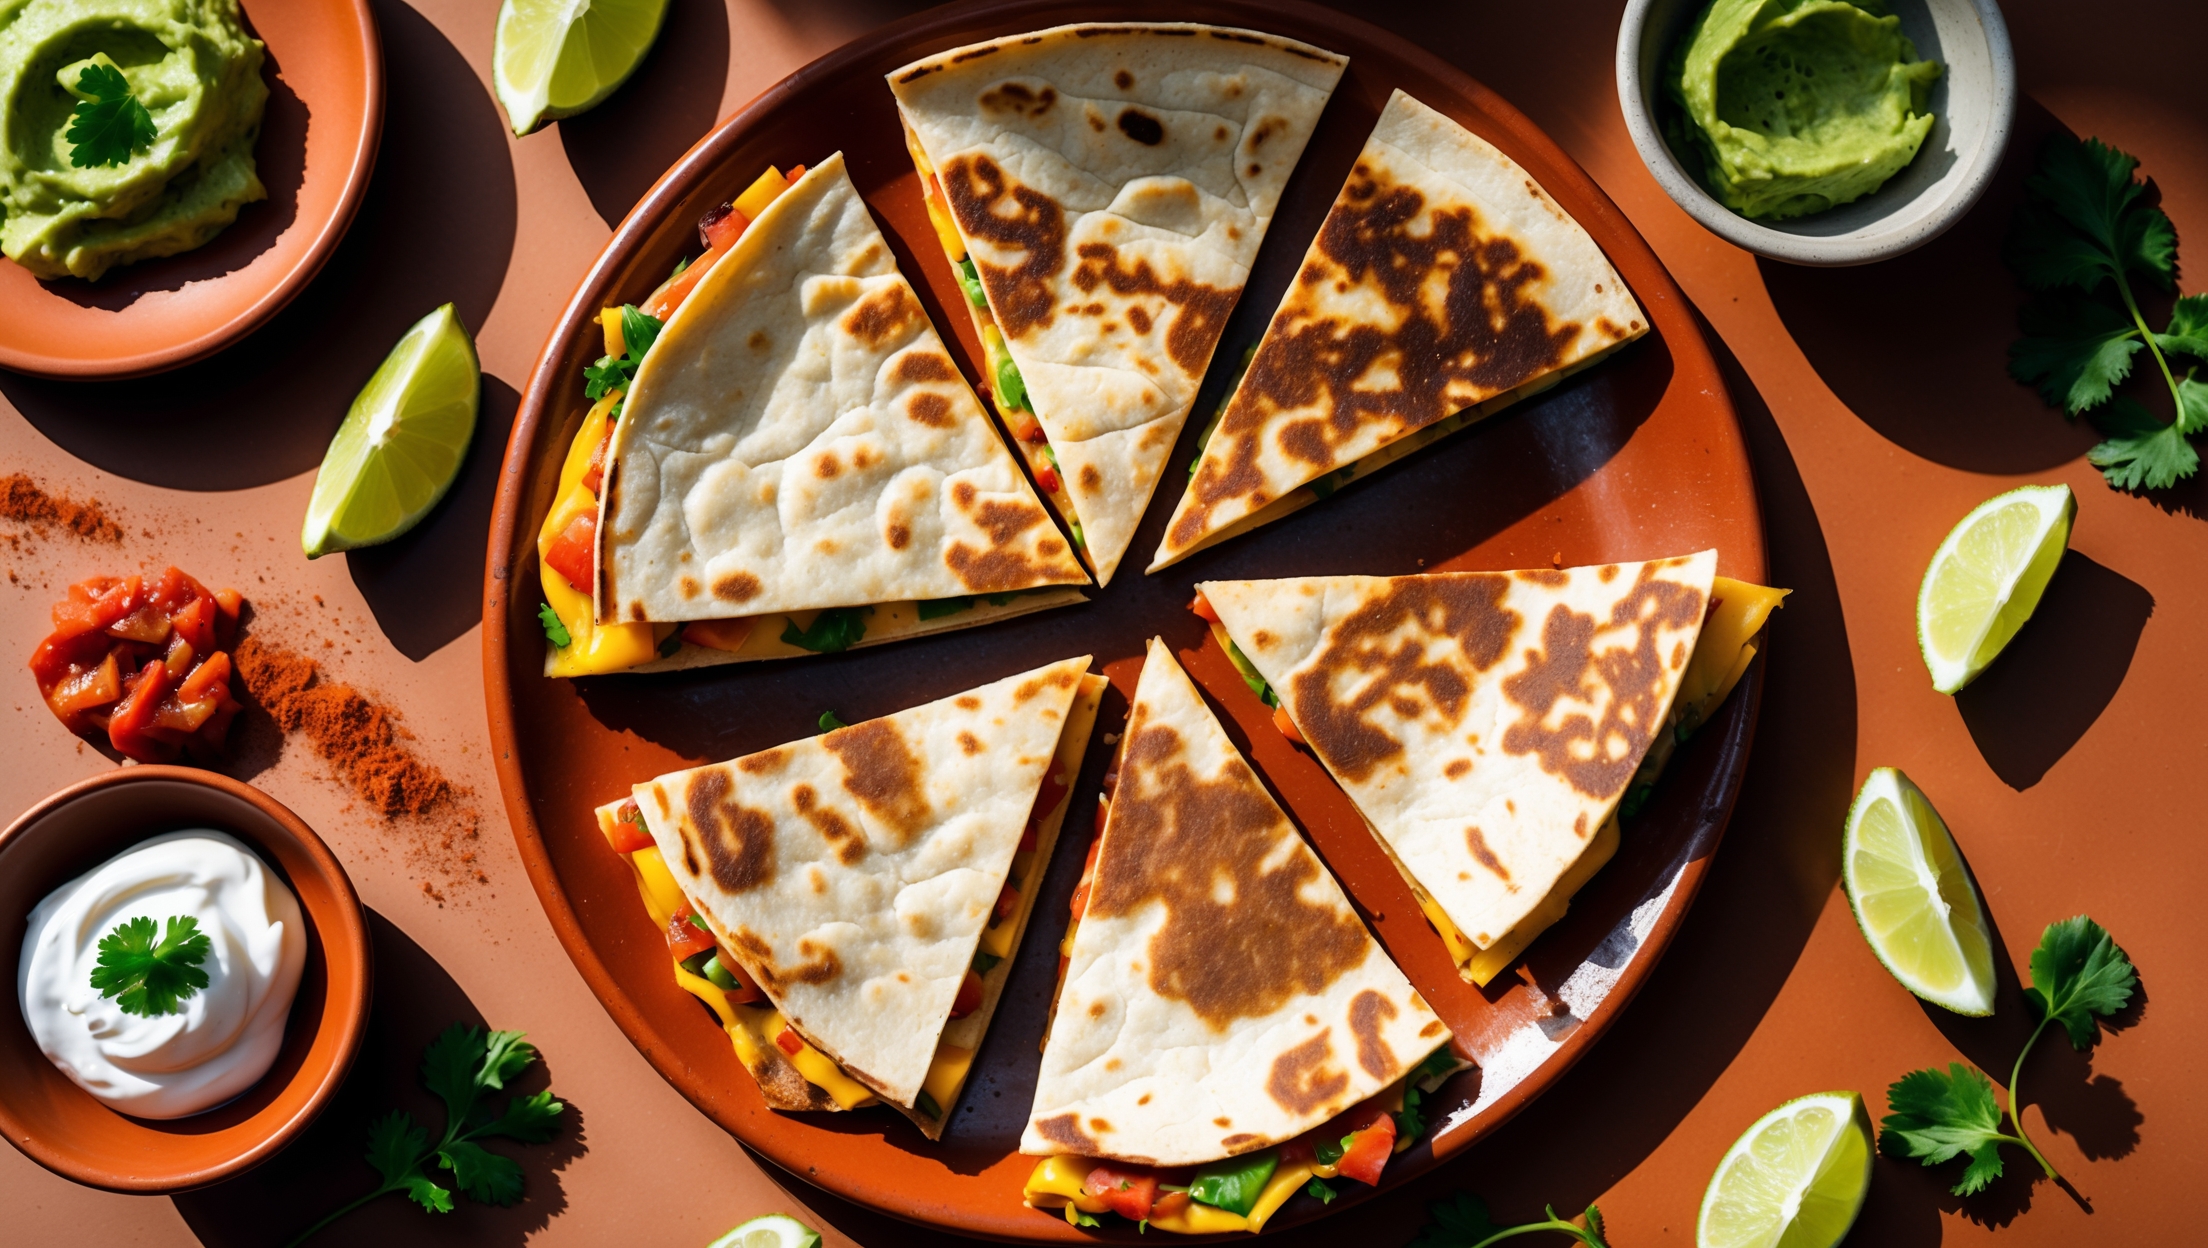
Overhead shot of golden-brown quesadilla wedges arranged on a rustic clay plate, showcasing the perfectly crisp exterior and stretchy cheese pulls as one piece is lifted. The cross-section reveals layers of melted cheese marbled with flecks of vibrant fillings against the backdrop of a terracotta tile counter. Soft natural light streams in from the side, highlighting the browned edges and creating appetizing shadows. Scattered around the composition are small bowls of bright guacamole, ruby-red salsa, and a dollop of sour cream, with lime wedges and cilantro sprigs for color contrast. Fine sprinkles of chili powder add warm red accents against the golden tortillas.

Ingredients

<ul class="ingredients-main-list"> <li class="ingredients-single-item">8 flour tortillas (20cm diameter)</li> <li class="ingredients-single-item">300g grated cheese blend (like cheddar and monterey jack)</li> <li class="ingredients-single-item">1 red bell pepper, finely diced</li> <li class="ingredients-single-item">1 small onion, finely diced</li> <li class="ingredients-single-item">2 tablespoons olive oil</li> <li class="ingredients-single-item">2 tablespoons fresh coriander, chopped (cilantro)</li> <li class="ingredients-single-item">1 teaspoon ground cumin</li> <li class="ingredients-single-item">Salt and pepper to taste</li> <li class="ingredients-single-item">Optional fillings: 200g cooked shredded chicken, 100g black beans, or 100g corn kernels</li> </ul>

Equipment

<ul class="equipment-main-list"> <li class="equipment-single-item">Large non-stick frying pan or griddle</li> <li class="equipment-single-item">Spatula</li> <li class="equipment-single-item">Cheese grater</li> </ul>
BAKE SMARTER

Kitchen Converter

Quickly switch between common baking units without leaving the recipe.

Convert
Result—

Volume uses US cups, tablespoons, and teaspoons. Converting weight to volume depends on the ingredient.

Directions

<ol class="no-list-style"> <li class="MethodStepper"> <h4 class="step-title">Step 1</h4> Prepare your filling ingredients by grating the cheese and finely dicing the vegetables. The small dice ensures even distribution throughout the quesadilla and prevents large chunks from tearing the tortilla. </li> <li class="MethodStepper"> <h4 class="step-title">Step 2</h4> Heat a large non-stick frying pan over medium heat. While traditional quesadillas don't require pre-cooking the vegetables, you can sauté the onions and bell peppers in a little oil for 3-4 minutes until softened if you prefer a softer texture. Season with cumin, salt, and pepper. Set aside. </li> <li class="MethodStepper"> <h4 class="step-title">Step 3</h4> Place a tortilla flat in the dry pan (no oil yet). Sprinkle half the tortilla with about 40g of cheese, ensuring you leave a 1cm border around the edge. The border prevents the cheese from leaking out during cooking. </li> <li class="MethodStepper"> <h4 class="step-title">Step 4</h4> Add a thin layer of your vegetable mixture (and any optional fillings) over the cheese, then sprinkle another 35g of cheese on top. This cheese-veggie-cheese layering is crucial - the cheese acts as "glue" on both sides to hold everything together. </li> <li class="MethodStepper"> <h4 class="step-title">Step 5</h4> Fold the empty half of the tortilla over the filling, creating a half-moon shape. Press down gently with your spatula to seal. </li> <li class="MethodStepper"> <h4 class="step-title">Step 6</h4> Brush or drizzle the outside of the folded tortilla with a little olive oil. This creates that beautiful golden crust without making the quesadilla greasy. </li> <li class="MethodStepper"> <h4 class="step-title">Step 7</h4> Cook for 2-3 minutes until the bottom is golden brown and crispy. You'll know it's ready to flip when the cheese starts melting and the tortilla develops golden brown patches. </li> <li class="MethodStepper"> <h4 class="step-title">Step 8</h4> Carefully flip the quesadilla using a wide spatula. Cook for another 1-2 minutes until the second side is equally golden and crispy, and the cheese inside is completely melted. The perfect quesadilla has a crisp exterior that makes a slight cracking sound when pressed. </li> <li class="MethodStepper"> <h4 class="step-title">Step 9</h4> Remove from the pan and let rest for 30 seconds on a cutting board. This brief resting period allows the melted cheese to slightly set, making it easier to cut without all the filling spilling out. </li> <li class="MethodStepper"> <h4 class="step-title">Step 10</h4> Cut into triangles using a sharp knife or pizza cutter. Repeat the process with the remaining tortillas and fillings. </li> <li class="MethodStepper"> <h4 class="step-title">Step 11</h4> Serve immediately while hot and crispy, with optional toppings like sour cream, guacamole, or salsa. Enjoy the perfect contrast between the crisp exterior and the molten, flavorful filling! </li> </ol>
Nutrition Facts (per serving)

🍽️ Serving Size: 1 quesadilla
🔥 Calories: 420 calories
🥑 Fat: 22 g
🧈 Saturated Fat: 9 g
🍞 Carbohydrates: 36 g
🍭 Sugar: 2 g
🍗 Protein: 18 g
🫀 Cholesterol: 45 mg
🧂 Sodium: 650 mg

Chef’s Notes

A few helpful details for making this recipe.

What's the secret to getting quesadillas crispy without being greasy?

The secret is using a dry pan initially and only brushing the exterior with a small amount of oil rather than cooking in oil. This technique creates that signature golden crust while keeping the quesadilla light. Also, cooking over medium heat allows for even browning without burning.

Which cheese works best for authentic Mexican-style quesadillas?

Traditional Mexican quesadillas often use Oaxaca cheese for its exceptional melting properties. For homemade versions, a combination of Monterey Jack and cheddar provides the perfect balance of meltability and flavour. Avoid pre-shredded cheese as it contains anti-caking agents that prevent proper melting.

Can I prepare quesadilla fillings ahead of time for quick assembly?

Absolutely! Prep vegetable fillings and protein options up to 3 days ahead and store them refrigerated in airtight containers. Grated cheese can also be prepared in advance. This makes quesadilla assembly a quick 5-minute process when you're ready to cook them.

Want to try something else in ...

More recipes you might like

Keep exploring with more recipes from What's Baking.