Cranberry Apple Pie Recipe
Ingredients
Equipment
Directions
FAQs
Find answers to your most pressing questions about this delicious recipe right here.
This pie requires all-purpose flour, cold butter, sugar, apples (Granny Smith or Braeburn), fresh cranberries, cornstarch, lemon juice, and warming spices like cinnamon, nutmeg, and allspice. The crust also includes apple cider vinegar for tenderness.
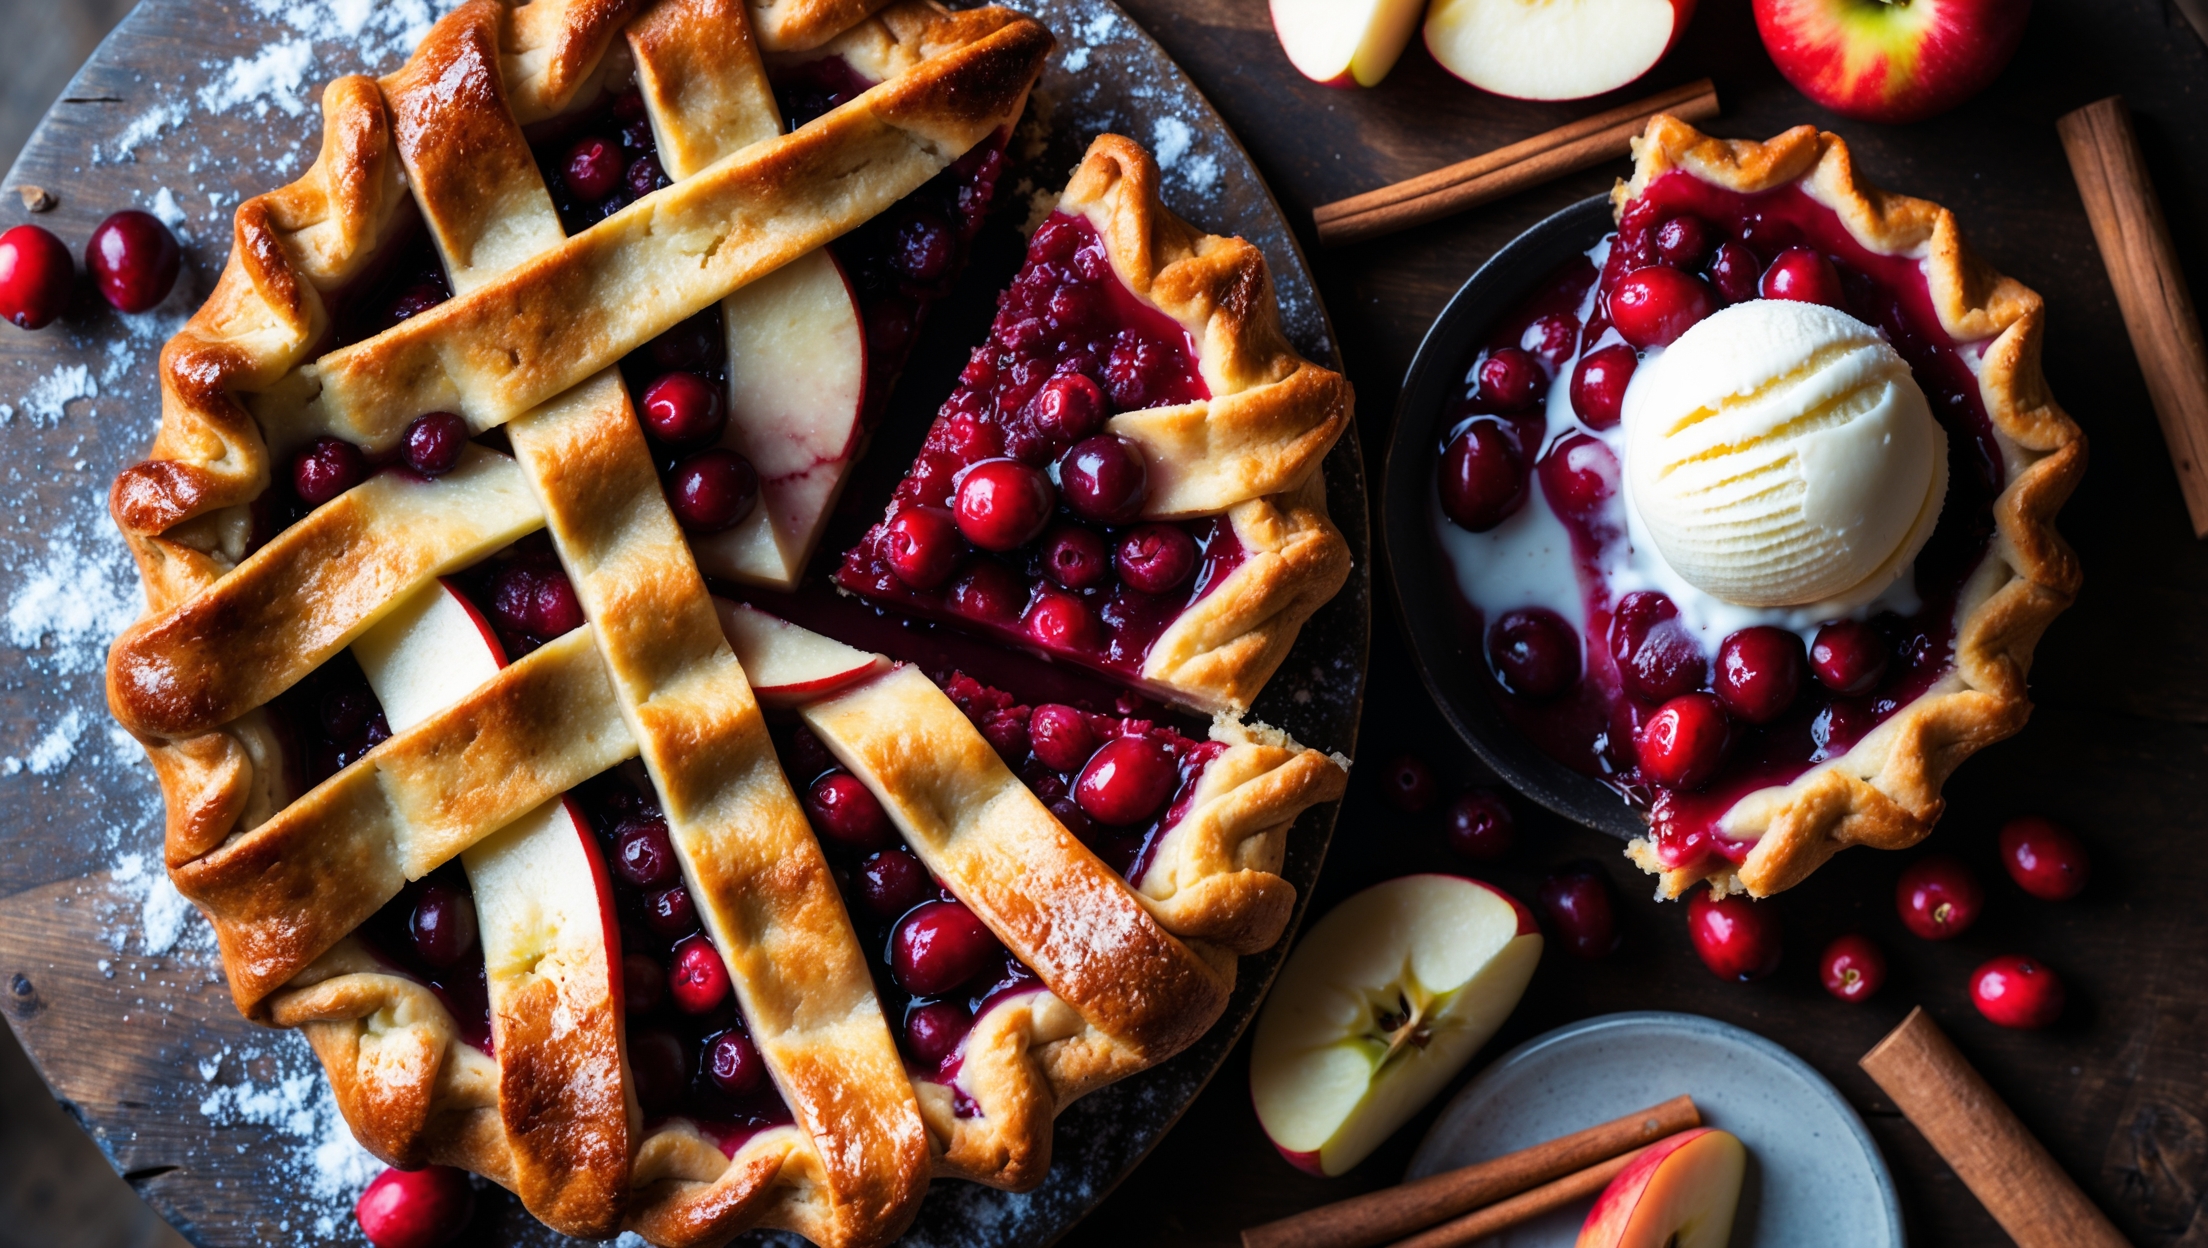
Learn how to cook Cranberry Apple Pie by making a buttery crust with cold ingredients, creating a filling with the perfect balance of tart cranberries and sweet apples, and mastering a beautiful lattice top. Bake at 190°C for 20 minutes, then reduce to 175°C for 30-35 minutes until golden and bubbling. Allow to cool for 3 hours before serving.
Apple cider vinegar inhibits gluten development in the dough, resulting in a more tender, flakier crust. It's a professional baker's trick that doesn't affect the flavour but dramatically improves texture. The acid also helps keep the dough from oxidising and turning grey.
Yes, frozen cranberries work perfectly in this pie. Thaw them completely and drain excess moisture before adding to the filling to prevent a soggy bottom crust. Frozen cranberries make this dessert accessible year-round, not just during fresh cranberry season.
The cooling period allows the cornstarch in the filling to properly set and thicken. Cutting too soon results in a runny filling that won't hold its shape. This patience ensures clean, photo-worthy slices with distinct layers of fruit that stay in place rather than collapsing.
Fruit Pies
Try following recommended recipes


