Apple Rose Pie Recipe

Delicate apple slices arranged like blooming roses nestle in buttery pastry with warm cinnamon and caramelized sweetness for a stunning dessert that's as beautiful as it is delicious.
Difficulty:
Intermediate
Prep Time:
45 mins
Cook Time:
40 mins
Serves:
1 pie (8 slices)
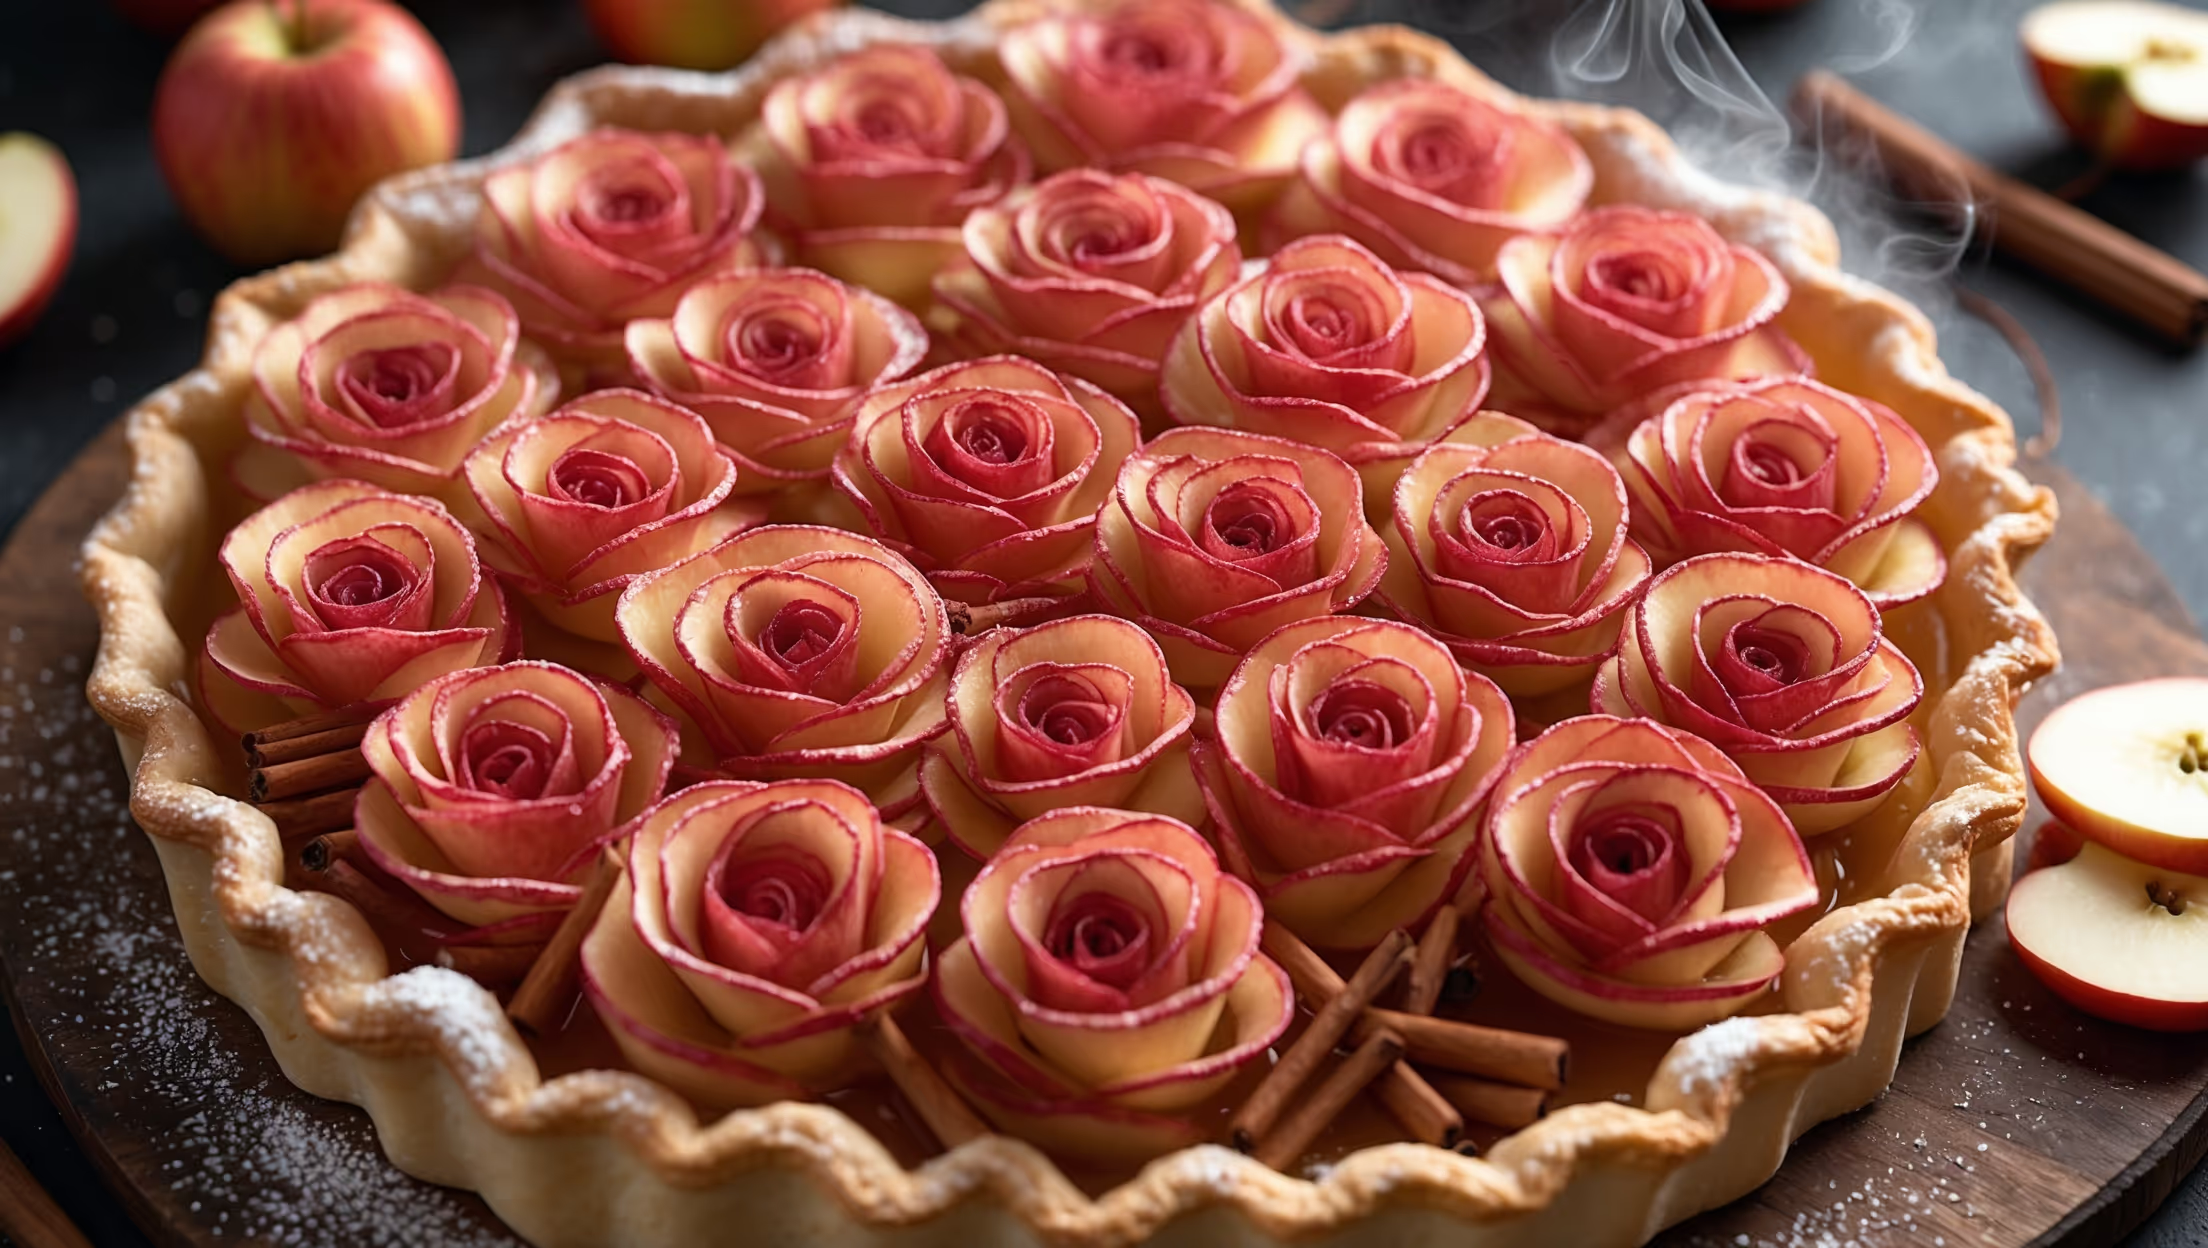
An overhead shot of the Apple Rose Pie reveals a mesmerizing pattern of thinly sliced apple "roses" arranged in concentric circles, their edges delicately curled and caramelized to a golden-red hue. Bathed in soft natural light, the pie sits on a rustic wooden serving board with scattered cinnamon sticks and fresh apple slices artfully placed alongside. A cross-section view displays the perfect layers of flaky, golden-brown pastry supporting the tender apple roses, which maintain their shape while glistening with a light apricot glaze. A dusting of powdered sugar creates beautiful contrast against the rich red-pink apple petals, while steam gently rises from the freshly baked masterpiece.

Ingredients

<ul class="ingredients-main-list"><li class="ingredients-single-item">For the pastry:</li><li class="ingredients-single-item">225g all-purpose flour</li><li class="ingredients-single-item">150g cold unsalted butter, cubed</li><li class="ingredients-single-item">30g granulated sugar</li><li class="ingredients-single-item">1/4 tsp salt</li><li class="ingredients-single-item">1 large egg yolk</li><li class="ingredients-single-item">3-4 tbsp ice-cold water</li><li class="ingredients-single-item">For the filling:</li><li class="ingredients-single-item">4-5 large red apples (preferably Gala or Pink Lady)</li><li class="ingredients-single-item">Juice of 1 lemon</li><li class="ingredients-single-item">75g granulated sugar</li><li class="ingredients-single-item">2 tbsp unsalted butter, melted</li><li class="ingredients-single-item">2 tsp ground cinnamon</li><li class="ingredients-single-item">1/2 tsp ground nutmeg</li><li class="ingredients-single-item">For the glaze:</li><li class="ingredients-single-item">3 tbsp apricot jam (or apple jelly)</li><li class="ingredients-single-item">1 tbsp water</li><li class="ingredients-single-item">Powdered sugar for dusting (optional)</li></ul>

Equipment

<ul class="equipment-main-list"><li class="equipment-single-item">23cm (9-inch) tart pan with removable bottom</li><li class="equipment-single-item">Mandoline slicer (or very sharp knife)</li><li class="equipment-single-item">Microwave-safe bowl</li><li class="equipment-single-item">Pastry brush</li><li class="equipment-single-item">Rolling pin</li></ul>
BAKE SMARTER

Kitchen Converter

Quickly switch between common baking units without leaving the recipe.

Convert
Result—

Volume uses US cups, tablespoons, and teaspoons. Converting weight to volume depends on the ingredient.

Directions

<ol class="no-list-style"><li class="MethodStepper"><h4 class="step-title">Step 1</h4>Begin by preparing your pastry. In a large bowl, whisk together the flour, sugar, and salt. Add the cold cubed butter and use your fingertips to rub it into the dry ingredients until the mixture resembles coarse breadcrumbs with some pea-sized pieces remaining. The varying butter sizes will create different layers of flakiness in your finished crust.</li><li class="MethodStepper"><h4 class="step-title">Step 2</h4>Mix the egg yolk with 3 tablespoons of ice-cold water. Drizzle this over the flour mixture and gently stir with a fork until the dough just begins to come together. If needed, add the remaining tablespoon of water. The dough should hold together when pressed but shouldn't be sticky.</li><li class="MethodStepper"><h4 class="step-title">Step 3</h4>Turn the dough onto a lightly floured surface, form it into a disk, wrap in plastic wrap, and refrigerate for at least 30 minutes. Chilling relaxes the gluten and firms the butter, resulting in a more tender, flaky crust.</li><li class="MethodStepper"><h4 class="step-title">Step 4</h4>While the dough chills, prepare the apples. Fill a large bowl halfway with cold water and add the lemon juice. Core the apples and slice them in half from top to bottom. Using a mandoline set to the thinnest setting (or a very sharp knife), slice the apples into paper-thin half-moons. Immediately place the slices in the lemon water to prevent browning.</li><li class="MethodStepper"><h4 class="step-title">Step 5</h4>Place the apple slices in a microwave-safe bowl with enough water to cover them. Microwave for 2-3 minutes until the slices are pliable but not mushy. This par-cooking makes them flexible enough to shape into roses without breaking. Drain and pat dry gently with paper towels.</li><li class="MethodStepper"><h4 class="step-title">Step 6</h4>In a bowl, mix together the sugar, cinnamon, and nutmeg. Preheat your oven to 190°C (375°F).</li><li class="MethodStepper"><h4 class="step-title">Step 7</h4>Roll out the chilled pastry on a lightly floured surface to about 3mm thickness. Carefully transfer to your tart pan, pressing it gently into the corners. Trim any excess dough and prick the bottom with a fork several times. Brush the base with melted butter and sprinkle with about 2 tablespoons of the sugar-spice mixture.</li><li class="MethodStepper"><h4 class="step-title">Step 8</h4>To form each rose, lay 5-6 apple slices in a straight, slightly overlapping row, with the skin side facing out. Roll the row up tightly to create a rose shape. The red skin edge creates the illusion of rose petals. Place each completed rose in the tart shell, working from the outside edge inward.</li><li class="MethodStepper"><h4 class="step-title">Step 9</h4>Continue making roses until the entire tart is filled. You'll want to place them close together so they support each other. For any gaps, tuck in small apple slices. Brush the roses with the remaining melted butter and sprinkle generously with the remaining sugar-spice mixture.</li><li class="MethodStepper"><h4 class="step-title">Step 10</h4>Bake in the preheated oven for 35-40 minutes until the pastry is golden and the apple edges begin to caramelize. If the roses start to brown too quickly, loosely cover with foil.</li><li class="MethodStepper"><h4 class="step-title">Step 11</h4>While the pie is baking, prepare the glaze by heating the apricot jam with water in a small saucepan until melted and smooth, or microwave for about 30 seconds.</li><li class="MethodStepper"><h4 class="step-title">Step 12</h4>When the pie is done, remove from oven and immediately brush with the warm apricot glaze. This adds shine and helps preserve the roses' shape. Allow to cool in the pan for at least 15 minutes before carefully removing the outer ring.</li><li class="MethodStepper"><h4 class="step-title">Step 13</h4>Before serving, dust lightly with powdered sugar if desired. Serve warm or at room temperature. Your Apple Rose Pie will keep, covered at room temperature, for up to 2 days, though it's most beautiful on the day it's made.</li></ol>
Nutrition Facts (per serving)

🍽️ Serving Size: 1 slice
🔥 Calories: 345 calories
🥑 Fat: 18 g
🧈 Saturated Fat: 11 g
🍞 Carbohydrates: 43 g
🍭 Sugar: 24 g
🍗 Protein: 3 g
🫀 Cholesterol: 75 mg
🧂 Sodium: 210 mg

Chef’s Notes

A few helpful details for making this recipe.

What's the secret to getting apple slices thin enough for perfect rose shapes?

A mandoline slicer is the best tool for achieving paper-thin, consistent apple slices. If you don't have one, use the sharpest knife possible and take your time. The key is getting slices thin enough to bend without breaking when rolled into rose shapes.

How can I prevent my apple roses from browning before baking?

Keep sliced apples in lemon water immediately after cutting to prevent oxidation. The microwave step not only makes the slices pliable for shaping but also helps set the colour. Working efficiently and brushing with melted butter helps create a protective coating.

Which apple varieties work best for creating decorative rose patterns in pies?

Red-skinned varieties like Gala, Pink Lady, or Honeycrisp are ideal as their coloured edges create realistic "petals." These varieties also offer the perfect balance of sweetness and firmness, maintaining their shape during baking while becoming tender without turning mushy.

Want to try something else in ...

More recipes you might like

Keep exploring with more recipes from What's Baking.