Whiskey-Soaked Dried Fruit Danish with Infused Glaze Recipe
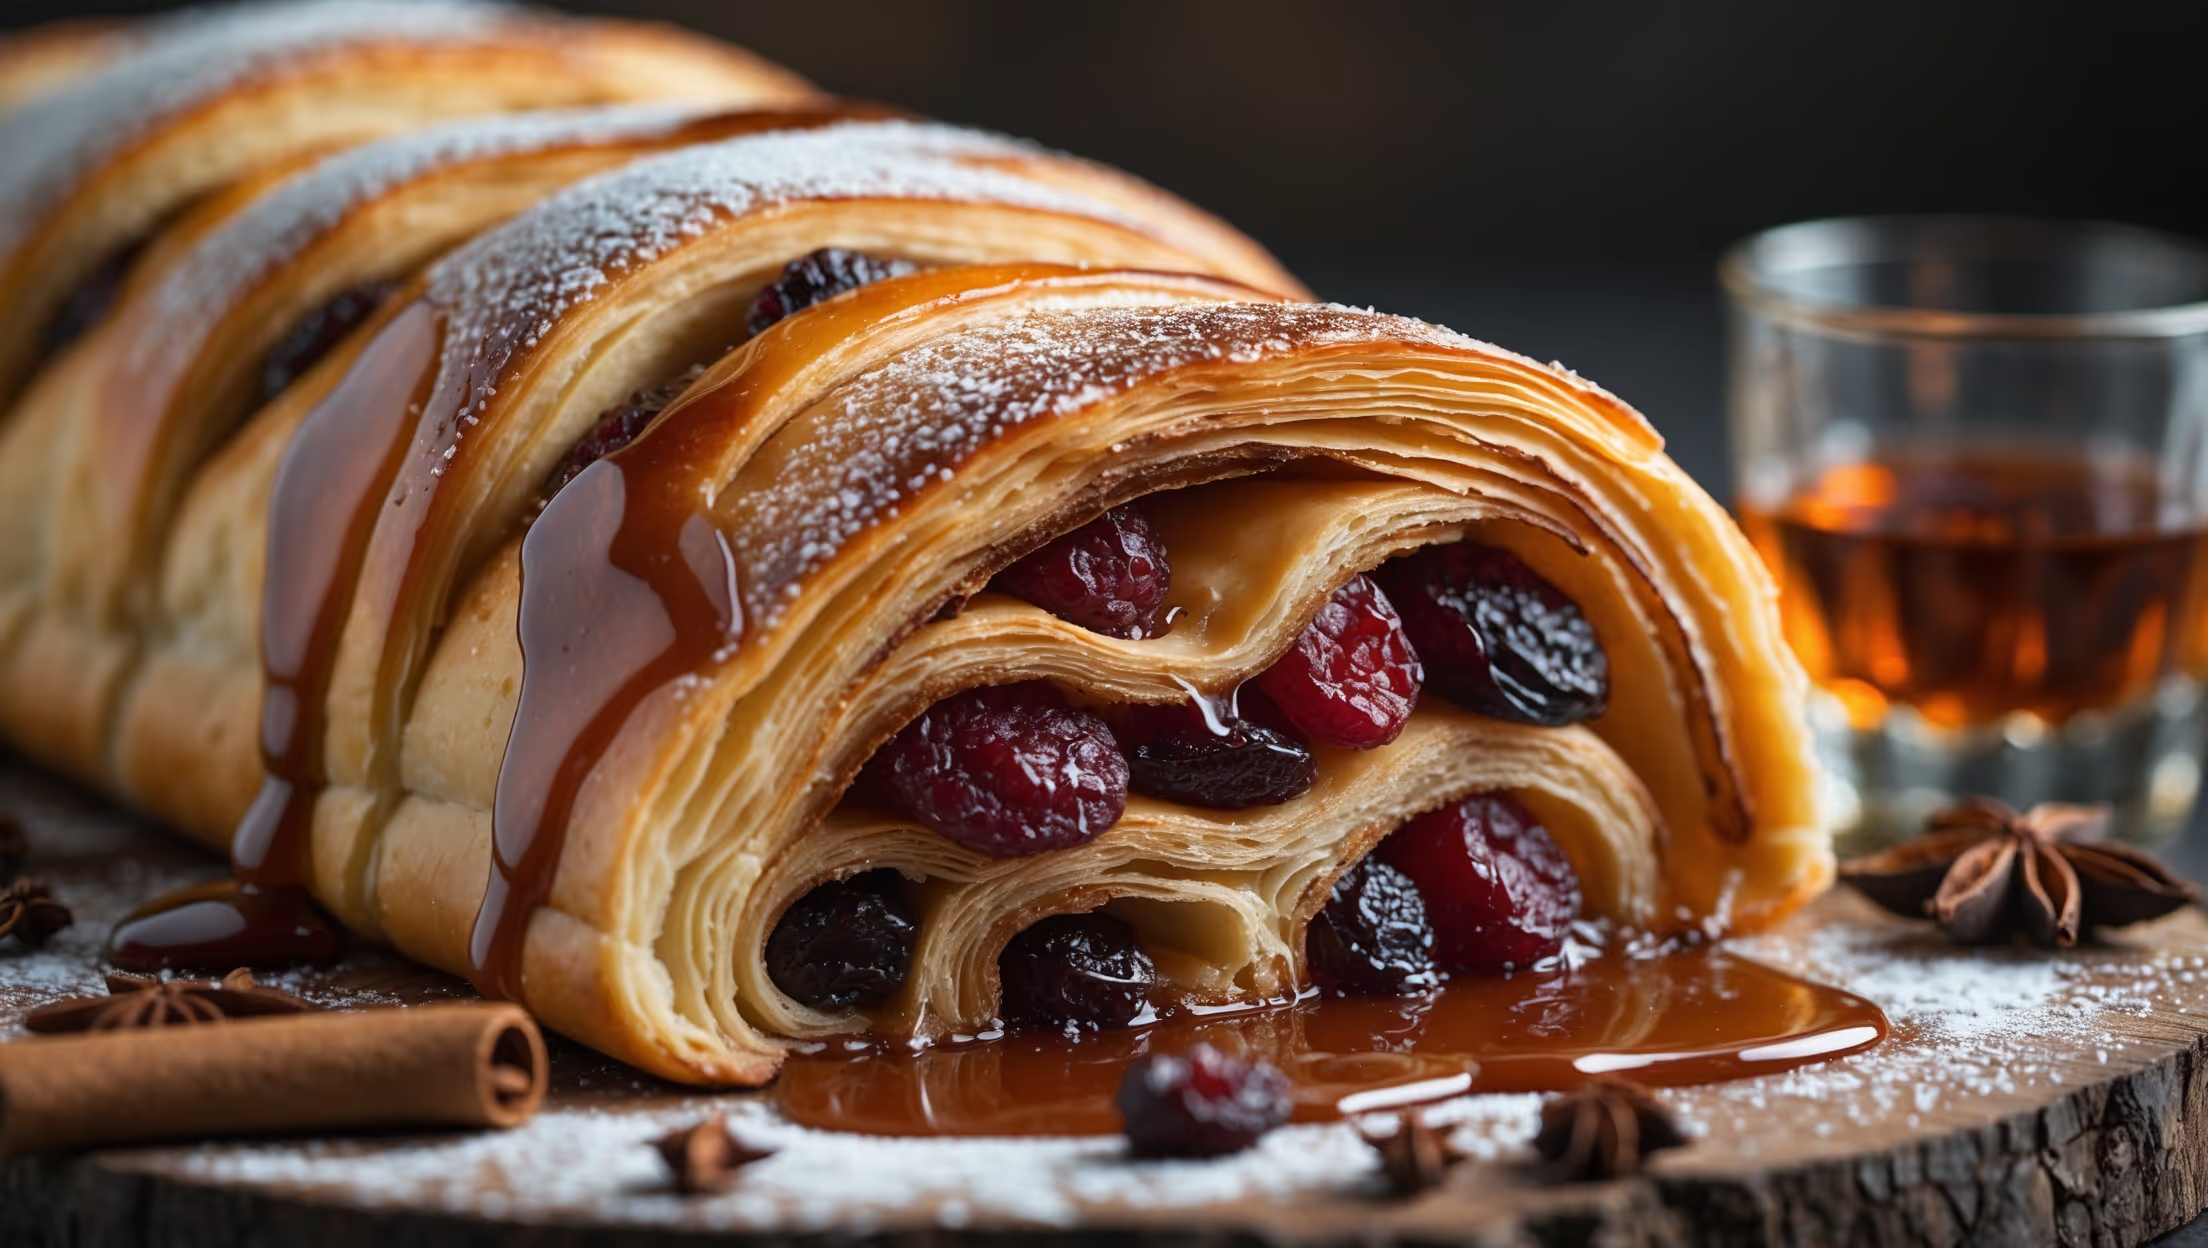
Learn how to make the best homemade whiskey-soaked dried fruit Danish with an easy laminated dough technique. This foolproof recipe creates flaky, buttery layers surrounding fruit that's been macerated in premium whiskey, all topped with an aromatic infused glaze that elevates your breakfast pastry game.
Difficulty:
Intermediate
Prep Time:
45 mins (plus overnight soaking)
Cook Time:
25 mins
Serves:
8 pastries
A close-up shot capturing the glistening whiskey-infused glaze dripping down the sides of a golden-brown Danish pastry, revealing plump, jewel-toned dried fruits nestled within its flaky, buttery layers. Soft natural light highlights the laminated dough's delicate structure while creating appetizing shadows in the folds. The pastry sits on a rustic wooden board dusted with powdered sugar, with scattered cinnamon sticks, star anise, and dried fruit pieces artfully arranged around it. A small glass of amber whiskey sits slightly blurred in the background, suggesting the Danish's signature flavor profile.

Ingredients

<ul class="ingredients-main-list"><li class="ingredients-single-item">For the fruit filling:</li><li class="ingredients-single-item">200g mixed dried fruits (raisins, currants, cranberries, apricots, cherries)</li><li class="ingredients-single-item">120ml whiskey (bourbon or Irish whiskey)</li><li class="ingredients-single-item">50g light brown sugar</li><li class="ingredients-single-item">1 orange, zested</li><li class="ingredients-single-item">1 tsp ground cinnamon</li><li class="ingredients-single-item">¼ tsp ground nutmeg</li><li class="ingredients-single-item">For the Danish dough:</li><li class="ingredients-single-item">500g strong bread flour</li><li class="ingredients-single-item">10g active dry yeast</li><li class="ingredients-single-item">80g granulated sugar</li><li class="ingredients-single-item">5g salt</li><li class="ingredients-single-item">2 large eggs</li><li class="ingredients-single-item">120ml warm milk</li><li class="ingredients-single-item">1 tsp vanilla extract</li><li class="ingredients-single-item">250g cold unsalted butter (for lamination)</li><li class="ingredients-single-item">For the infused glaze:</li><li class="ingredients-single-item">150g powdered sugar</li><li class="ingredients-single-item">2 tbsp whiskey</li><li class="ingredients-single-item">1 tbsp orange juice</li><li class="ingredients-single-item">1 tsp vanilla extract</li><li class="ingredients-single-item">¼ tsp ground cinnamon</li></ul>

Equipment

<ul class="equipment-main-list"><li class="equipment-single-item">Rolling pin</li><li class="equipment-single-item">Baking sheet</li><li class="equipment-single-item">Pastry brush</li><li class="equipment-single-item">Sharp knife or pastry wheel</li><li class="equipment-single-item">Stand mixer with dough hook (optional)</li></ul>

Directions

<ol class="no-list-style"><li class="MethodStepper"><h4 class="step-title">Step 1</h4>Begin by preparing the fruit filling the night before. Chop any larger dried fruits into small pieces, then place all dried fruits in a medium bowl. Pour the whiskey over the fruit, add the brown sugar, orange zest, cinnamon, and nutmeg. Stir well to combine, cover with plastic wrap, and leave to macerate overnight at room temperature. The alcohol will soften and plump the fruits while infusing them with rich flavor.</li><li class="MethodStepper"><h4 class="step-title">Step 2</h4>For the Danish dough, combine the flour, yeast, sugar, and salt in a large bowl or the bowl of your stand mixer. In a separate bowl, whisk together the eggs, warm milk (around 38°C, warm but not hot to preserve the yeast), and vanilla extract. Add the wet ingredients to the dry and mix until a shaggy dough forms. If using a stand mixer, knead with the dough hook for 5 minutes; if by hand, turn onto a lightly floured surface and knead for 8-10 minutes until smooth and elastic. The proper development of gluten at this stage is crucial for lamination success.</li><li class="MethodStepper"><h4 class="step-title">Step 3</h4>Shape the dough into a rectangle, wrap in plastic, and refrigerate for at least 30 minutes. Meanwhile, prepare the butter block by placing the cold butter between two sheets of parchment paper and beating it with a rolling pin until malleable but still cold. Shape into a 20×15cm rectangle, rewrap, and refrigerate until firm but pliable (about 15 minutes).</li><li class="MethodStepper"><h4 class="step-title">Step 4</h4>Roll the chilled dough into a 30×20cm rectangle on a lightly floured surface. Place the butter block on one half of the dough, leaving a 1cm border. Fold the other half over the butter and seal the edges well by pinching. This encases the butter completely which is essential for creating those beautiful flaky layers.</li><li class="MethodStepper"><h4 class="step-title">Step 5</h4>Now for the first turn: Roll the dough into a 45×20cm rectangle, keeping the edges straight (use your hands to square them if needed). Fold the dough like a letter: fold the bottom third up, then the top third down. Rotate the dough 90 degrees (so the open edge is on the right). Wrap and refrigerate for 30 minutes. The cold rest periods are non-negotiable – they allow the gluten to relax and the butter to firm up again.</li><li class="MethodStepper"><h4 class="step-title">Step 6</h4>Repeat the rolling, folding, and chilling process two more times (three turns total). After the final turn, wrap the dough well and refrigerate for at least 2 hours or overnight. This patience results in perfectly laminated dough with distinct butter layers.</li><li class="MethodStepper"><h4 class="step-title">Step 7</h4>When ready to shape, drain any excess liquid from the soaked fruit mixture. Preheat your oven to 190°C and line a baking sheet with parchment paper. Roll the dough into a large rectangle about 40×30cm and 3-4mm thick. Cut into 8 equal squares.</li><li class="MethodStepper"><h4 class="step-title">Step 8</h4>Place about 1-2 tablespoons of the whiskey-soaked fruit mixture in the center of each square. Fold two opposite corners of each square into the center, overlapping slightly, to form a diamond shape. Press firmly to seal. Alternatively, fold all four corners into the center for a different design. The pastry should cradle the filling while allowing some fruit to peek through.</li><li class="MethodStepper"><h4 class="step-title">Step 9</h4>Place the shaped Danishes on the prepared baking sheet, leaving space between them. Cover loosely with a clean kitchen towel and allow to proof at room temperature for 30-45 minutes until slightly puffy. The pastries should look visibly expanded but not doubled in size.</li><li class="MethodStepper"><h4 class="step-title">Step 10</h4>Bake in the preheated oven for 20-25 minutes or until deeply golden brown. The high sugar content in the dough can cause quick browning, so check after 15 minutes – if they're browning too quickly, cover loosely with foil. The internal temperature should reach 90°C when fully baked.</li><li class="MethodStepper"><h4 class="step-title">Step 11</h4>While the Danishes are baking, prepare the glaze by whisking together the powdered sugar, whiskey, orange juice, vanilla extract, and cinnamon until smooth. The glaze should be thick enough to coat the back of a spoon but still pourable – adjust with more powdered sugar or liquid as needed.</li><li class="MethodStepper"><h4 class="step-title">Step 12</h4>Allow the Danishes to cool for 10 minutes on the baking sheet, then transfer to a wire rack. While still warm but not hot, drizzle the infused glaze generously over each pastry, allowing it to seep slightly into the layers. The warmth helps the glaze to set with a beautiful sheen. Serve warm or at room temperature. These Danishes are best enjoyed the day they're made but will keep in an airtight container for up to 2 days. You can refresh them briefly in a 160°C oven for 5 minutes before serving.</li></ol>

FAQs

Find answers to your most pressing questions about this delicious recipe right here.

What ingredients are used in Whiskey-Soaked Dried Fruit Danish with Infused Glaze?

This Danish pastry uses mixed dried fruits soaked in whiskey, a laminated dough (flour, yeast, eggs, milk, butter), and a whiskey glaze made with powdered sugar, orange juice, vanilla and cinnamon. The secret is premium whiskey for both soaking and glazing.

How to cook Whiskey-Soaked Dried Fruit Danish with Infused Glaze at home?

Learn how to cook Whiskey-Soaked Dried Fruit Danish by first soaking dried fruits in whiskey overnight, then creating a laminated dough through a series of folds. Shape the dough around the drained fruit filling, bake until golden brown (190°C for 20-25 minutes), and finish with a whiskey-infused glaze while still warm for that professional bakery finish.

What's the secret to achieving perfectly flaky layers in Danish pastry?

The secret lies in proper lamination - keeping the butter cold throughout the folding process, ensuring precise turns, and allowing sufficient resting time between folds. Never rush the chilling stages, as they maintain butter's integrity. Roll with gentle, even pressure for consistent layers.

Can I make this pastry without alcohol and still get good results?

Absolutely! Replace whiskey with apple juice, orange juice or strong tea for fruit soaking. For the glaze, use additional orange juice with a splash of vanilla. While you'll miss the distinctive whiskey notes, you'll still achieve delicious, moist fruit and a flavourful Danish pastry.

How far in advance can I prepare components of this Danish pastry?

The fruit mixture can be prepared up to 3 days ahead and refrigerated. The laminated dough can be made 24-48 hours in advance and kept chilled. For the freshest results, bake the pastries on the day of serving, though they can be shaped and refrigerated overnight before the final proof.

Want to try something else in ...

Danish Pastry

Try following recommended recipes

{ "@context": "http://schema.org/", "@type": "Recipe", "name": "Whiskey-Soaked Dried Fruit Danish with Infused Glaze Recipe", "author": { "@type": "Person", "name": "Gurbir Aujla", "brand": "What's Baking?", "jobTitle": "Baker" }, "datePublished": "2024-07-09", "description": "Learn how to make the best homemade whiskey-soaked dried fruit Danish with an easy laminated dough technique. This foolproof recipe creates flaky, buttery layers surrounding fruit that's been macerated in premium whiskey, all topped with an aromatic infused glaze that elevates your breakfast pastry game.", "prepTime": "PT45M", "cookTime": "PT25M", "totalTime": "PT1H10M", "keywords": "whiskey danish, dried fruit pastry, laminated dough, breakfast pastry, boozy danish", "recipeYield": "8", "recipeCategory": "Pastry", "recipeCuisine": "Danish", "nutrition": { "@type": "NutritionInformation", "calories": "375 calories", "carbohydrateContent": "45 g", "proteinContent": "5 g", "fatContent": "18 g", "saturatedFatContent": "11 g", "cholesterolContent": "85 mg", "sodiumContent": "210 mg", "sugarContent": "22 g", "servingSize": "1 serving" }, "recipeIngredient": [ "200g mixed dried fruits (raisins, currants, cranberries, apricots, cherries)", "120ml whiskey (bourbon or Irish whiskey)", "50g light brown sugar", "1 orange, zested", "1 tsp ground cinnamon", "¼ tsp ground nutmeg", "500g strong bread flour", "10g active dry yeast", "80g granulated sugar", "5g salt", "2 large eggs", "120ml warm milk", "1 tsp vanilla extract", "250g cold unsalted butter (for lamination)", "150g powdered sugar", "2 tbsp whiskey", "1 tbsp orange juice", "1 tsp vanilla extract", "¼ tsp ground cinnamon" ], "recipeInstructions": [ { "@type": "HowToStep", "name": "Prepare fruit filling", "text": "Begin by preparing the fruit filling the night before. Chop any larger dried fruits into small pieces, then place all dried fruits in a medium bowl. Pour the whiskey over the fruit, add the brown sugar, orange zest, cinnamon, and nutmeg. Stir well to combine, cover with plastic wrap, and leave to macerate overnight at room temperature. The alcohol will soften and plump the fruits while infusing them with rich flavor." }, { "@type": "HowToStep", "name": "Make dough", "text": "For the Danish dough, combine the flour, yeast, sugar, and salt in a large bowl or the bowl of your stand mixer. In a separate bowl, whisk together the eggs, warm milk (around 38°C, warm but not hot to preserve the yeast), and vanilla extract. Add the wet ingredients to the dry and mix until a shaggy dough forms. If using a stand mixer, knead with the dough hook for 5 minutes; if by hand, turn onto a lightly floured surface and knead for 8-10 minutes until smooth and elastic. The proper development of gluten at this stage is crucial for lamination success." }, { "@type": "HowToStep", "name": "Chill dough and prepare butter", "text": "Shape the dough into a rectangle, wrap in plastic, and refrigerate for at least 30 minutes. Meanwhile, prepare the butter block by placing the cold butter between two sheets of parchment paper and beating it with a rolling pin until malleable but still cold. Shape into a 20×15cm rectangle, rewrap, and refrigerate until firm but pliable (about 15 minutes)." }, { "@type": "HowToStep", "name": "Incorporate butter", "text": "Roll the chilled dough into a 30×20cm rectangle on a lightly floured surface. Place the butter block on one half of the dough, leaving a 1cm border. Fold the other half over the butter and seal the edges well by pinching. This encases the butter completely which is essential for creating those beautiful flaky layers." }, { "@type": "HowToStep", "name": "First lamination turn", "text": "Now for the first turn: Roll the dough into a 45×20cm rectangle, keeping the edges straight (use your hands to square them if needed). Fold the dough like a letter: fold the bottom third up, then the top third down. Rotate the dough 90 degrees (so the open edge is on the right). Wrap and refrigerate for 30 minutes. The cold rest periods are non-negotiable – they allow the gluten to relax and the butter to firm up again." }, { "@type": "HowToStep", "name": "Complete lamination", "text": "Repeat the rolling, folding, and chilling process two more times (three turns total). After the final turn, wrap the dough well and refrigerate for at least 2 hours or overnight. This patience results in perfectly laminated dough with distinct butter layers." }, { "@type": "HowToStep", "name": "Shape pastries", "text": "When ready to shape, drain any excess liquid from the soaked fruit mixture. Preheat your oven to 190°C and line a baking sheet with parchment paper. Roll the dough into a large rectangle about 40×30cm and 3-4mm thick. Cut into 8 equal squares." }, { "@type": "HowToStep", "name": "Add filling", "text": "Place about 1-2 tablespoons of the whiskey-soaked fruit mixture in the center of each square. Fold two opposite corners of each square into the center, overlapping slightly, to form a diamond shape. Press firmly to seal. Alternatively, fold all four corners into the center for a different design. The pastry should cradle the filling while allowing some fruit to peek through." }, { "@type": "HowToStep", "name": "Proof pastries", "text": "Place the shaped Danishes on the prepared baking sheet, leaving space between them. Cover loosely with a clean kitchen towel and allow to proof at room temperature for 30-45 minutes until slightly puffy. The pastries should look visibly expanded but not doubled in size." }, { "@type": "HowToStep", "name": "Bake", "text": "Bake in the preheated oven for 20-25 minutes or until deeply golden brown. The high sugar content in the dough can cause quick browning, so check after 15 minutes – if they're browning too quickly, cover loosely with foil. The internal temperature should reach 90°C when fully baked." }, { "@type": "HowToStep", "name": "Prepare glaze", "text": "While the Danishes are baking, prepare the glaze by whisking together the powdered sugar, whiskey, orange juice, vanilla extract, and cinnamon until smooth. The glaze should be thick enough to coat the back of a spoon but still pourable – adjust with more powdered sugar or liquid as needed." }, { "@type": "HowToStep", "name": "Glaze and serve", "text": "Allow the Danishes to cool for 10 minutes on the baking sheet, then transfer to a wire rack. While still warm but not hot, drizzle the infused glaze generously over each pastry, allowing it to seep slightly into the layers. The warmth helps the glaze to set with a beautiful sheen. Serve warm or at room temperature. These Danishes are best enjoyed the day they're made but will keep in an airtight container for up to 2 days. You can refresh them briefly in a 160°C oven for 5 minutes before serving." } ], "aggregateRating": { "@type": "AggregateRating", "ratingValue": "5", "ratingCount": "178" }, "review": [ { "@type": "Review", "author": "Isabella Rodriguez", "datePublished": "2024-07-05", "reviewBody": "These Danishes are absolutely spectacular! The butter layers melted perfectly, creating that gorgeous flaky texture I've been trying to achieve for years. The whiskey-soaked fruits add such a sophisticated flavor profile.", "name": "Butter layers melted perfectly!", "reviewRating": { "@type": "Rating", "ratingValue": "5" } }, { "@type": "Review", "author": "François Lamarche", "datePublished": "2024-07-02", "reviewBody": "I was hesitant about the time investment, but these pastries are worth every minute spent folding that dough! The whiskey glaze is the perfect finishing touch - not too sweet and beautifully aromatic.", "name": "Worth every minute of folding!", "reviewRating": { "@type": "Rating", "ratingValue": "5" } }, { "@type": "Review", "author": "Akira Tanaka", "datePublished": "2024-07-01", "reviewBody": "I've tried many Danish recipes, but these are genuinely better than what I've purchased at high-end bakeries. The detailed instructions made the lamination process much less intimidating than I expected.", "name": "Better than bakery Danish!", "reviewRating": { "@type": "Rating", "ratingValue": "5" } }, { "@type": "Review", "author": "Priya Sharma", "datePublished": "2024-06-28", "reviewBody": "The whiskey flavor in these pastries is perfectly balanced - subtle enough for breakfast but divine enough to feel special. I used bourbon and the caramel notes paired beautifully with the dried apricots and cherries.", "name": "Whiskey flavor subtle but divine!", "reviewRating": { "@type": "Rating", "ratingValue": "5" } }, { "@type": "Review", "author": "Sven Andersson", "datePublished": "2024-06-25", "reviewBody": "Made these pastries twice already within one week! The first batch disappeared so quickly at our family brunch that I had to make more. The overnight fruit soaking really makes a difference - don't skip that step!", "name": "Made these twice already!", "reviewRating": { "@type": "Rating", "ratingValue": "5" } } ] }
{ "@context": "https://schema.org", "@type": "FAQPage", "mainEntity": [ { "@type": "Question", "name": "What ingredients are used in Whiskey-Soaked Dried Fruit Danish with Infused Glaze?", "acceptedAnswer": { "@type": "Answer", "text": "This Danish pastry uses mixed dried fruits soaked in whiskey, a laminated dough (flour, yeast, eggs, milk, butter), and a whiskey glaze made with powdered sugar, orange juice, vanilla and cinnamon. The secret is premium whiskey for both soaking and glazing." } }, { "@type": "Question", "name": "How to cook Whiskey-Soaked Dried Fruit Danish with Infused Glaze at home?", "acceptedAnswer": { "@type": "Answer", "text": "Learn how to cook Whiskey-Soaked Dried Fruit Danish by first soaking dried fruits in whiskey overnight, then creating a laminated dough through a series of folds. Shape the dough around the drained fruit filling, bake until golden brown (190°C for 20-25 minutes), and finish with a whiskey-infused glaze while still warm for that professional bakery finish." } }, { "@type": "Question", "name": "What's the secret to achieving perfectly flaky layers in Danish pastry?", "acceptedAnswer": { "@type": "Answer", "text": "The secret lies in proper lamination - keeping the butter cold throughout the folding process, ensuring precise turns, and allowing sufficient resting time between folds. Never rush the chilling stages, as they maintain butter's integrity. Roll with gentle, even pressure for consistent layers." } }, { "@type": "Question", "name": "Can I make this pastry without alcohol and still get good results?", "acceptedAnswer": { "@type": "Answer", "text": "Absolutely! Replace whiskey with apple juice, orange juice or strong tea for fruit soaking. For the glaze, use additional orange juice with a splash of vanilla. While you'll miss the distinctive whiskey notes, you'll still achieve delicious, moist fruit and a flavourful Danish pastry." } }, { "@type": "Question", "name": "How far in advance can I prepare components of this Danish pastry?", "acceptedAnswer": { "@type": "Answer", "text": "The fruit mixture can be prepared up to 3 days ahead and refrigerated. The laminated dough can be made 24-48 hours in advance and kept chilled. For the freshest results, bake the pastries on the day of serving, though they can be shaped and refrigerated overnight before the final proof." } } ] }