Weinerbrod (Traditional Danish) Recipe
Ingredients
Equipment
Directions
FAQs
Find answers to your most pressing questions about this delicious recipe right here.
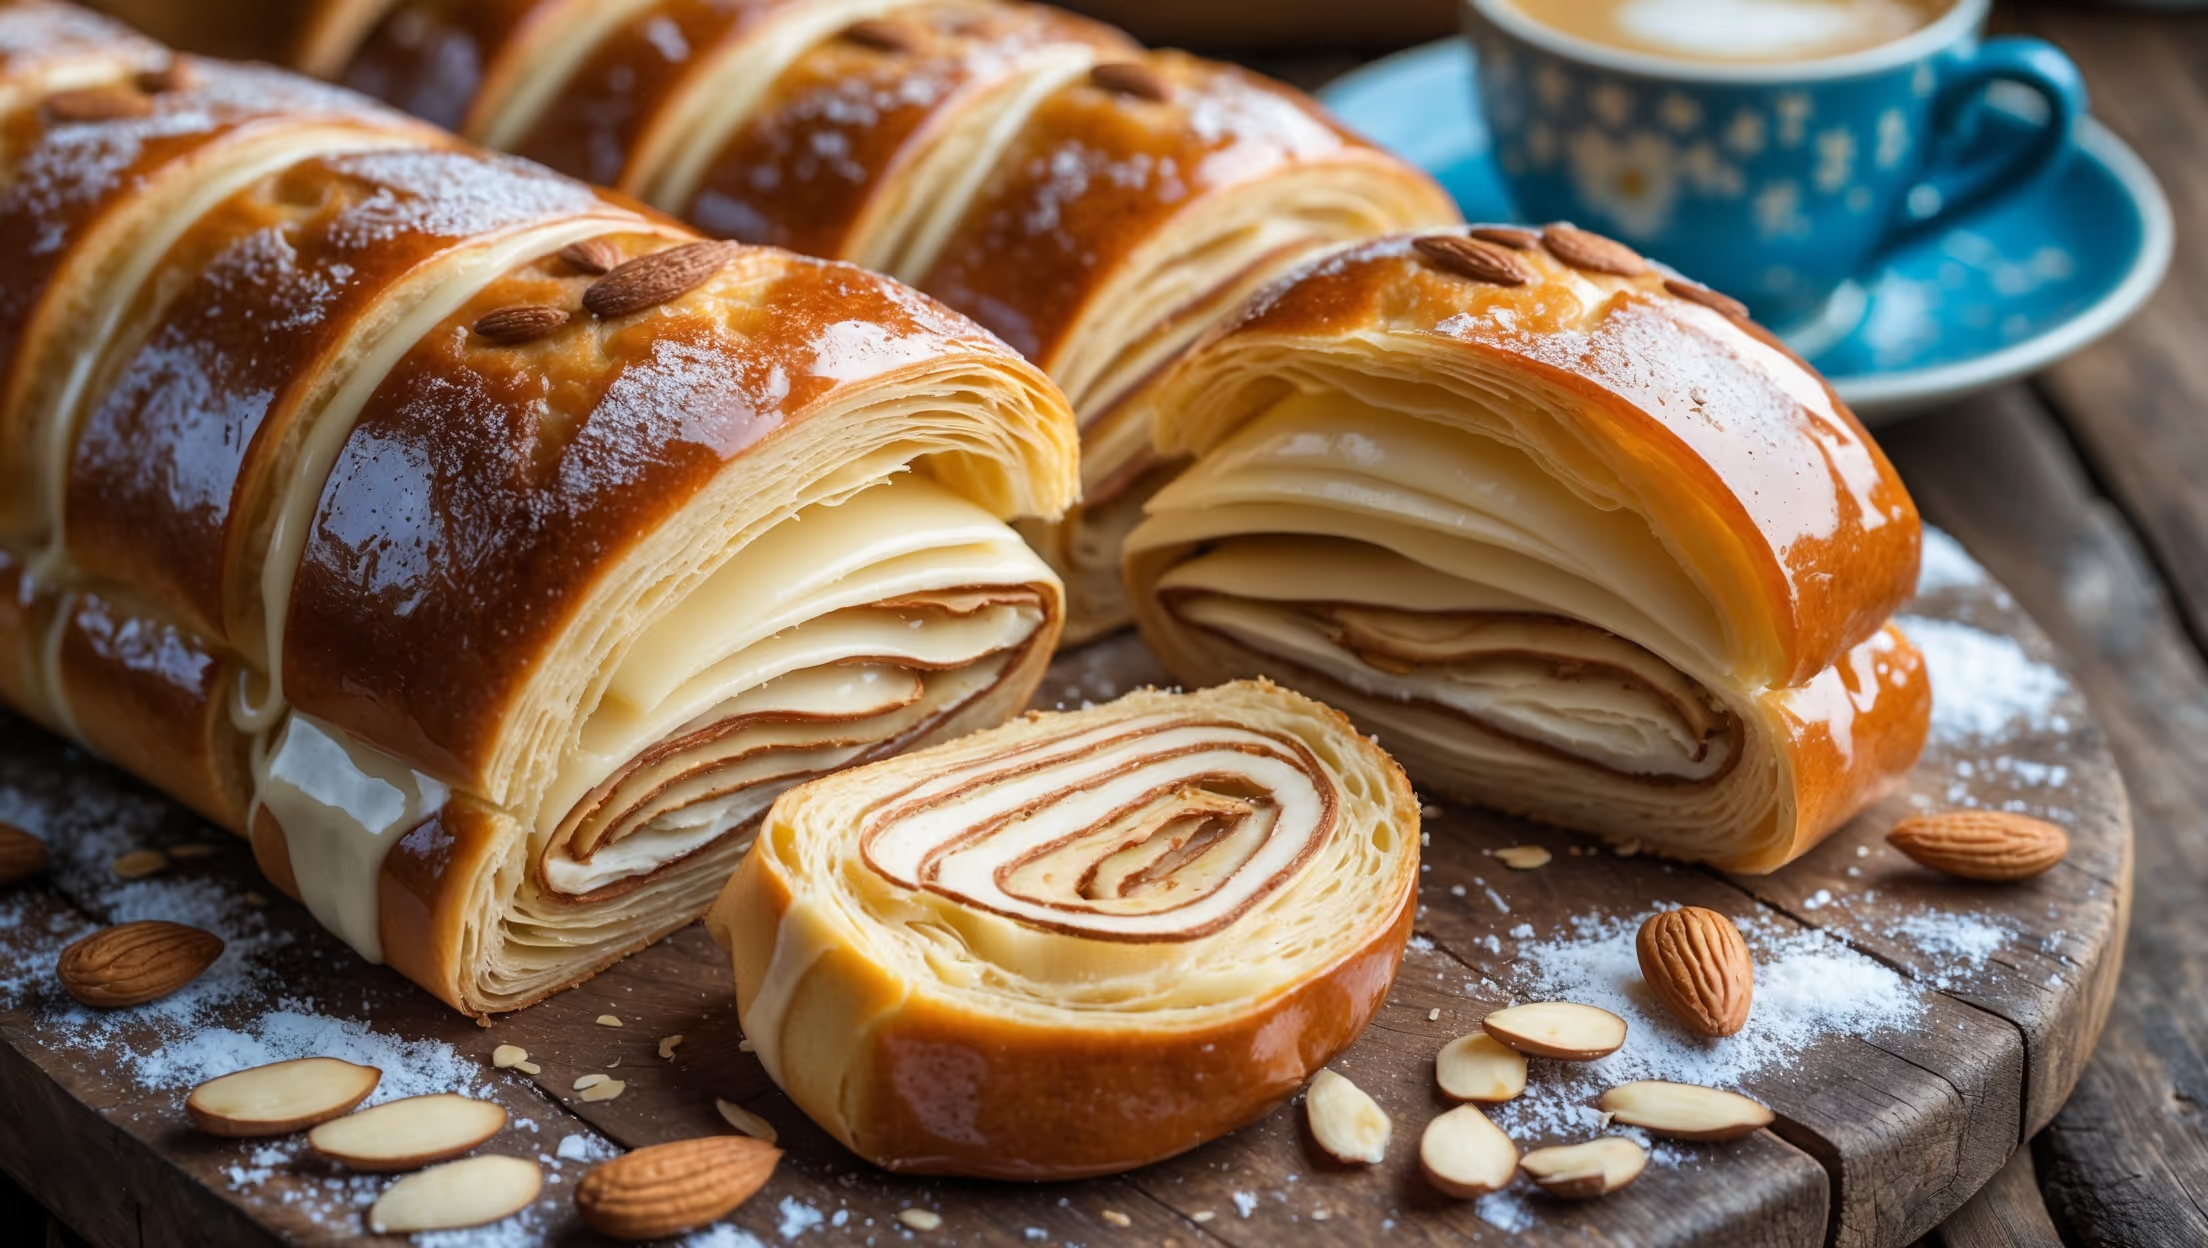
Authentic weinerbrod requires all-purpose flour, yeast, sugar, salt, eggs, milk, water, and cold butter for lamination. The filling uses almond paste, while the finish needs egg wash, sliced almonds and a simple vanilla glaze made from confectioners' sugar.
Learn how to cook Weinerbrod (Traditional Danish) by creating a laminated dough through multiple folding techniques that create delicate buttery layers. After shaping and filling with almond paste, the pastries are proofed until puffy, then baked at 190°C until deeply golden brown before finishing with a sweet vanilla glaze and sliced almonds.
Insufficient flakiness usually stems from butter melting into the dough rather than creating distinct layers. Keep ingredients cold throughout the process, allow proper resting time between folds, and make sure your final bake is long enough to fully develop those signature crisp, shattered layers.
While both are laminated doughs, Danish pastry contains eggs and more sugar, resulting in a richer, slightly sweeter dough with a tender interior. Croissant dough is leaner with a more pronounced butter flavour and crispier texture. Danish pastry is also typically filled, while croissants are often plain.
Yes, laminated dough freezes excellently! After completing all folds, wrap tightly in plastic wrap and freeze for up to 3 months. Thaw overnight in the refrigerator before rolling, shaping and proofing. This makes weekday morning pastries much more accessible with weekend prep.
Danish Pastry
Try following recommended recipes


