Weinerbrod (Traditional Danish) Recipe
Ingredients
Equipment
Directions
FAQs
Find answers to your most pressing questions about this delicious recipe right here.
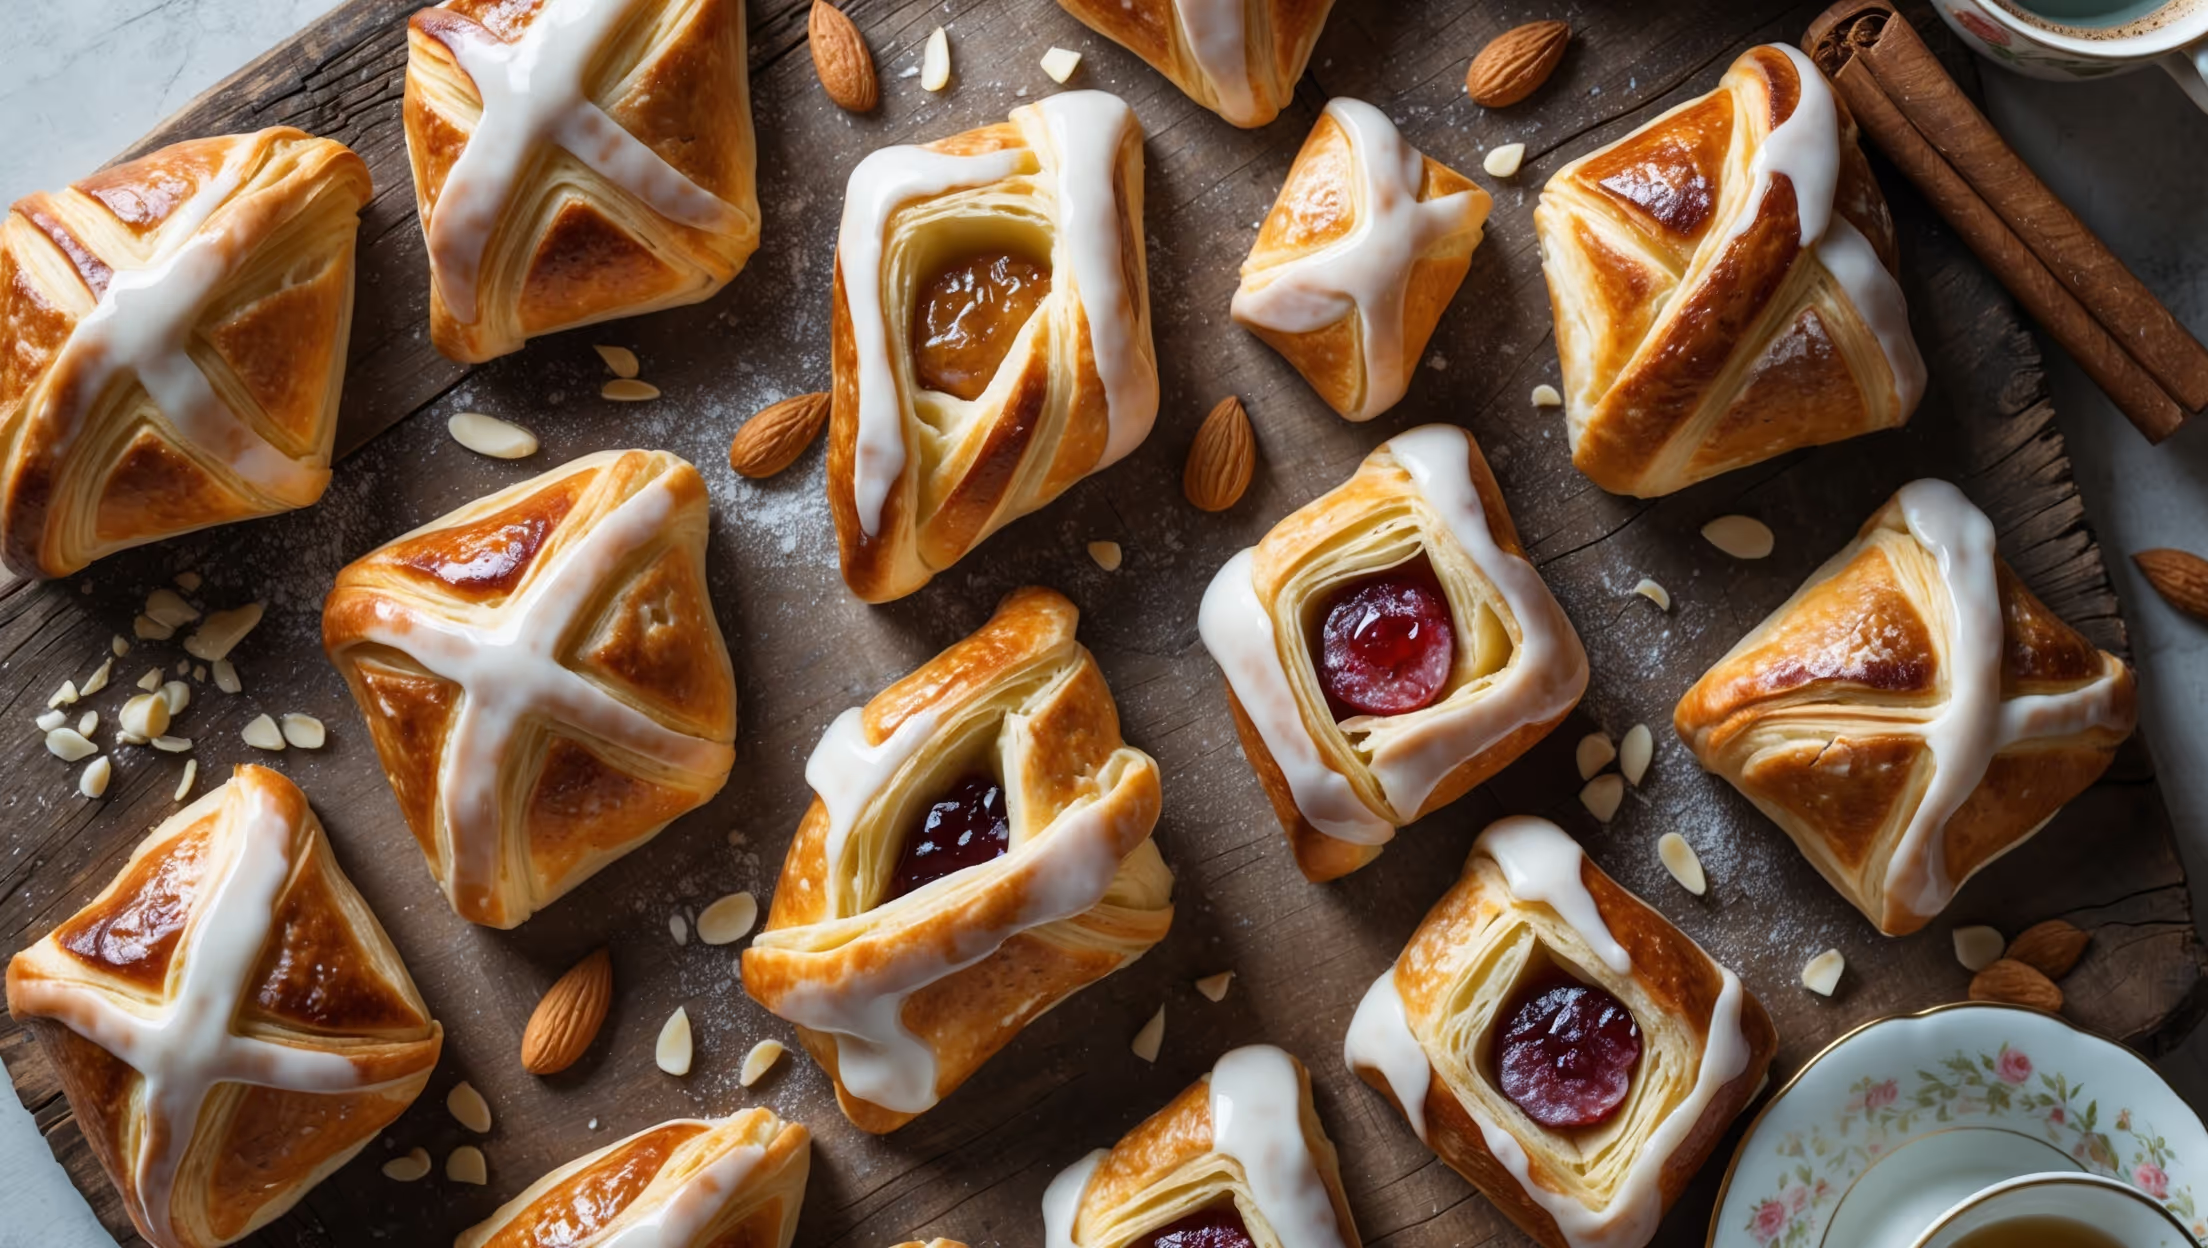
Traditional weinerbrod requires strong bread flour, yeast, butter, eggs, sugar, cardamom and salt for the laminated dough. Fillings include almond paste (marzipan), custard, or fruit preserves, while toppings feature sliced almonds and a simple glaze made with powdered sugar.
Learn how to cook Weinerbrod (Traditional Danish) by making a cardamom-spiced dough, creating proper butter lamination through a series of folds, and shaping into distinctive Danish pastry forms. After proofing, bake at 200°C for 15-20 minutes until golden brown, then finish with a sweet vanilla glaze while still warm for that authentic bakery finish.
Lamination creates the characteristic flaky layers that define Danish pastries. The process of folding butter between dough layers produces steam during baking, pushing the layers apart and creating the airy, delicate texture that's crisp on the outside and tender inside - the hallmark of quality weinerbrod.
Yes, Danish pastry dough benefits from advance preparation. After completing the lamination process, you can refrigerate the dough for up to 48 hours or freeze it for up to a month. This rest period actually enhances flavour development while making the baking process more convenient.
While both use laminated dough, weinerbrod typically contains eggs, milk, and cardamom, making the dough richer and slightly sweeter than croissants. Danish pastries also feature distinctive shapes and fillings like marzipan or custard, whereas croissants are usually plain or chocolate-filled.
Danish Pastry
Try following recommended recipes


