Vanilla Cream Danish Recipe
Ingredients
Equipment
Directions
FAQs
Find answers to your most pressing questions about this delicious recipe right here.
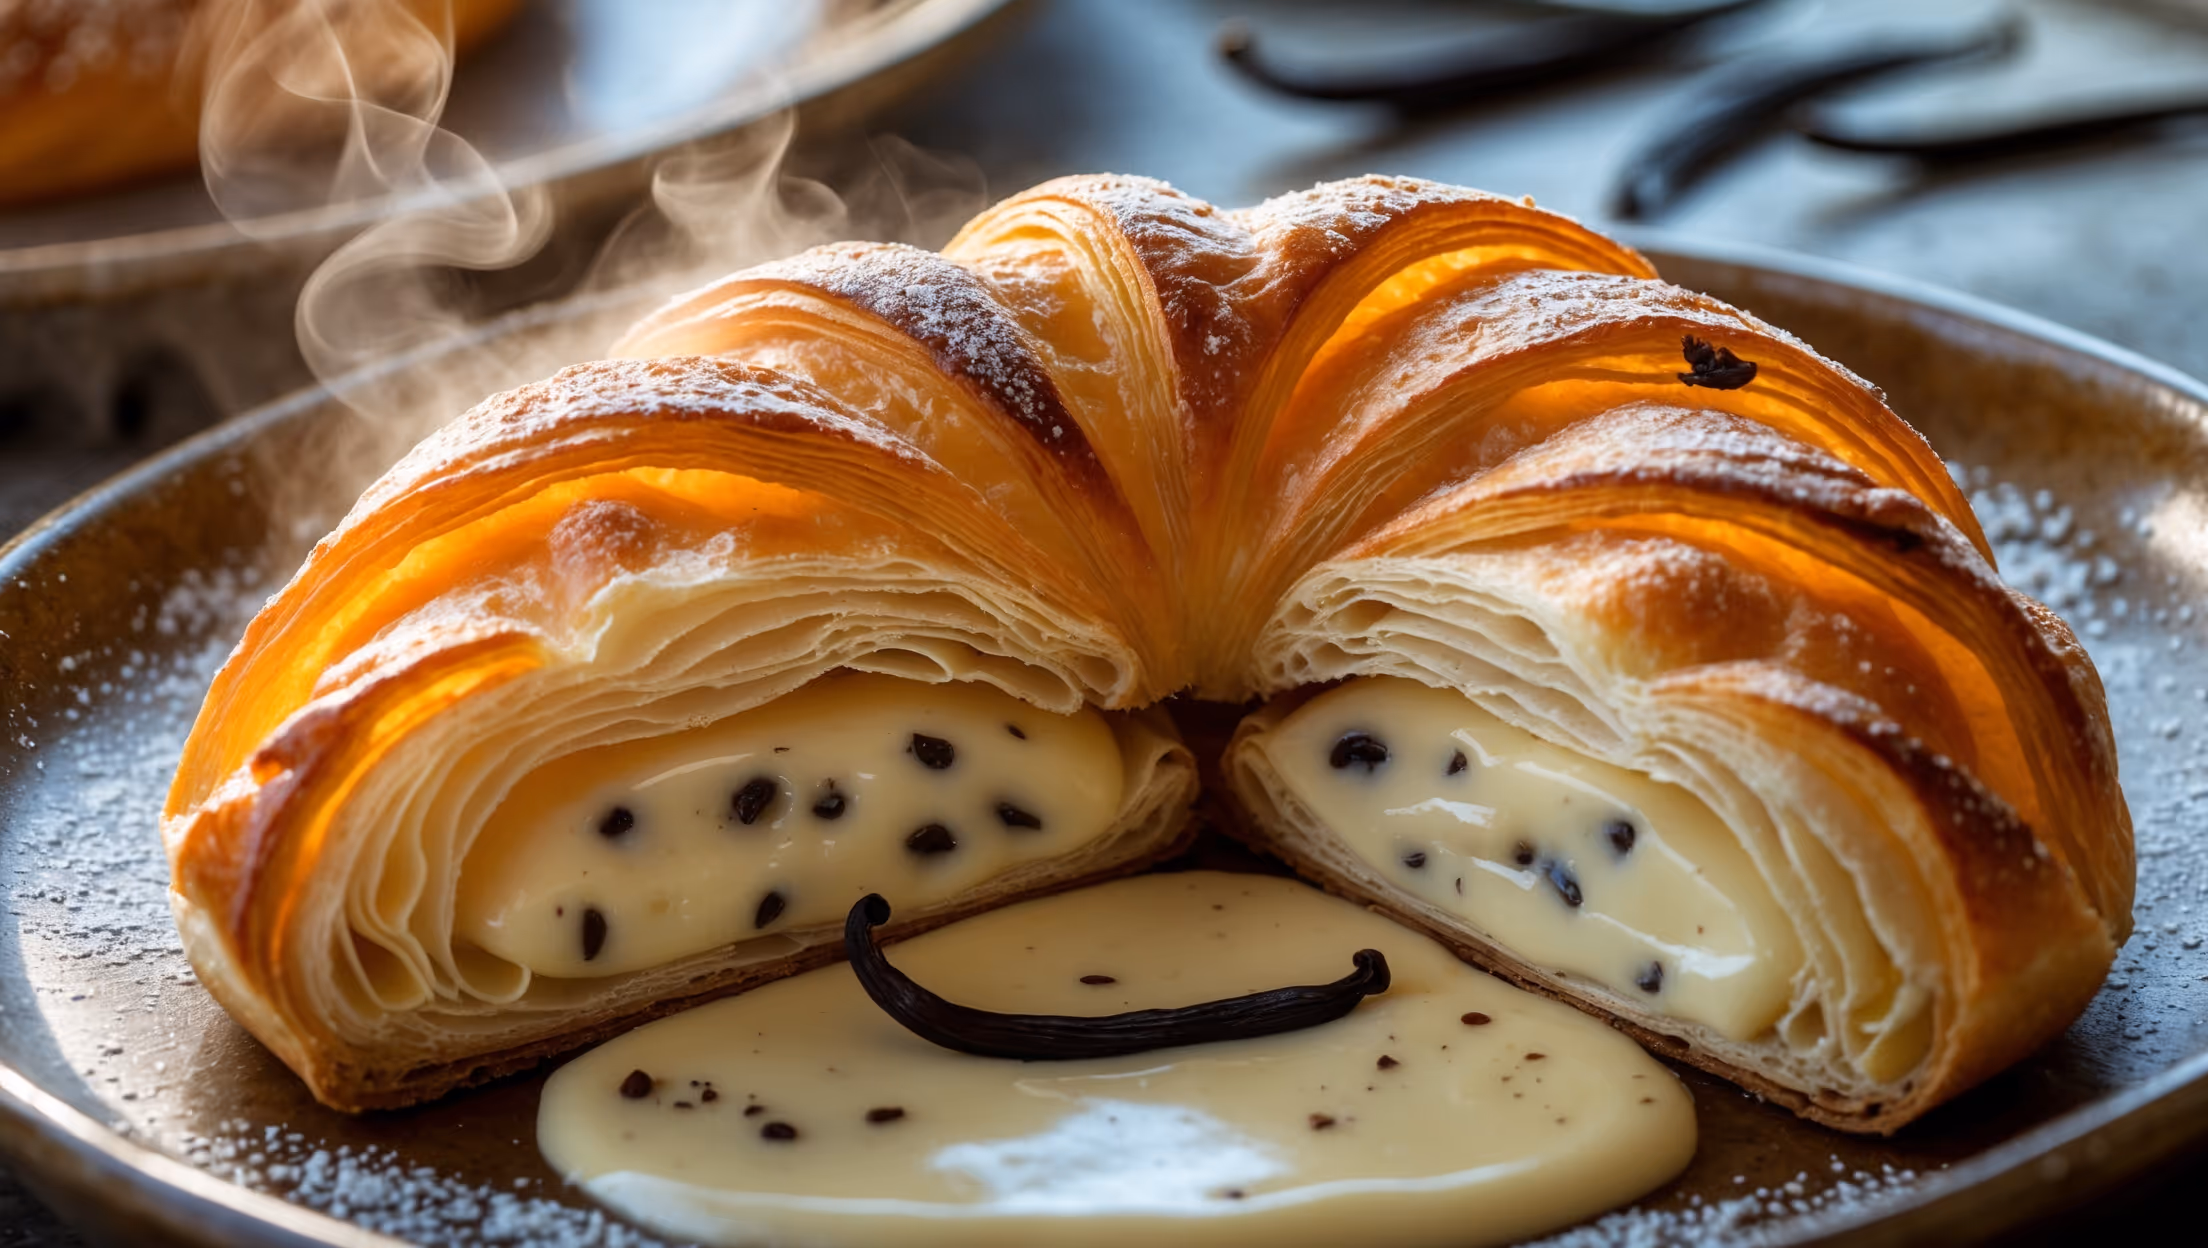
Vanilla Cream Danish requires all-purpose flour, instant yeast, sugar, salt, milk, eggs, vanilla extract, butter for lamination, plus whole milk, vanilla bean, sugar, cornstarch, egg yolks, butter and salt for the cream filling. A simple glaze is made with powdered sugar, milk and vanilla.
Learn how to cook Vanilla Cream Danish by first preparing a rich vanilla custard, then making a laminated dough through a series of folds with butter. After shaping the Danish with custard in the centre, proof until puffy, then bake at 190°C for 18-20 minutes until golden brown. Finish with a simple vanilla glaze while still warm for that professional bakery finish.
Yes, you can make Danish pastry dough by hand. Mix ingredients in a bowl with a wooden spoon, then knead on a floured surface for 8-10 minutes until smooth and elastic. The process takes more effort but many bakers prefer the tactile control of hand-kneading for laminated doughs.
The secret to flaky Danish pastry is keeping the butter cold but pliable during lamination, maintaining sharp folds, and allowing proper rest periods between turns. Temperature control is crucial – butter should never melt into the dough, as distinct layers create that signature honeycomb texture.
Properly proofed Danish pastries should look visibly puffy and increased in size by about 50%. When gently pressed with a fingertip, the dough should spring back slowly but not completely. If it springs back immediately, it needs more proofing time; if it doesn't spring back at all, it's overproofed.
Danish Pastry
Try following recommended recipes


