Spiced Apple Danish Recipe
Ingredients
Equipment
Directions
FAQs
Find answers to your most pressing questions about this delicious recipe right here.
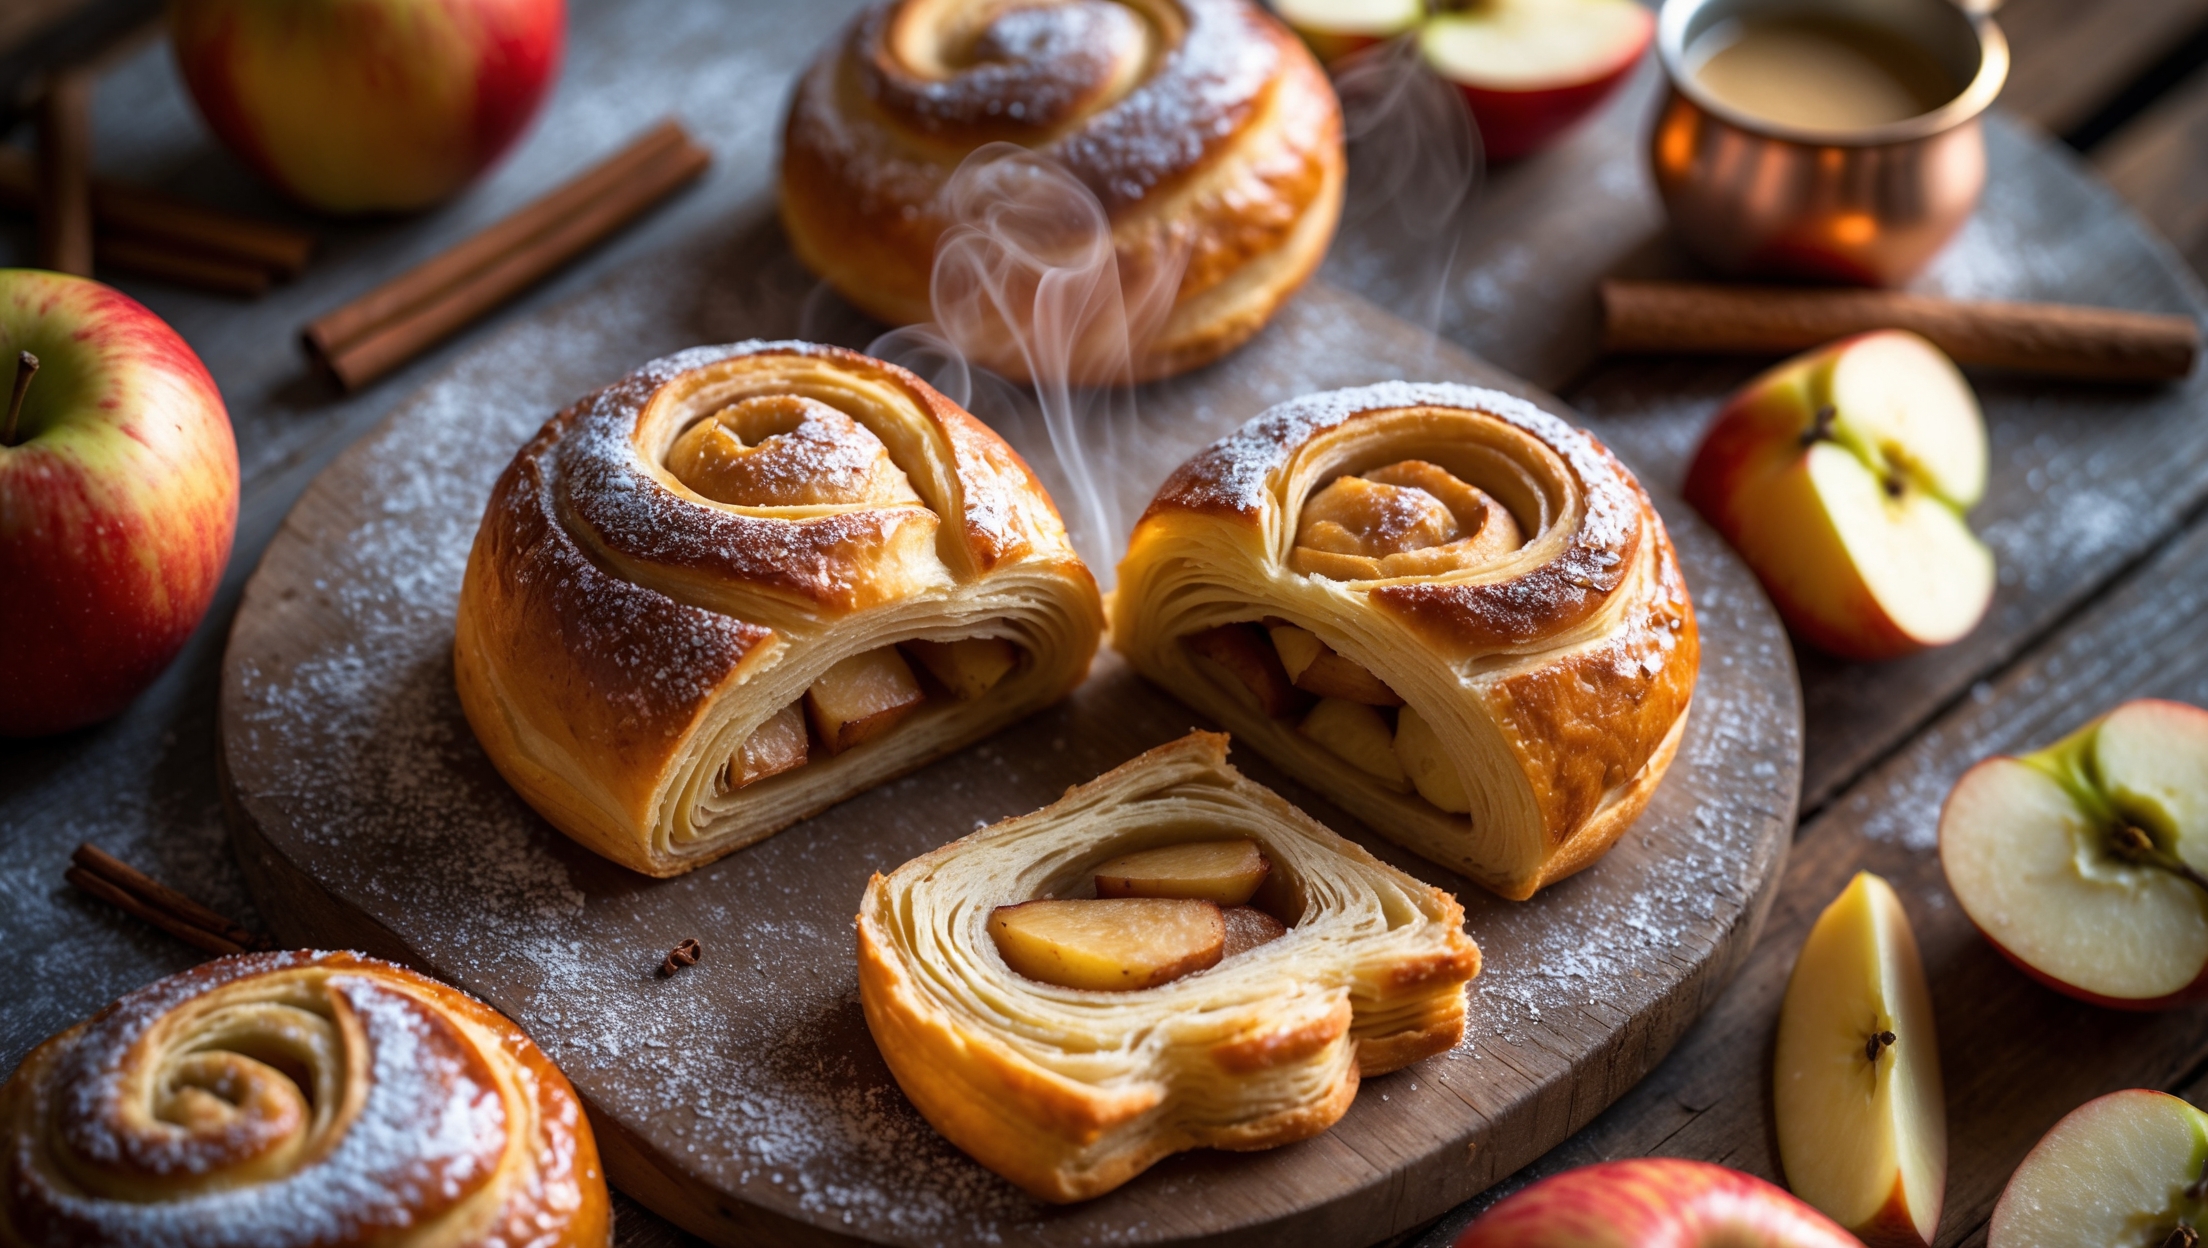
The key ingredients in this pastry include all-purpose flour, yeast, cold butter for lamination, Granny Smith or Braeburn apples, brown sugar, warming spices (cinnamon, nutmeg, cardamom), cornstarch for thickening, and powdered sugar for the glaze.
Learn how to cook Spiced Apple Danish Recipe by making a laminated dough through multiple folding processes, preparing a spiced apple filling, shaping the pastries, and baking at 190°C until golden brown. The technique creates flaky, buttery layers with perfectly cooked apple filling nestled inside each pastry.
The key is proper lamination - keeping the butter cold but pliable between dough layers, executing multiple folds with sufficient chilling time between each turn, and ensuring the final dough is rolled to the correct thickness before shaping and proofing.
Absolutely! The laminated dough can be prepared up to 3 days in advance and kept refrigerated. You can even freeze it for up to 1 month - simply thaw overnight in the refrigerator before rolling, shaping, and baking for fresh pastries.
Firm, tart apples like Granny Smith, Braeburn, or Honeycrisp work best as they hold their shape during cooking and provide a balanced sweet-tart flavour. Avoid softer varieties like McIntosh or Red Delicious which can break down too much during baking.
Danish Pastry
Try following recommended recipes


