Raspberry Danish Recipe
Ingredients
Equipment
Directions
FAQs
Find answers to your most pressing questions about this delicious recipe right here.
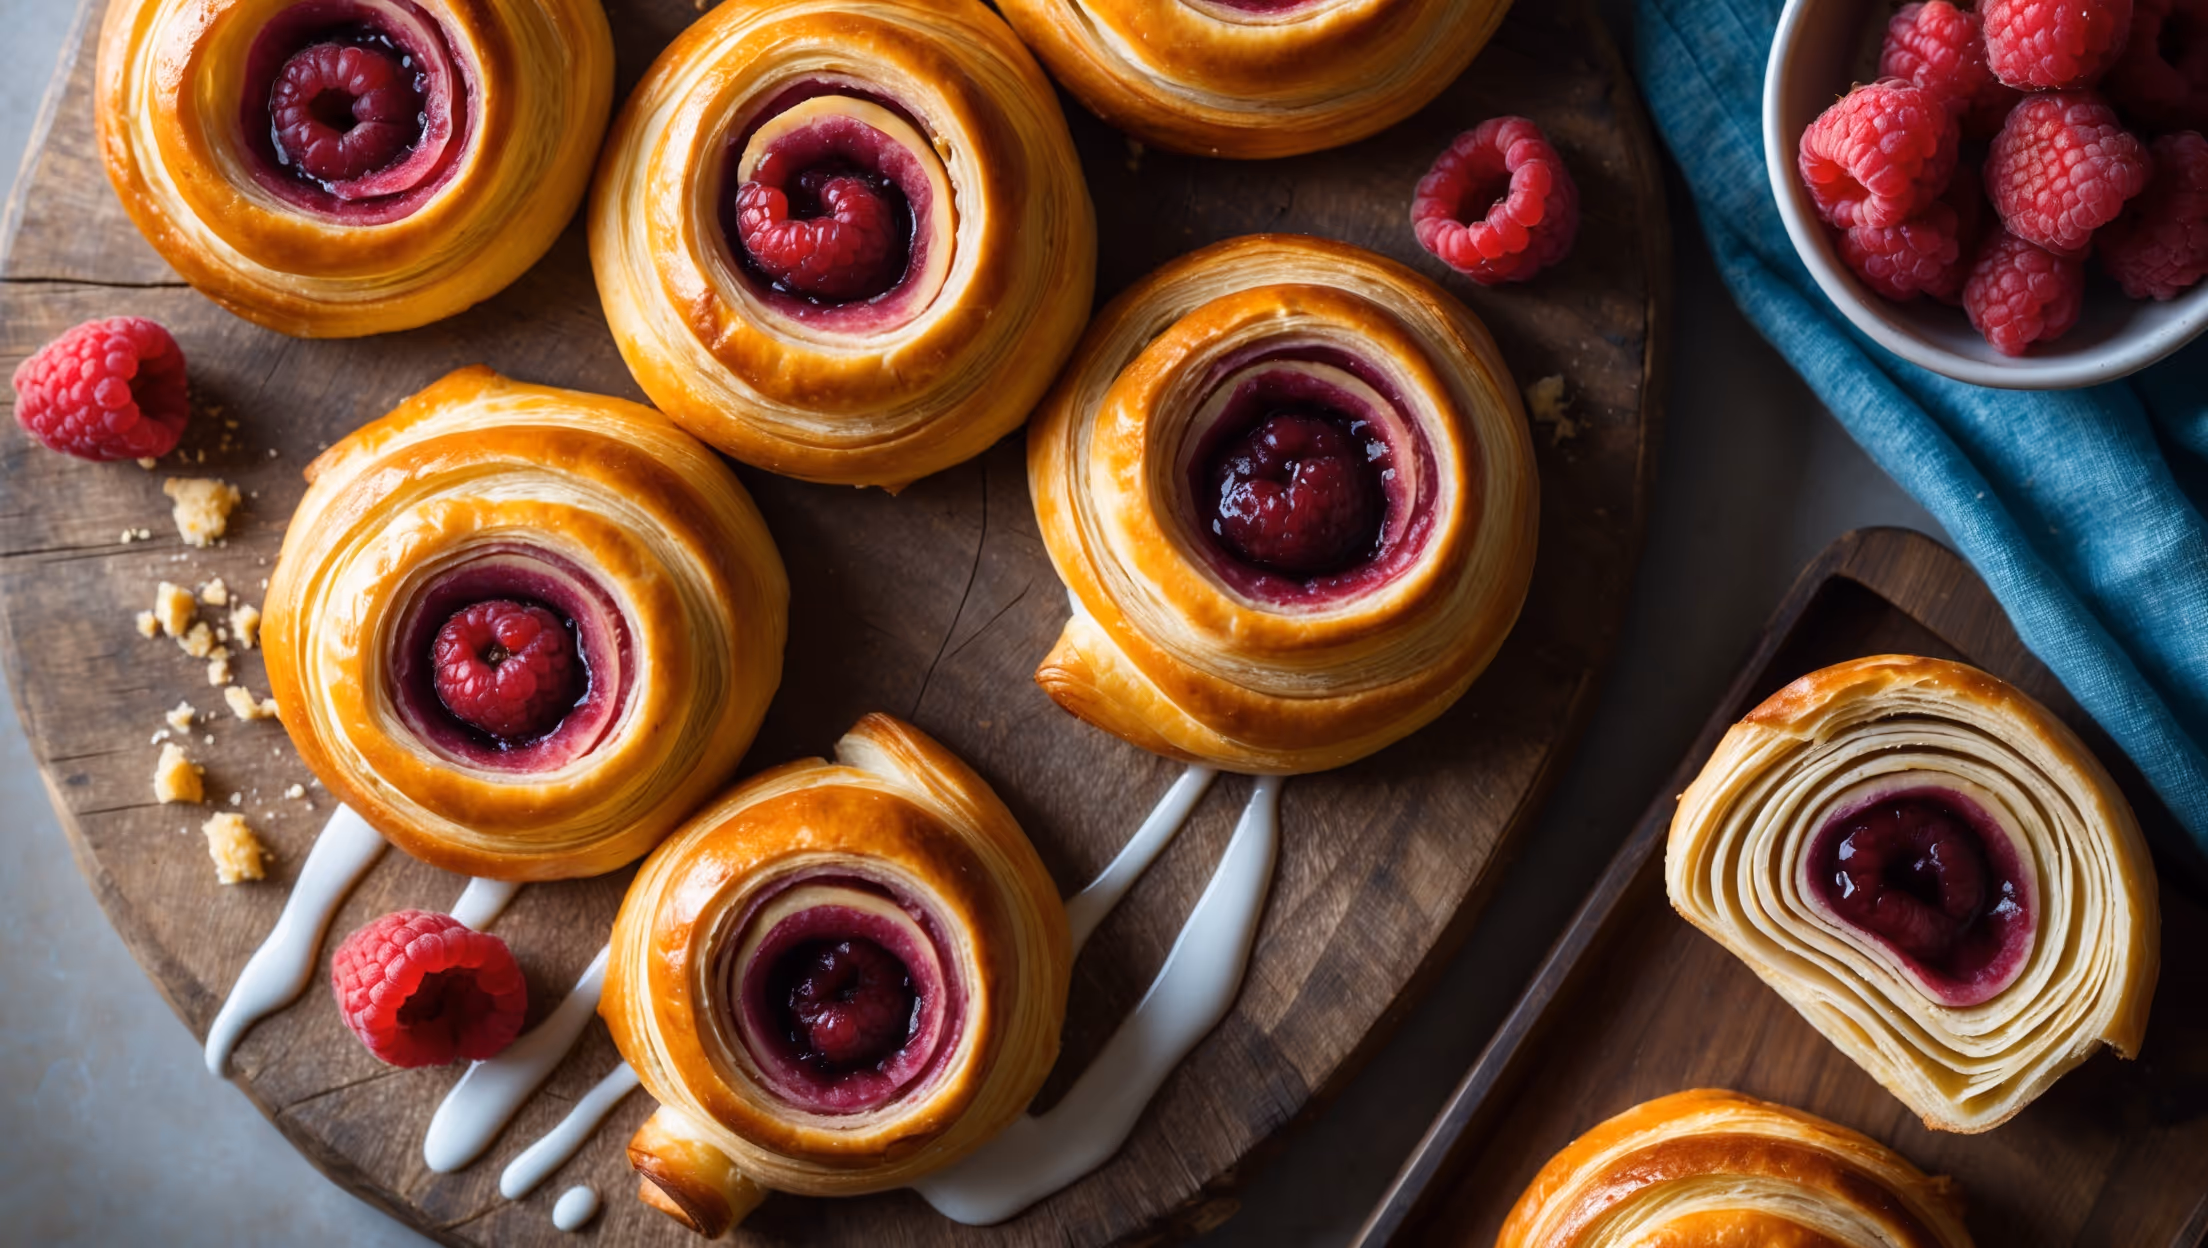
Key ingredients include all-purpose flour, active dry yeast, sugar, salt, milk, eggs, vanilla, butter for lamination, raspberry preserves, and fresh raspberries. The glaze requires powdered sugar, milk, and vanilla extract for that perfect finishing touch.
Learn how to cook Raspberry Danish by creating laminated dough through a series of folds that create buttery layers. After shaping the dough into spirals with raspberry filling, proof until puffy, then bake at 190°C for 18-20 minutes until golden brown. Finish with a drizzle of vanilla glaze while still warm.
The secret to perfect Danish pastry layers is proper temperature control. Keep the butter cold but pliable, rest the dough between folds, and maintain straight edges when rolling. The letter folds create distinct layers, while the extended mixing develops the gluten needed for structure.
Yes, you can freeze unbaked Danish pastries after shaping but before proofing. Place them on a baking sheet until frozen solid, then transfer to airtight containers. When ready to bake, thaw overnight in the refrigerator, then proof and bake as directed.
Properly laminated Danish pastry should have visible striations (alternating butter and dough) when you cut the dough. During baking, the pastry should rise evenly with distinct separation between layers. The baked exterior should be crisp and flaky, while the interior remains tender.
Danish Pastry
Try following recommended recipes


