Pear Danish Recipe
Ingredients
Equipment
Directions
FAQs
Find answers to your most pressing questions about this delicious recipe right here.
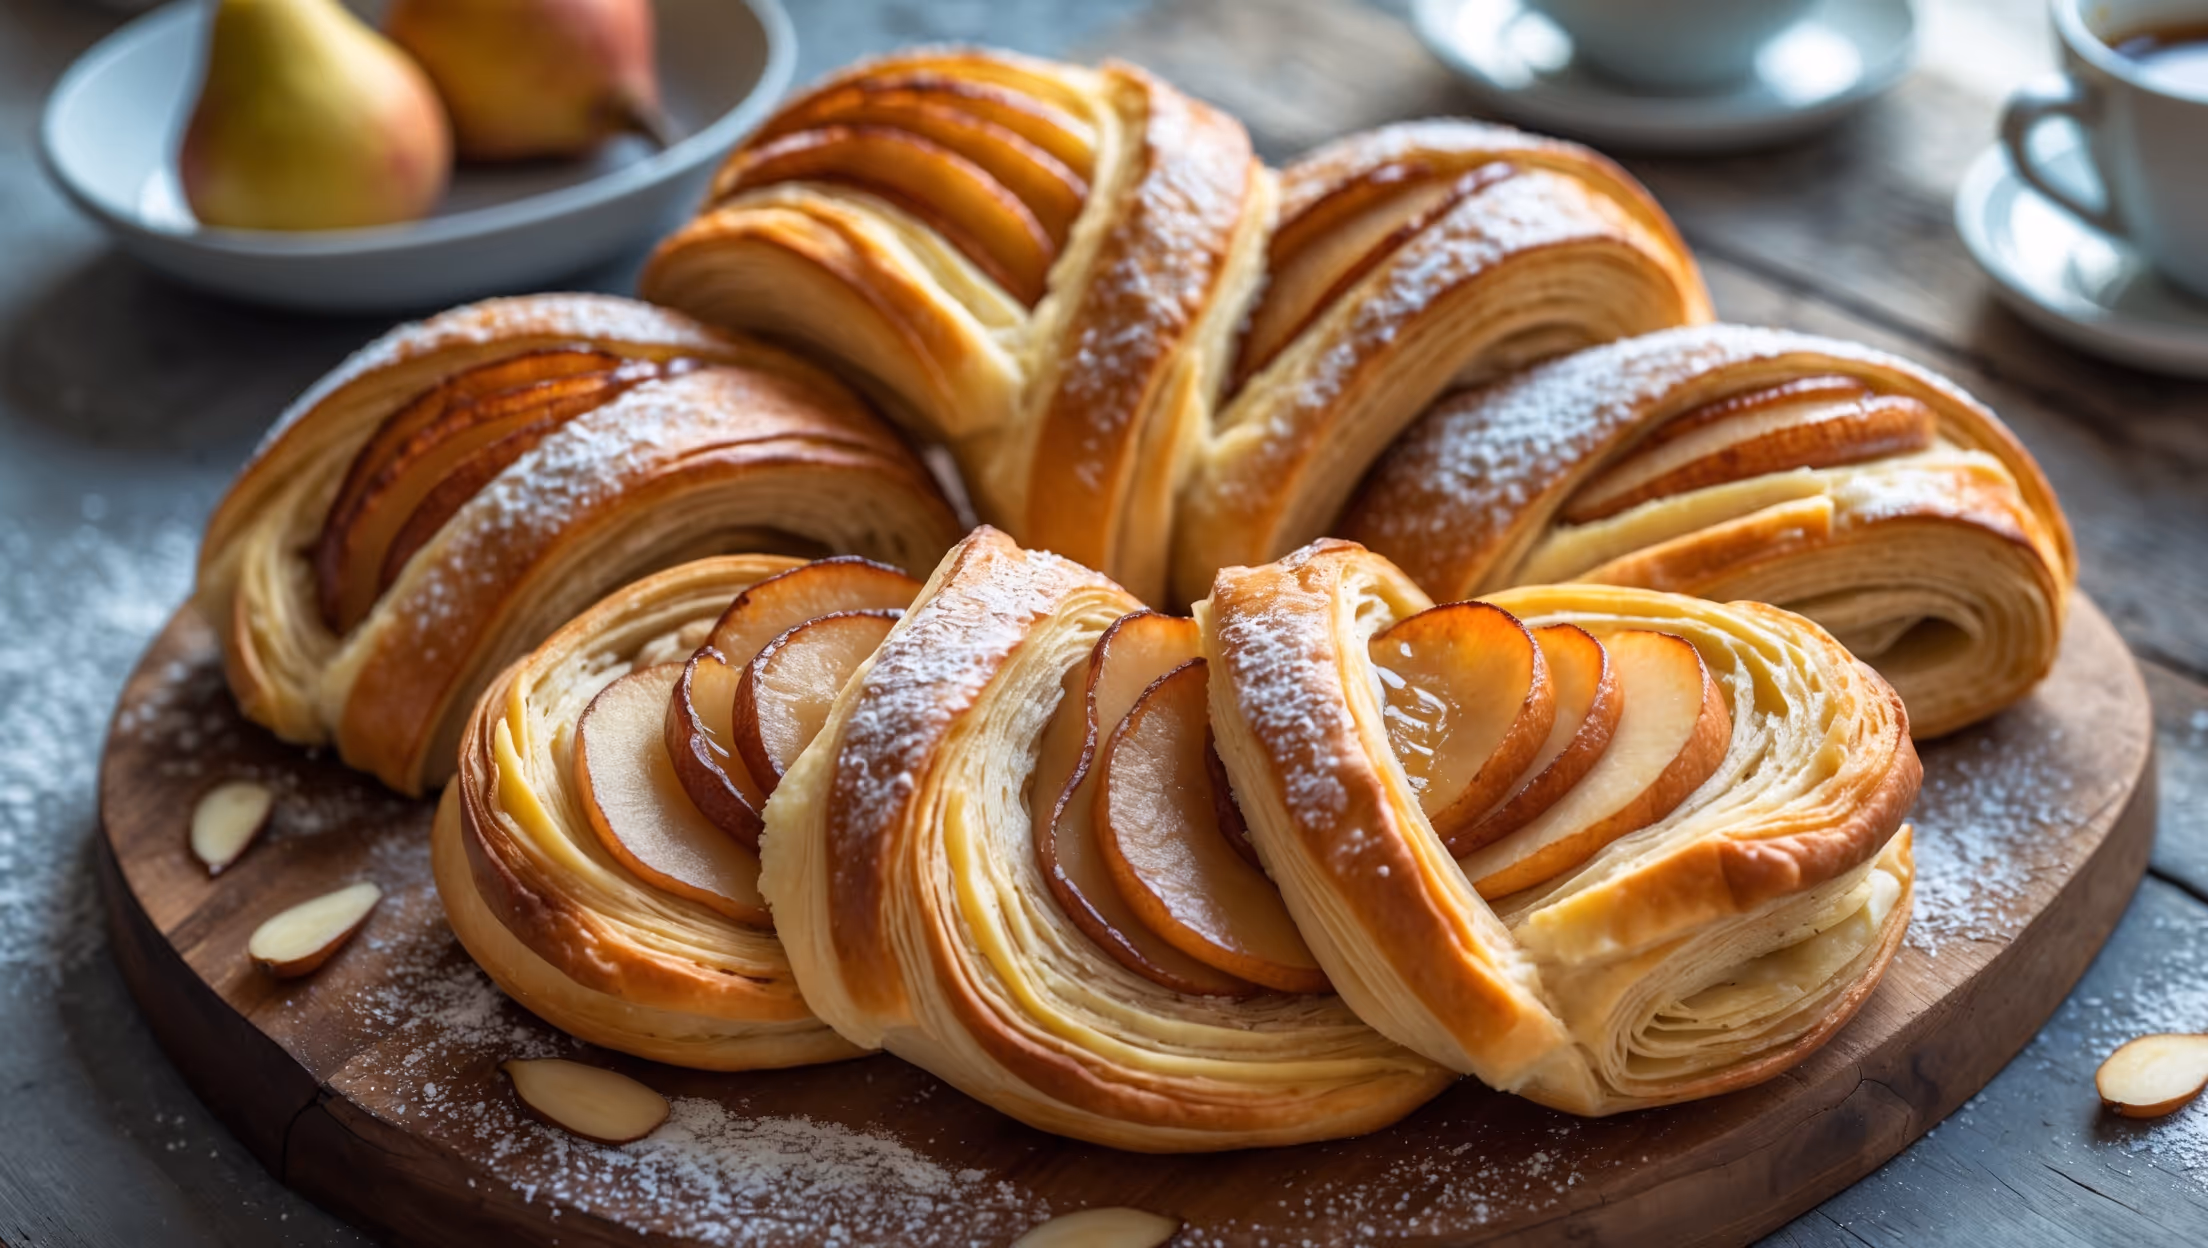
Pear Danish uses all-purpose flour, yeast, cold butter for lamination, ripe pears, sugar, cinnamon, eggs, milk, vanilla extract, and almonds. The glaze requires powdered sugar, milk, and almond extract for a professional finishing touch.
Learn how to cook Pear Danish Recipe by creating a laminated dough through a series of folds with cold butter, then shaping portions around sweetened pear slices. After brushing with egg wash and sprinkling with almonds, bake at 190°C for 18-20 minutes until golden brown, then finish with an almond glaze.
Properly laminated dough should have distinct layers of butter and dough when cut. After baking, you'll see clear separation between flaky layers. During rolling, the dough should feel smooth without butter breaking through, and should maintain a rectangle shape without shrinking back.
Bosc or Anjou pears work best as they hold their shape during baking without becoming mushy. Choose firm but ripe pears that yield slightly to pressure. Bartlett pears can work too, but may need to be slightly underripe to prevent them from becoming too soft.
Yes! The laminated dough can be refrigerated for up to 3 days or frozen for up to 1 month. If freezing, thaw overnight in the refrigerator before using. This make-ahead option is perfect for weekend baking or preparing for special breakfast occasions.
Danish Pastry
Try following recommended recipes


