Nutella Danish Recipe
Ingredients
Equipment
Directions
FAQs
Find answers to your most pressing questions about this delicious recipe right here.
The ingredients include strong bread flour, salt, sugar, yeast, milk, eggs, vanilla extract, cold unsalted butter for lamination, Nutella for filling, egg wash, optional chopped hazelnuts, and powdered sugar for dusting.
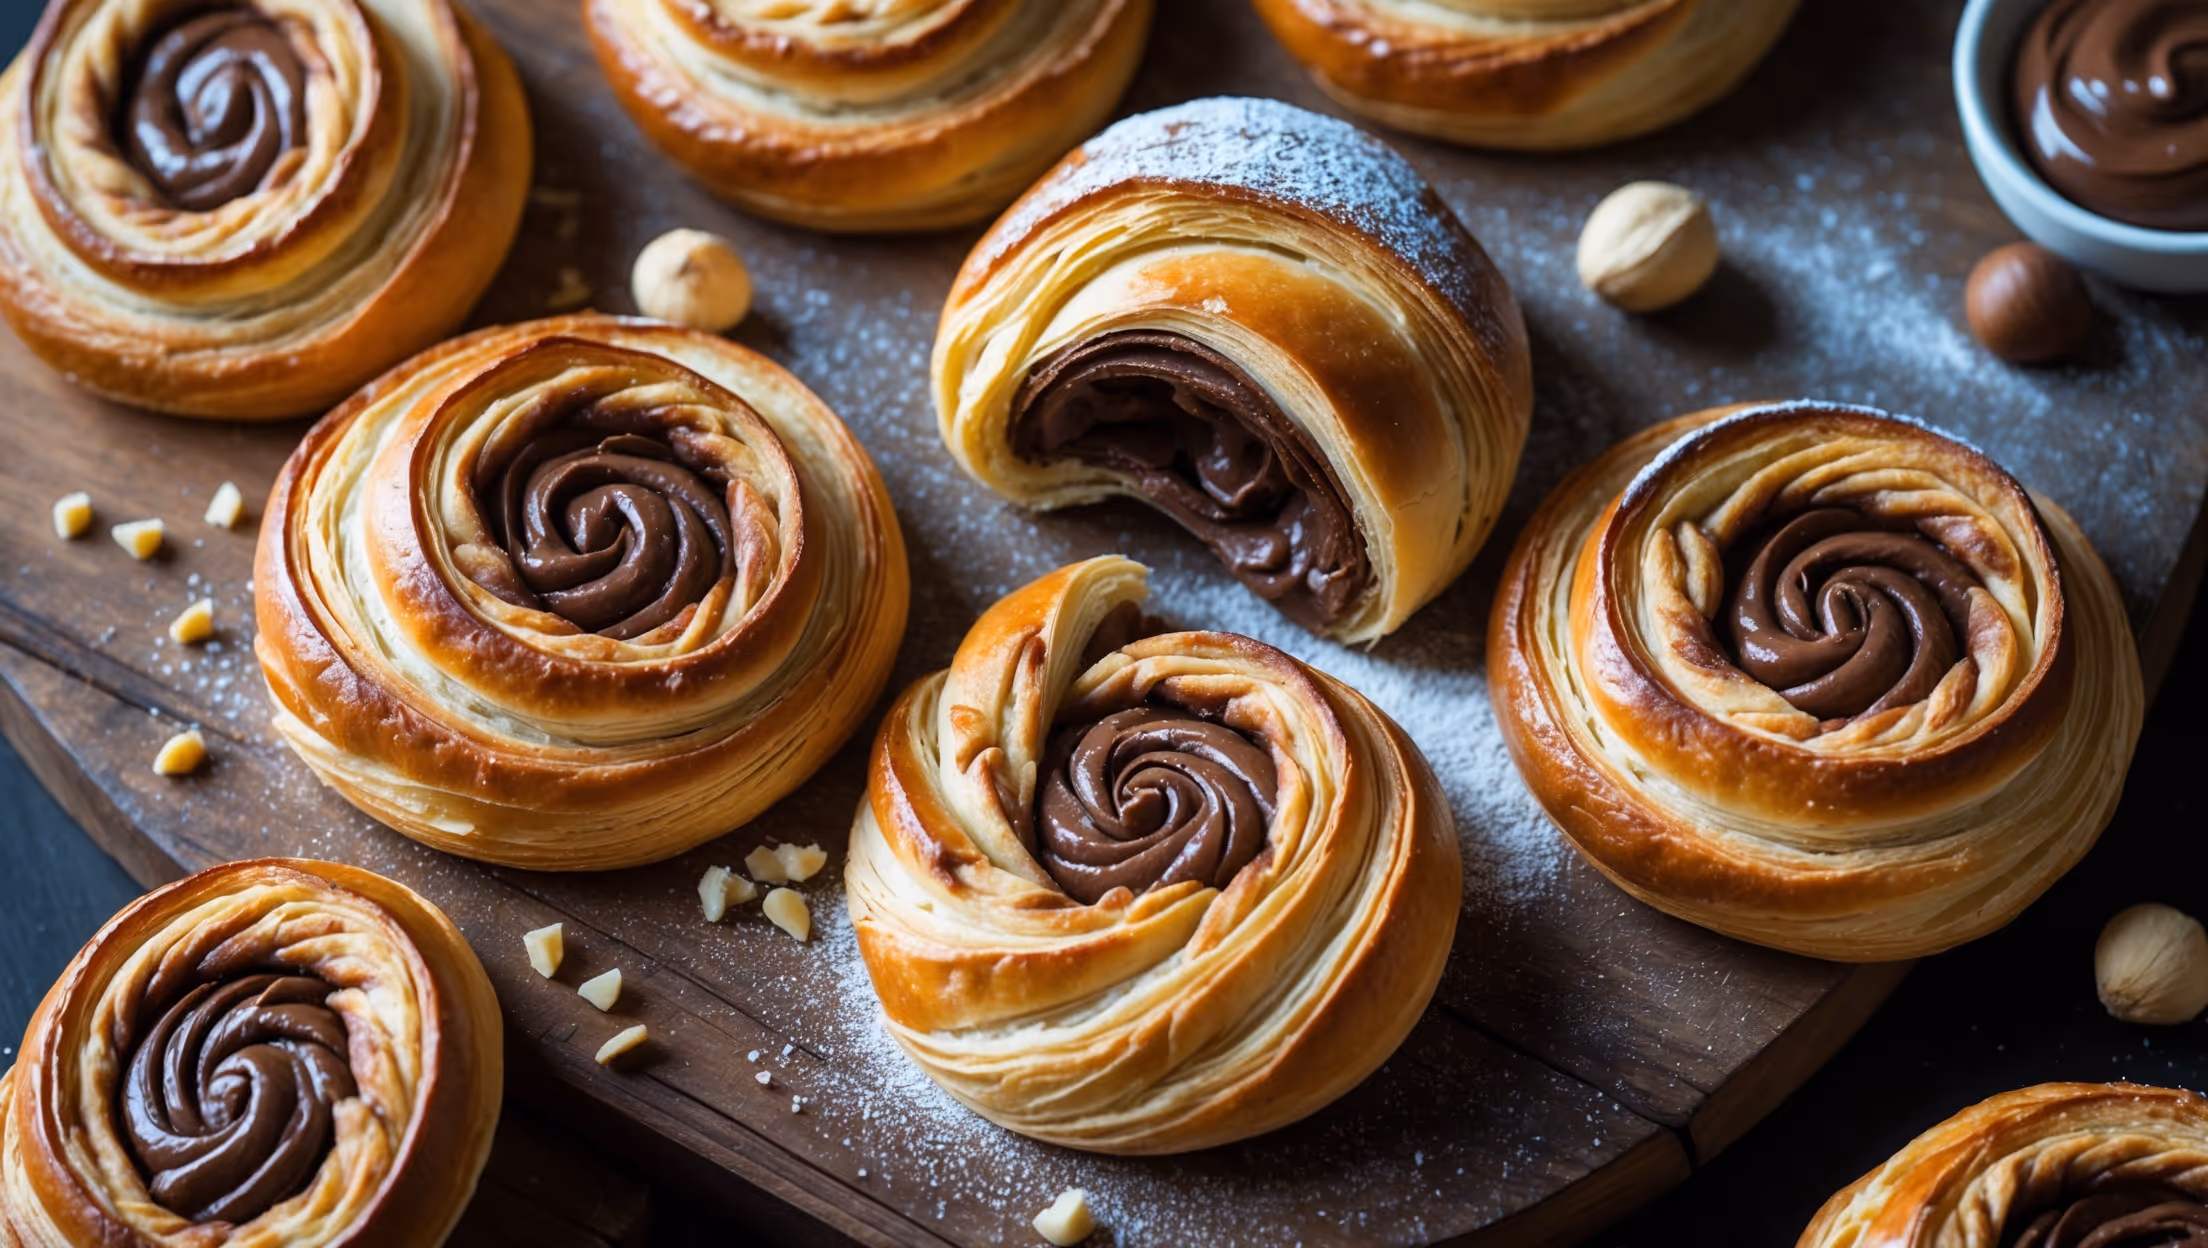
Learn how to cook Nutella Danish Recipe by creating a yeasted dough, properly laminating it with butter to create flaky layers, spreading Nutella over the rolled dough, shaping into spirals, and baking until golden brown. The key is properly chilling the dough between folds to maintain distinct butter layers.
Danish pastry stands out with its laminated dough—multiple layers of butter folded between dough that create a distinctly flaky, light texture. Unlike croissants, Danishes typically contain eggs in the dough, making them richer, and they're traditionally shaped into various forms with sweet fillings.
Perfect lamination requires maintaining cold butter throughout the process—chill the dough between folds, work on cool surfaces, and keep movements precise. The butter should remain solid yet pliable, creating distinct layers that will puff and separate during baking for that signature flaky texture.
Yes, laminated dough benefits from make-ahead preparation! After completing all folding turns, you can refrigerate it for up to 3 days or freeze for up to 3 months. This not only saves time but often improves flavour development and makes the dough easier to handle.
Danish Pastry
Try following recommended recipes


