Mocha Danish Recipe
Ingredients
Equipment
Directions
FAQs
Find answers to your most pressing questions about this delicious recipe right here.
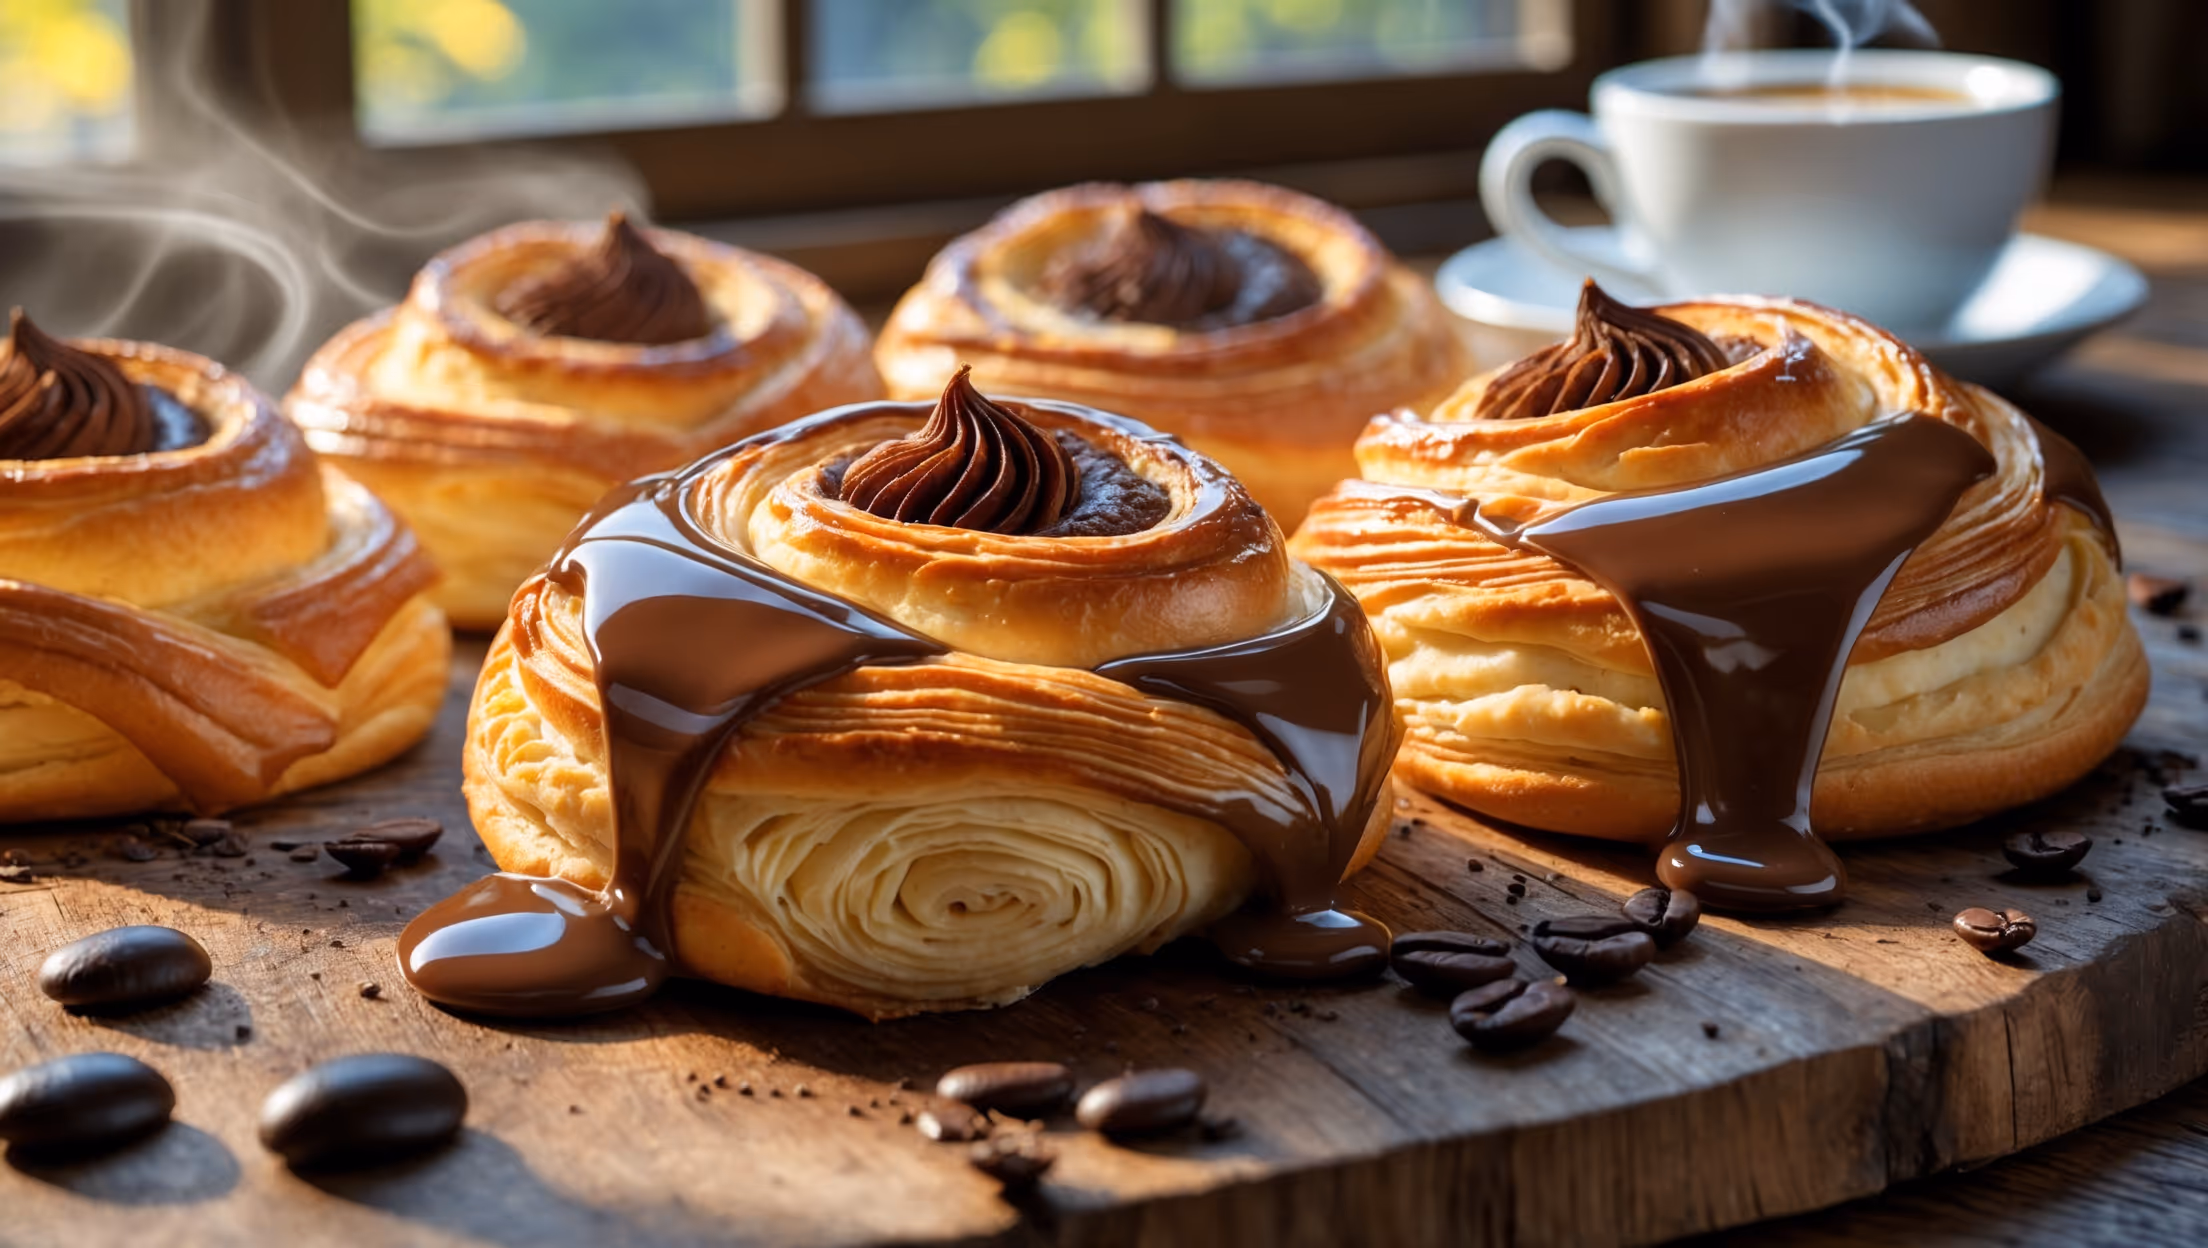
The key ingredients include bread flour, yeast, coffee, dark chocolate, cocoa powder, and butter for lamination. The filling combines dark chocolate, espresso, and cocoa, while the mocha glaze uses icing sugar, espresso, cocoa powder, and butter.
Learn how to cook Mocha Danish Recipe by mastering the art of laminated dough. Create a coffee-infused dough, fold in butter through multiple chilling and folding stages, prepare a rich chocolate-espresso filling, shape into pastries, and finish with a glossy mocha glaze for professional-quality Danish pastries.
Lamination is the process of creating alternating layers of dough and butter by folding and rolling repeatedly. It's crucial for Danish pastries as these layers create the characteristic flaky texture when baked—the butter creates steam that pushes the dough apart for a light, crisp finish.
Yes, you can prepare the dough up to 3 days ahead and refrigerate it, or freeze for up to a month. Alternatively, shape and freeze unbaked pastries, then thaw overnight before proofing and baking. Baked Danishes freeze well for up to 3 months—just warm before serving.
This happens when the gluten is overworked or hasn't rested enough. Ensure you're chilling the dough between folds (at least 30 minutes), not applying excessive pressure when rolling, and using cold but pliable butter to achieve the perfect consistency for lamination.
Danish Pastry
Try following recommended recipes


