Kanelstang (Cinnamon Stick) Recipe
Ingredients
Equipment
Directions
FAQs
Find answers to your most pressing questions about this delicious recipe right here.
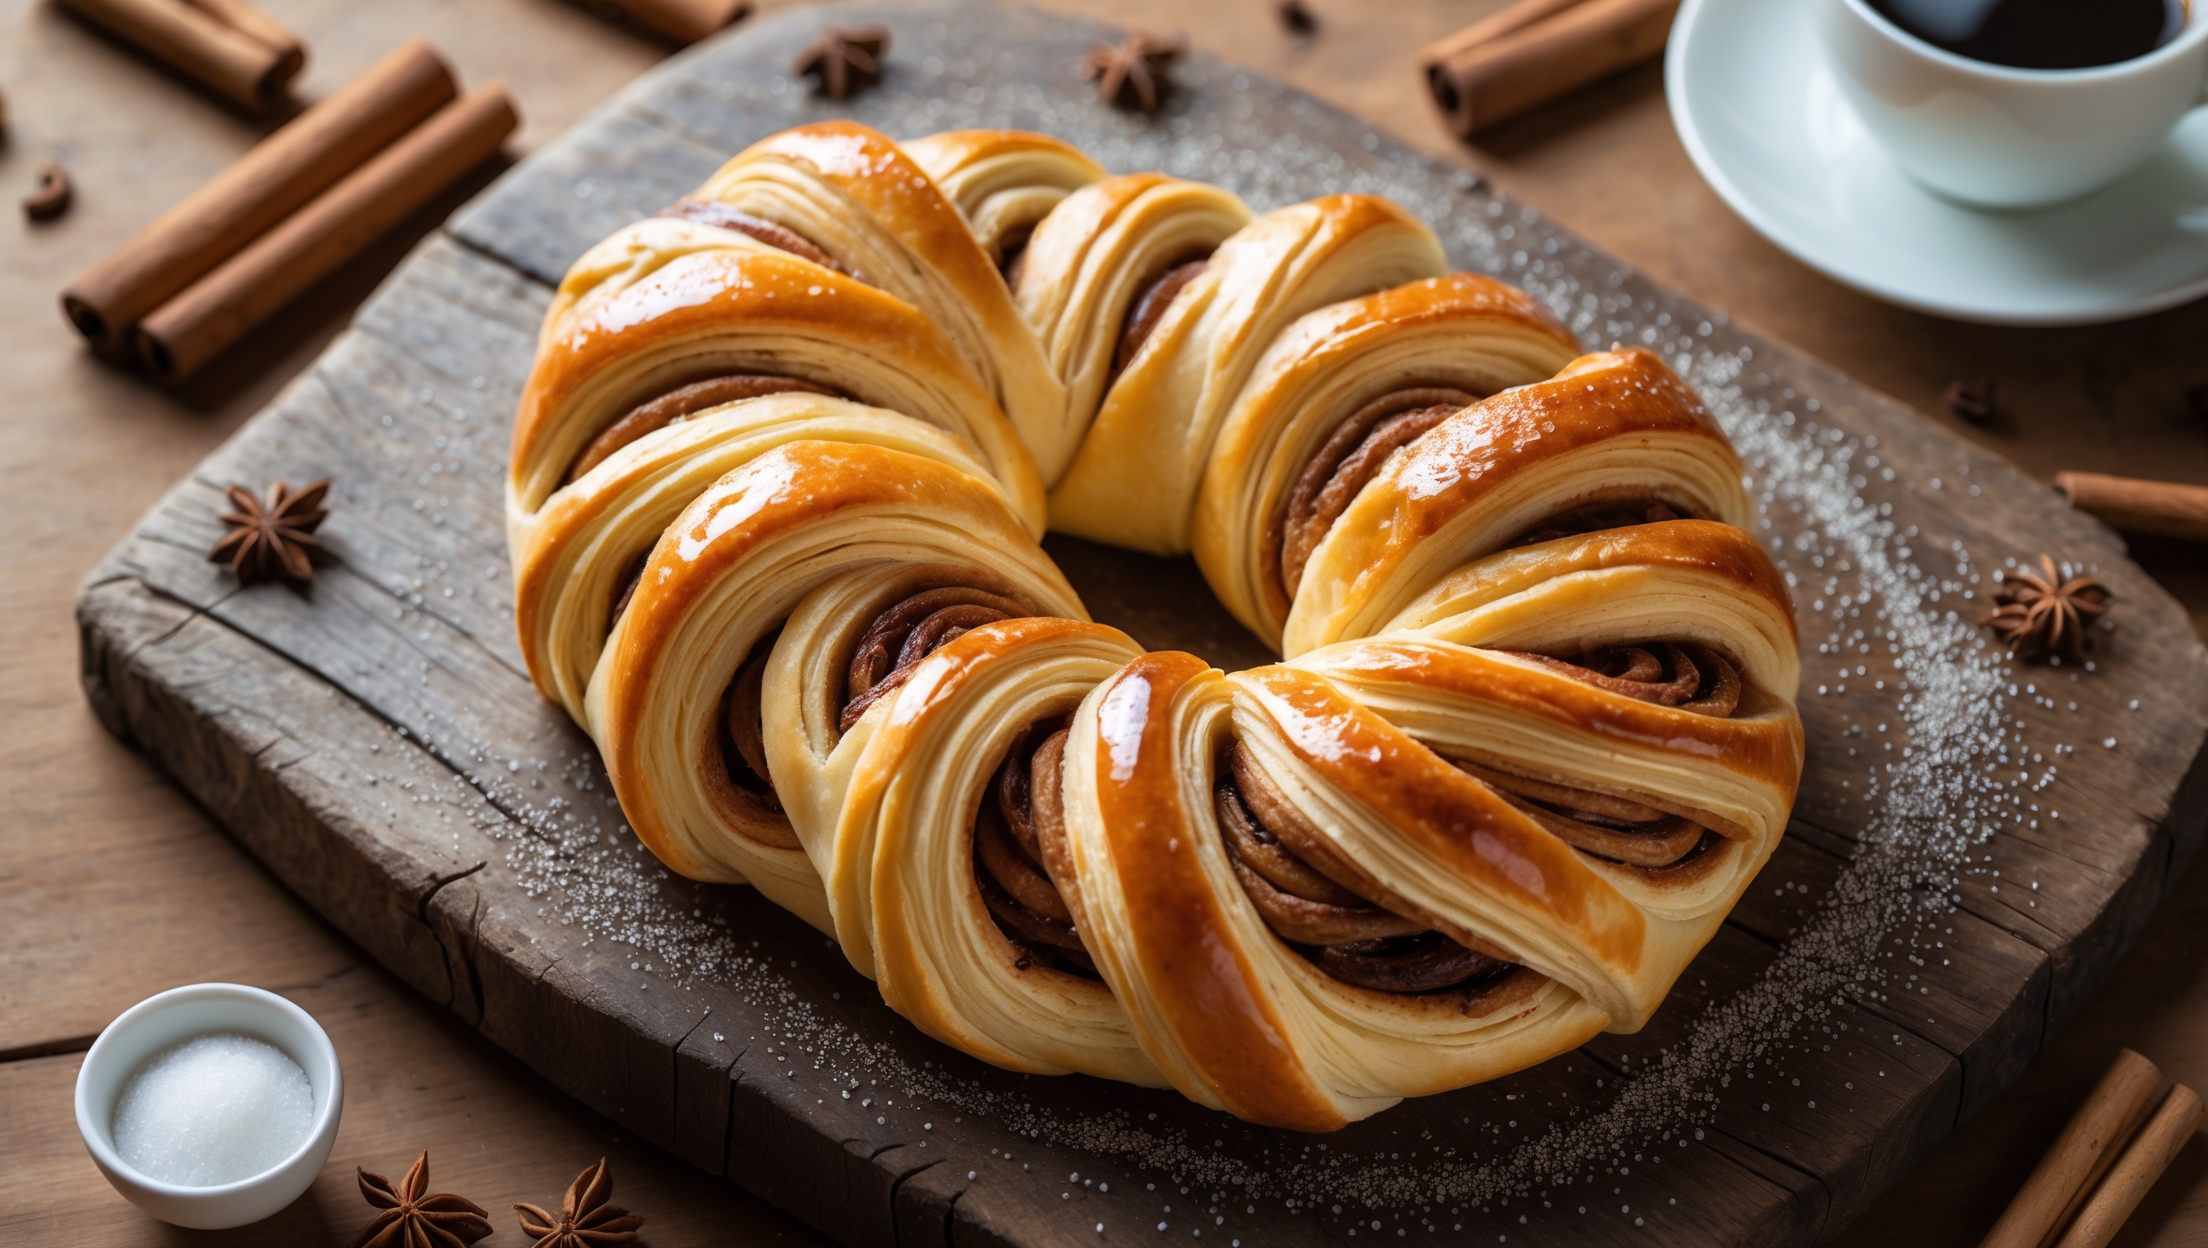
Traditional Kanelstang requires all-purpose flour, sugar, yeast, salt, egg, milk, cold butter for lamination, plus a filling of butter, brown sugar and cinnamon. It's topped with egg wash, pearl sugar and optionally sliced almonds for that authentic Danish bakery finish.
Learn how to cook Kanelstang (Cinnamon Stick) by mastering the Danish lamination technique. Create a cold dough, fold in butter through multiple turns, then fill with cinnamon-sugar mixture. The key is maintaining cold temperatures throughout the folding process, allowing proper resting time between turns, and baking until deeply golden at 190°C for 25-30 minutes.
Danish pastry dough is a laminated dough, meaning it contains thin layers of butter folded between layers of yeasted dough. This creates the signature flaky texture when baked. Unlike regular bread dough, Danish dough uses cold ingredients and requires multiple folding and resting periods to develop its characteristic layers.
Yes! You can freeze Danish cinnamon pastry either before or after baking. For unbaked pastry, freeze after shaping but before final rise, then thaw overnight in the refrigerator before proofing and baking. Baked pastries freeze well for up to 3 months and can be reheated in a warm oven until crisp.
Pearl sugar (nib sugar) is popular in Scandinavian baking because it doesn't melt during baking, providing delightful crunch and sweetness on pastries. It's made of compressed sugar crystals that maintain their shape and white appearance when heated, creating the distinctive look and texture characteristic of authentic Danish pastries.
Danish Pastry
Try following recommended recipes


